
To adjust the miter saw angle, set the angle indicator to the desired angle and adjust the saw blade to the indicator. Make sure to adjust the angle slowly and carefully to ensure accurate cuts.
Are you ready to get accurate cuts with your miter saw? If you’ve been struggling to get the perfect angle, this is the blog for you! In this blog, you’ll learn how to adjust your miter saw angles for precise results.
We’ll start by discussing the steps you need to take to prepare your miter saw. This includes making sure your saw has the proper blade, ensuring that the blade is aligned correctly, and oiling the saw correctly. After that, we’ll move on to setting the miter saw angle. We’ll cover how to adjust the angle to get the perfect cut, as well as how to test the accuracy of the angle.
Finally, we’ll talk about locking in the miter saw angle and making the final cut. We’ll discuss the importance of making sure your saw is securely locked in place before cutting, and how to make sure you get a precise cut. By the end of this blog, you’ll be a miter saw pro! So, let’s get started and learn how to adjust miter saw angles for accurate cuts.
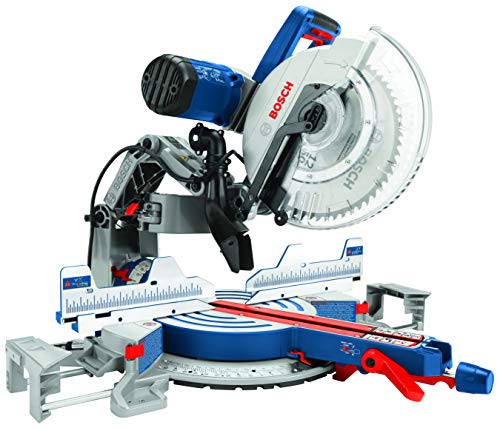
Preparing the miter saw
Setting up a miter saw is a surprisingly easy task that can help you achieve an accurate cut. To get started, make sure the saw is unplugged and the blade guard is in the upright, locked position.
Then, adjust the miter angle by loosening the miter lock handle. To move the saw head to the desired angle, either use the miter scale on the saw or use a protractor. Depending on the saw, the miter scale may have preset angles or could slide freely. After positioning the head, tighten the miter lock handle and then check the angle with a protractor.
Next, you’ll need to adjust the bevel angle. This is done by loosening the bevel lock handle and then turning the bevel knob to the desired angle. Once the angle is set, tighten the bevel lock handle and then recheck with a protractor.
Finally, after your miter saw is set up and the angles are adjusted, be sure to check the blade guard and the blade itself to make sure that it is secure. This is an important step to ensure your safety while using the saw.
Once you’ve verified everything is secure, you’re ready to start using your miter saw. You can now make accurate miter cuts with confidence and accuracy.
Setting the miter saw angle
When adjusting the miter saw angle, it’s important to get it right in order to make accurate cuts. Whether you’re cutting bevels, compound angles, or other miter cuts, it’s essential that you know how to set the angle of the saw. Here’s how you can do it.
First, you’ll need to adjust the miter saw’s angle of attack. To do this, turn the handle located at the back of the saw. You’ll see an indicator on the saw head that will show you the angle of the blade. Make sure to refer to the saw’s instructions to find out how to adjust the angle.
Next, you’ll need to adjust the bevel angle. The bevel angle determines how much the blade is tilted from the vertical. To adjust the bevel angle, you’ll need to move the bevel lock lever and then adjust the bevel angle lock lever, located on the side of the saw. Again, make sure to refer to the saw’s instructions to find out how to adjust the angle.
Finally, you’ll need to adjust the miter angle. This adjustment determines the angle of the cut that the saw will make. To adjust the miter angle, turn the miter adjustment knob. Keep adjusting until the desired angle is achieved. Make sure to always double-check your angles before making a cut.
By following these steps, you can be sure that your miter saw angle is set correctly. With the correct angle set, you can enjoy accurate cuts every time.
Adjusting the miter saw angle
Adjusting the miter saw angle is a key part of ensuring accurate cuts. The miter saw angle is usually adjustable in 1-degree increments up to a maximum of 45 degrees. To adjust the angle, you need to unlock the saw’s angle lock lever, rotate the saw to the desired angle, and then lock the angle lock lever back in place.
When adjusting the angle, it’s important to double-check the angle with a protractor to make sure the angle is set correctly. Once the angle is set, you can make the cut.
If you’re having difficulty setting the desired angle, you can use a combination square and a protractor to set the angle. Start by placing the square against the blade. Then, use the protractor to measure the angle between the square and the saw’s base. Adjust the saw until the angle is correct, and then lock the angle lock lever back in place.
Adjusting the miter saw angle is a simple process that can help you make accurate cuts. With a little practice and patience, you can master the process and make perfect cuts every time.
Testing the angle accuracy
Adjusting the angle of your miter saw for accurate cuts can be a tricky task. But with the right tools and some practice, you can learn to make correct angle adjustments – and test them – quickly and easily. Here’s what you need to know to test the accuracy of your miter saw angle adjustments.
The first step is to use a digital angle gauge to check the angle accuracy of your miter saw. This tool should come with your saw and can measure the angle of the blade to within a few degrees of accuracy. To use it, set the blade to your desired angle and then hold the digital angle gauge up to the blade. If the angle matches your desired angle, you’re good to go.
The next step is to use a test board to double-check your angle accuracy. To do this, cut a piece of scrap wood at your desired angle and then measure the angle of the cut with a protractor. If the angle of the cut matches the angle of your digital angle gauge, then your miter saw angle is set accurately.
Finally, use a square to check for square cuts. Measure the edges of the cut and make sure that they form a 90-degree angle. If they do, then your miter saw angle is set accurately.
With these steps, you’ll be able to quickly and easily test the accuracy of your miter saw angle adjustments. And with a little practice, you’ll be cutting accurate angles in no time.
Locking in the miter saw angle
If you’re looking for a quick and easy way to lock in the miter saw angle for accurate cuts, then you’re in luck! All you need to do is adjust the miter saw angle and then lock it in place to ensure that the saw blade maintains the desired angle.
First, you’ll need to adjust the miter saw angle so that it’s exactly the angle that you want to use. If you’re not sure what angle you want to use, you can check the manual for your miter saw or look online for some guidelines. Once you have the angle set the way you want, you can move on to the locking process.
The locking process is easy but important, as it will ensure that your miter saw angle stays the same no matter how many times you use the saw. To do this, you’ll need to use the locking mechanism on the saw. Simply move the lever or knob to the locked position and the saw should be secure.
Once your miter saw angle is locked in place, you can start using the saw for accurate cuts. It’s important to remember to unlock the saw once you’re done using it, as this will ensure that the saw blade is able to rotate freely.
Locking in the miter saw angle is a simple and straightforward process that will ensure that your cuts are accurate every time. So take the time to adjust and lock the angle correctly, and you’ll be able to get the perfect cut every time.
Making the final cut
The final cut is the most important step when adjusting miter saw angles. Getting the angle just right means the pieces of the project will fit together perfectly. To make sure you get that perfect cut, take the time to check the accuracy of the angle before you begin sawing.
First, use a combination square to check the angle. Place it against the saw table and make sure the saw blade is at the desired angle. Move the saw blade back and forth to make sure the angle isn’t changing when the blade moves. If the angle is off, adjust the saw until the angle looks perfect.
Next, you can use a protractor or bevel square to double-check the angle. Make sure the angle you’re cutting matches the angle set on the saw. If needed, you can also use a digital angle finder to make sure the angle is spot on.
Once you’ve checked the angle accuracy, it’s time to make the cut. Make sure the saw is firmly secured in place, and then get to work. Take your time and be careful not to rush. When you’re done, check the cut again using the combination square, protractor, and bevel square.
Making the final cut is the last step in adjusting miter saw angles. With the right tools and a bit of patience, you can make sure you get the perfect cut every time.
Frequently Asked Questions
What is the best way to adjust miter saw angles for precise cuts?
The best way to adjust miter saw angles for precise cuts is to use a square or a protractor to measure the angle of the cut you want to make. Then, adjust the saw to the angle you measured and double-check your measurement before making the cut. Make sure to tighten the saw’s locking mechanism when you’re done.
How can i make sure the angle i set on my miter saw is accurate?
Before making any adjustments to the miter saw angle, make sure the saw is on a level surface. You can use a carpenter’s level to ensure that the saw is perfectly level. Once the saw is level, you can use a protractor to measure the angle of the saw. Set the angle you want it to be, and then check the angle with the protractor again to make sure it is accurate.
What should i do to lock in the angle i set on my miter saw?
Once you have set the angle on your miter saw, make sure to lock it in to ensure accuracy. To do this, simply loosen the locking screw and adjust the angle to the desired setting. Then, tighten the screw to lock the angle in place. Additionally, you can ensure accuracy by double-checking the angle on a square or protractor.
How can i make sure i’m getting the perfect cut from my miter saw?
To make sure you’re getting an accurate cut with your miter saw, be sure to double check the angle on the saw against a gauge or protractor. Additionally, make sure the blade is sharp and the saw is securely fastened. Finally, use a clamp to hold the material firmly in place for the best results.
Conclusion
Making accurate cuts with your miter saw is essential for successful woodworking projects. With a few simple steps, you can easily adjust the miter saw angles to ensure precision. First, make sure that the saw is on a level surface and the blade is properly aligned with the miter slot. Then, use the miter and bevel scales to adjust the saw to the desired angle. Finally, use a digital angle finder to double-check the accuracy of the angle. With these easy steps, you can make sure that your miter saw is cutting with exact precision.