15 Fun Letter O Crafts for Preschoolers with Paper and Paint
There’s something magical about watching little hands shape letters through play. With just paper and paint, you can turn the letter O into a world of discovery that builds fine motor skills and sparks joy.
These crafts are made for tiny fingers and big imaginations. Each one uses simple materials you already have, and every step is designed to be doable, delightful, and truly different from the rest.
1. Owl Face Stamp Art
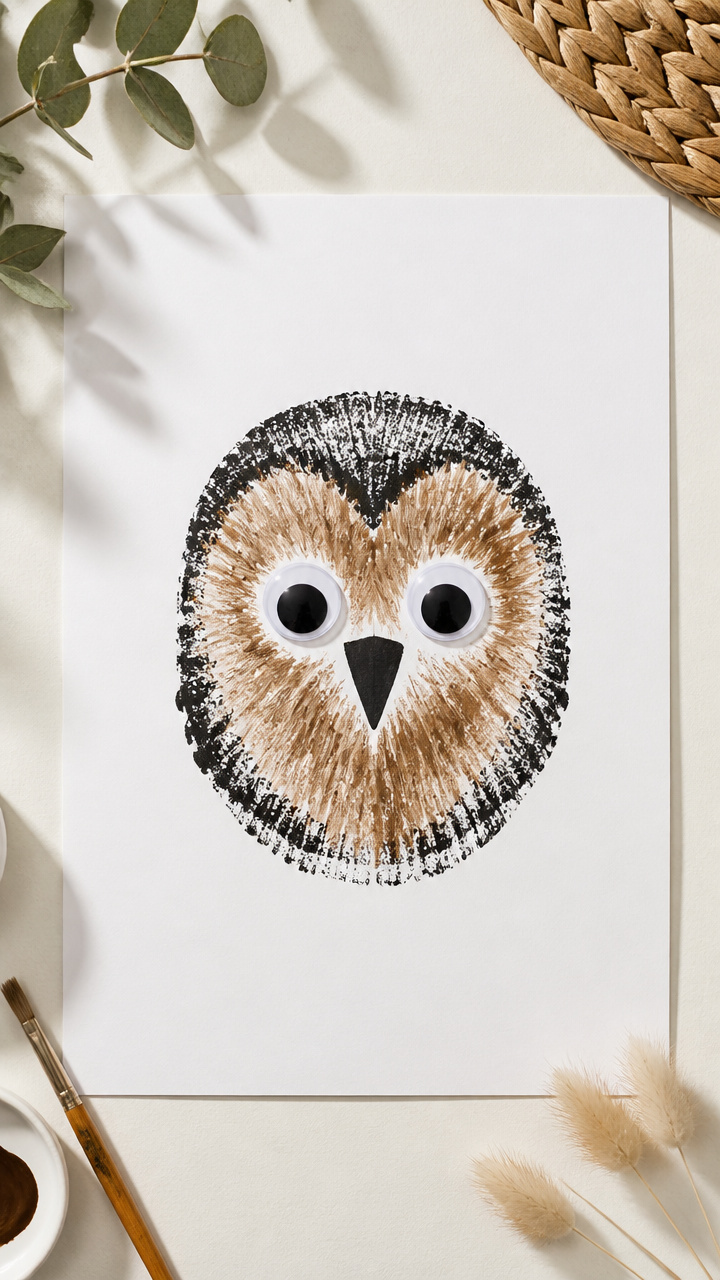
Round fingerprint eyes bring this feathery O to life using stamp pads and cardstock. Kids love seeing their prints become part of a friendly forest owl.
Materials Needed
- A4 white cardstock, 1 sheet per child
- Black washable ink pad
- Brown acrylic paint
- Paintbrush, size 3
- Googly eyes, 2 per craft
- Glue stick
- Orange construction paper
- Scissors (adult use)
How to Make It
- Press your child’s thumbs into the black ink pad and stamp two round eyes near the top center of the cardstock.
- Use the paintbrush to add wavy brown feathers around each stamped eye, blending outward in soft strokes.
- Glue on googly eyes over the thumbprints and cut small triangle beaks from orange paper to finish the face.


2. Ocean Bubble Blow Painting
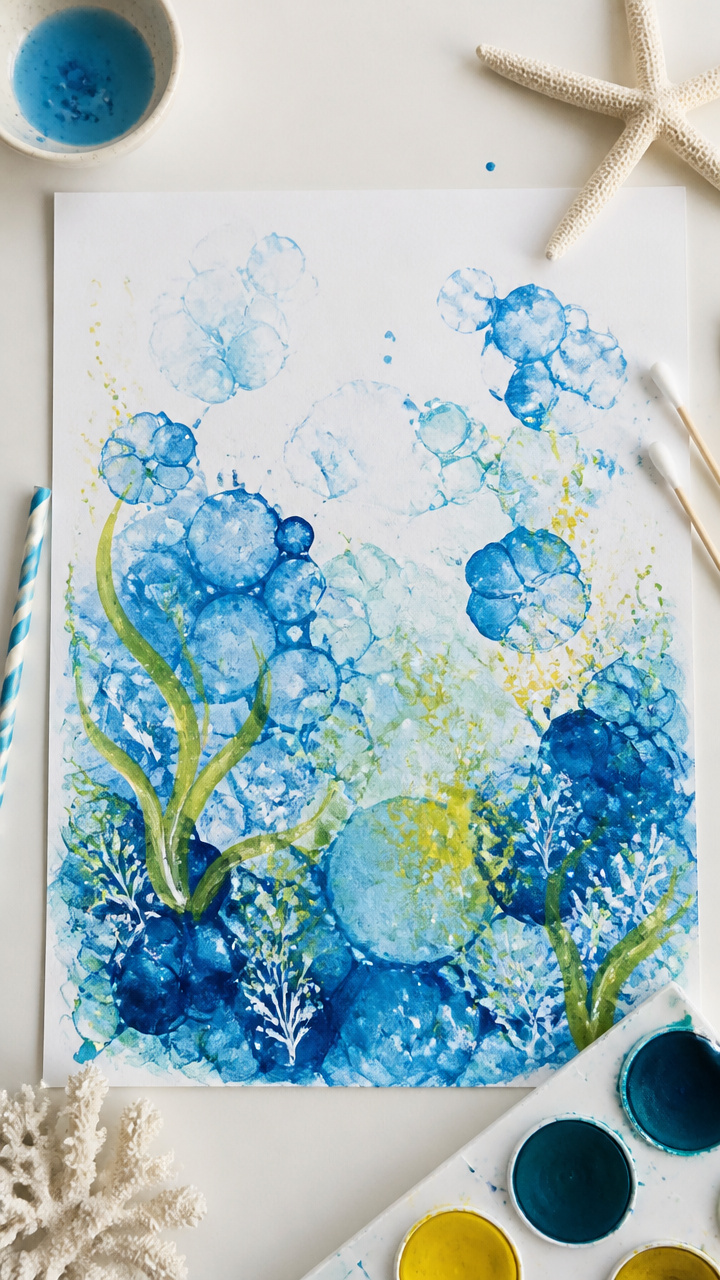
Swirling bubbles form glowing O shapes when you blow paint through straws. This sensory-rich activity fills the page with underwater motion.
Materials Needed
- Blue tempera paint, 3 tablespoons
- White drawing paper, 9×12 inches
- Drinking straws, 1 per child
- Pipette or small spoon
- Cotton swabs
- Green and yellow watercolor paints
How to Make It
- Place drops of blue paint near the center of the paper using the pipette.
- Have your child blow gently through the straw to spread the paint into webbed, circular patterns resembling bubbles.
- Once dry, dot green and yellow rings around some bubbles with cotton swabs to turn them into letter Os.


3. Octopus Handprint Craft
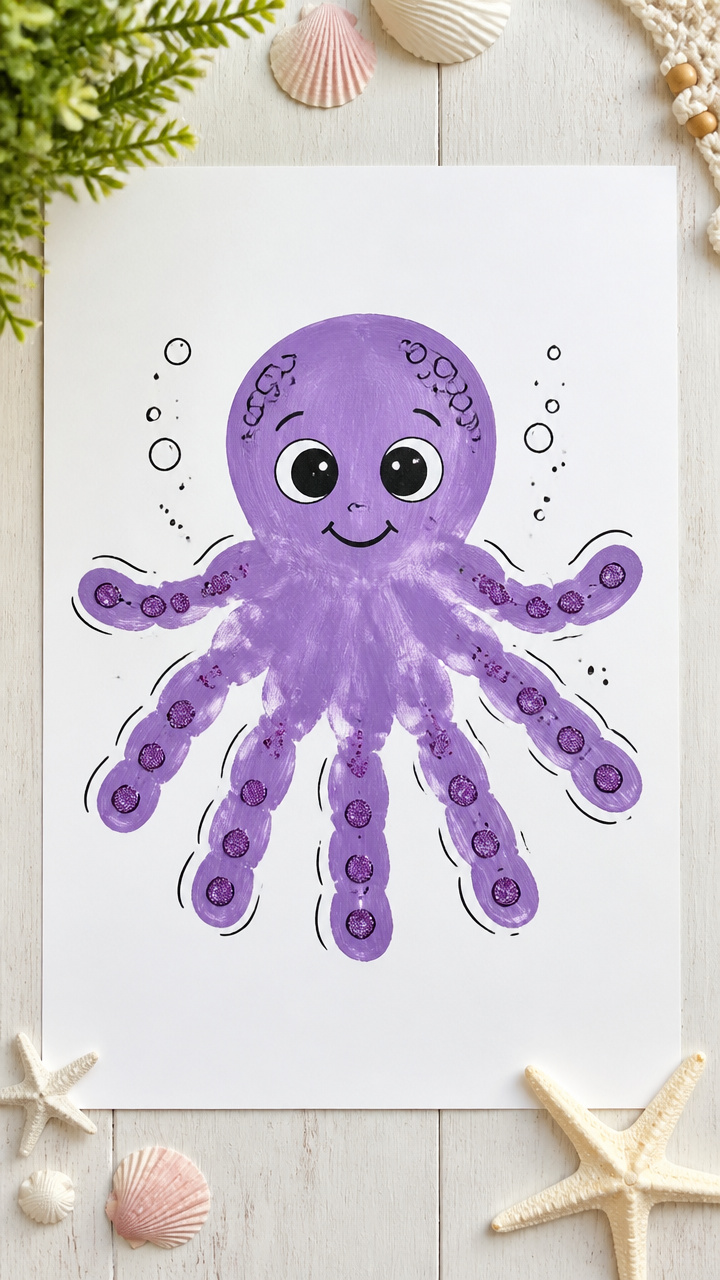
A painted hand becomes eight-tentacled fun with curling arms and bold eyes. It's a keepsake piece that grows with your child’s pride.
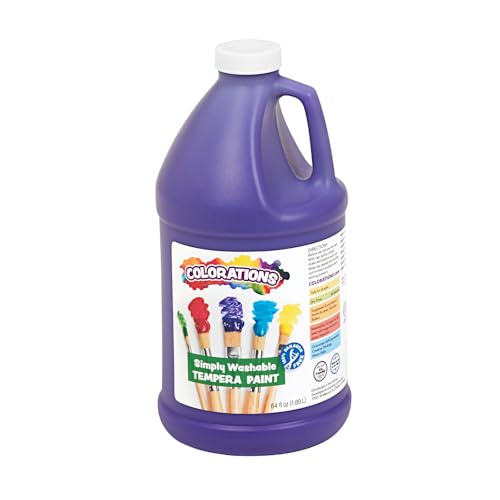
Materials Needed
- Purple washable paint
- Large white construction paper, 12×18 inches
- Paint tray
- Black marker
- Wet wipes
- Glitter glue, purple
How to Make It
- Spread purple paint evenly on the tray and press your child’s palm flat in the center, then curl their fingers down to make arm shapes.
- Lift the hand straight up to avoid smudging and let the print dry for 10 minutes.
- Draw large eyes on the palm body and outline some arms with glitter glue for shimmering detail.


4. Orange Slice Collage
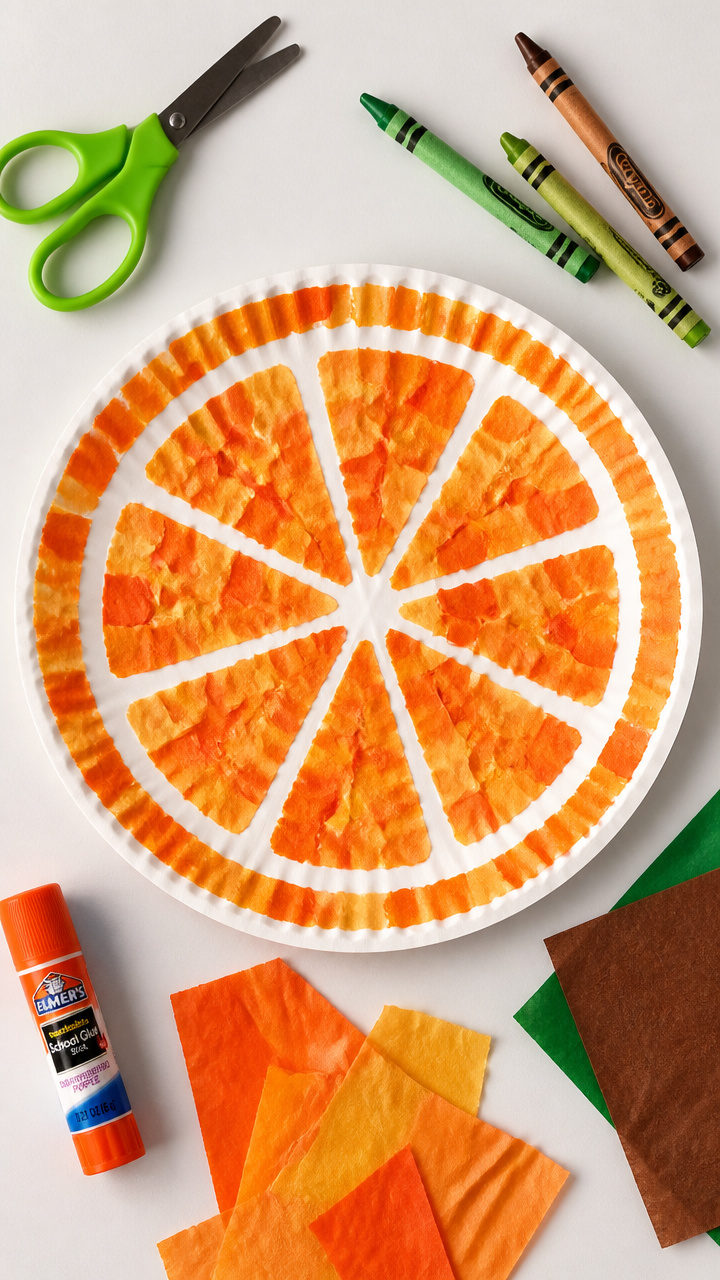
Bright tissue paper wedges form a juicy citrus O with crinkled texture and sticky-finger fun. The result looks good enough to eat.
Materials Needed
- Orange tissue paper, 4 sheets
- Green and brown crayons
- Scissors (adult use)
- Glue stick
- Round paper plate, 1 per child
- Pencil
How to Make It
- Cut the center out of the paper plate to leave a thick ring, forming the base O shape.
- Tear tissue paper into 1-inch squares and crumple a few into small balls for seed dots.
- Glue tissue pieces side by side onto the ring to mimic orange segments, then add crumpled balls as seeds.


5. Open Umbrella Drip Art
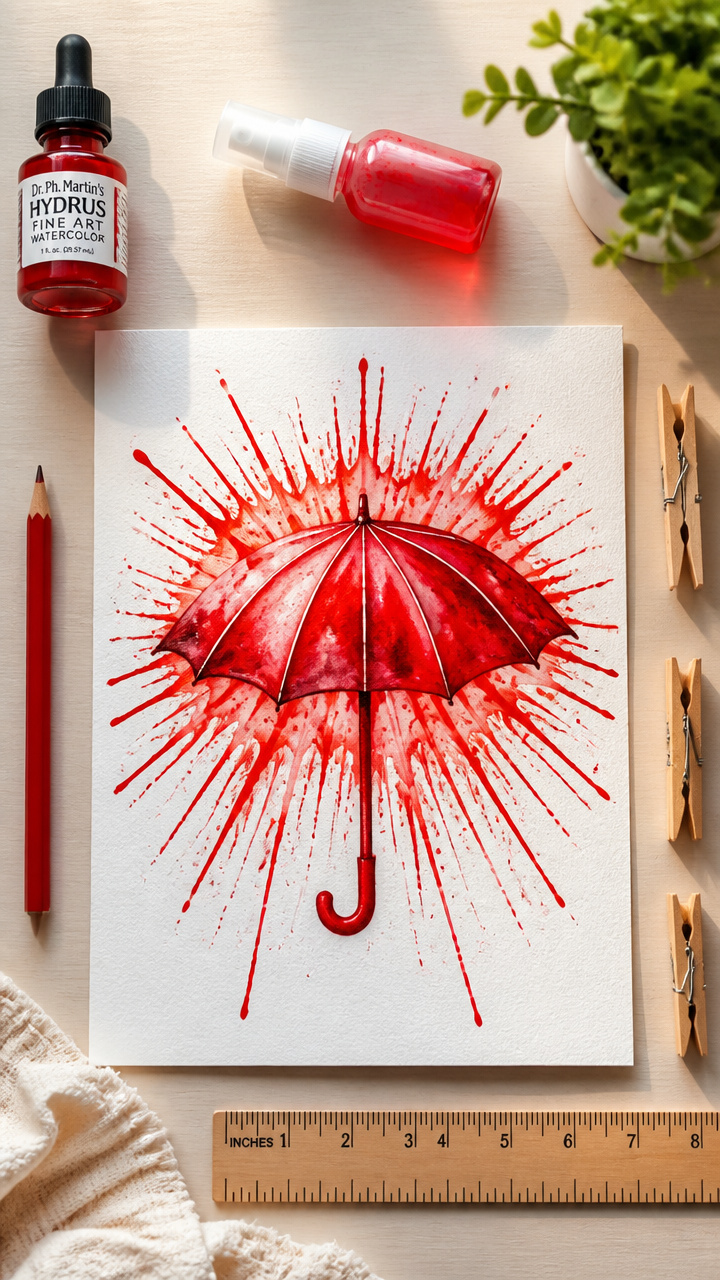
Raindrops fall from a bright umbrella O made with tilted paper and liquid watercolors. Watching color run is half the fun.
Materials Needed
- Red liquid watercolor paint
- Water spray bottle
- Thick watercolor paper, 8.5×11 inches
- Pencil
- Ruler
- Clothespins
- Tray or box lid
How to Make It
- Draw a large upside-down U shape with pencil and ruler to form the umbrella dome, then draw handle lines beneath.
- Clip the paper to a clothespin and tilt it over the tray at a 45-degree angle.
- Dip a brush in red paint and let drips flow down the page like rain, spraying water lightly to spread the flow.


6. Oval Owl Cutout
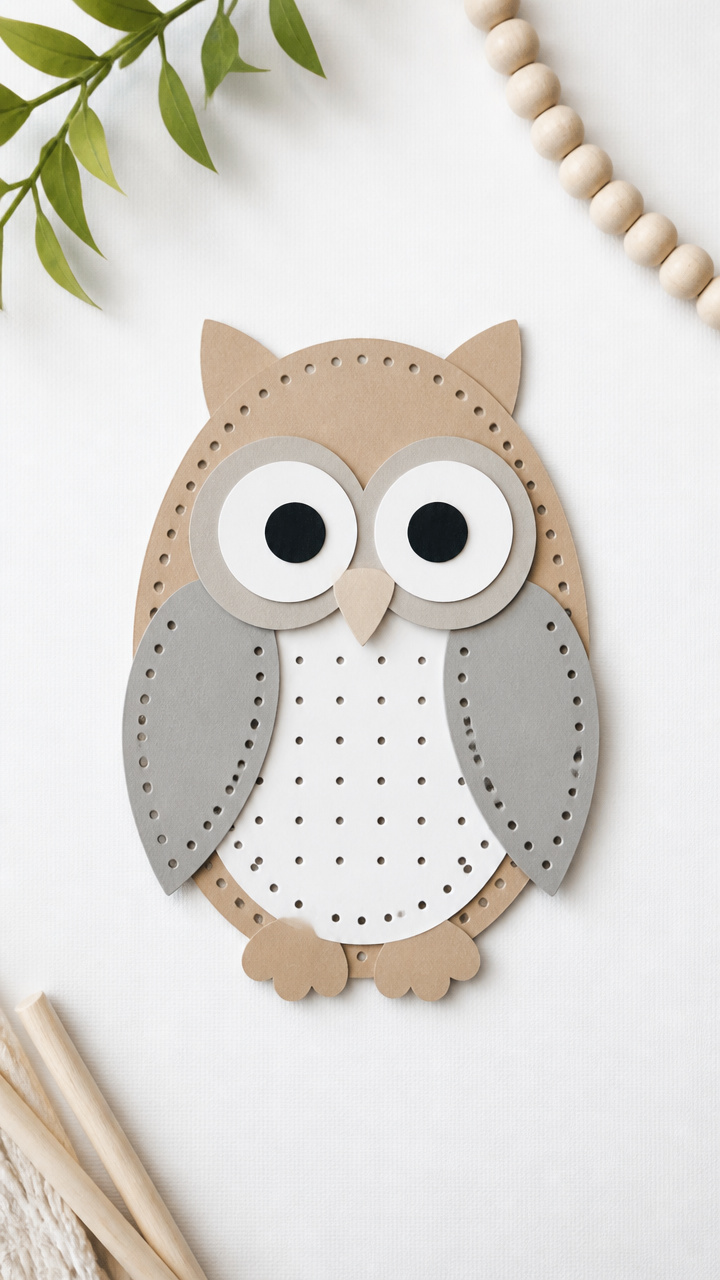
Layered ovals build a soft-feathered owl with symmetrical wings and a centered O belly. Scissor practice feels like storytelling.
Materials Needed
- Tan, gray, and white construction paper
- Child-safe scissors
- Glue stick
- Black circle stickers, 1 inch, 2 per craft
- Pencil
- Hole punch
How to Make It
- Cut two large matching ovals from gray paper for wings and one smaller tan oval for the body.
- Glue the body in the center of a white sheet and place wings on either side so they frame the body like an O.
- Add black sticker eyes and punch two holes near the top for hanging with string.


7. Oatmeal Texture Painting
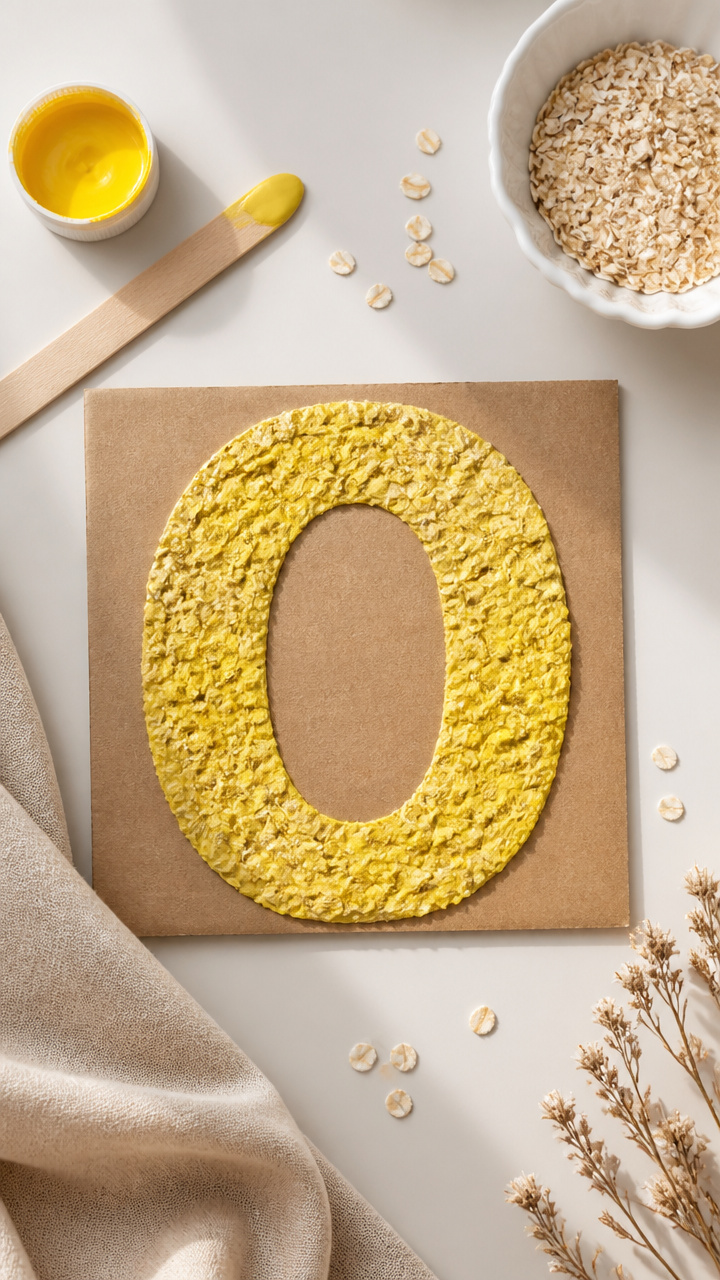
Mix real oatmeal into paint for a bumpy, edible-safe O that invites touching. The grainy swirls teach texture in the tastiest way.
Materials Needed
- Uncooked oats, 2 tablespoons
- White glue, 1 tablespoon
- Yellow tempera paint
- Mixing bowl
- Popsicle stick
- Cardboard, 6×6 inches
- Plastic spoon
How to Make It
- Stir oats, glue, and paint together in the bowl until the mixture holds together like thick paste.
- Use the spoon to scoop and shape a fat O ring on the cardboard, pressing the mix firmly into place.
- Let dry overnight—the surface will harden with a rough, natural texture perfect for little fingertips.


8. Onion Ring Stamping
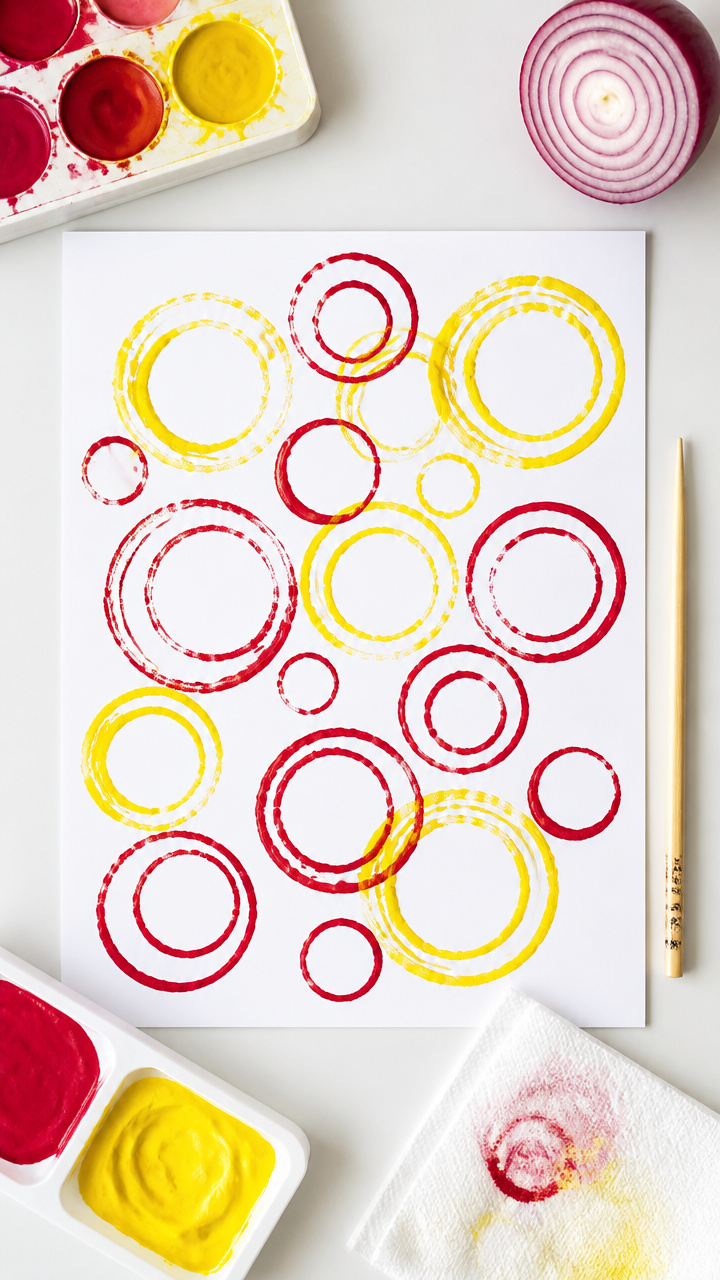
Fresh onion halves leave perfect O imprints when dipped in paint. It's a kitchen surprise that turns dinner prep into art time.
Materials Needed
- 1 large white onion
- Red and yellow acrylic paint
- Paint trays, 2
- White printer paper, 8.5×11 inches
- Chopstick
- Paper towel
How to Make It
- Cut the onion in half and remove the outer layer so the round end shows clean rings.
- Press the cut side into red paint and stamp firmly onto the paper, lifting straight up to avoid smears.
- Repeat with yellow paint and overlap some rings, using the chopstick to add small center dots as seeds.


9. Overhead Sun Print
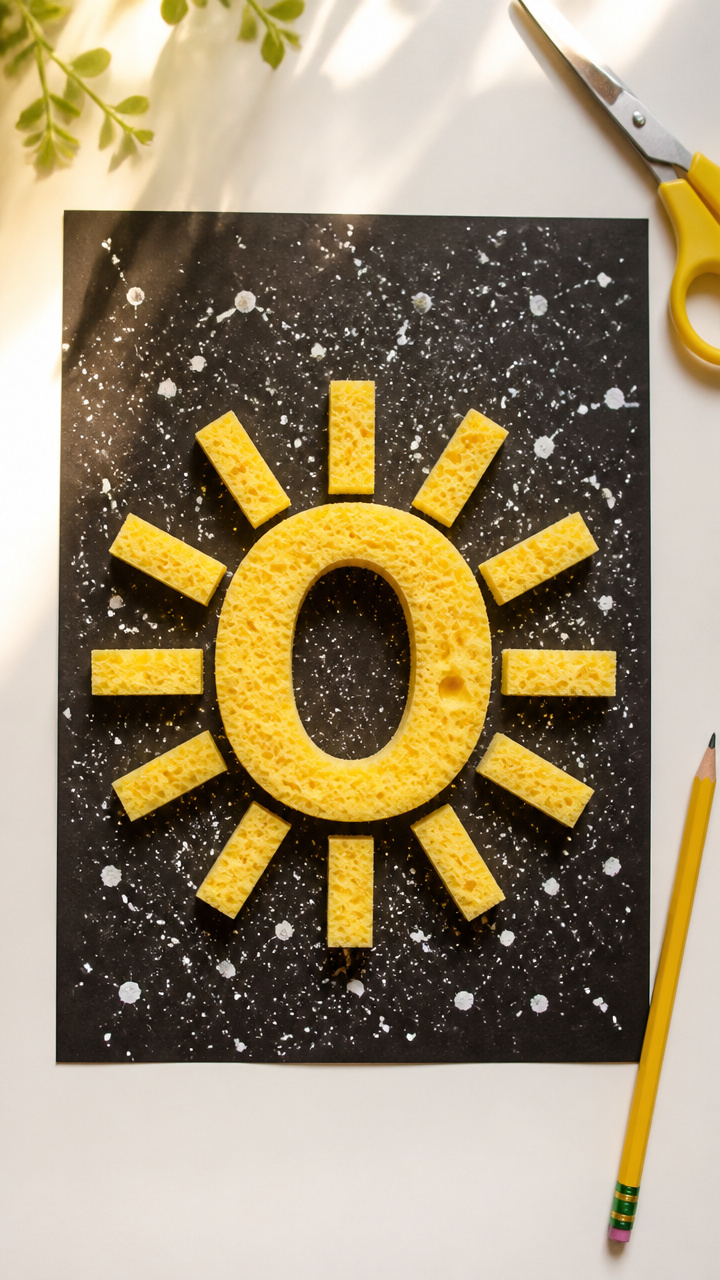
A blazing sun with radiating lines emerges from sponged yellow layers. The glowing O center warms up any classroom wall.
Materials Needed
- Yellow sponge, 1
- Scissors
- White finger paint, 2 tablespoons
- 9×12 inch black construction paper
- Pencil
- Eraser
How to Make It
- Cut a circle from the sponge using the eraser as a stencil, pressing firmly to shape the O pad.
- Dab yellow paint onto the sponge and press it onto the black paper to leave a crisp ring.
- Use the edge of the sponge to drag short lines outward from the ring, creating sun rays.


10. Owl Eye Dot Painting
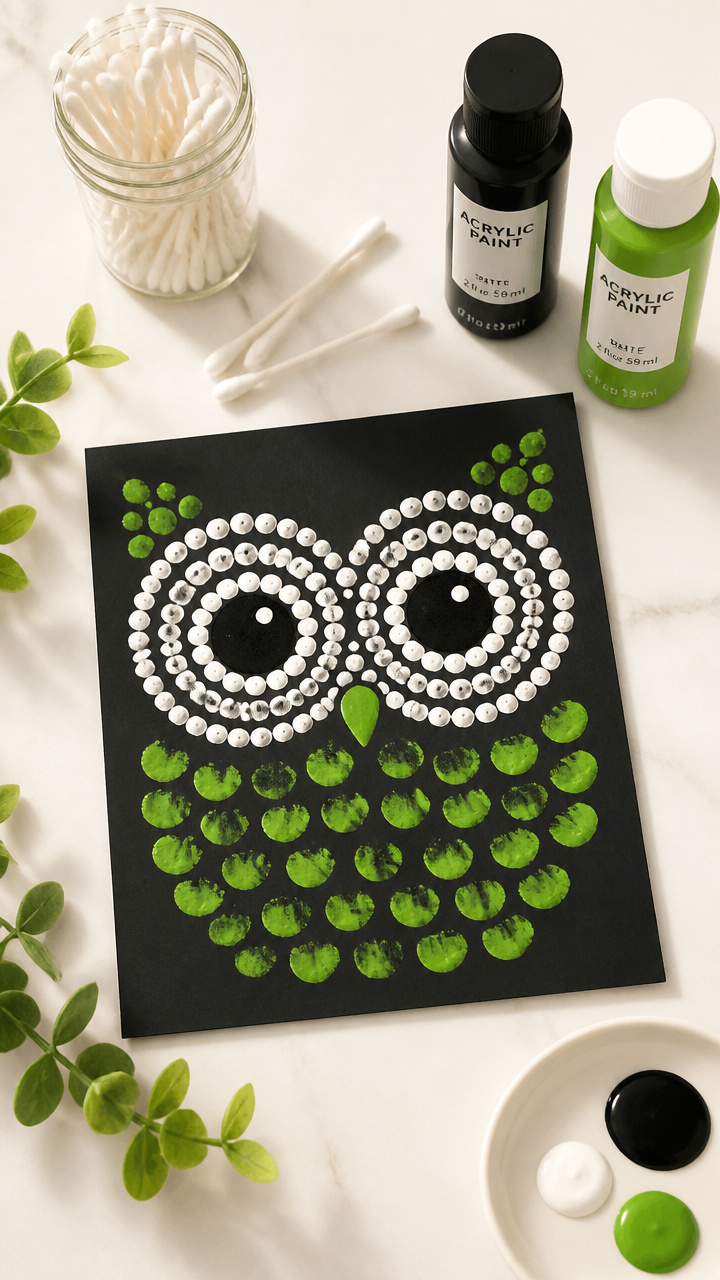
Q-tip dabs form concentric circles in wise owl eyes shaped like Os. The steady dipping builds focus and control.
Materials Needed
- Black and white paint
- Cotton swabs, 10 per child
- Cardstock, 8.5×11 inches
- Pencil
- Green finger paint
- Small jar
How to Make It
- Draw two large circles on the cardstock and fill the outer ring with black paint using swabs in tight spirals.
- Switch to white paint and dot a small arc along the top edge of each circle for shine.
- Add green rings inside each eye with fresh swabs, leaving a black center O pupil.

11. Oblong Otter Shapes
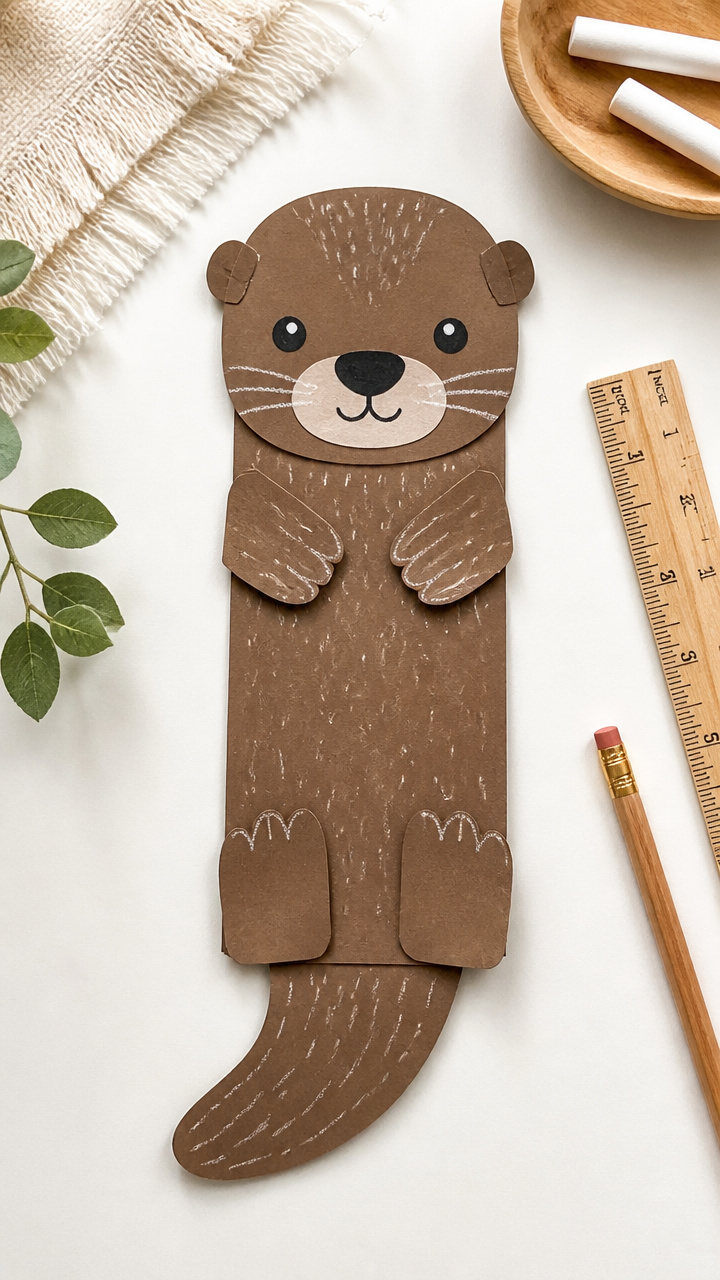
Curved paper strips twist into otter bodies that loop like playful Os. Folding and gluing train coordination with charm.
Materials Needed
- Brown construction paper
- Scissors
- Glue stick
- White chalk
- Ruler
- Pencil
How to Make It
- Cut ten 1×6 inch strips from brown paper and bend each into a gentle curve.
- Glue the ends of each strip to a central strip running vertically, fanning them out to form a wavy body.
- Use chalk to add small white reflections in the eyes and tail tip after assembly.


12. Orange Peel Rubbing
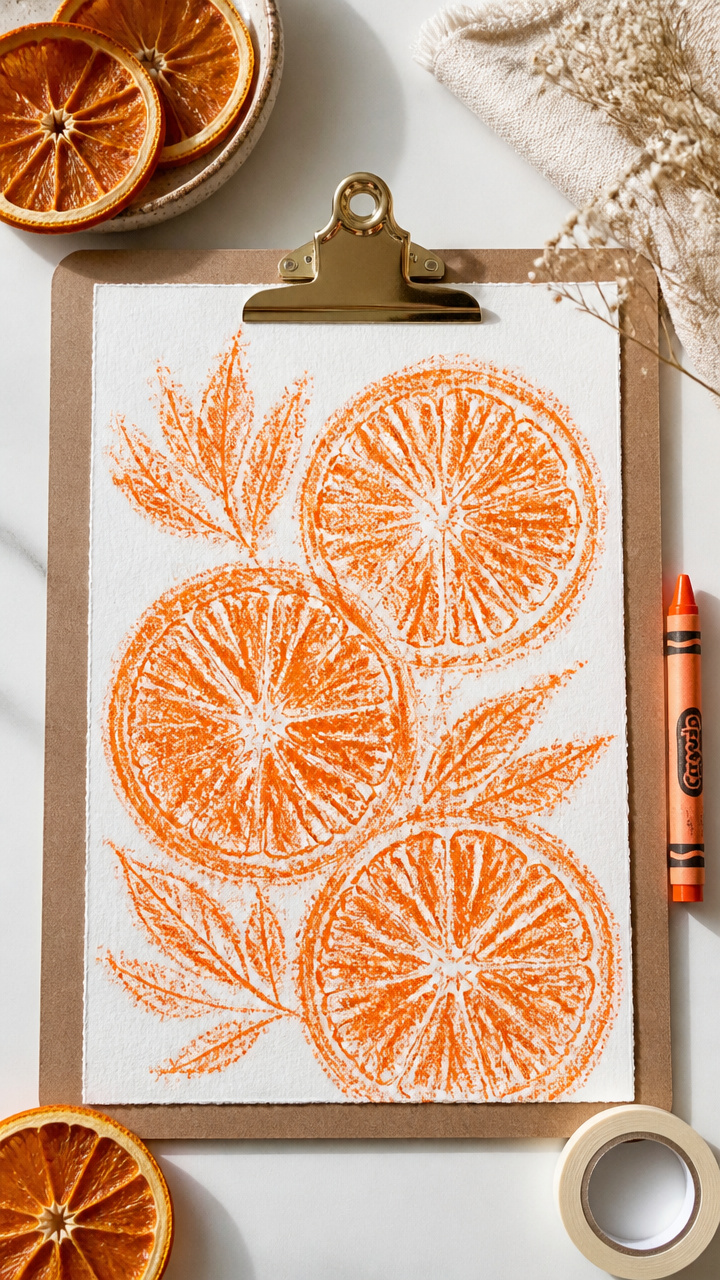
Real citrus peels create bumpy O outlines when covered with paper and rubbed with crayons. Nature leaves its mark beautifully.
Materials Needed
- 1 orange peel, halved and dried
- White drawing paper, 8.5×11 inches
- Orange crayon
- Tape
- Clipboard or hard surface
How to Make It
- Place the orange peel flat on the clipboard and tape a sheet of paper over it.
- Hold the paper taut and rub the crayon sideways across the surface, letting the bumps show through as textured rings.
- Trace a darker O around the outer edge of the rubbing to define the letter shape.


13. Oval Nest Weaving
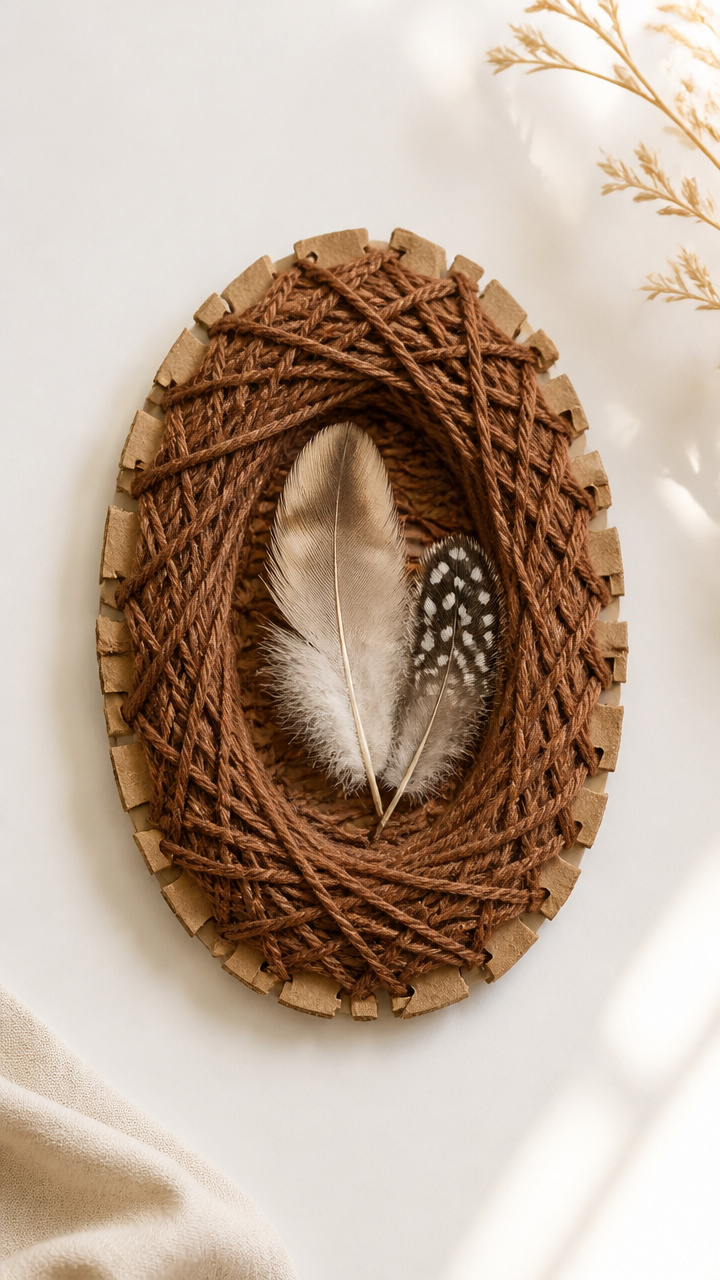
Yarn loops weave into a soft bird’s nest shaped like a thick O. Finger weaving introduces pattern with cozy results.
Materials Needed
- Brown yarn, 1 ball
- Scissors
- Cardboard strip, 1×8 inches
- Glue
- Feathers, 3 small
How to Make It
- Fold the cardboard strip into a loose oval and tape the ends together to form a ring.
- Wrap yarn over the front and back of the ring in crossing motions, making a web-like weave with fingers.
- Tuck feathers into the weave and add a drop of glue where the yarn ends meet to secure.


14. Oreo Button Mosaic
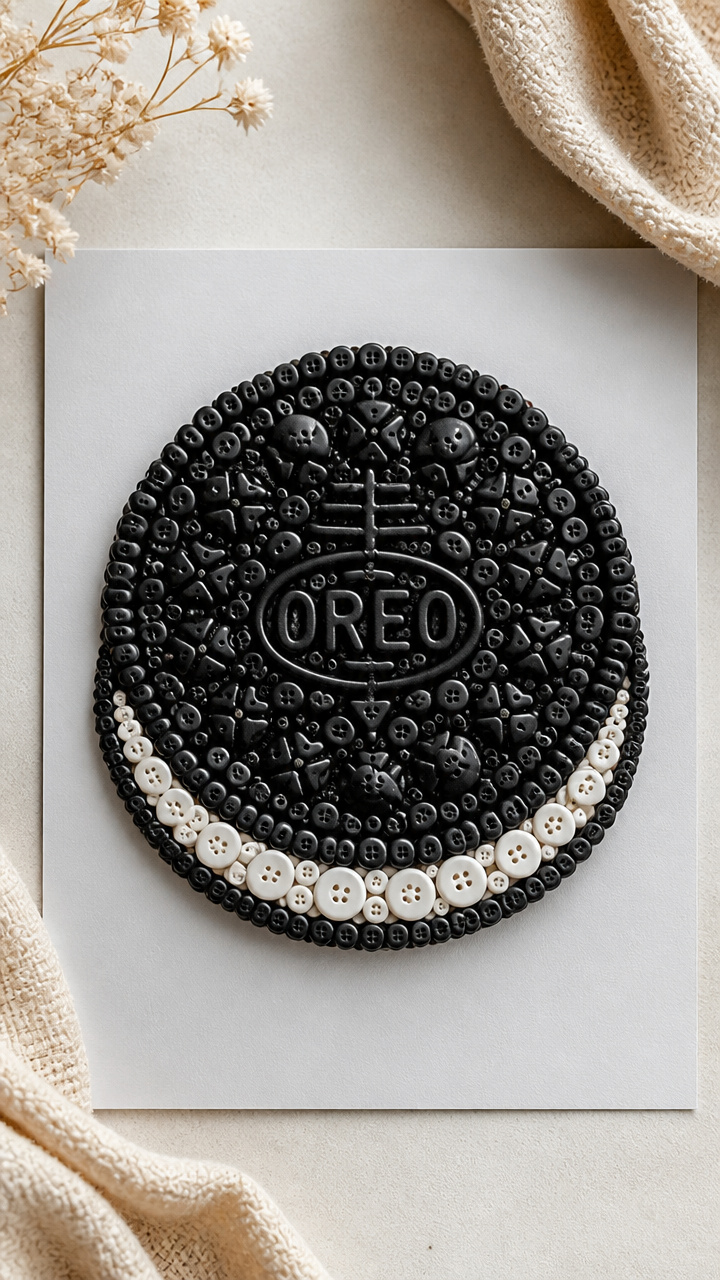
Black and white buttons cluster into a cookie O with crunchy texture. Sorting and placing boosts pincer grip naturally.
Materials Needed
- White and black buttons, 15 each
- Glue dots, 30
- Gray cardstock, 8.5×11 inches
- Pencil
- Eraser
How to Make It
- Trace a large O on the cardstock using the eraser to shape smooth curves.
- Press glue dots inside the line and stick white buttons close together to form the cookie base.
- Add black buttons around the edge and scatter a few in the center to mimic chocolate chunks.


15. Owl Wing Stencils
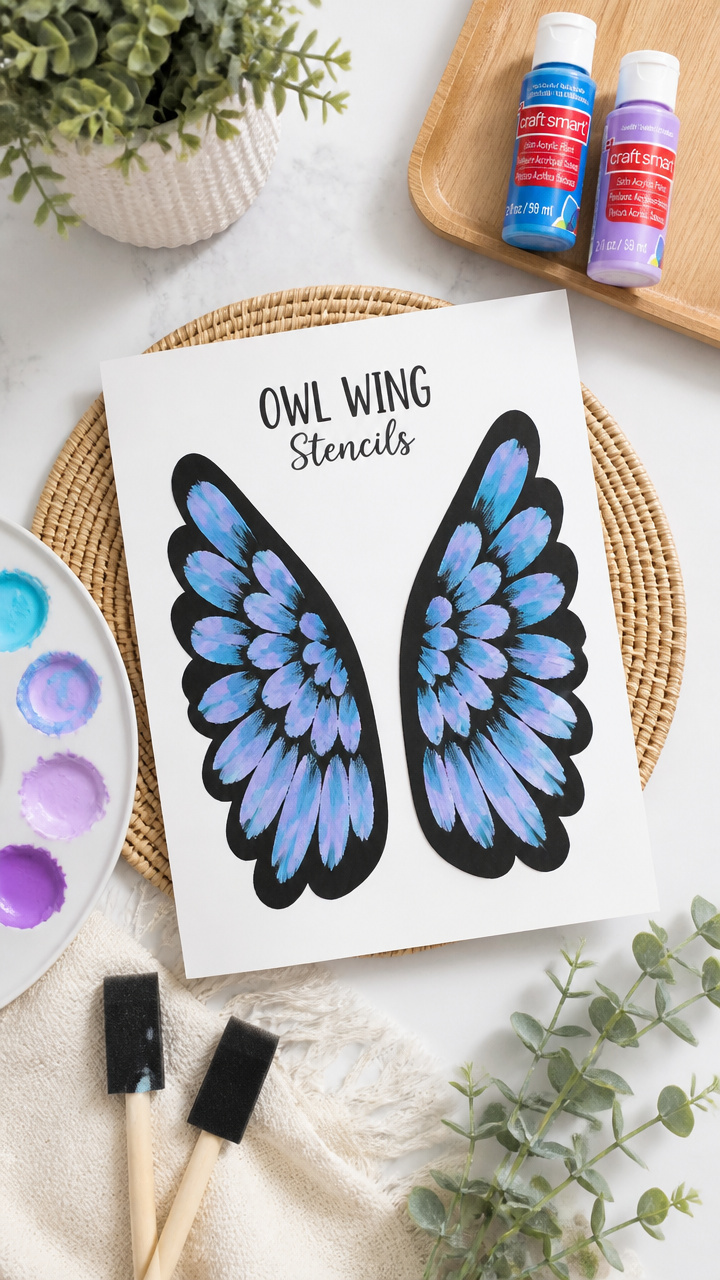
Hand-cut stencils guide swooping feather shapes that form O silhouettes. Reusable templates invite endless repainting.
Materials Needed
- Cardstock, black, 8.5×11 inches
- Pencil
- Scissors
- Blue and purple washable paint
- Foam brushes, 2
- White paper, 9×12 inches
How to Make It
- Draw a wide U shape on black cardstock and cut it out to make a wing stencil with an open center O.
- Place the stencil on white paper and dab blue paint inside the curve with a foam brush.
- Lift the stencil carefully and repeat in a new spot with purple paint to layer colorful wings.


You’ve got everything you need right in your craft drawer to make learning the letter O a hands-on adventure. Grab those papers and paints, and let your child’s creativity roll in beautiful, circular waves.