10 Easy Summer Cricut Projects for Beginners
Summer is the perfect time to try something new and creative. With a Cricut machine, you can make thoughtful, handmade items that add charm to your days and gifts you’re proud to give.
These beginner-friendly projects use simple materials and clear steps. Each one brings a little joy, whether it’s for your home, your kids, or your next outdoor gathering.
1. Personalized Beach Tote Bag
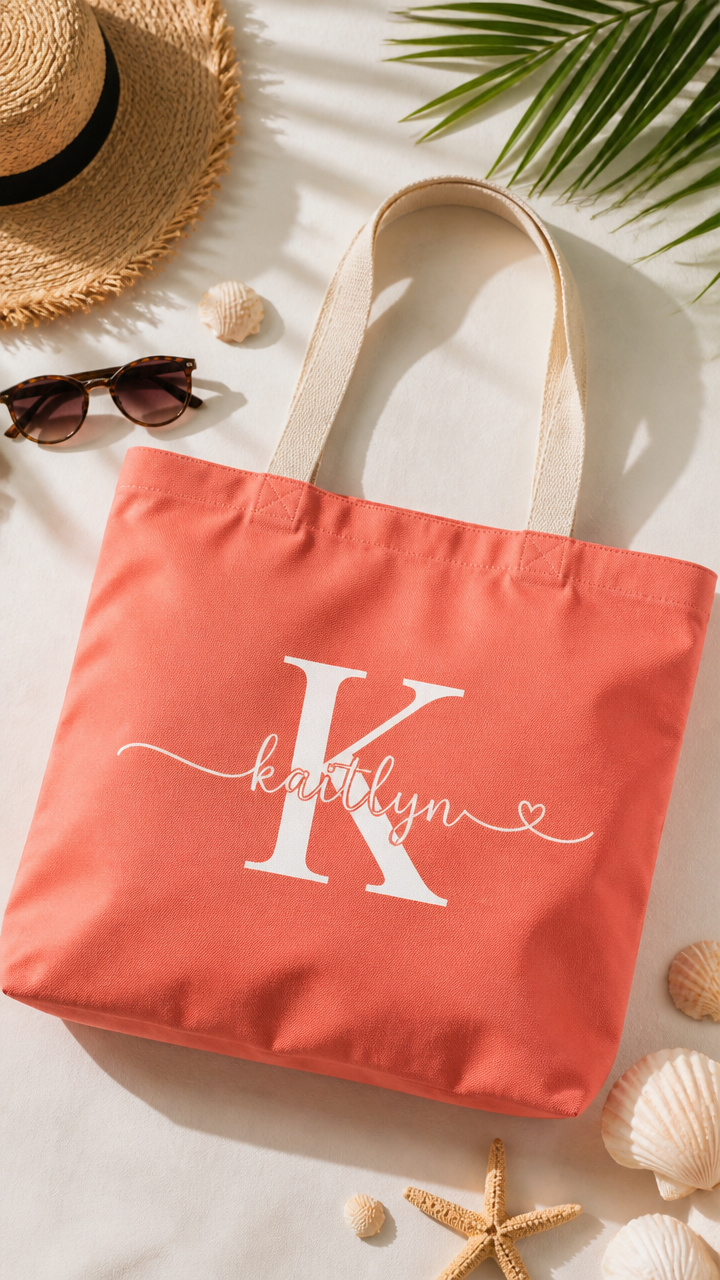
Sturdy canvas tote bags with custom names or summer sayings are practical and fun. You’ll love carrying this one to the beach or farmer’s market.
Materials Needed
- One 15 inch by 15 inch natural canvas tote bag
- One 12 inch by 12 inch sheet of iron-on vinyl in coral
- Cricut Explore or Maker machine
- StandardGrip cutting mat
- Weeder tool
- EasyPress 2 or household iron
How to Make It
- Load the iron-on vinyl onto the cutting mat, shiny side down, then load into the Cricut.
- Use Cricut Design Space to type a name or phrase, size to fit the tote, then cut using the iron-on setting.
- Weed out excess vinyl using the weeder tool, leaving only your design.
- Place the tote on a flat surface, center the design, and press with the EasyPress at 270°F for 30 seconds.
2. Reusable Ice Cream Coasters

Bright, wipeable coasters shaped like ice cream scoops bring smiles to any patio table. These double as decor and conversation starters.
Materials Needed
- Four 4 inch diameter cork rounds
- One 12 inch by 12 inch sheet of white permanent vinyl
- Scissors
- Foam brush
- Clear waterproof sealant spray
- Transfer tape
How to Make It
- Cut three ice cream shapes from the vinyl using the Cricut with the permanent vinyl setting and fine point blade.
- Weed away the background, then apply transfer tape over the top.
- Position each design on a cork round and press firmly with your hand.
- Peel off the transfer tape slowly, then coat the entire coaster with two light sprays of sealant.
3. Sunflower Garden Marker
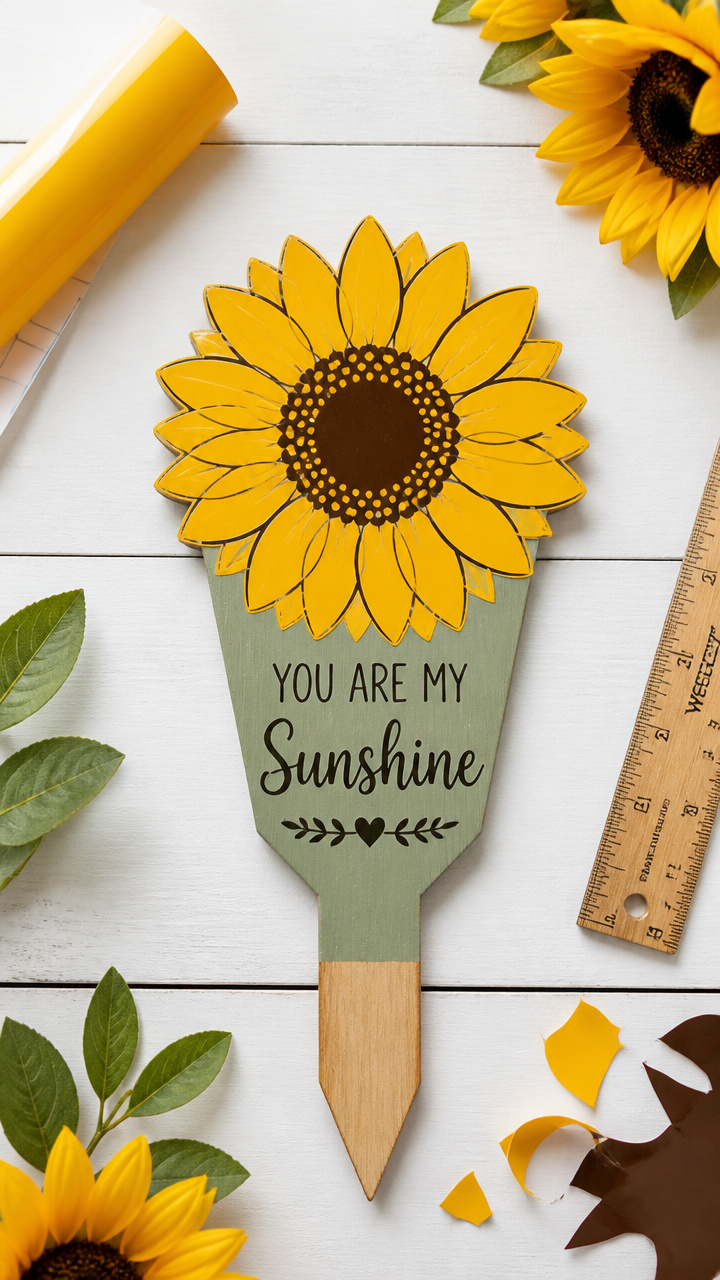
A painted wooden garden marker helps track what you’ve planted and adds color to your flower beds. This one stands tall and weather-resistant.
Materials Needed
- One 6 inch pine wood stake
- One 12 inch by 12 inch sheet of yellow and brown vinyl
- Acrylic paint in sage green
- Paintbrush
- Permanent vinyl sealer
- Ruler
How to Make It
- Paint the wood stake with sage green acrylic paint and let dry for 2 hours.
- Use the Cricut to cut sunflower shapes from yellow and brown vinyl, then weed the designs.
- Measure 1 inch from the top of the stake and place the sunflower centered.
- Seal the entire stake with a spray-on vinyl sealer to protect from rain.
4. Custom Flip-Flop Name Straps
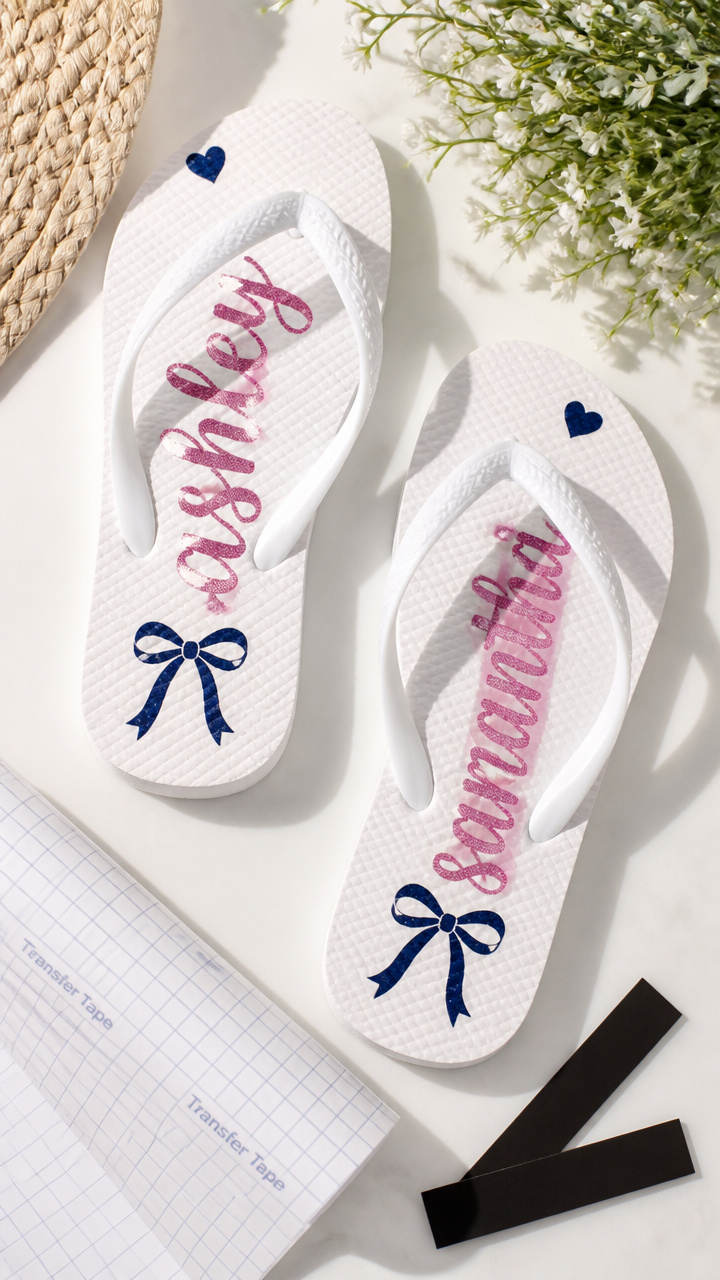
Add a personal touch to plain flip-flops with colorful name straps. Perfect for pool parties or family vacations.
Materials Needed
- One pair of white rubber flip-flops
- One 12 inch by 12 inch sheet of pink glitter vinyl
- One 12 inch by 12 inch sheet of navy blue vinyl
- Hole punch
- Adhesive-backed magnet strips (optional)
- Transfer tape
How to Make It
- Design a name in Cricut Design Space, choose a bold font, and cut from navy vinyl.
- Weed each letter carefully, then apply transfer tape over the top.
- Attach the letters to the flip-flop strap just above the footbed, pressing firmly.
- Cut small stars from pink glitter vinyl, weed, and arrange around the name using transfer tape.
5. Pineapple Pool Float Decal
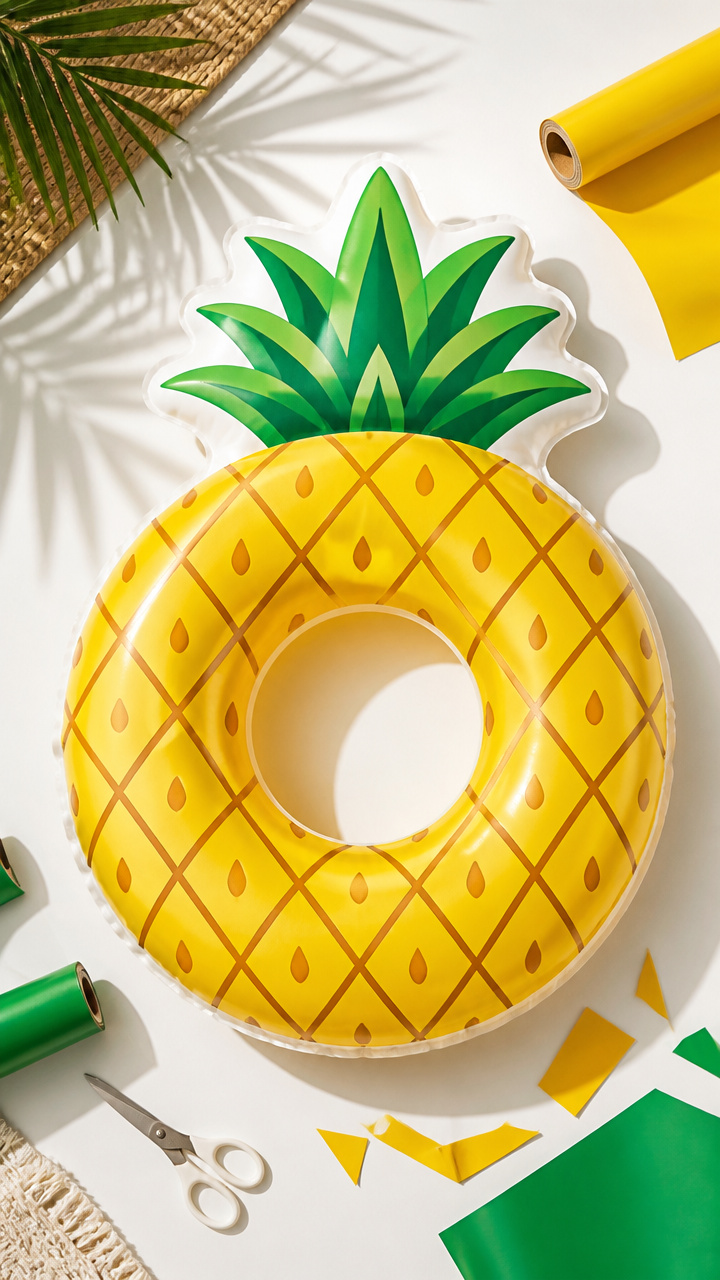
Turn an ordinary inflatable ring into a cheerful pool favorite. This decal sticks well and survives splashes.
Materials Needed
- One 40 inch inflatable pool ring
- One 12 inch by 12 inch sheet of yellow and green permanent vinyl
- Squeegee tool
- Isopropyl alcohol wipes
- Transfer tape
How to Make It
- Clean the pool ring surface with an alcohol wipe and let dry completely.
- Cut pineapple shapes from yellow and green vinyl using the Cricut with the permanent setting.
- Weed the excess vinyl, apply transfer tape, then position the design on the float.
- Smooth with the squeegee, remove the transfer tape slowly, and wait 24 hours before inflating.
6. Lemonade Stand Sign
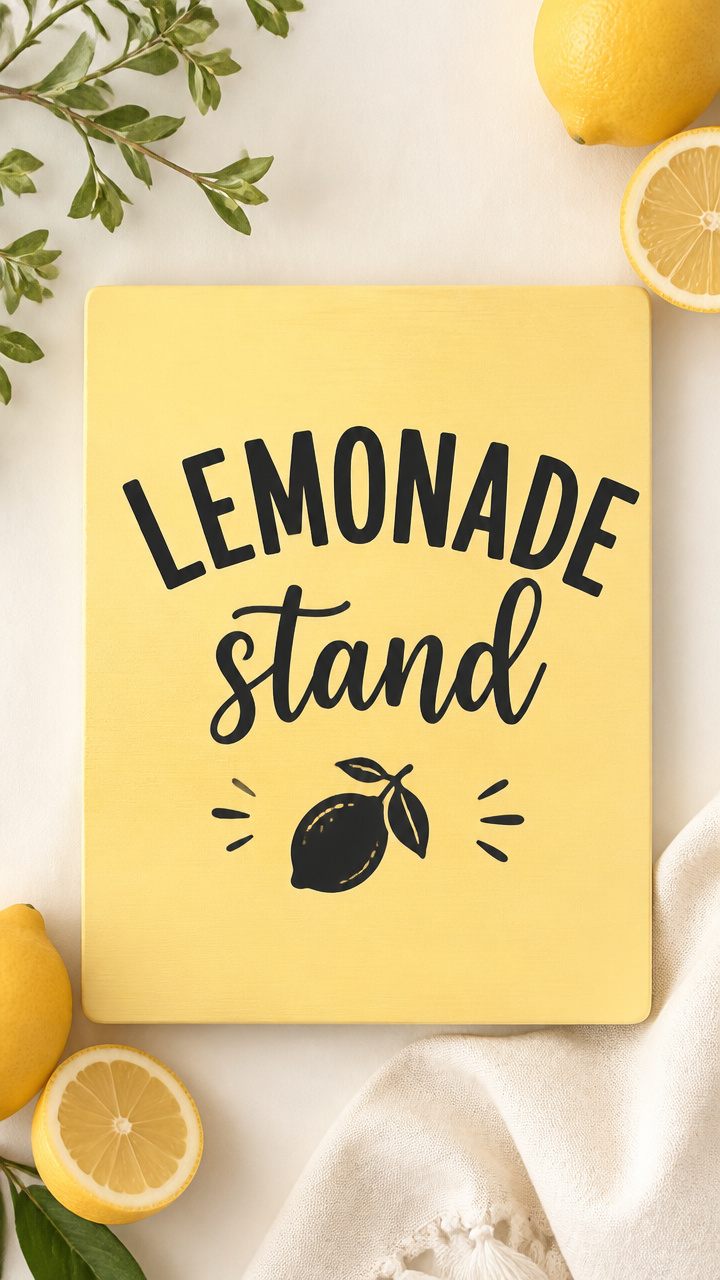
A handcrafted wooden sign makes any lemonade stand feel official and inviting. Kids love helping make and display this one.
Materials Needed
- One 8 inch by 10 inch birch plywood board
- Sandpaper (220 grit)
- Chalk paint in pastel yellow
- Paintbrush
- One 12 inch by 12 inch sheet of black permanent vinyl
- Transfer tape
How to Make It
- Sand the plywood edges smooth, then wipe clean with a dry cloth.
- Paint the board with pastel yellow chalk paint and let dry overnight.
- Use the Cricut to cut “Fresh Lemonade” in a playful font from black vinyl.
- Apply transfer tape, position the text in the center, and press firmly with your palm.
7. Water Bottle Name Labels
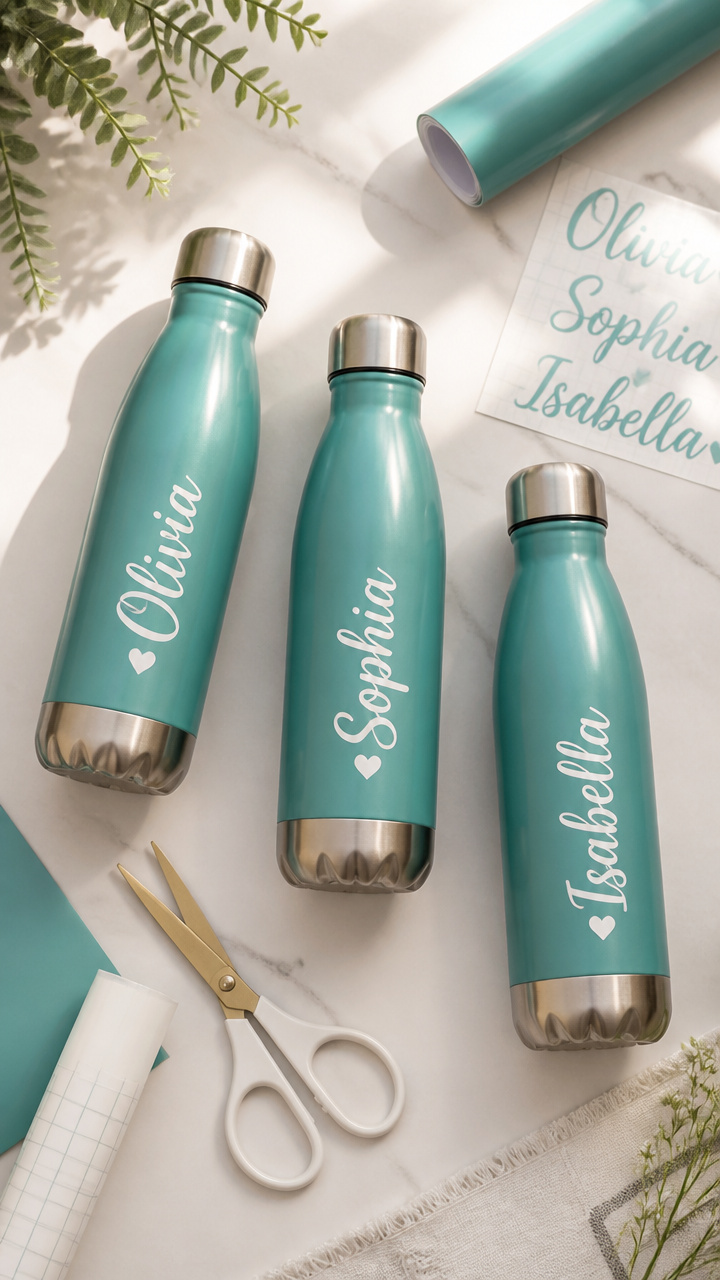
No more guessing which water bottle is yours. These slim vinyl labels stick perfectly and wash well.
Materials Needed
- Three 20 oz stainless steel water bottles
- One 12 inch by 12 inch sheet of teal permanent vinyl
- Label laminator sheets (optional)
- Scissors
- Transfer tape
- Lint-free cloth
How to Make It
- Wipe each bottle with a lint-free cloth to remove oils.
- Cut name labels using the Cricut with rounded rectangle frames and names inside.
- Weed each label, apply transfer tape, and align 2 inches from the bottom of each bottle.
- Press firmly with a credit card edge, then remove the transfer tape slowly.
8. Butterfly Kids’ Room Decals
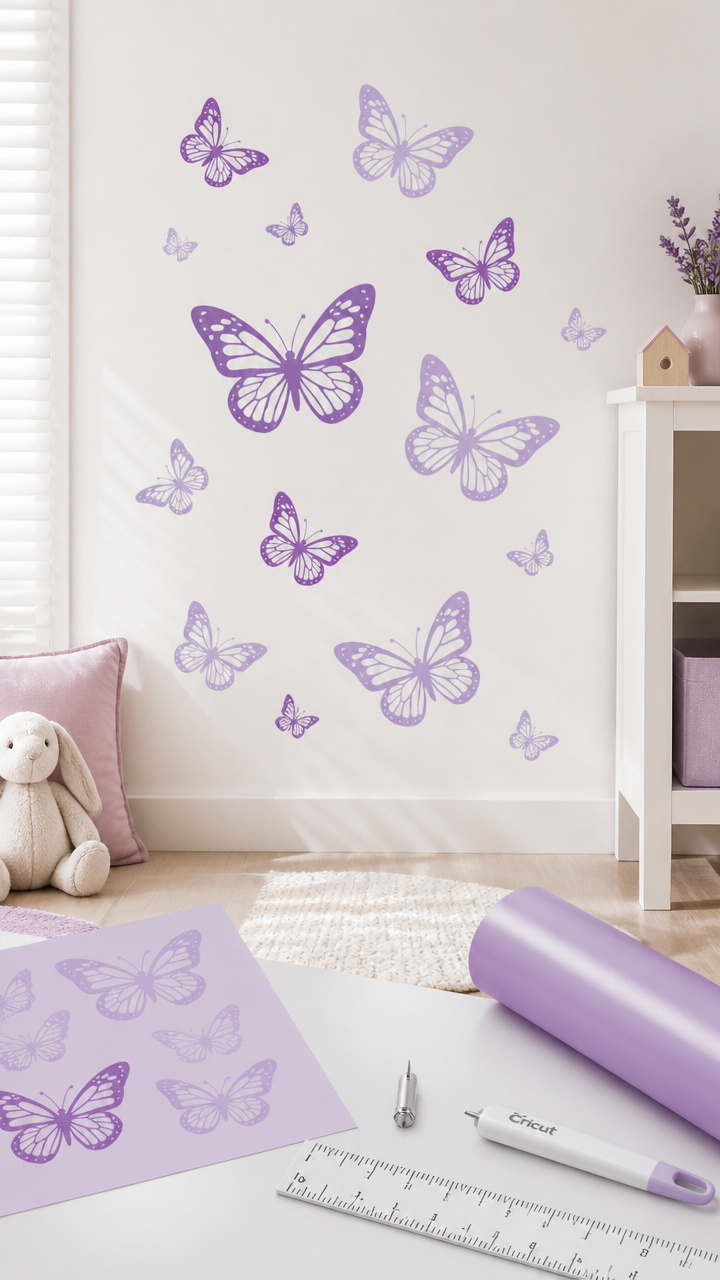
Delicate butterflies in flight add whimsy to a bedroom wall without damaging paint. These reposition easily if needed.
Materials Needed
- One 12 inch by 12 inch sheet of purple and lavender removable vinyl
- Painter’s tape
- Ruler
- Soft cloth
- Cricut Fine Point Blade
How to Make It
- Cut butterfly shapes in various sizes using the removable vinyl setting on your Cricut.
- Weed each butterfly carefully, keeping the transfer tape intact.
- Use painter’s tape to mark spacing on the wall, then place each butterfly at different heights.
- Press each decal with a soft cloth, starting at the center and moving outward.
9. Outdoor Movie Night Banner
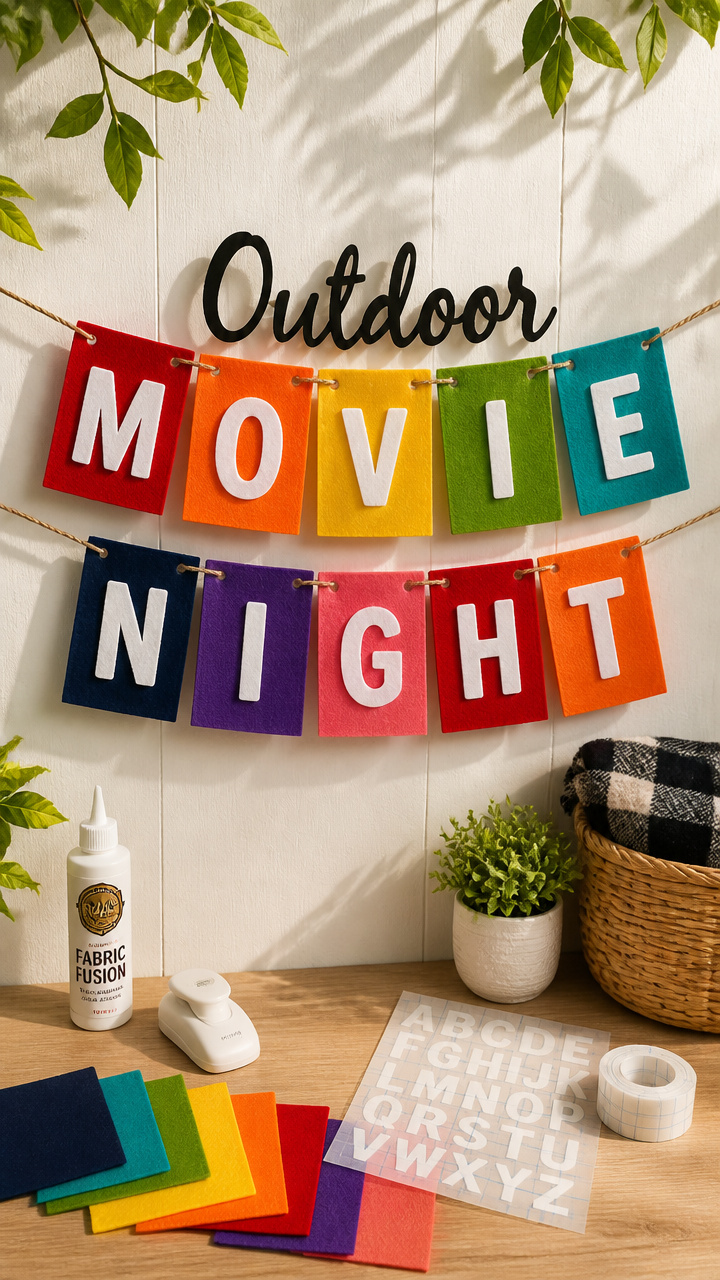
String up this festive banner for backyard movie nights. It sets the mood and lasts through many evenings.
Materials Needed
- One 50 ft nylon clothesline
- Ten 6 inch by 6 inch felt squares in assorted bright colors
- One 12 inch by 12 inch sheet of white permanent vinyl
- Fabric glue
- Hole punch
- Transfer tape
How to Make It
- Cut film strip shapes from white vinyl using the Cricut, then weed carefully.
- Glue one film strip design to the center of each felt square and let dry for 1 hour.
- Apply transfer tape to each vinyl design, press onto the felt, and smooth with your hand.
- Punch a hole in each top corner of the squares and thread onto the clothesline with knots every 12 inches.
10. Flip-Top Can Cooler Sleeves
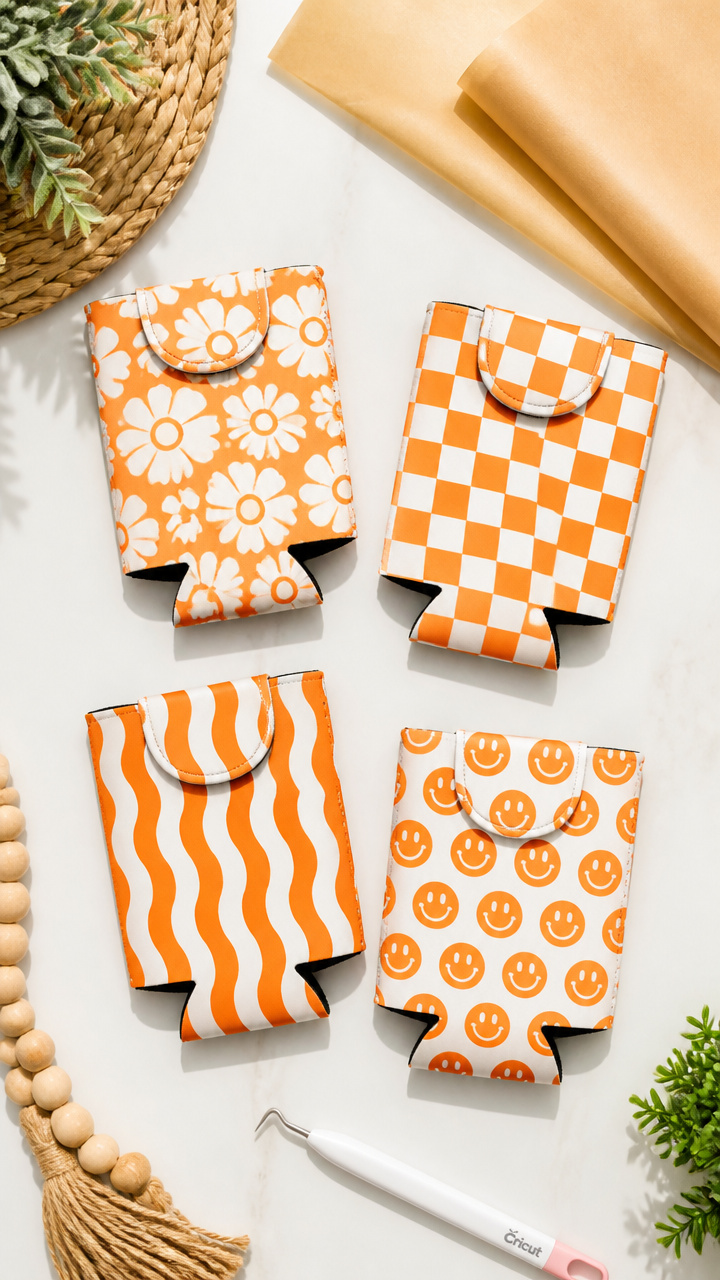
Keep drinks cold and hands dry with neoprene sleeves featuring custom designs. These make great quick gifts.
Materials Needed
- Four pre-cut neoprene can cooler blanks
- One 12 inch by 12 inch sheet of orange and white patterned iron-on vinyl
- EasyPress 2
- Parchment paper
- Weeder tool
How to Make It
- Cut surfboard-themed designs from the iron-on vinyl using the Cricut with heat-activated adhesive setting.
- Weed the excess, then place the design face down on a cooler sleeve.
- Cover with parchment paper and press with EasyPress at 280°F for 25 seconds.
- Let cool completely before handling, then repeat for all four sleeves.
You’ve got everything you need to start crafting right now. Grab your Cricut, pick one project, and enjoy the quiet joy of making something with your hands.