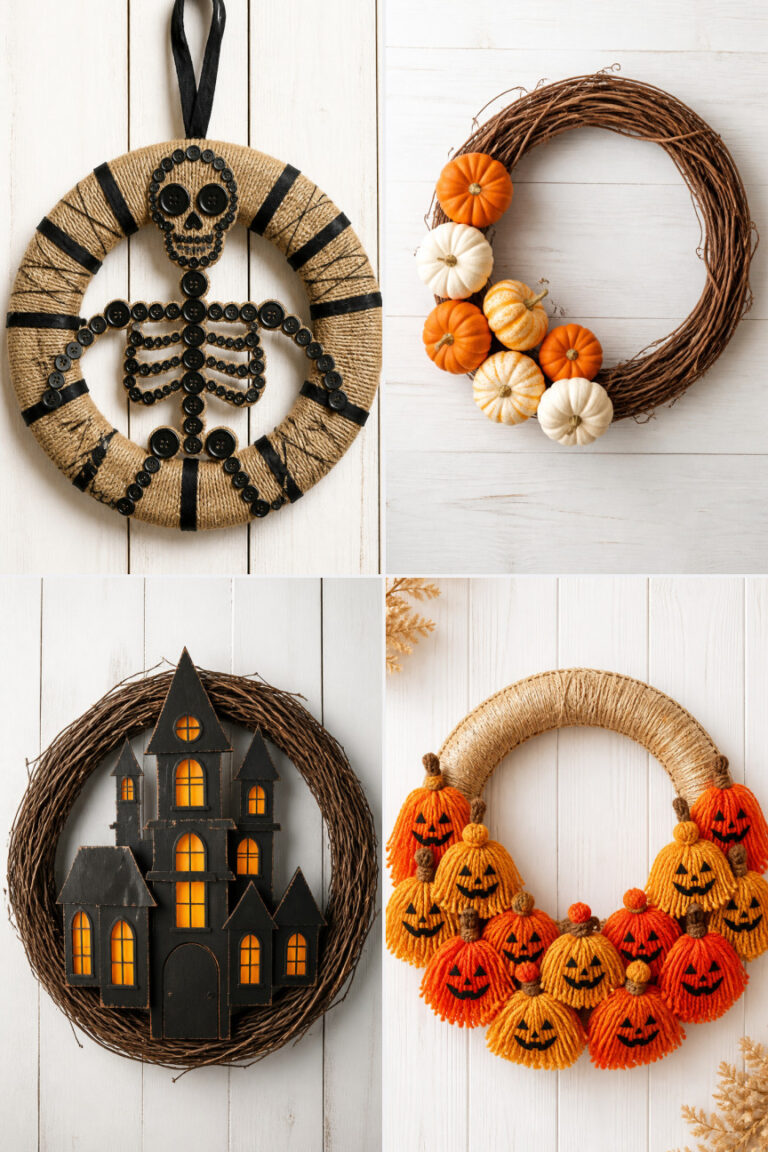
15 Vintage Halloween Wreath Ideas for a Nostalgic Front Porch
There’s something special about a front porch dressed in vintage charm, especially when the air turns crisp and the nights grow longer. A handmade wreath brings warmth and whimsy, hinting at stories from another time without saying a word.
These designs pull from classic materials and old-fashioned techniques, each one distinct and full of character. You’ll find buttons, burlap, antique books, and more—simple things made magical with care.
1. Antique Book Page Wreath
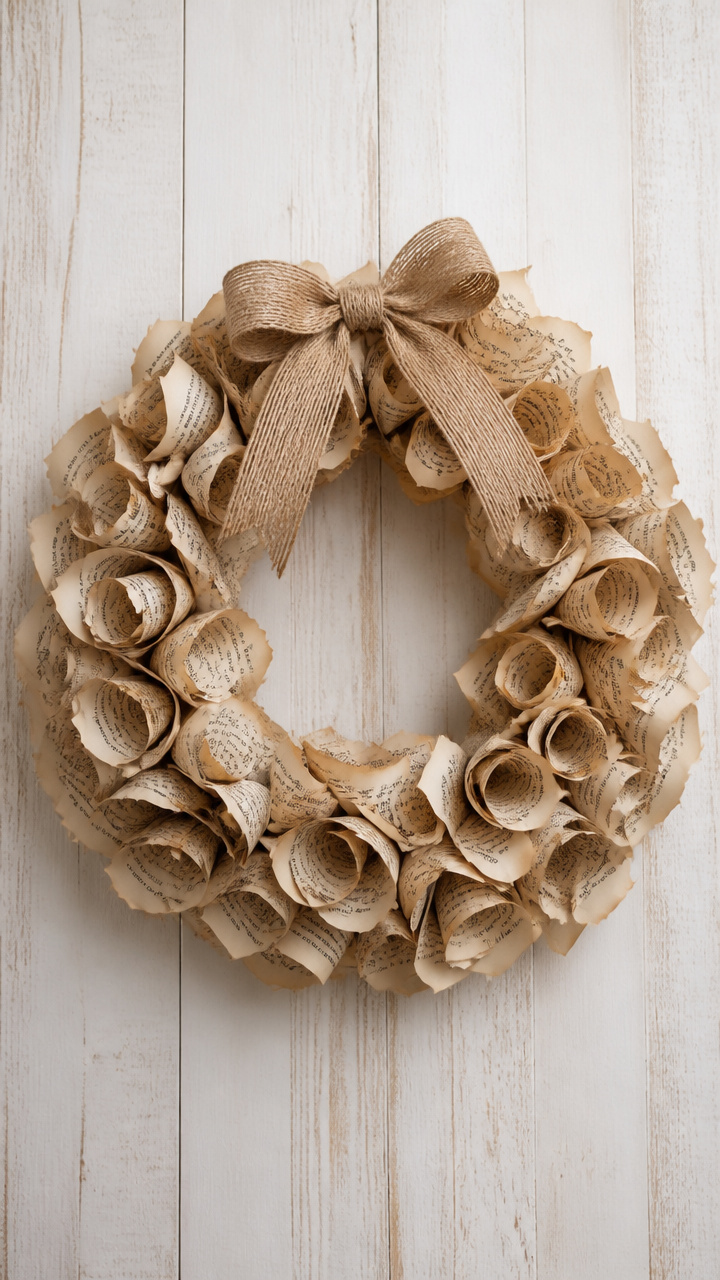
Faded pages from an old novel curl into soft spirals, giving this wreath a timeworn library feel that whispers mystery. The brown ink and delicate folds look like they’ve traveled decades just to land on your door.
Materials Needed
- 12-inch straw wreath form
- 20 pages from a discarded hardcover book (preferably yellowed)
- Scissors
- Hot glue gun with glue sticks
- 12-inch length of tan jute twine
How to Make It
- Cut each book page into 1-inch wide strips using scissors.
- Wrap each strip tightly around a pencil to create a curled scroll, then slide it off and let it relax slightly.
- Working in sections, apply hot glue to one end of a curled strip and press it onto the straw form, overlapping the next strip over the previous by half an inch.
- Continue gluing curled strips until the entire form is covered, leaving no straw visible.
- Tie the jute twine into a loose bow and glue it to the bottom of the wreath.


2. Pressed Flower Glass Wreath
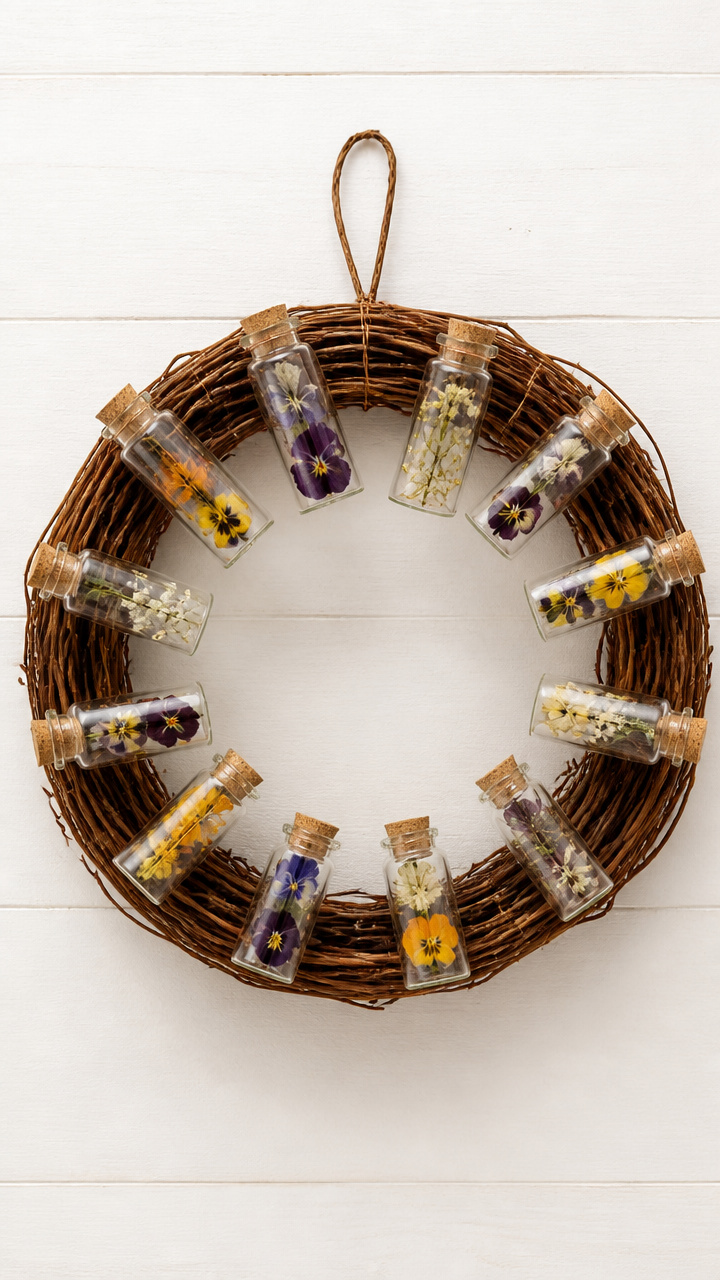
Tiny dried blooms sealed under glass domes add a delicate, apothecary-like elegance to this wreath. Each bloom looks like it was saved from a forgotten garden journal.
Materials Needed
- 9-inch grapevine wreath
- 12 glass test tube ornaments with cork stoppers (1-inch diameter)
- 10 pressed flowers (such as pansies or baby’s breath)
- Floral wire (24-gauge, 12 inches long per tube)
- Wire cutters
- Small wooden clothespins (12)
How to Make It
- Slide one pressed flower into each glass test tube, arranging it carefully so the bloom faces outward.
- Insert the cork stopper to seal each tube.
- Use floral wire to attach a clothespin to the back of each tube by wrapping the wire tightly around the pin’s base.
- Clip each tube onto the grapevine wreath, spacing them evenly around the circle.
- Weave the wire ends into the grapevine to hide and secure them.


3. Bakelite Button Bouquet Wreath
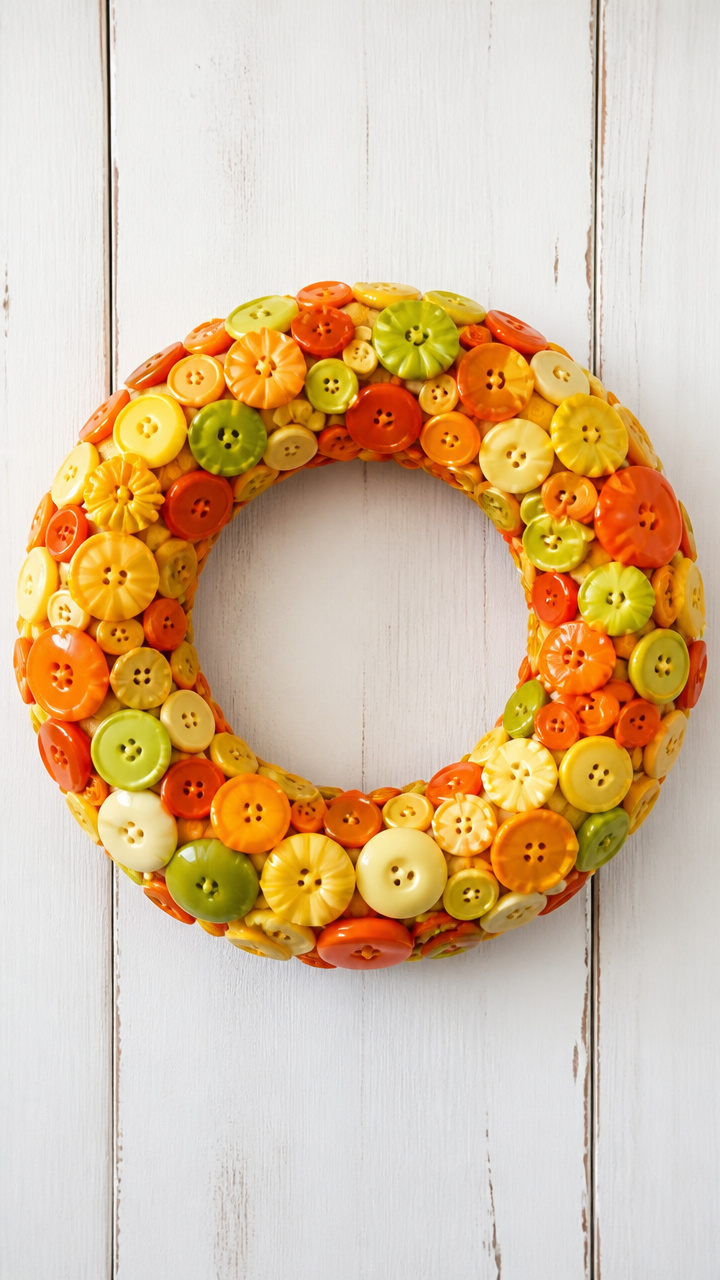
Chunks of colorful Bakelite buttons in citrus tones cluster like vintage candy on this cheerful, tactile wreath. Their glossy finish catches the light like tiny treasures.
Materials Needed
- 10-inch foam wreath form
- 60 vintage Bakelite buttons (assorted sizes from ½ to 1 inch)
- Needle and strong white thread
- Green embroidery floss
- Floral pins (1 inch)
- Scissors
How to Make It
- Thread the needle with doubled white thread and knot the end.
- Sew each button securely to the foam form by passing the needle through two holes and anchoring it into the foam beneath.
- Arrange larger buttons in the center cluster and smaller ones radiating outward.
- Use green embroidery floss to stitch leaf shapes between buttons, securing each with small stitches.
- Pin a floral pin at the top for hanging.


4. Lace Doily Ghost Wreath
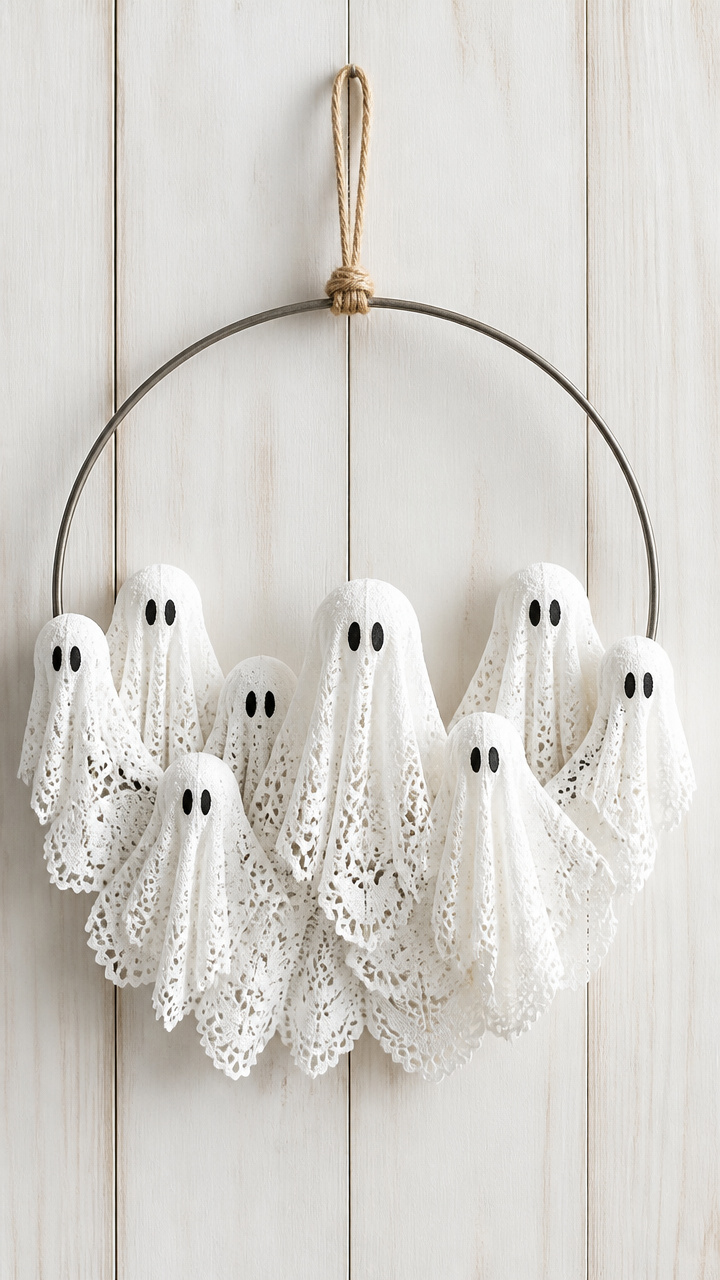
White lace doilies shaped into floating ghosts give this wreath a soft, spectral charm. They flutter gently in the breeze like spirits pausing on your porch.
Materials Needed
- 8-inch metal embroidery hoop
- 5 paper doilies (8 inches each)
- White school glue
- Water
- Paintbrush
- Twine (18 inches)
- Black marker
How to Make It
- Mix equal parts white school glue and water in a bowl.
- Use the paintbrush to coat one side of each doily with the glue mixture, pressing it gently onto the inner hoop ring.
- Overlap the doilies slightly and shape them into rounded ghost forms by lifting the edges while the glue sets.
- Let dry completely for 4 hours, then trim excess paper near the hoop.
- Draw simple eyes and mouth on each ghost with a black marker and tie twine to the top for hanging.


5. Vintage Postcard Wreath
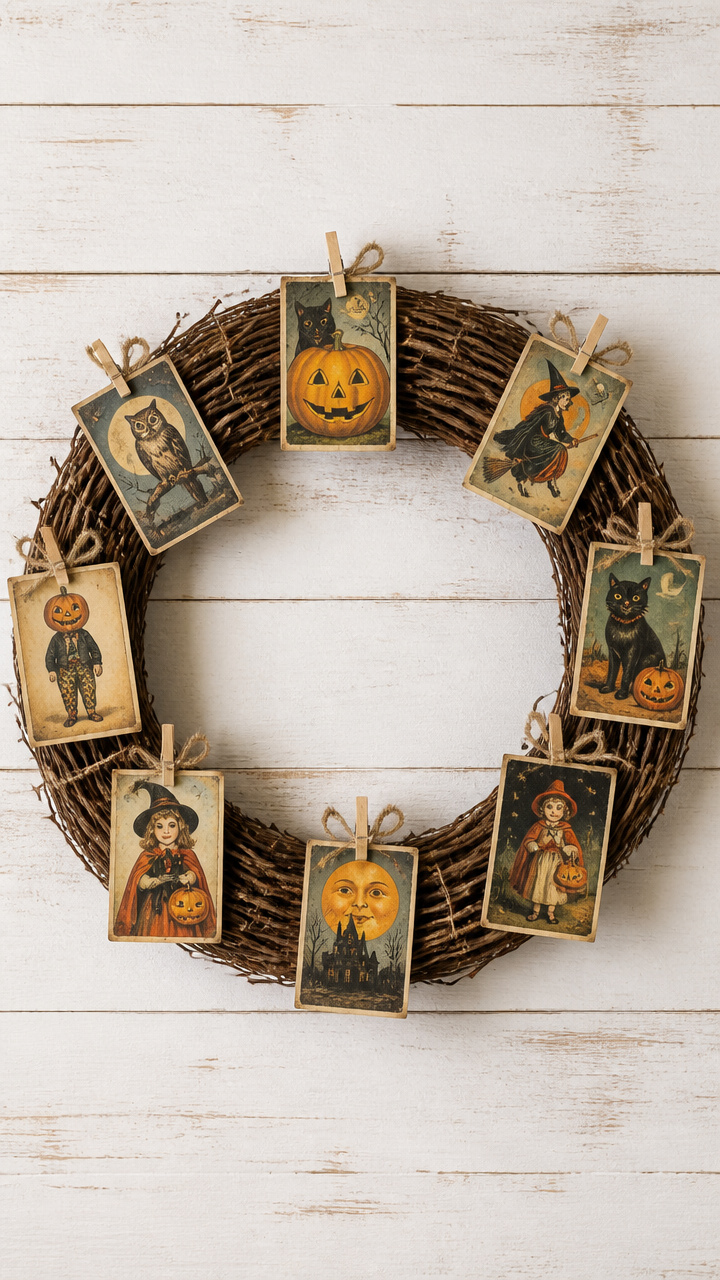
Old Halloween postcards with faded greetings and ink smudges make this wreath feel like mail from the past. Each card tells a silent story from Halloweens gone by.
Materials Needed
- 14-inch grapevine wreath
- 8 vintage Halloween postcards (3 x 5 inches)
- Clothespins (mini, unpainted wood, 8)
- Brown twine (8 pieces, 6 inches each)
- Hot glue gun
- Scissors
How to Make It
- Fold each postcard in half lengthwise so the image remains visible on the outside.
- Glue one end of a 6-inch twine piece to the back crease of each folded card.
- Tie the other end of the twine to a clothespin, trimming any excess.
- Clip each clothespin to the grapevine wreath, spacing them evenly.
- Adjust the cards so they face forward and tilt slightly outward.


6. Mason Jar Lid Spider Web
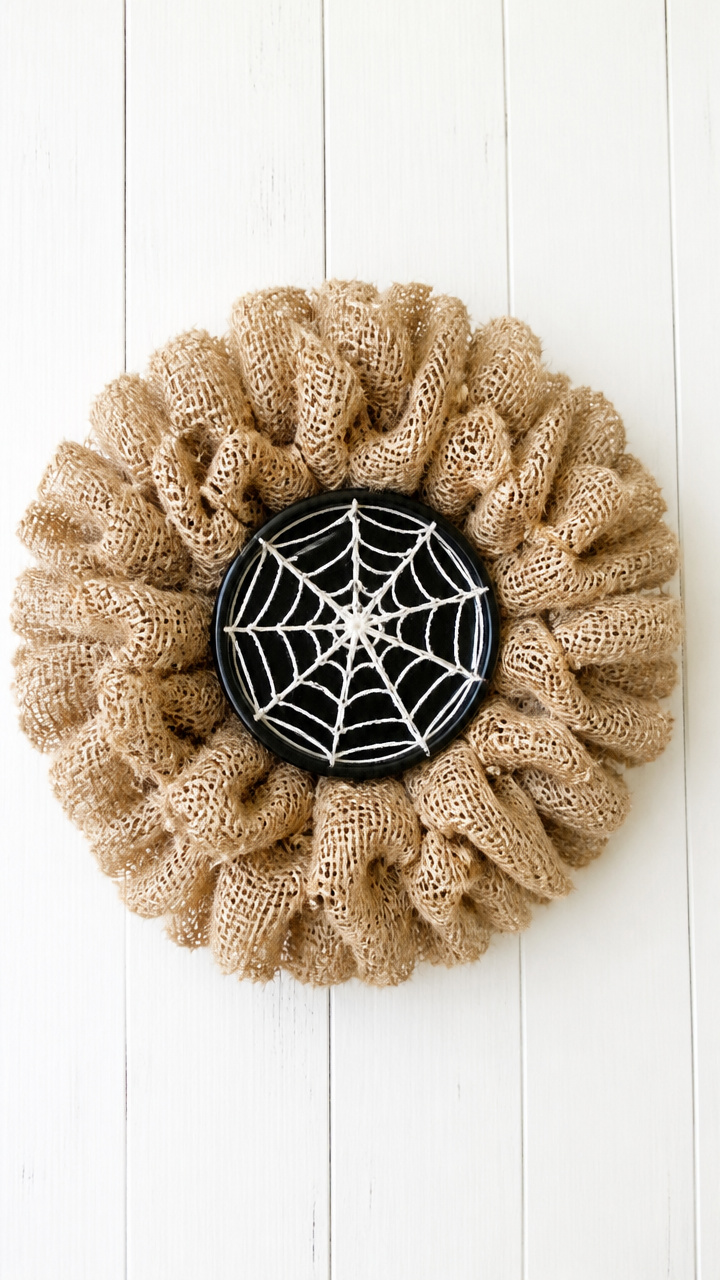
A spiderweb spun inside a vintage mason jar lid becomes a striking focal point on this rustic wreath. The silver rim frames the web like a relic from a country cellar.
Materials Needed
- 10-inch burlap wreath
- 1 large mason jar lid (4 inches)
- White craft thread
- Needle (large eye)
- Black acrylic paint
- Paintbrush
- Hot glue gun
How to Make It
- Paint the mason jar lid with black acrylic paint and let dry for 30 minutes.
- Thread the needle with 3 feet of white craft thread.
- Stitch radial lines from the center to the edge of the lid, spacing them evenly like a clock face.
- Wrap the thread around each spoke to form concentric circles, securing the end with a knot.
- Glue the completed web to the front of the burlap wreath, placing it slightly off-center.


7. Chalkware Cat Silhouette Wreath
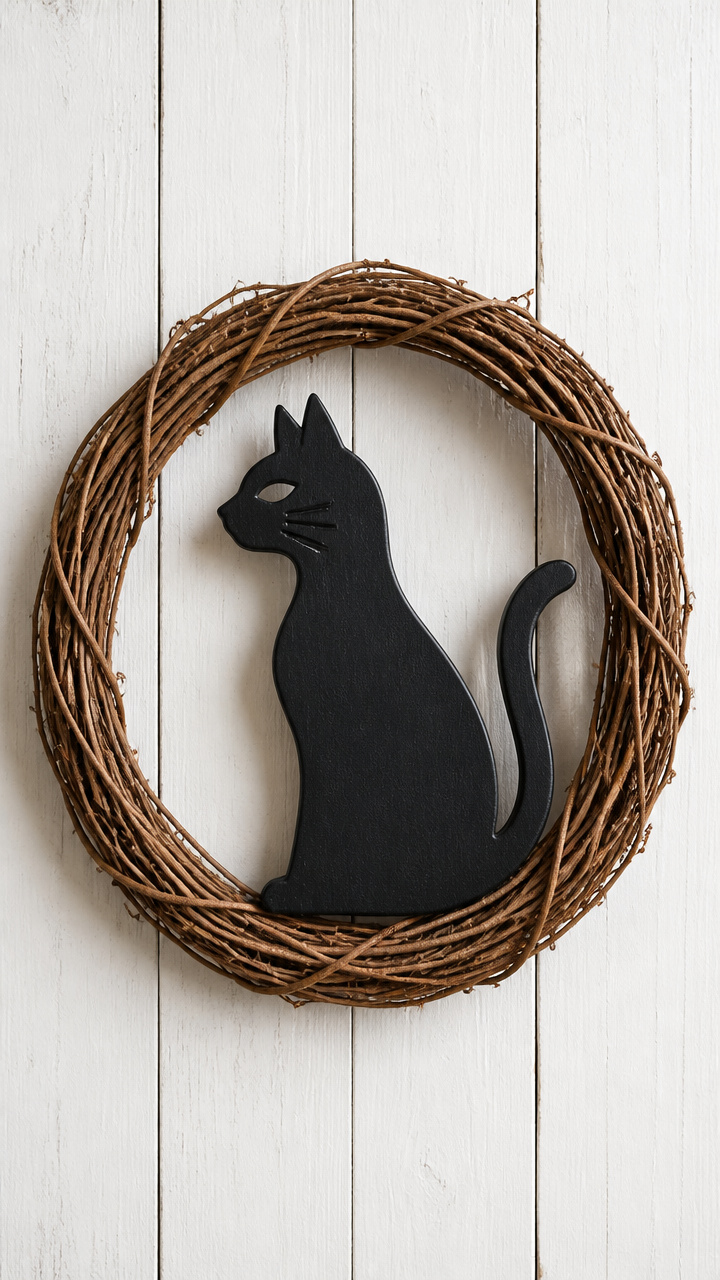
A flat chalkware cat cutout painted matte black adds a bold, mid-century accent to this simple grapevine base. Its silhouette stands out like a shadow against dusk.
Materials Needed
- 9-inch grapevine wreath
- 1 flat chalkware cat plaque (6 inches tall)
- Matte black spray paint
- Painter’s tape
- Drop cloth
- Floral wire (6 inches)
- Wire cutters
How to Make It
- Place the chalkware cat on a drop cloth and spray with matte black paint, holding the can 10 inches away.
- Let dry for 1 hour, then apply a second coat if needed.
- Cut a 6-inch piece of floral wire and twist the ends together to form a loop hanger.
- Attach the wire to the back of the cat with hot glue, letting it dry for 5 minutes.
- Weave the wire ends into the grapevine wreath to secure the cat at the bottom.


8. Hankie Ghost Cluster Wreath
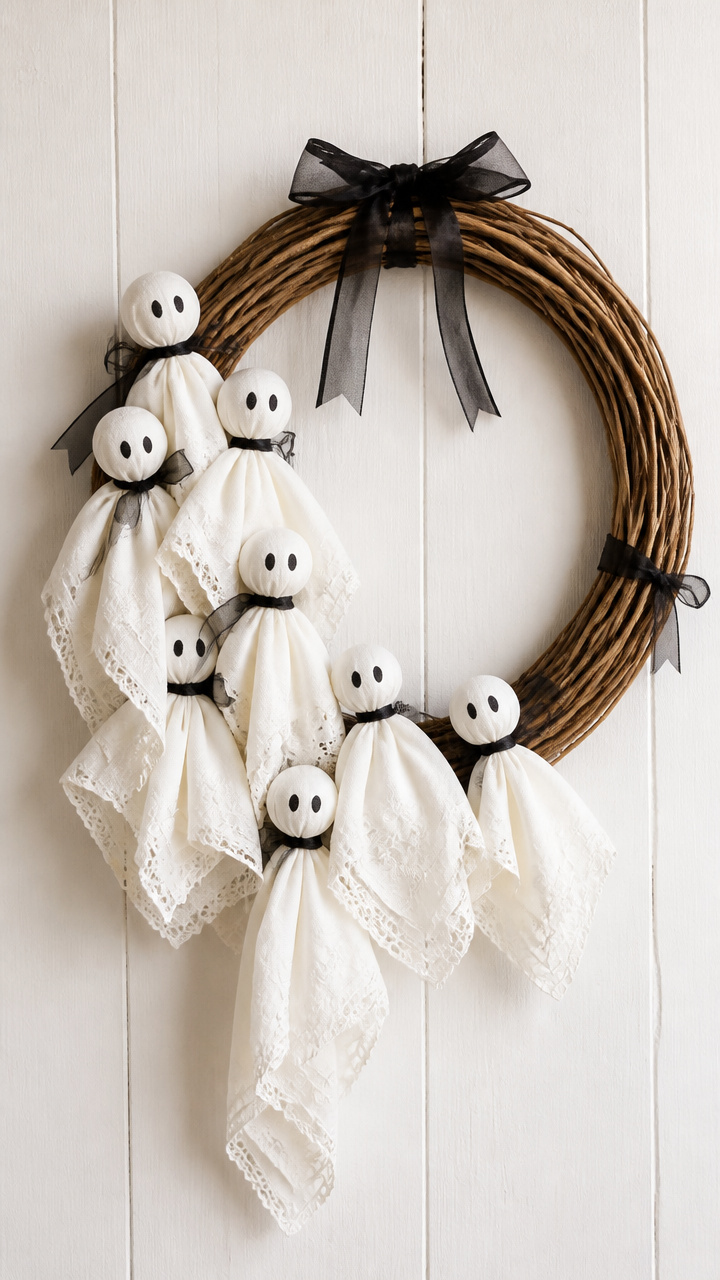
Sheer cotton handkerchiefs tied into gentle ghosts drape softly over a willow wreath. Their embroidered initials hint at family heirlooms given new life.
Materials Needed
- 12-inch willow wreath
- 6 vintage cotton handkerchiefs (12 x 12 inches)
- Black fabric paint
- Fine paintbrush
- Ribbon (black, ¼ inch wide, 36 inches)
- Scissors
How to Make It
- Use the fine paintbrush to paint two dot eyes and a small curved mouth on one corner of each handkerchief.
- Let the paint dry for 20 minutes.
- Gather the opposite corner of each hankie into a knot to form a ghost head.
- Tie each knotted hankie to the willow wreath with a 6-inch ribbon piece, spacing them unevenly.
- Let the tails of the hankies hang freely around the wreath.


9. Cork Bottle Cap Bats
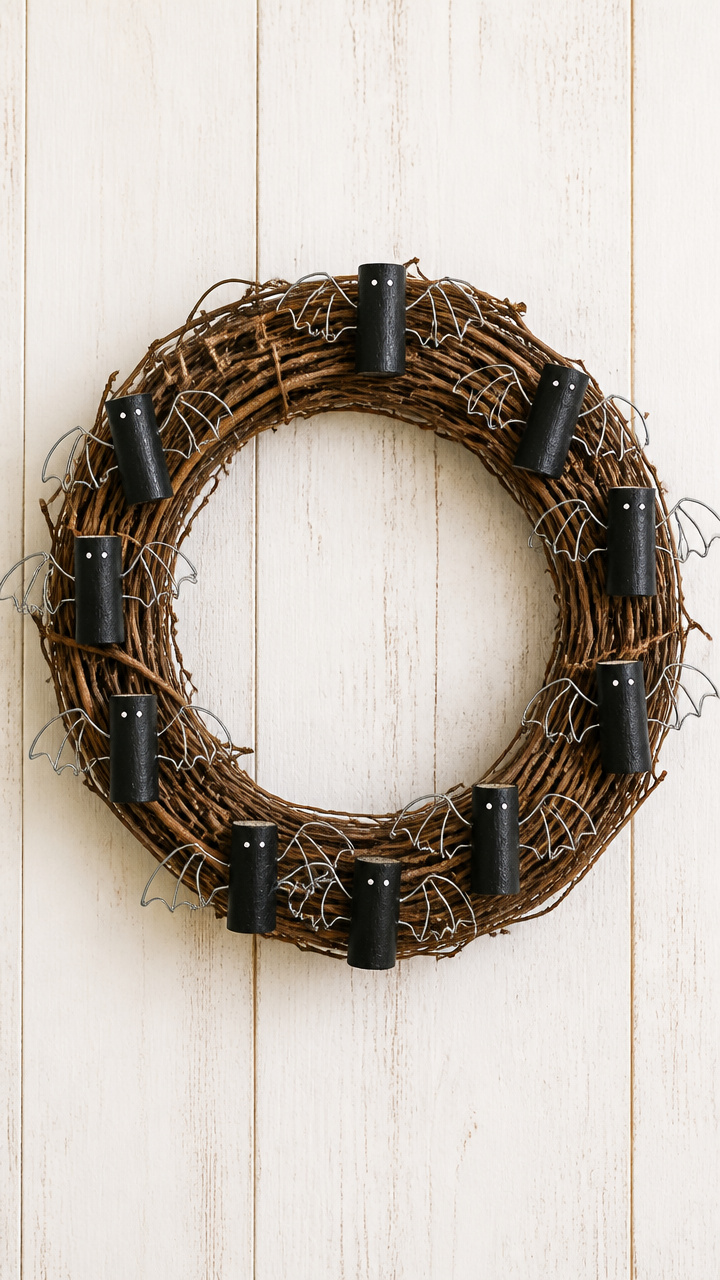
Recycled wine corks become flapping bats with simple cuts and wire wings. Their earthy tone blends perfectly with a twig wreath base.
Materials Needed
- 10-inch twig wreath
- 10 wine corks
- Black acrylic paint
- Paintbrush
- X-Acto knife
- Silver brass wire (20-gauge, 4 inches per bat)
- Pliers
How to Make It
- Paint each wine cork black and let dry for 30 minutes.
- Use the X-Acto knife to slice each cork in half lengthwise.
- Cut two diagonal slits on each side of a cork half to insert wire wings.
- Bend each 4-inch wire into a bat wing shape using pliers and insert one into each slit.
- Glue each bat to the twig wreath, clustering them near the bottom in flight formation.


10. Tin Can Lantern Wreath
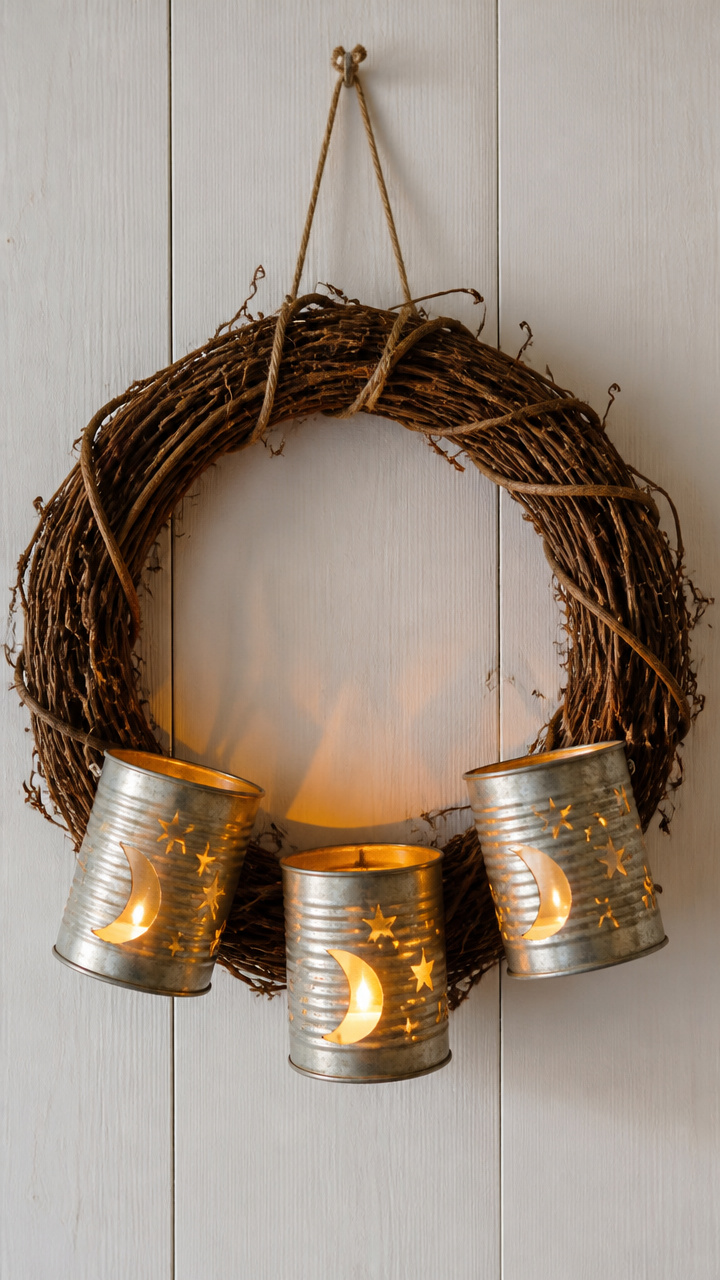
Repurposed tin cans punched with star and moon patterns glow warmly when lit, turning the wreath into a luminous centerpiece. The patina on the metal adds instant age.
Materials Needed
- 12-inch grapevine wreath
- 3 clean tin cans (15 oz size)
- Hammer
- Nail (¼ inch)
- Tealight candles (battery-operated, 3)
- Silver spray paint
- Work gloves
How to Make It
- Put on work gloves and use the hammer and nail to punch constellation patterns into each can, working on a hard surface.
- Spray the outside of each can with silver paint and let dry for 1 hour.
- Place one battery tealight inside each can.
- Position the cans upright on the grapevine wreath, spacing them evenly.
- Weave floral wire around each can base and into the wreath to hold them securely.


11. Victorian Hairwork Frame Accent
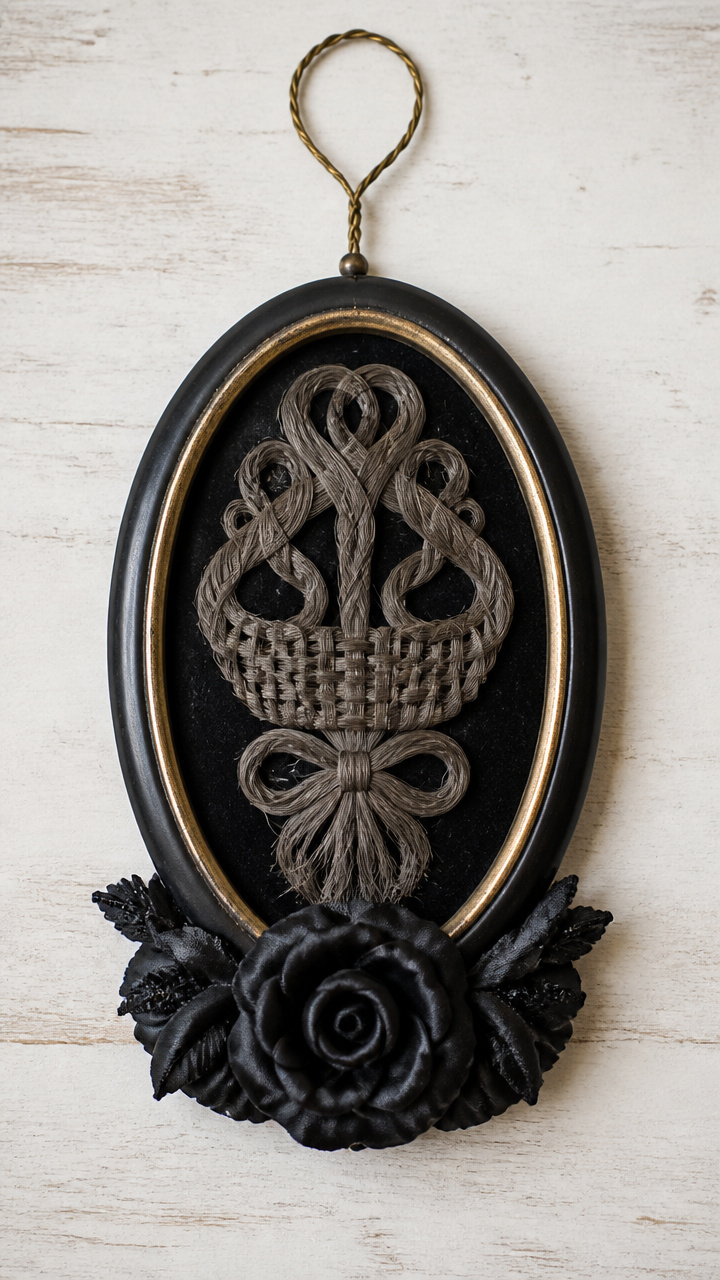
A small oval frame with faux hairwork art adds eerie elegance, recalling mourning customs from another century. It draws eyes like a secret kept too long.
Materials Needed
- 8-inch velvet wreath
- 1 miniature oval frame (2 x 3 inches) with faux braided gray yarn 'hair' art
- Gold picture wire (4 inches)
- Hot glue gun
- Small black silk rose (1)
- Floral pick (2 inches)
How to Make It
- Attach gold picture wire to the back of the frame by looping and twisting it around the sides.
- Glue the floral pick to the back of the frame for extra support.
- Press the frame into the velvet wreath at a slight angle, securing it with hot glue around the base.
- Tuck the silk rose beneath the frame’s lower edge and glue it in place.
- Let the glue cure for 10 minutes before hanging.


12. Cardboard Tube Owls
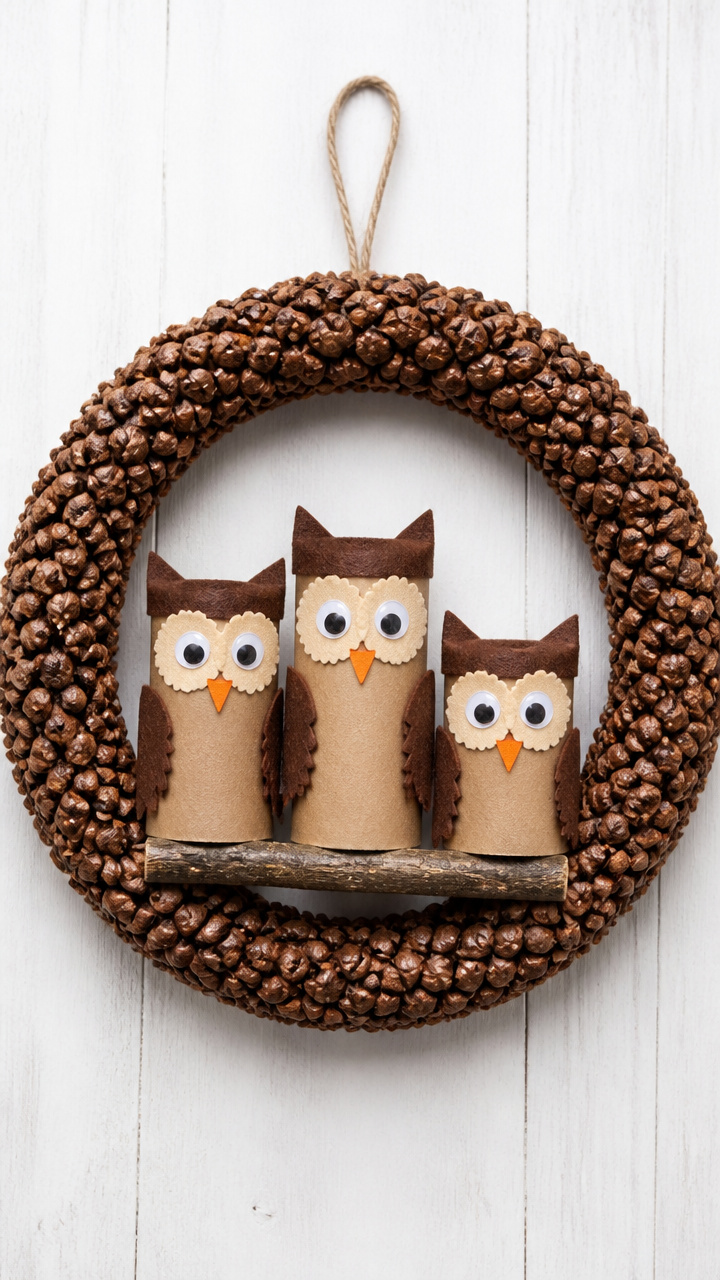
Toilet paper tubes wrapped in kraft paper become wide-eyed owls with felt caps and feather tufts. They perch playfully on a pinecone-studded base.
Materials Needed
- 10-inch foam wreath
- 3 cardboard toilet paper tubes
- Kraft paper (8 x 11 inches)
- Brown felt sheet
- Googly eyes (¾ inch, 6)
- Craft glue
- Feathers (small, brown, 9)
- Scissors
How to Make It
- Cut kraft paper into 2-inch high strips and wrap each tube completely, gluing the seam.
- Glue two googly eyes to the front of each tube.
- Cut small hats from brown felt and glue them to the top of each owl.
- Glue three feathers behind each hat to mimic plumes.
- Attach each owl to the foam wreath with craft glue, spacing them apart and pressing firmly for 30 seconds.


13. Glass Marble Witch Hat
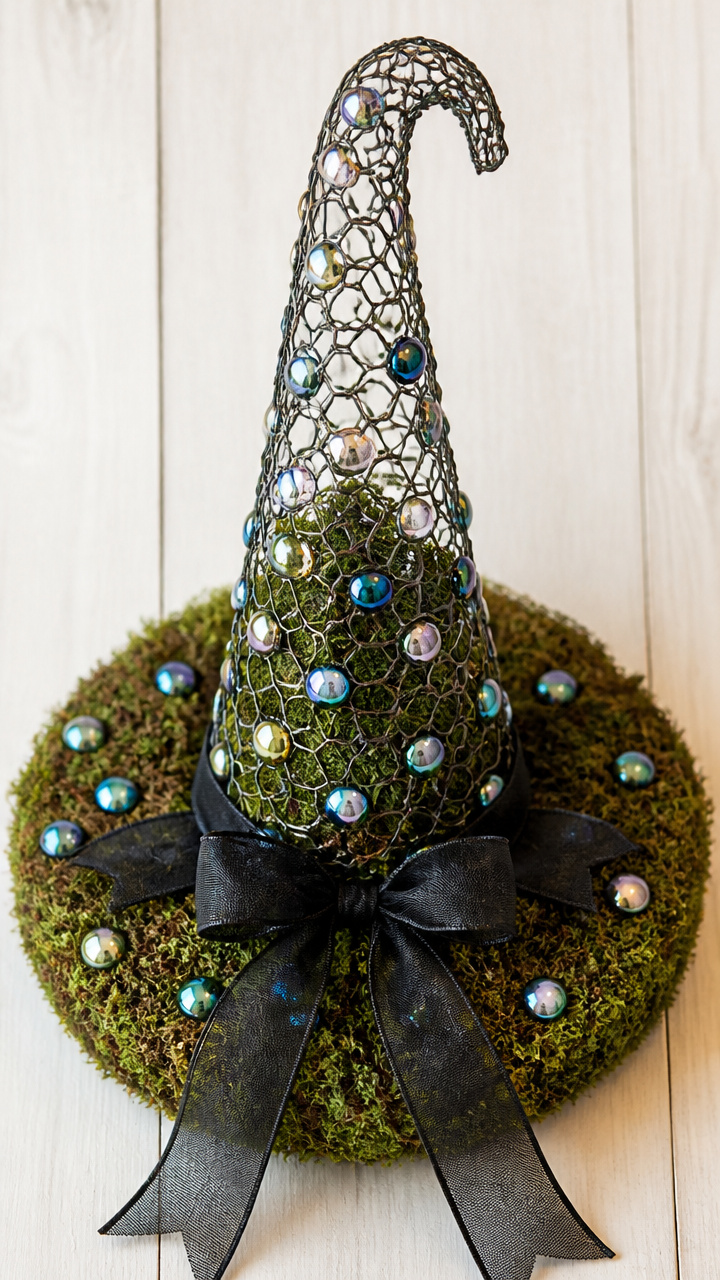
A witch’s hat shaped from chicken wire holds iridescent marbles that catch the light like enchanted orbs. It sits proudly atop a moss-covered base.
Materials Needed
- 9-inch moss wreath
- Chicken wire (6 x 6 inches)
- Pliers
- 15 iridescent glass marbles (½ inch)
- Floral adhesive
- Black ribbon (1 inch wide, 12 inches)
- Wire cutters
How to Make It
- Use pliers to shape the chicken wire into a cone 5 inches tall and fold the bottom edge inward to form a brim.
- Wrap the wire cone with moss and secure with floral adhesive.
- Glue marbles around the brim and up the side in staggered rows.
- Let the adhesive dry for 2 hours.
- Tie the black ribbon around the base of the hat and glue it to the moss wreath at the top.


14. Penny Rug Centerpiece Wreath
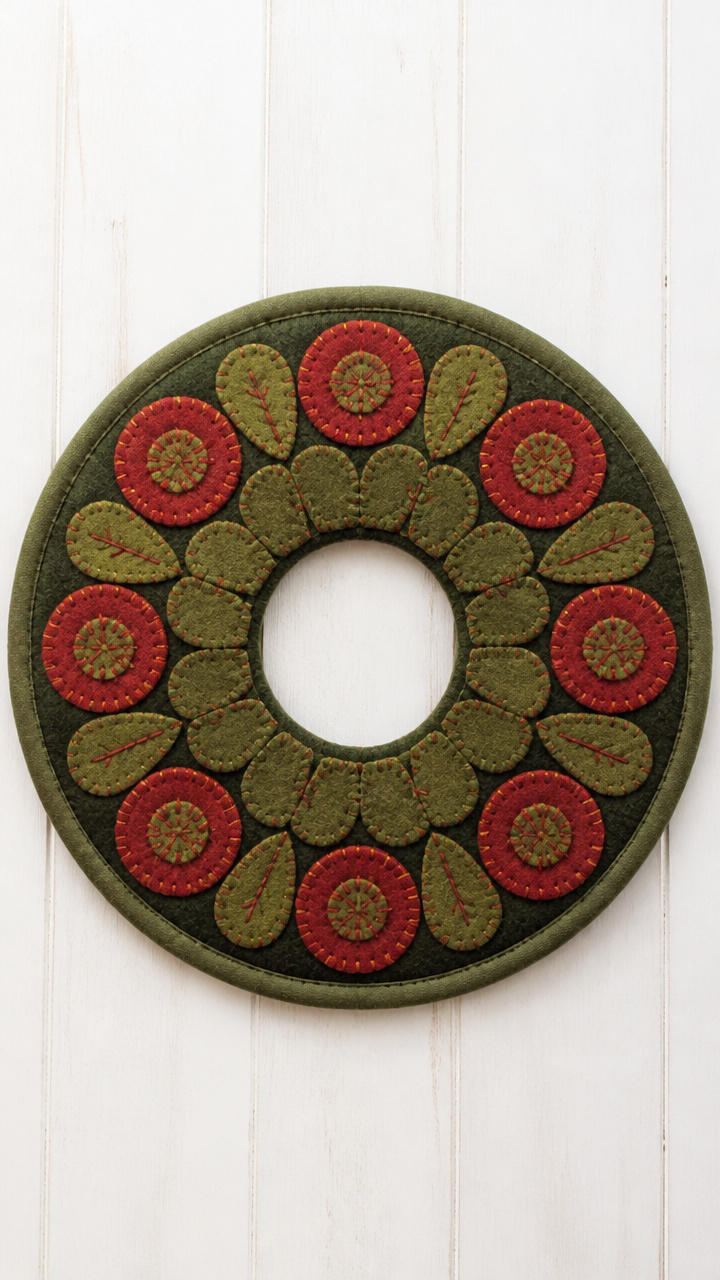
A wool rug made in the penny pattern forms the core of this textile wreath, its red and green rings glowing like an heirloom quilt. The texture invites touch.
Materials Needed
- 12-inch foam wreath
- Handmade wool penny rug (9 inches diameter)
- Fabric glue
- Bias tape (green, 1 inch wide, 24 inches)
- Scissors
- Straight pins
How to Make It
- Center the penny rug on the foam wreath and trace the outer edge lightly with chalk.
- Apply fabric glue within the traced line and press the rug down firmly.
- Hold in place with straight pins around the edge for 15 minutes.
- Cut bias tape to fit the rug’s circumference and glue it over the raw edge as a binding.
- Remove pins after 20 minutes and let dry completely overnight.


15. Porcelain Doll Head Fragment
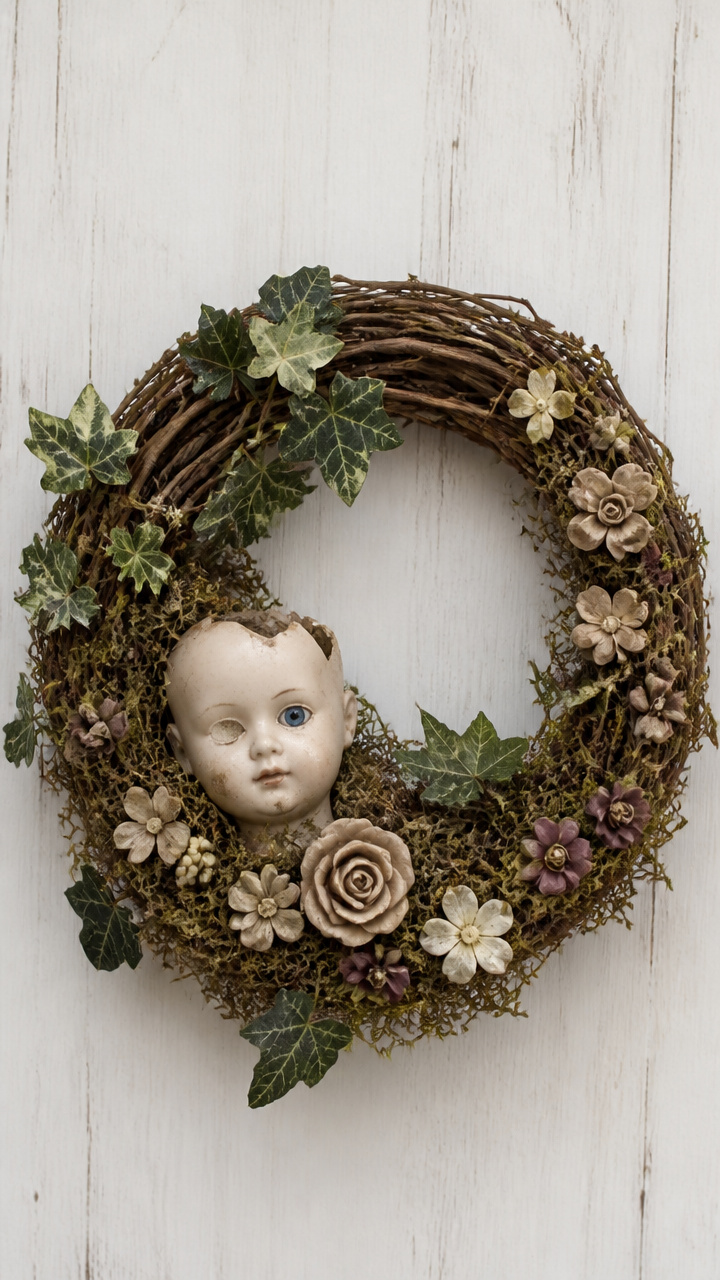
A chipped porcelain doll head, partially buried in dried moss and ivy, creates a haunting yet beautiful focal point. One glass eye stares knowingly from the greenery.
Materials Needed
- 10-inch grapevine wreath
- 1 vintage porcelain doll head (3 inches tall, with one intact eye)
- Dried sheet moss
- Preserved ivy sprigs (3)
- Floral clay
- Hot glue gun
- Tweezers
How to Make It
- Shape floral clay into a flat disc and press it into the bottom center of the wreath.
- Press the doll head halfway into the clay so it appears emerging from the vines.
- Use tweezers to tuck dried moss around the base, covering the clay completely.
- Weave preserved ivy sprigs through the grapevine above and beside the head.
- Secure all elements with dots of hot glue where needed and let set for 10 minutes.


Each of these wreaths carries its own quiet story, built from humble things given new purpose. Pick one that speaks to you and let your hands bring it to life.