17 Cute Christmas Card Crafts Using Paper and Ribbon
Skip the store-bought card aisle this holiday season. Nothing carries warmth, care, and a personal touch quite like a handmade greeting, especially one your friends will proudly pin to the fridge or tuck into their holiday displays.
The best part is that you do not need an elaborate craft stash to get started. With just paper, ribbon, and materials you likely already have at home, you can create simple, charming keepsakes that are joyful to make and truly lovely to receive.
1. Peppermint Candy Pop-Up
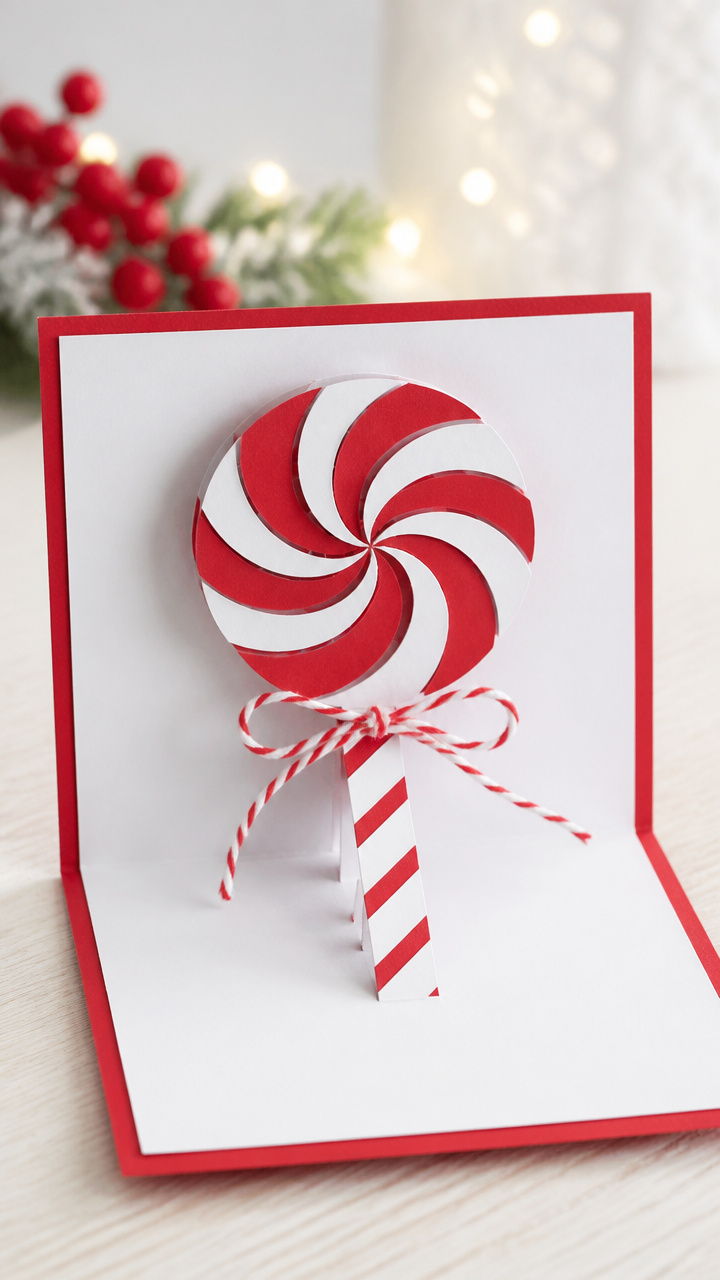
Red and white swirls jump off the page with this cheerful pop-up design. It mimics real candy canes and adds playful dimension to your message.
Materials Needed
- A5 red cardstock, 1 sheet
- White cardstock, 1 sheet
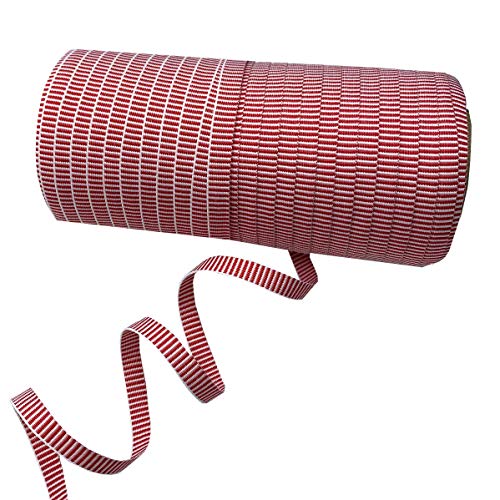
- 1/4-inch wide white grosgrain ribbon, 6 inches
- 1/4-inch wide red grosgrain ribbon, 6 inches
- Scissors
- Glue stick
- Black fine-tip marker
How to Make It
- Fold the red cardstock in half to form the card base. Press the crease firmly with your fingernail.
- Cut a 2-inch circle from white cardstock. Cut it in half and curl each piece around a pencil to form candy stripes.
- Glue one curved edge of each half-circle to the inside center fold so they arch up when the card opens.
- Weave the red and white ribbons together in a zigzag pattern across the front, gluing only at the ends.
- Use the black marker to draw tiny cracks on the ribbons for a realistic peppermint texture.


2. Ribbon-Wrapped Tree Silhouette
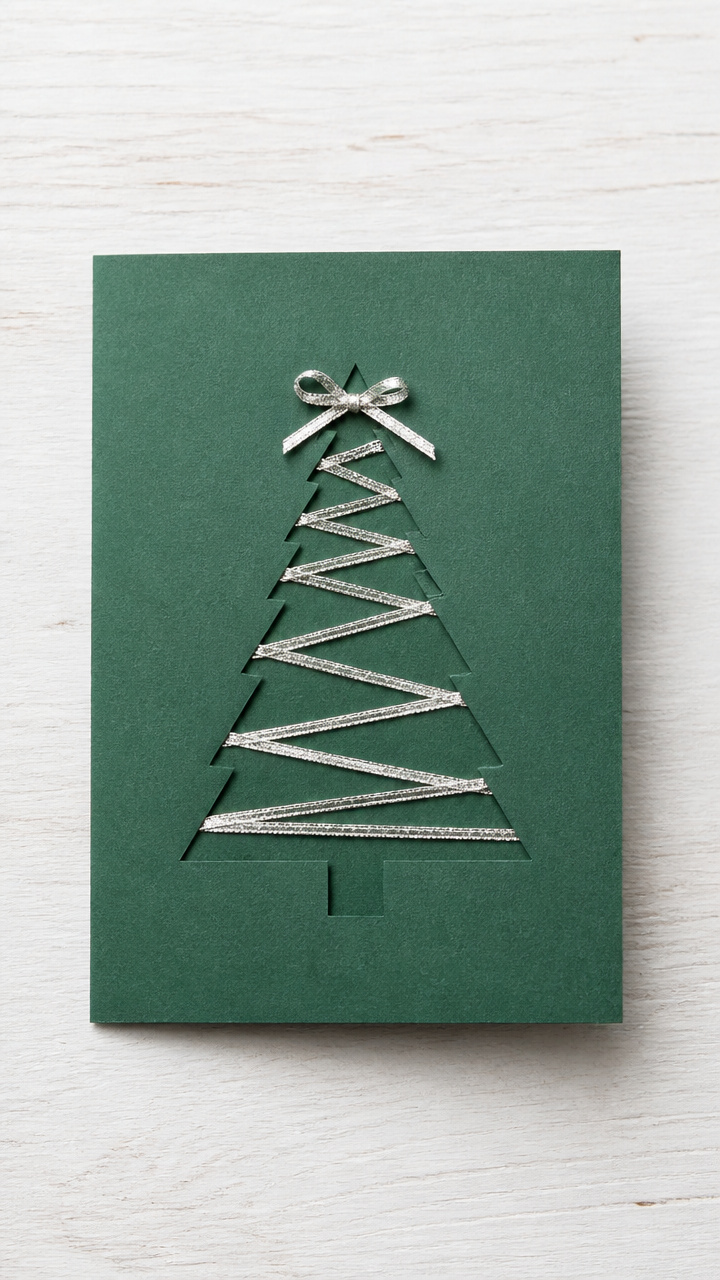
A sleek evergreen shape wrapped in shimmering ribbon gives a modern twist to holiday cheer. The contrast between matte paper and glossy ribbon catches the light beautifully.
Materials Needed
- A6 green cardstock, 1 sheet
- Silver metallic ribbon, 1/8 inch wide, 12 inches
- White A6 envelope
- Pencil
- Craft knife
- Cutting mat
- Double-sided tape
How to Make It
- Draw a tall triangle tree shape on the green cardstock and cut it out with a craft knife on a cutting mat.
- Starting at the bottom tip, wrap the silver ribbon around the tree shape in tight spirals, pressing gently as you go.
- Overlap each ribbon turn slightly to avoid gaps and secure the end with a dot of double-sided tape on the back.
- Attach the finished tree to the front of the white envelope with double-sided tape centered.
- Let the ribbon catch the light when held at an angle—it looks like frost on branches.


3. Paper Chain Garland Insert
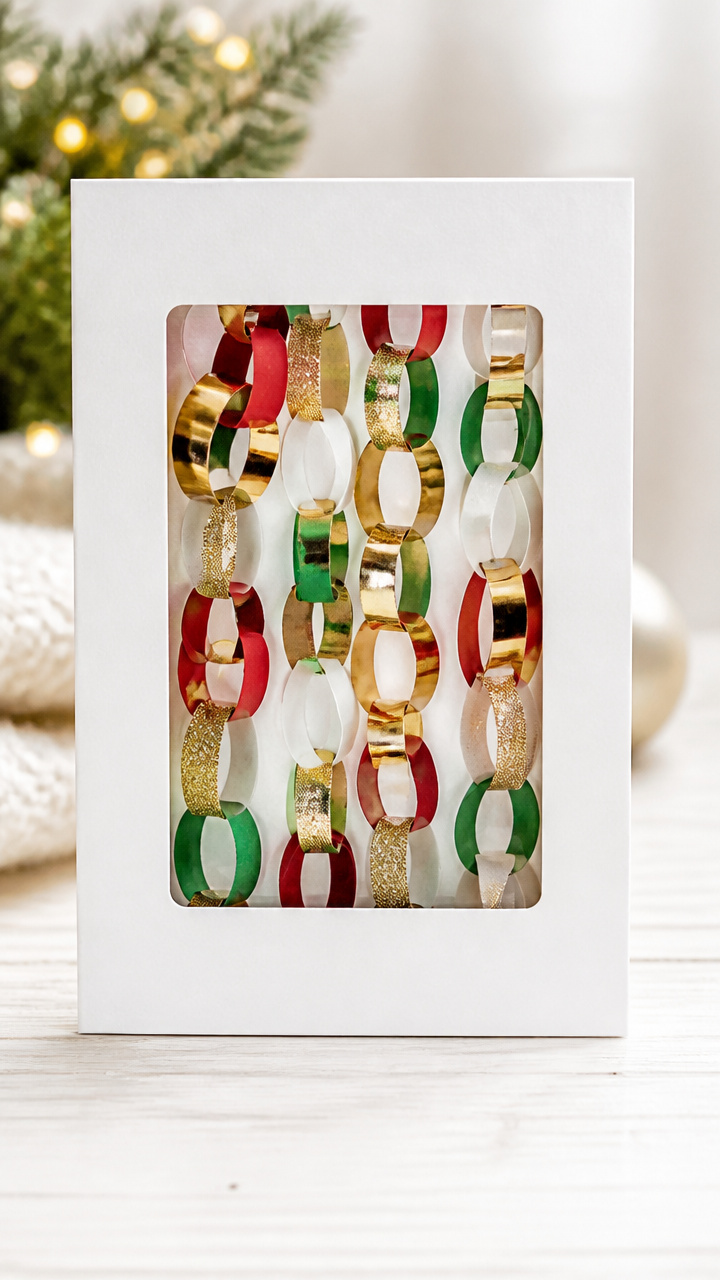
Tiny paper chains dangle inside a windowed card, swaying slightly when opened. This one surprises with subtle movement and classic charm.
Materials Needed
- A5 white cardstock, 1 sheet
- Red, green, and gold 1-inch paper strips, 5 of each color
- Clear acetate sheet, 2×3 inches
- Hole punch
- Double-sided tape
- Glue dots
How to Make It
- Fold the white cardstock in half for the base and trim the top edge into a scalloped shape with scissors.
- Punch a 1.5-inch rectangle from the front center and tape the acetate behind it to create a window.
- Link the paper strips into a chain by gluing the end of one strip into a loop and threading the next through it.
- Once all five links are connected, use a glue dot to attach the top link to the inside ceiling of the card.
- Close the card gently so the chain rests flat and won’t tangle.


4. Bows on a Branch Card
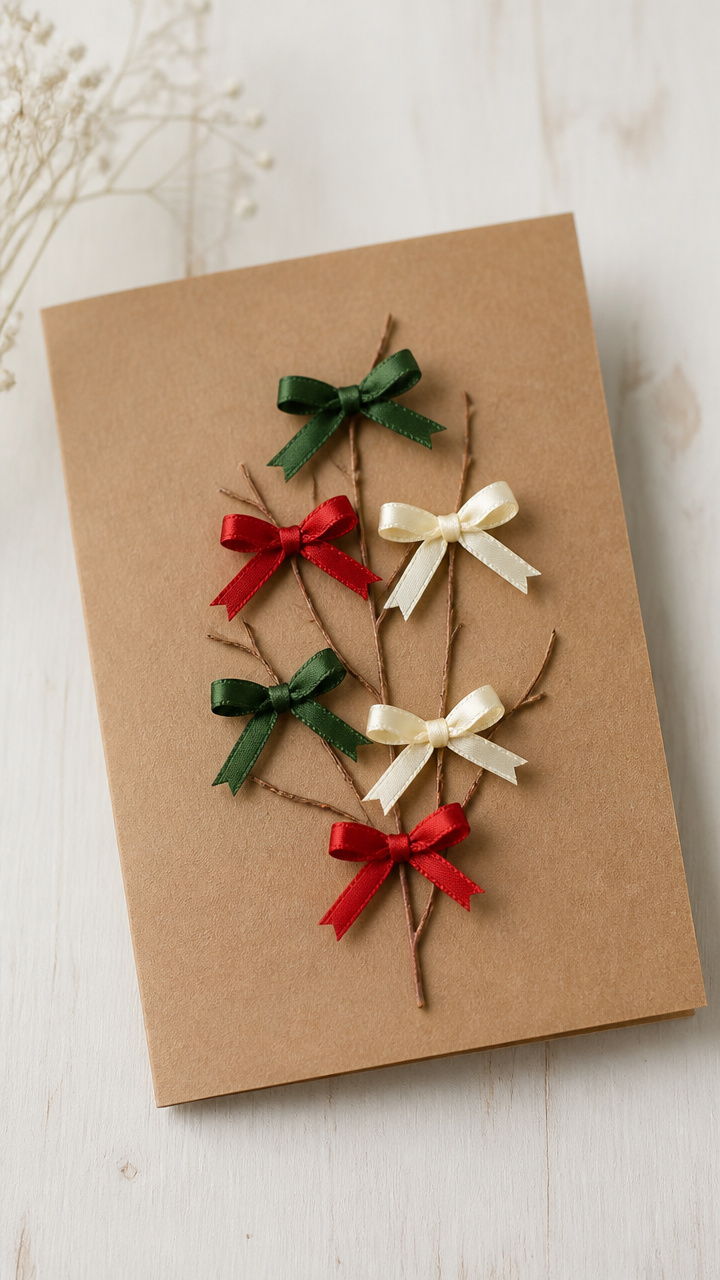
Delicate paper twigs hold tiny hand-tied bows like ornaments. This rustic design feels cozy and handmade, perfect for nature lovers.
Materials Needed
- Kraft brown cardstock, A5 size, 1 sheet
- Assorted 1/4-inch satin ribbons in red, forest green, and cream, 8 inches each
- Brown fine-tip marker
- Scissors
- Glue dots
How to Make It
- Fold the kraft cardstock in half to make the base. Use the brown marker to draw two forked branches across the front.
- Cut three 8-inch lengths each of red, green, and cream ribbon. Tie each into a small bow with even loops.
- Trim the tails of each bow at a slight angle with scissors for a clean look.
- Place a glue dot on the knot of each bow and arrange them along the drawn branches.
- Let the bows vary in height so they appear to hang naturally from the twigs.


5. Layered Snowman Stack
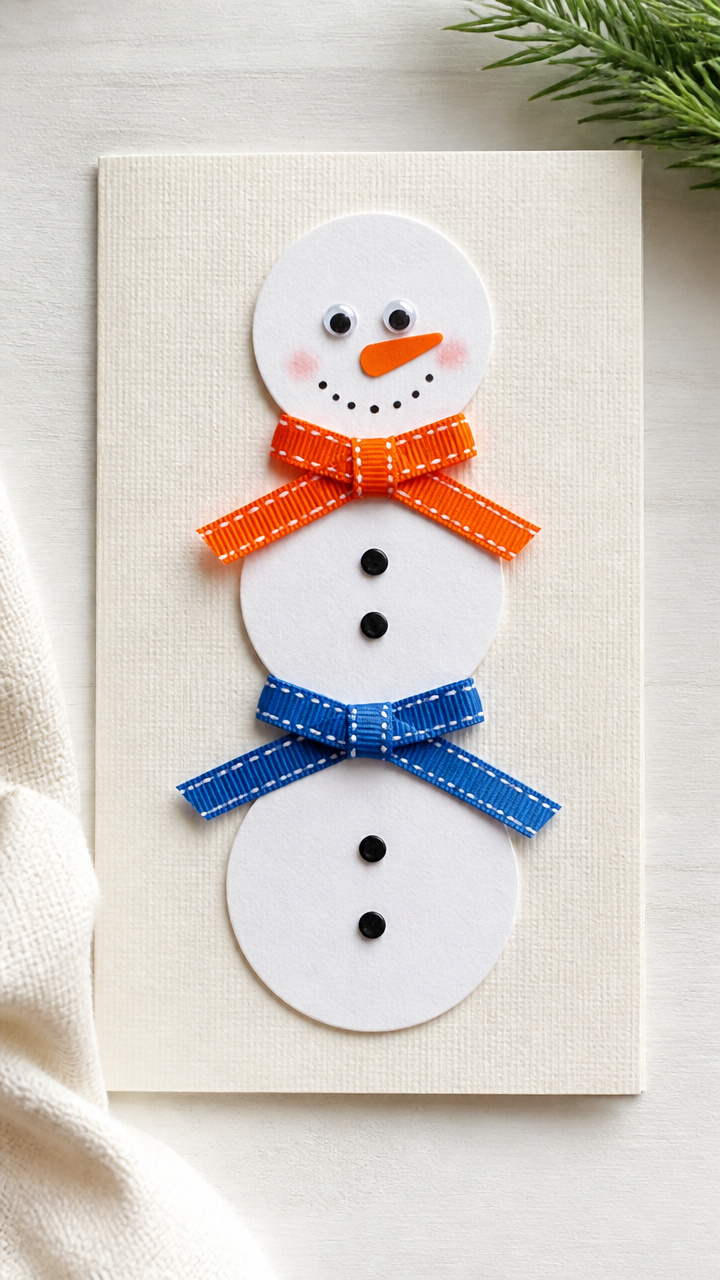
Three fluffy paper circles form a snowman with ribbon scarves. The layers add depth, and the fabric-like ribbon softens the look.
Materials Needed
- White A5 cardstock, 1 sheet
- Orange, black, and blue 1/4-inch ribbon, 5 inches each
- Scissors
- Glue stick
- Googly eyes, 6mm, 2 per card
- Black fine-tip pen
How to Make It
- Cut three descending circles from white cardstock: 2 inches, 1.5 inches, and 1 inch in diameter.
- Stack and glue them vertically on the card front to form a snowman body.
- Cut a 2-inch piece of orange ribbon and fold it into a triangle for a carrot nose, gluing it near the top circle.
- Use the black pen to draw coal buttons down the middle and a smiling mouth on the top circle.
- Tie the blue ribbon into a loose knot and glue it around the middle circle like a scarf.


6. Ribbon-Framed Photo Corner
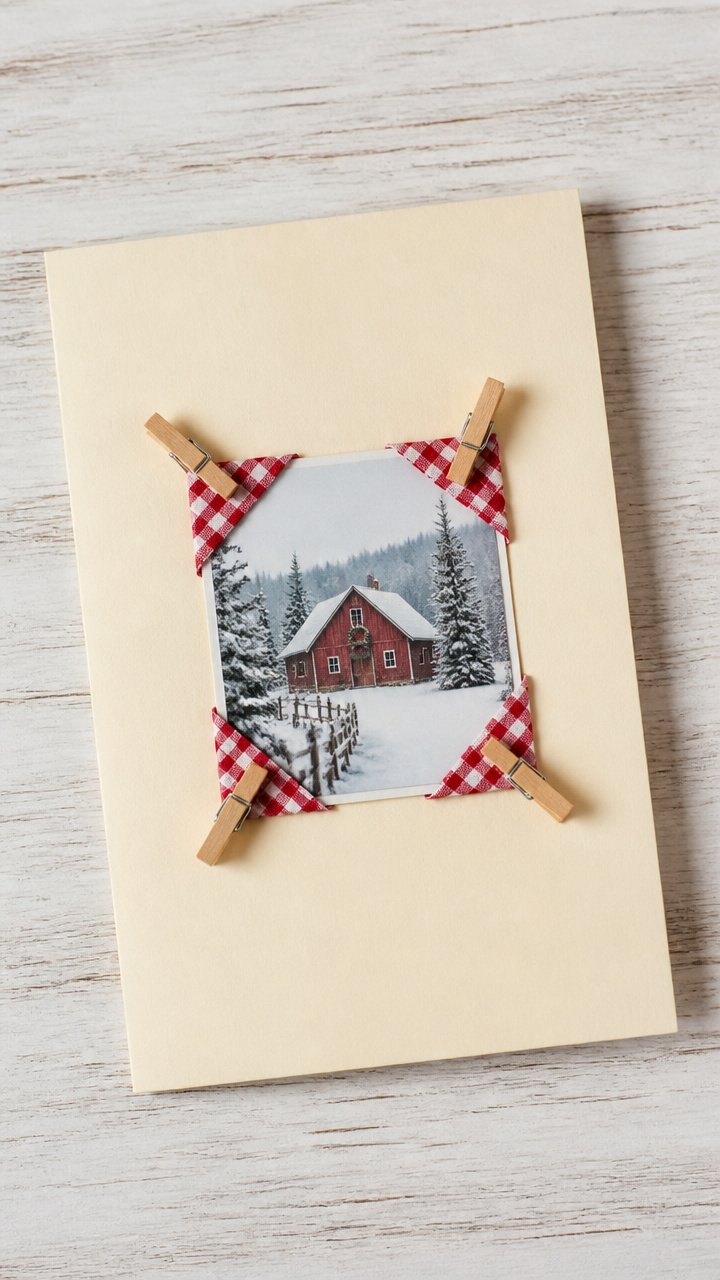
Mini clothespins clipped with ribbon hold a tiny holiday photo. This nostalgic style makes a sweet keepsake for family cards.
Materials Needed
- A5 cream cardstock, 1 sheet
- 1.5-inch wooden mini clothespins, 4
- Red gingham ribbon, 1/4 inch wide, 16 inches
- Small printed photo, 1×1 inch
- Glue dots
- Scissors
How to Make It
- Fold the cream cardstock in half to create the base. Position the photo in the top left corner.
- Cut four 4-inch pieces of red gingham ribbon. Slide one end of each under a clothespin jaw.
- Glue the free end of each ribbon piece to the card just behind the photo corners.
- Clip each clothespin over the photo corner, securing it gently with the ribbon trailing down.
- Press each clothespin firmly so it grips without wrinkling the photo.


7. Frosted Pinecone Sprig
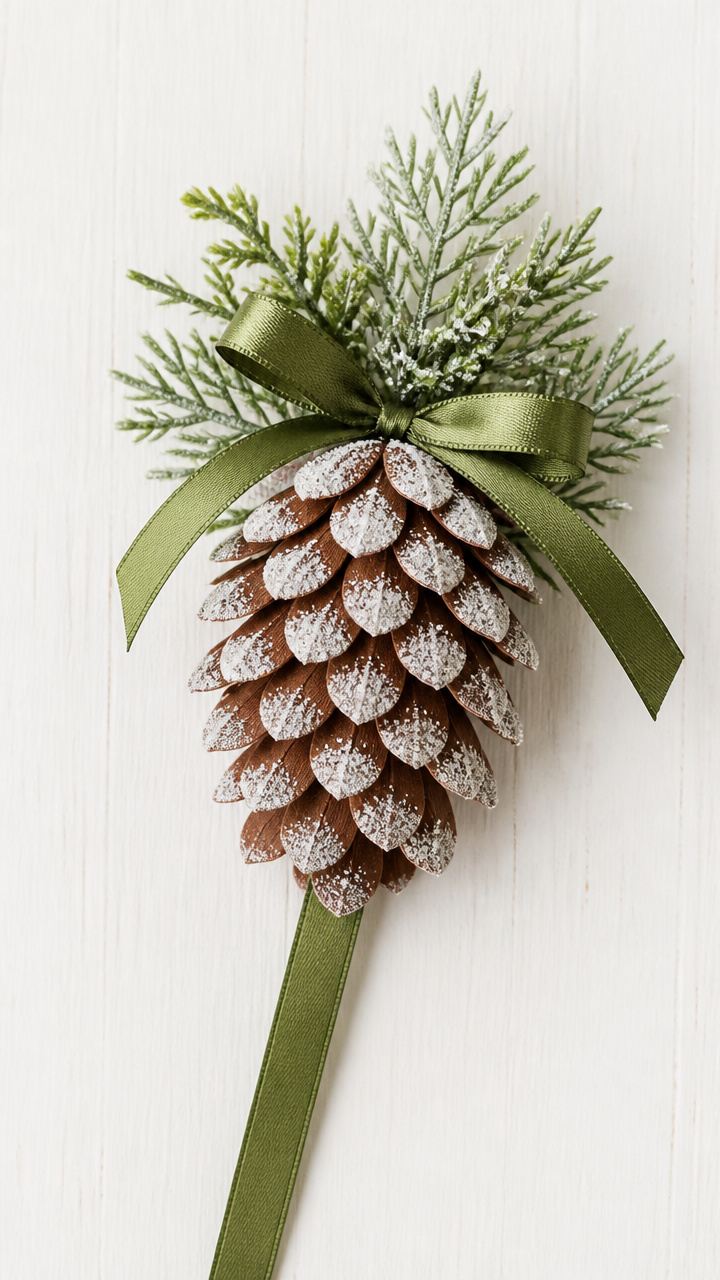
A paper pinecone dusted with glitter sits atop a ribbon stem. This elegant detail looks like it was gathered from a snowy woods.
Materials Needed
- Brown cardstock, 4×6 inches
- 1/4-inch wide olive green satin ribbon, 5 inches
- White glitter glue
- Pencil
- Scissors
- Glue stick
How to Make It
- Roll a 2×3 inch rectangle of brown cardstock into a cone and glue the edge to secure.
- Cut thin slits every 1/4 inch along one long edge and fan them outward to mimic pinecone scales.
- Wrap the green ribbon around the base of the cone and glue it in place to form a stem.
- Apply white glitter glue in streaks across the scales to simulate frost, letting it dry completely.
- Glue the pinecone sprig diagonally across the lower right corner of a folded white card.


8. Santa’s Belt Wrap
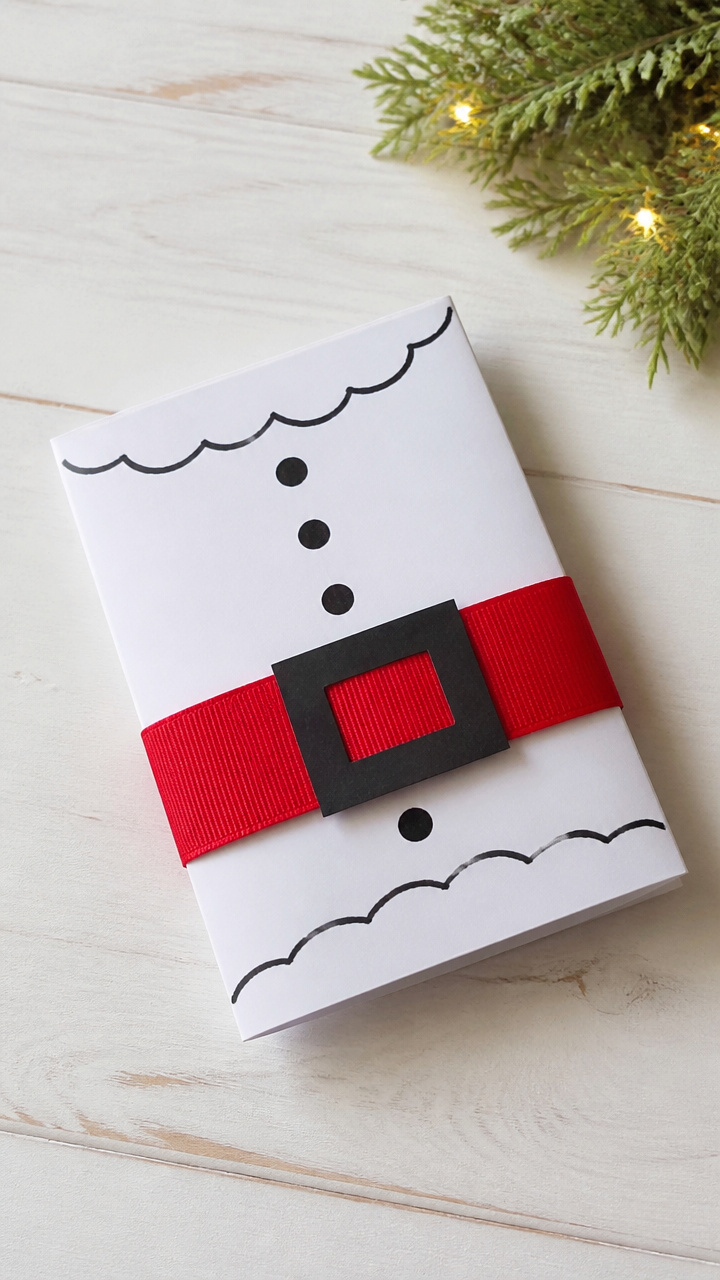
A bold red ribbon belt wraps around a jolly Santa belly made of paper. The contrast of textures makes this one instantly recognizable.
Materials Needed
- Red 1/2-inch grosgrain ribbon, 6 inches
- White cardstock, 3×4 inches
- Black cardstock, 1×3 inches
- Glue stick
- Scissors
- Black marker
How to Make It
- Cut a large oval from white cardstock for Santa’s belly and glue it to the center of a folded card.
- Cut a 1-inch wide strip from black cardstock and glue it horizontally across the middle of the oval.
- Lay the red ribbon over the black strip so it covers it completely, gluing only the back ends to the card.
- Draw two buckle details on the ribbon with the black marker to finish the belt.
- Add a tiny cotton ball beard above the belly if you want extra flair.


9. Starburst Window Accent
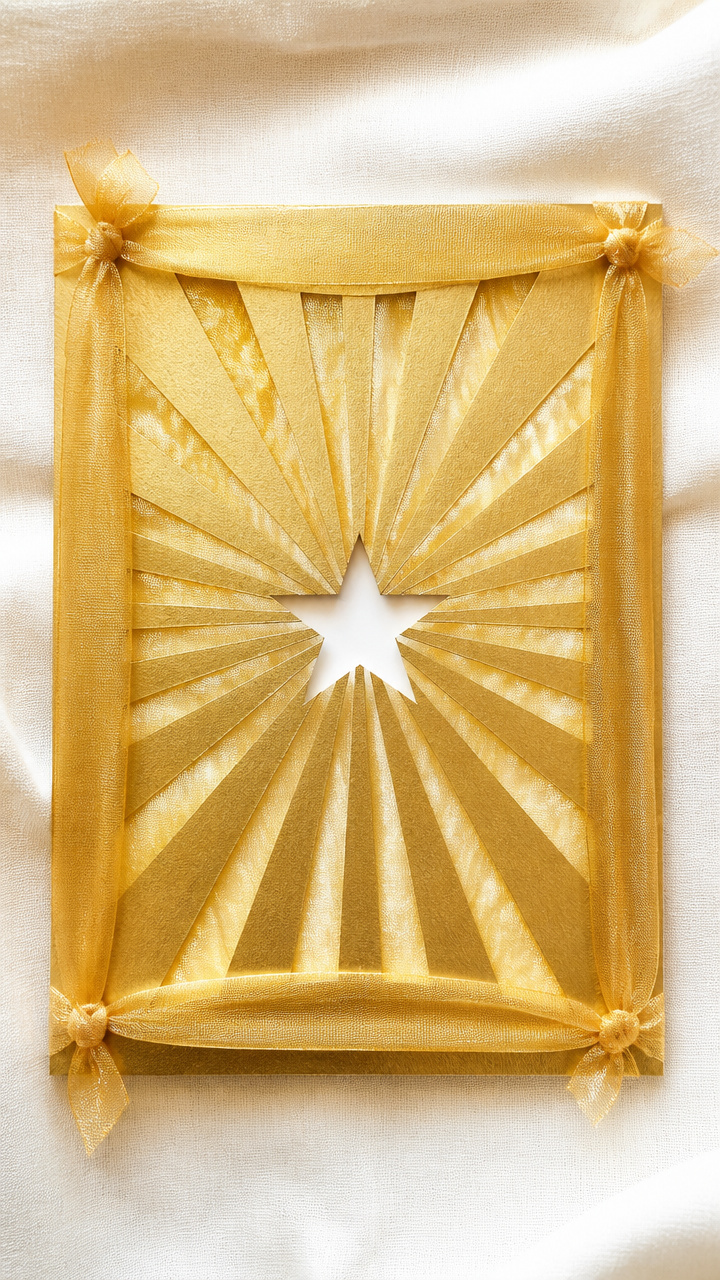
Golden rays radiate from a central star cutout framed in sheer ribbon. Light shines through the opening for a glowing effect.
Materials Needed
- Gold metallic cardstock, A5, 1 sheet
- Sheer gold organza ribbon, 1/2 inch wide, 8 inches
- Craft knife
- Cutting mat
- Double-sided tape
- Star-shaped hole punch
How to Make It
- Fold the gold cardstock in half for the base. Use the star punch near the center of the front panel.
- Cut a 1-inch border around the star using the craft knife on a cutting mat to widen the opening.
- Cut the organza ribbon into four 2-inch pieces. Layer them in a cross pattern behind the star hole.
- Secure the ribbon ends with double-sided tape on the inside of the card.
- When light hits the card, the sheer layers glow like sunbeams.



10. Reindeer Antler Frame
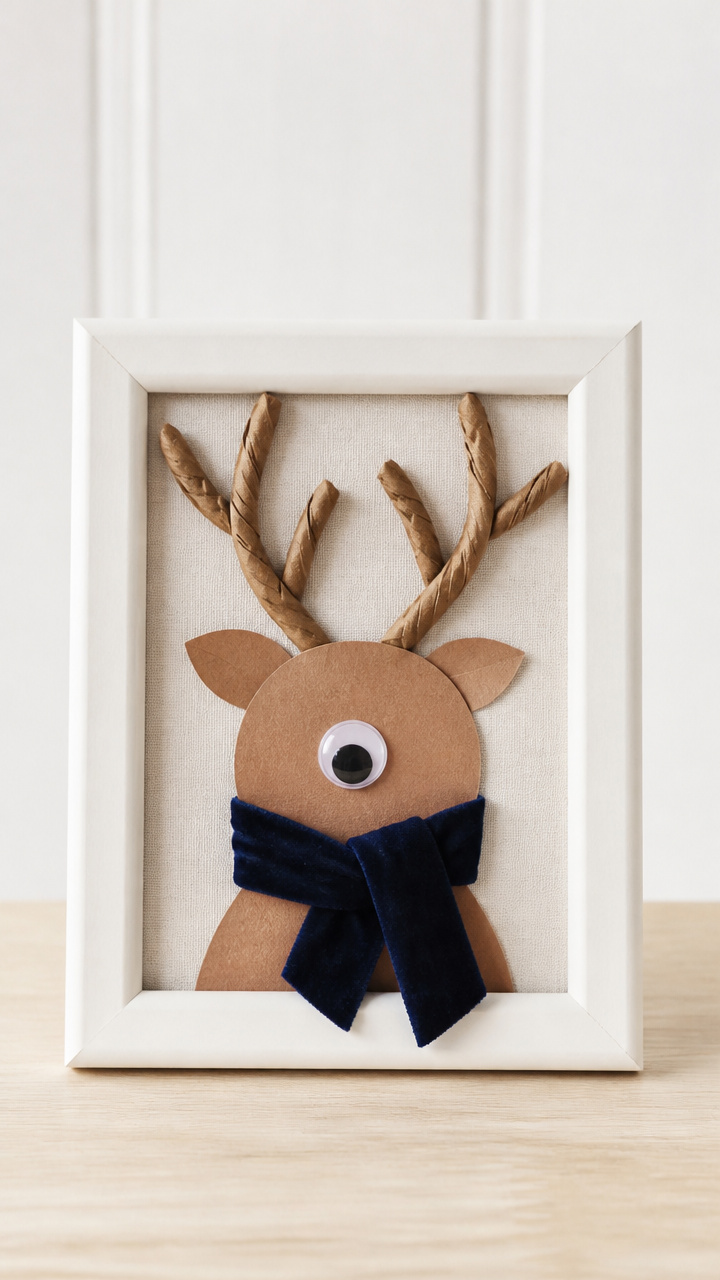
Twisted brown paper antlers stretch above a faceless reindeer, accented with a velvet ribbon neck warmer. Simple shapes say it all.
Materials Needed
- Brown construction paper, 4×5 inches
- Navy blue velvet ribbon, 1/4 inch wide, 6 inches
- Large googly eye, 1
- Glue stick
- Scissors
- Pencil
How to Make It
- Draw a rounded reindeer head shape on brown paper and cut it out. Glue it to the card front.
- Cut two antler shapes with branching tips and curl the ends slightly with a pencil.
- Glue the antlers to the top of the head, angling them outward.
- Cut a 1.5-inch piece of navy ribbon and glue it below the head like a turtleneck.
- Center the googly eye just above the ribbon and press gently to adhere.


11. Candy Cane Lane Border
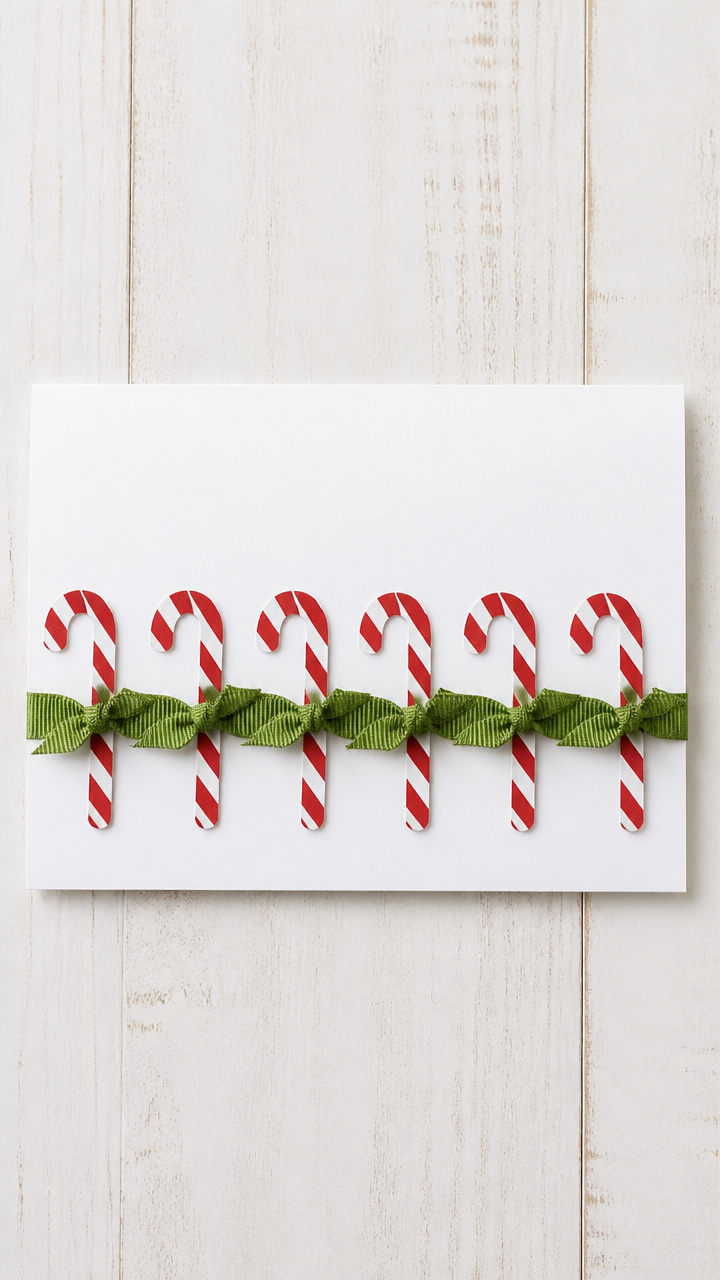
A row of striped paper candy canes lines the bottom edge, tied together with a continuous ribbon runner. It’s festive and orderly, like a village display.
Materials Needed
- White A5 cardstock, 1 sheet
- Red and white 1/2-inch strips, 10 each
- Green grosgrain ribbon, 1/4 inch wide, 7 inches
- Glue stick
- Scissors
How to Make It
- Fold the white cardstock in half to form the base. Arrange ten red and white strips side by side along the bottom edge.
- Roll each strip into a candy cane curve and glue the base flat to the card.
- Cut the green ribbon to length and weave it horizontally behind the base of each candy cane, gluing only the ends.
- Let the ribbon peek between each cane like a garland holding them together.
- Press each glued area with your fingertip to ensure a strong hold.


12. Present Stack with Bow Toppers
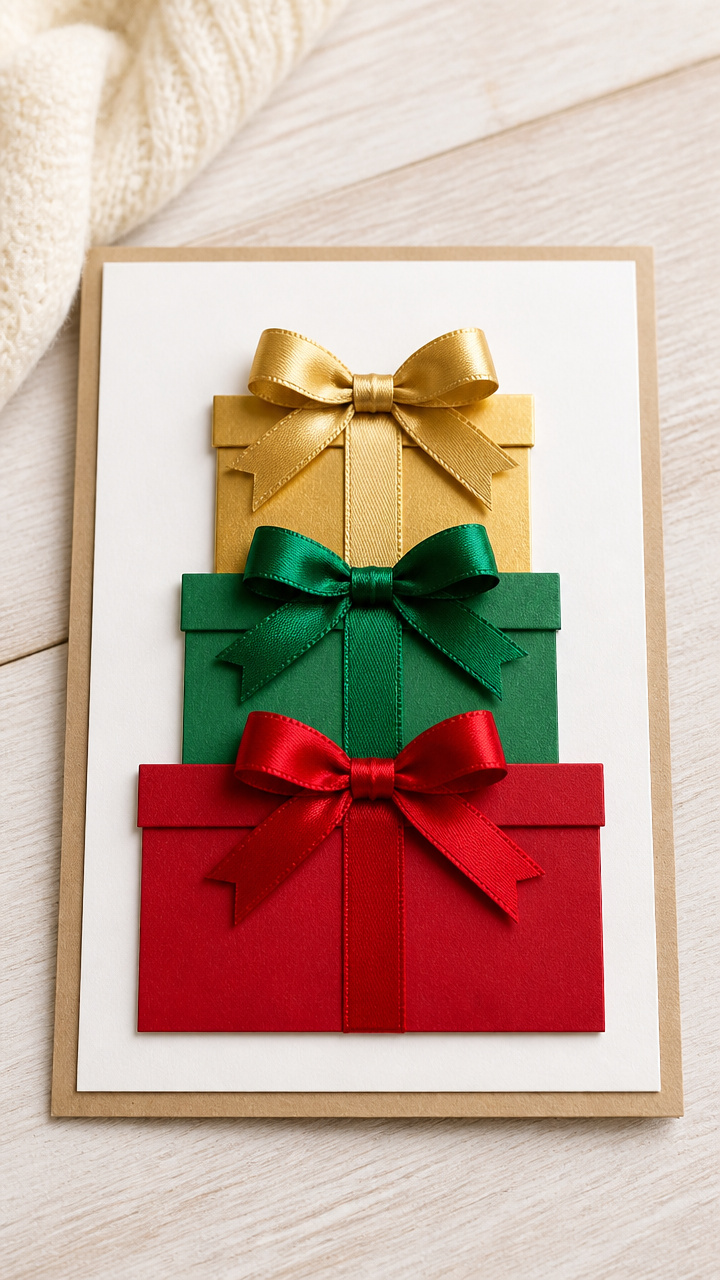
Three layered gift boxes rise from the card base, each crowned with a real ribbon bow. The dimensional stack feels gift-ready.
Materials Needed
- Red, green, and gold cardstock, 2×3 inches each
- Assorted 1/4-inch ribbons in coordinating colors, 12 inches each
- Glue stick
- Scissors
- Double-sided tape
How to Make It
- Cut three rectangles in descending sizes: 2×3 inches, 1.5×2.5 inches, and 1×2 inches.
- Fold each in half and glue the sides to form open-top boxes. Let dry flat.
- Stack and glue them in order on the card front, largest on bottom.
- Cut three 12-inch ribbon lengths. Tie each into a bow with short tails.
- Glue each bow to the top center of its box using double-sided tape for stability.


13. Mitten Pair Hang Tag
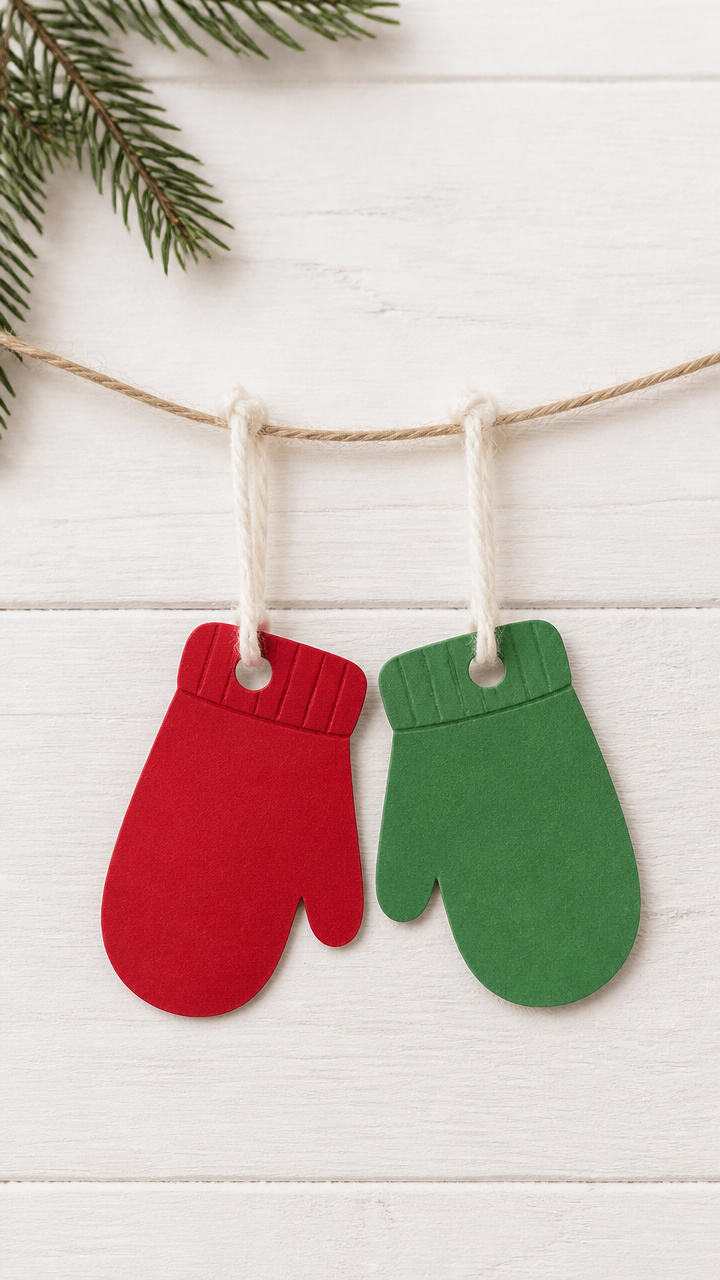
Two paper mittens dangle from a ribbon hanger like laundry on a line. This cozy design warms hearts with its simplicity.
Materials Needed
- Red and green cardstock, 3×4 inches each
- White yarn, 8 inches
- Hole punch
- Scissors
- Glue stick
How to Make It
- Draw and cut two mitten shapes from red and green cardstock. Glue a white yarn cuff along the top edge of each.
- Punch a hole at the top of each mitten and thread a 4-inch yarn piece through both.
- Tie the ends of the yarn together to form a hanging loop.
- Glue the knot and loop base to the inside top of a folded card so the mittens hang freely.
- Adjust the yarn so the mittens sit side by side without tilting.


14. Ornament Dangle Surprise
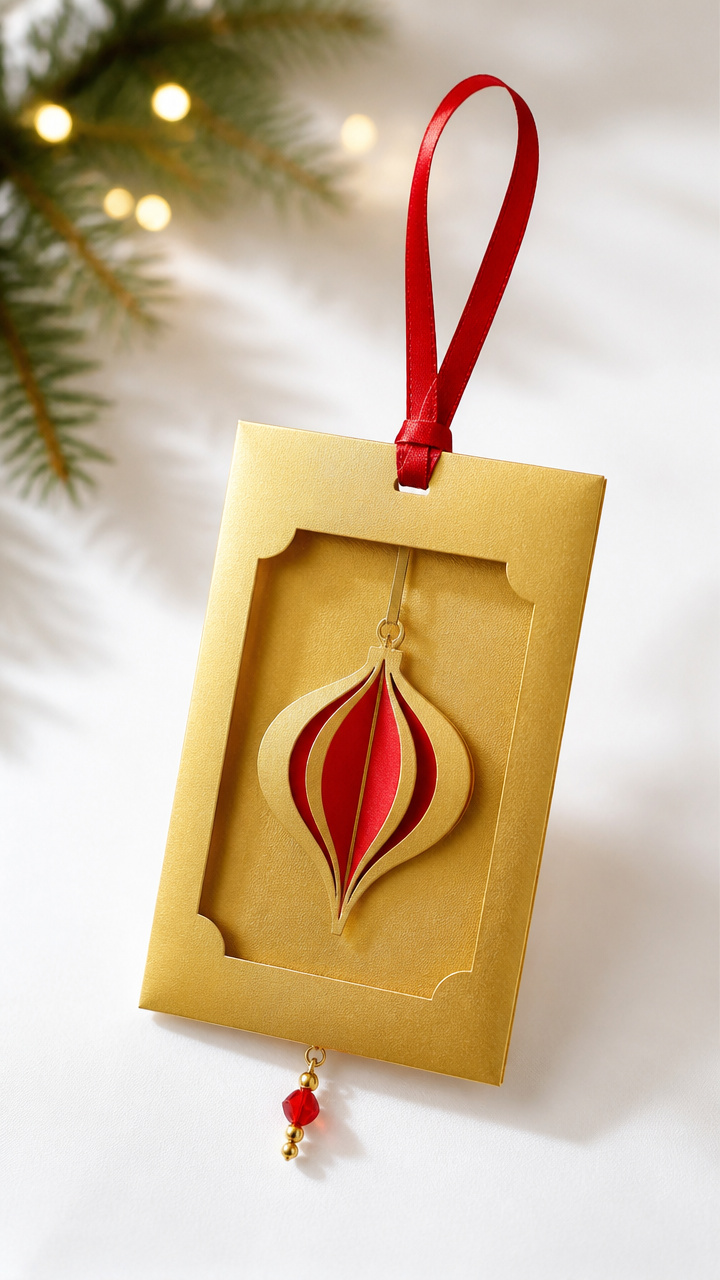
A single paper ornament swings from a ribbon hook inside the card. When opened, it sways like it’s on a tree branch.
Materials Needed
- Gold cardstock, 2×3 inches
- Red satin ribbon, 1/8 inch wide, 10 inches
- Hole punch
- Glue dot
- Scissors
How to Make It
- Cut an ornament shape from gold cardstock and punch a hole at the top.
- Cut a 3-inch ribbon piece and thread it through the hole, tying the ends to form a hanger loop.
- Glue a small glue dot just inside the top center of the card interior.
- Press the knot of the ornament hanger into the glue dot so the ornament hangs down.
- Test the swing by opening the card slowly—the ornament should move gently.


15. Wreath of Ribbon Loops

Overlapping ribbon loops form a full wreath around a handwritten greeting. The circular shape symbolizes endless goodwill.
Materials Needed
- Green satin ribbon, 1/4 inch wide, 24 inches
- White A5 cardstock, 1 sheet
- Red marker
- Glue dots
- Scissors
How to Make It
- Fold the white cardstock in half to make the base. Write a holiday message in the center with the red marker.
- Cut the green ribbon into six 4-inch pieces. Loop each into a teardrop shape.
- Arrange the loops in a circle around the message, overlapping the bases slightly.
- Secure each loop base with a glue dot on the back, pressing firmly.
- Let the tops of the loops face outward to mimic fresh garland.


16. Tree Skirt Ruffle Edge
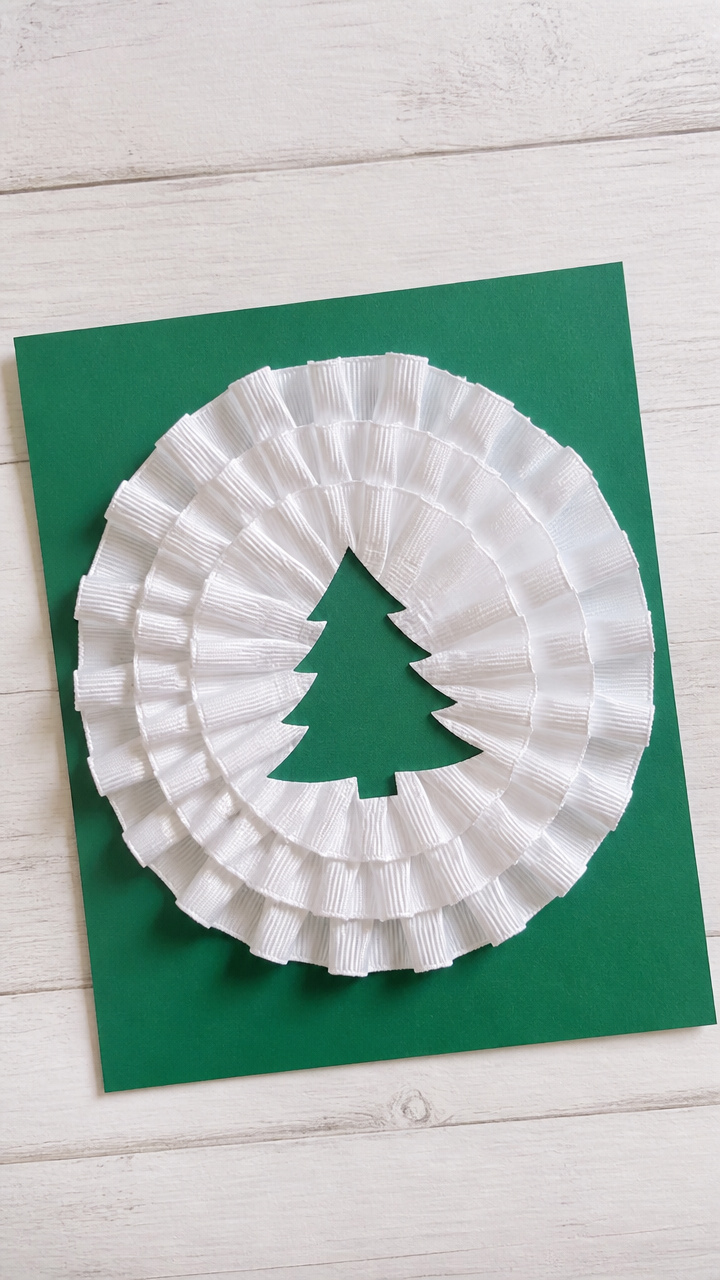
A frilled paper skirt flares beneath a slim tree, made entirely from pleated ribbon. The ruffles add whimsy and texture.
Materials Needed
- Green cardstock, 3×5 inches
- White grosgrain ribbon, 1/2 inch wide, 10 inches
- Scissors
- Glue stick
- Pencil
How to Make It
- Cut a tall triangle from green cardstock for the tree and glue it to the card front.
- Accordion-fold the white ribbon by making 1/2 inch pleats all along its length.
- Glue the folded ribbon along the base of the tree, curving it into a semi-circle.
- Ease the folds close together at the sides and looser in the middle for a natural flare.
- Press each glued section for three seconds to set the ruffle in place.


17. Stocking Hangs with Care

A plump paper stocking droops slightly under a ribbon cuff, ready for treats. The tilt gives it character and charm.
Materials Needed
- Red cardstock, 3×4 inches
- White 1/2-inch grosgrain ribbon, 5 inches
- Glue stick
- Scissors
- Black marker
How to Make It
- Draw a stocking shape with a curled top on red cardstock and cut it out.
- Glue the white ribbon across the top edge to form a cuff, wrapping it slightly over the front.
- Fold the stocking in half vertically and make a small crease at the top back.
- Glue only the top 1/2 inch of the back to the card, letting the rest hang forward.
- Draw three white pom-poms on the cuff with the black marker for decoration.


Each of these cards holds a little magic, made not from perfection but from your hands. Pick one that speaks to you and let the scissors snip, the glue stick glide, and the ribbon unwind.