10 Summer Crafts for Teens
Summer and a free afternoon are basically a crafting invitation.
This list pulls together 10 hands-on projects built for teens — things like tie-dye bucket hats, pressed flower phone cases, macramé wall hangings, and painted rock garden art.
None of these need a ton of experience or expensive supplies. Most use stuff you can grab at a craft store or already have lying around.
Pick one, grab a friend, and actually make something this summer.
1. Tie-Dye Bucket Hat Making
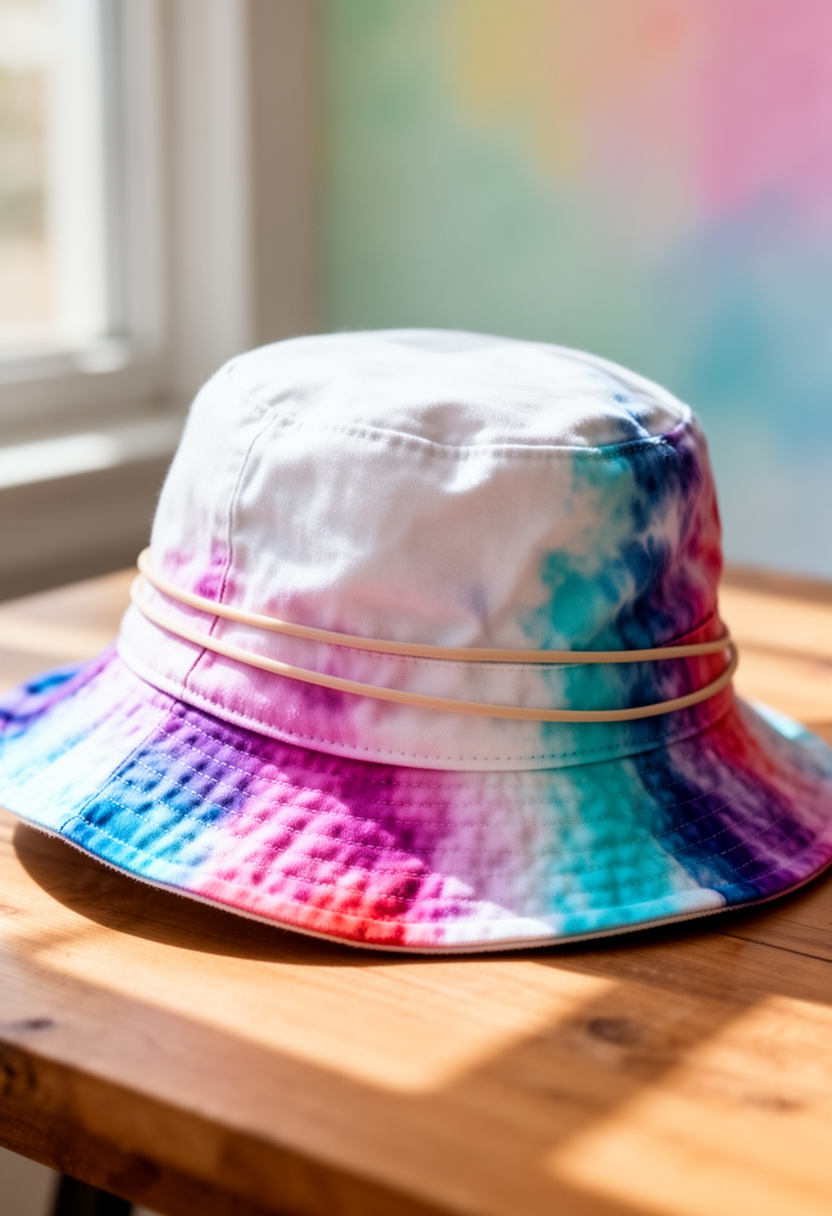


Bucket hats and tie-dye are both having a massive moment right now, and combining them makes for one of the most wearable crafts on this list.
Grab a plain white cotton bucket hat, rubber bands, and a tie-dye kit — the squeeze-bottle kind gives you way more control than dip-dyeing.
Scrunch the hat into sections, wrap the rubber bands tight, and soak it in water before applying the dye so the colors bleed into each other instead of sitting on the surface.
Let it sit wrapped in plastic for at least six hours, then rinse it in cold water until it runs clear. The longer you wait, the bolder the colors stay after washing.
2. Pressed Flower Phone Cases
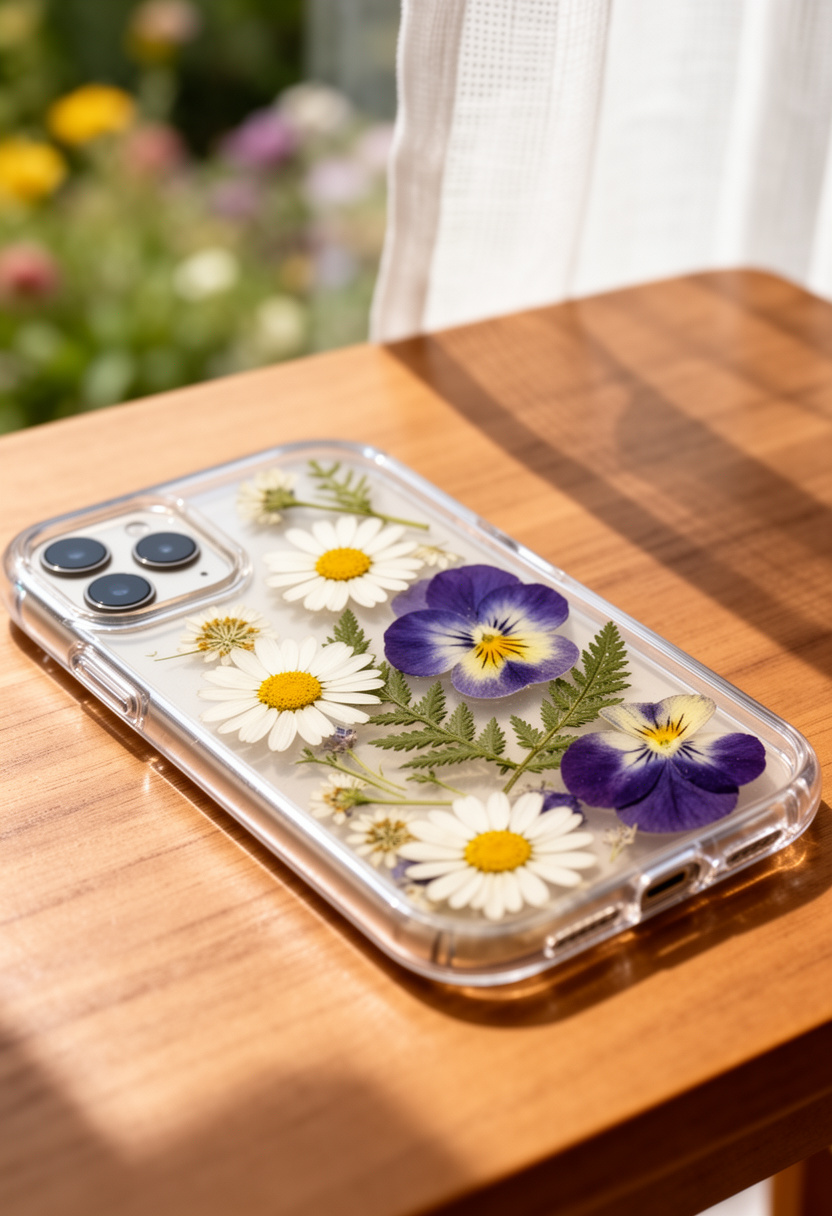


Pressed flower phone cases turn something you pick up on a walk into a case that actually looks like it came from a boutique.
You’ll need a clear resin kit, a blank hard plastic phone case, and dried flowers — pansies, daisies, and small ferns work best because they press flat without bulking up.
Spend a week pressing flowers between heavy books first, then arrange them on the case and seal everything with a thin pour of UV or epoxy resin.
Each case ends up completely one-of-a-kind since no two flower arrangements land the same way twice.
3. DIY Macramé Wall Hangings
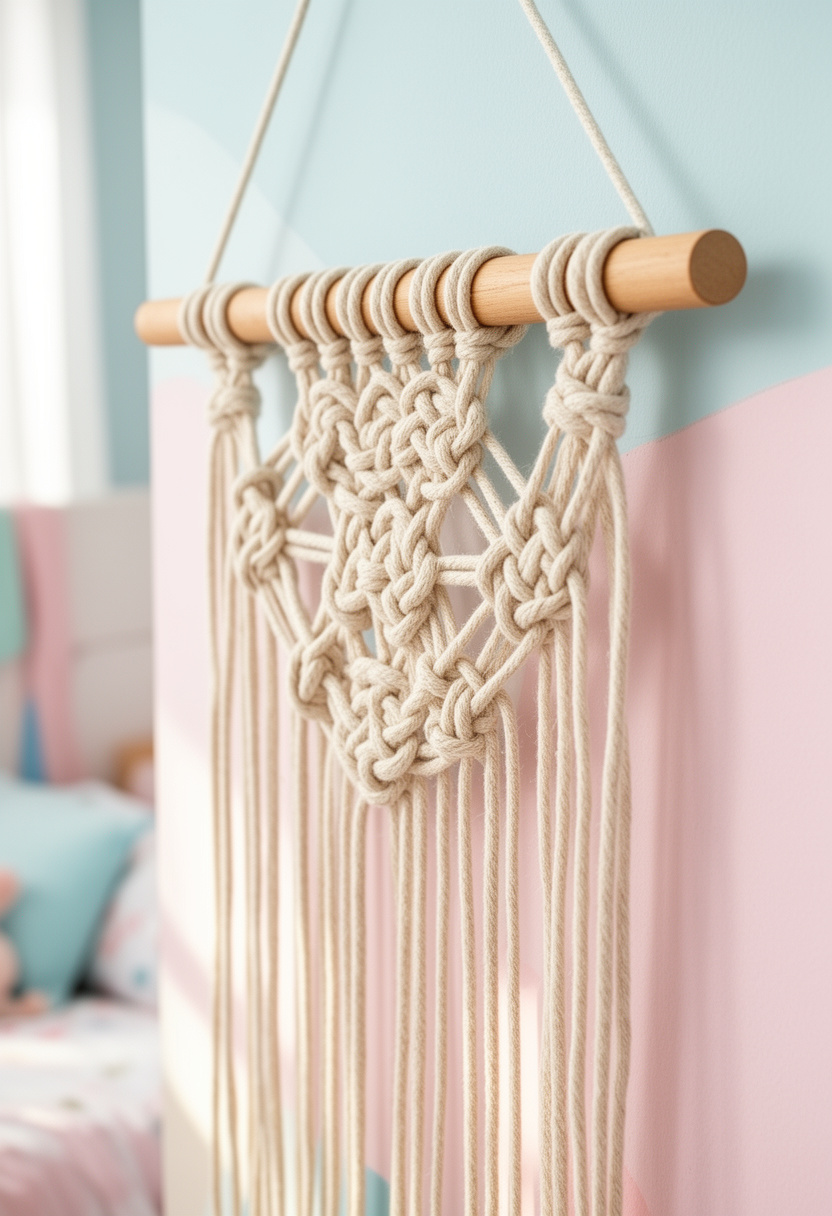


Macramé looks complicated, but it basically comes down to two knots: the square knot and the half hitch.
Grab a wooden dowel, some natural cotton rope in 3mm or 5mm thickness, and a pair of scissors — that’s genuinely all you need to get started.
Cut your rope into lengths about four times the finished size you want, fold them in half over the dowel, and start knotting in rows.
The satisfying part is watching a flat bundle of rope slowly become something that actually looks good hanging on a bedroom wall.
4. Painted Rock Garden Art
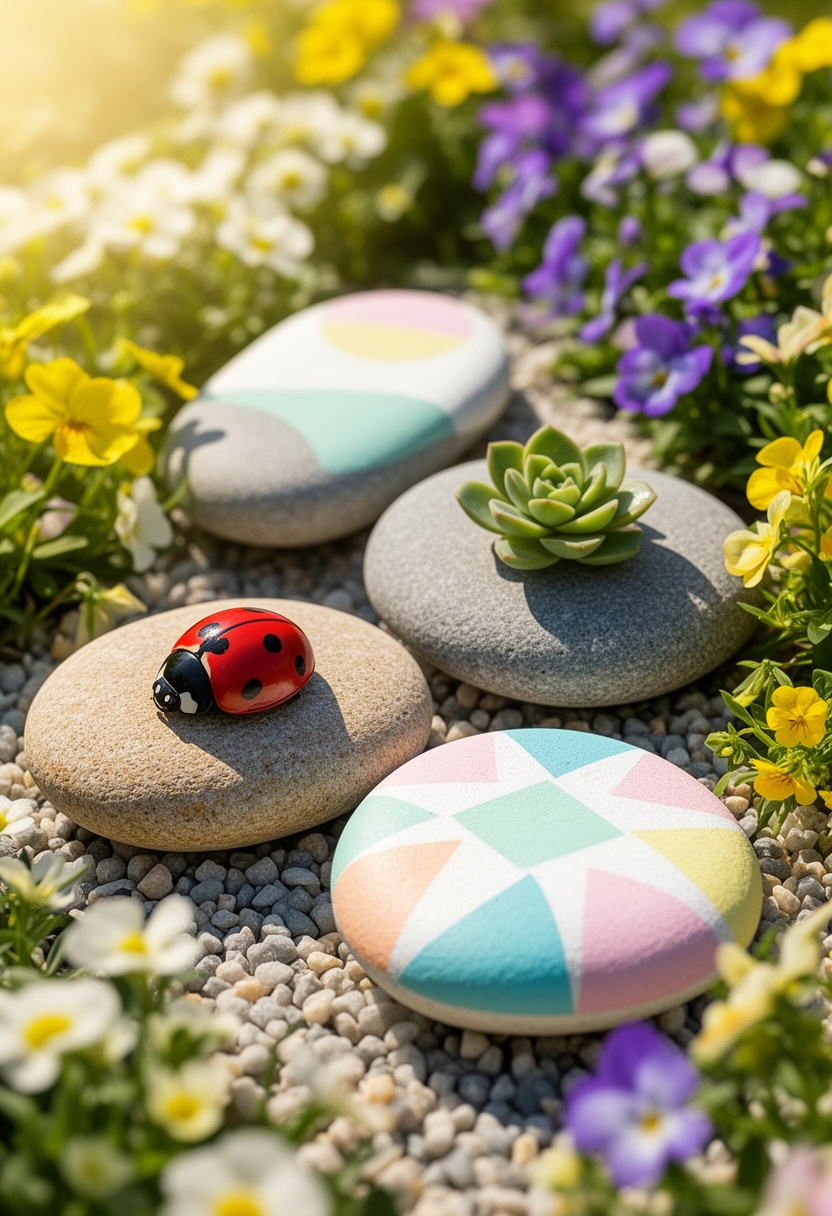


Grab a handful of smooth river rocks and some acrylic paint, and you’ve got one of the most low-cost crafts on this list.
The best designs lean into the rock’s natural shape — paint a ladybug on a round one, a tiny succulent on a flat oval, or geometric patterns using a fine-tipped brush and a steady hand.
Seal everything with a coat of Mod Podge or outdoor varnish so the paint survives rain and sun without peeling.
Line them along garden borders, tuck them between flower pots, or stack a few near a front door — they actually look intentional, not like a school project.
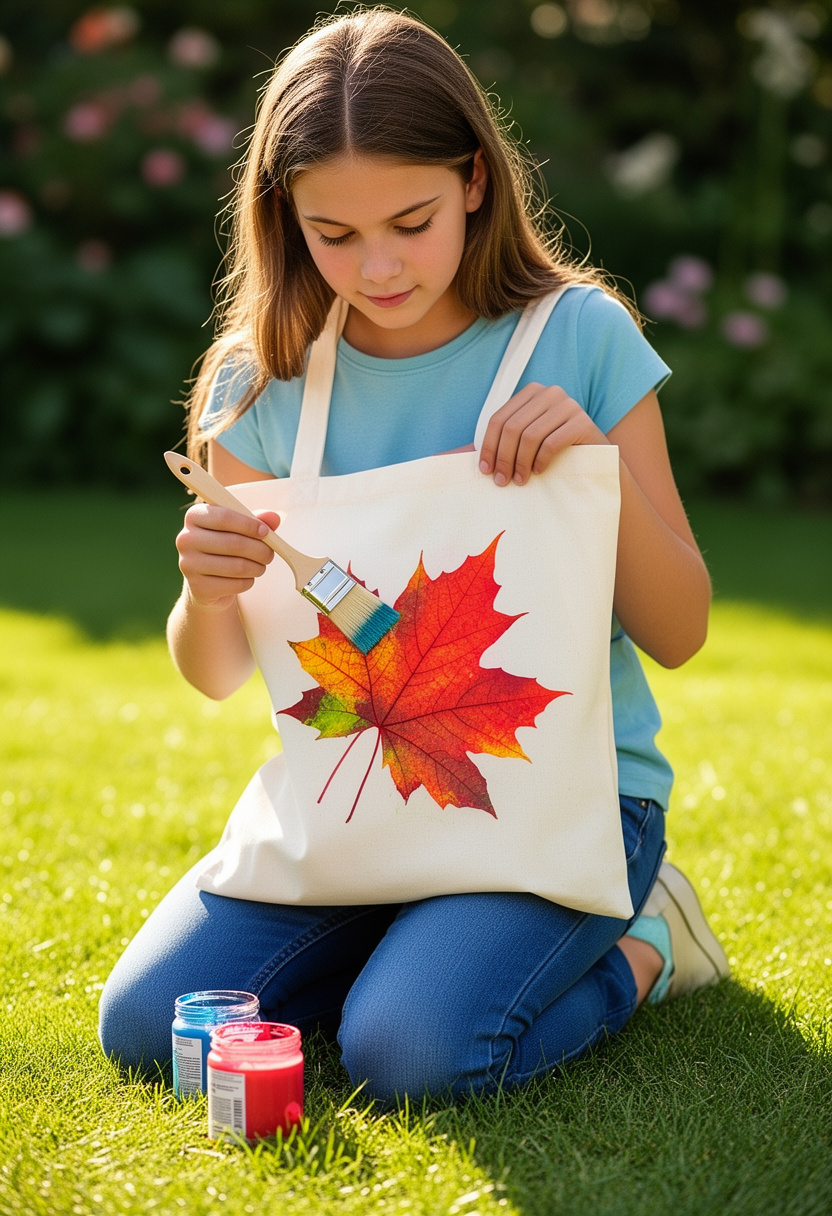
5. Upcycled Denim Tote Bags
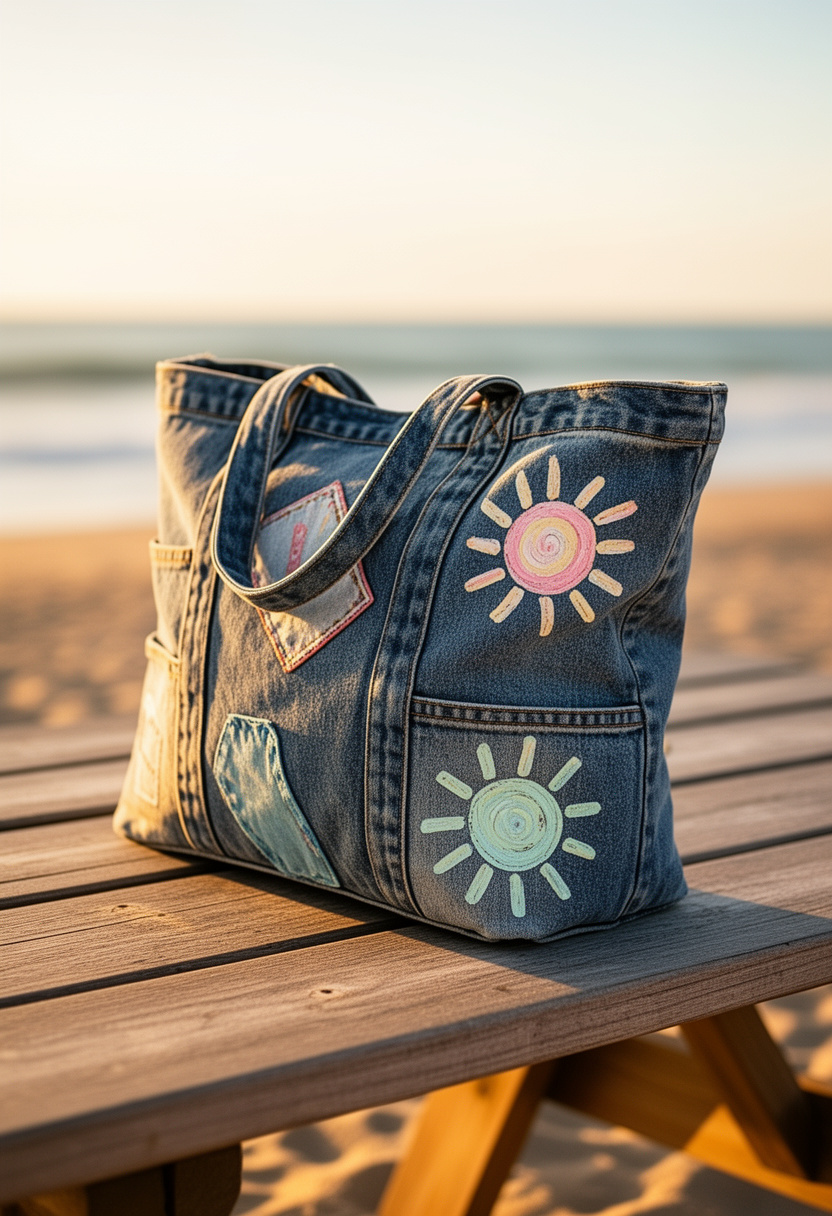

Raid the back of your closet for old jeans — the more worn out, the better. Cut off the legs, flip the waistband down, and you already have the basic shape of a tote bag.
Sew or use iron-on hem tape to seal the bottom seam shut.
From there, grab fabric paint, bleach pens, or iron-on patches to decorate the outside. Stencil a sun, write something in block letters, or layer patches over the back pockets for extra texture.
Thick denim handles hold up to real weight, so this bag actually works for beach trips, farmers markets, or hauling art supplies around all summer.
6. Friendship Bracelet Embroidery Fusion
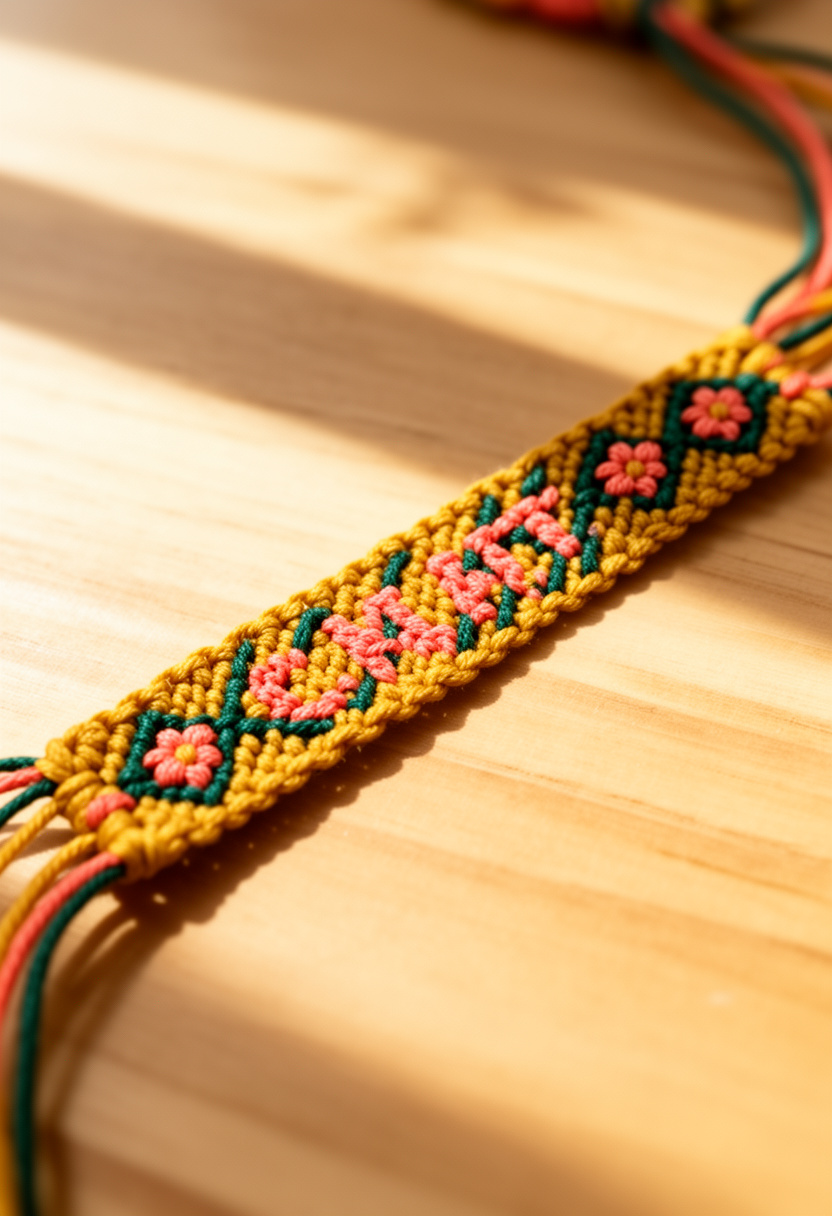


Friendship bracelets get a serious upgrade when you mix traditional knotting with embroidery floss stitching. Grab a handful of colors — think mustard yellow, coral, and forest green — and combine basic diagonal knots with simple cross-stitched initials or tiny flower motifs along the band.
You only need embroidery floss, a clipboard or safety pin to anchor your work, and a basic embroidery needle for the stitched sections.
Start with a standard six-strand bracelet base, then switch to a needle to stitch small details directly onto the flat sections between knot clusters. The contrast between the knotted texture and the smooth stitching looks intentional and genuinely cool.
7. Handmade Candle Pouring Party
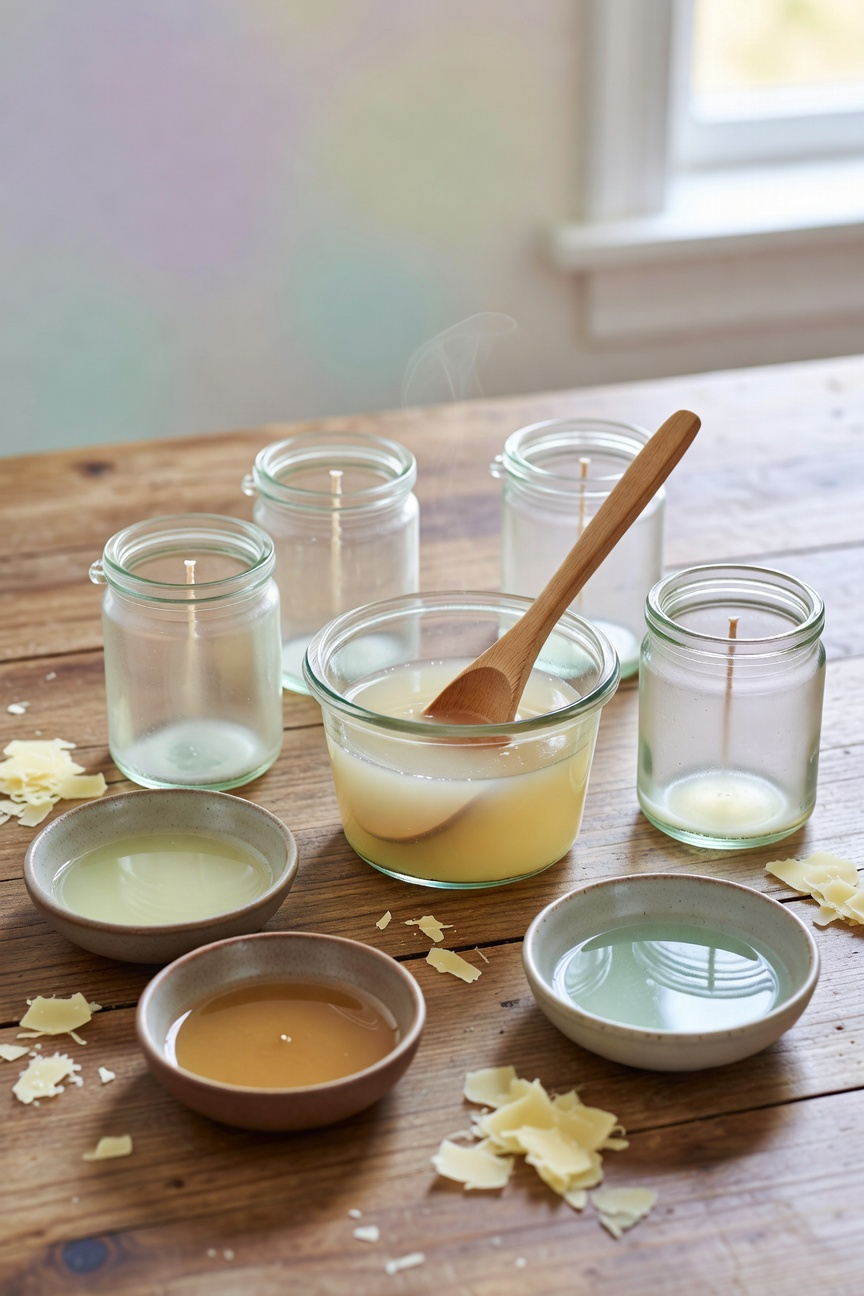

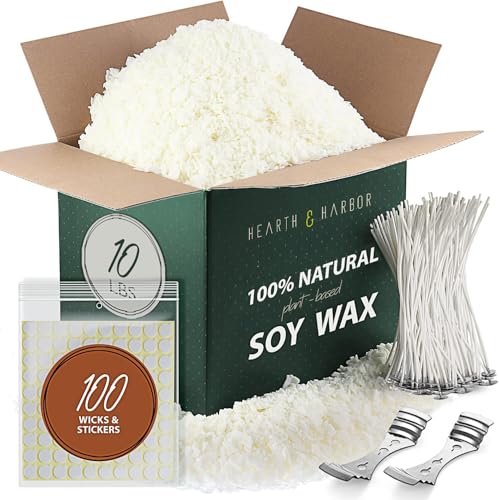

Gather a few friends, pick up some soy wax flakes, fragrance oils, and cotton wicks, and you have everything you need for an afternoon candle pouring party.
Melt the wax to around 170°F, stir in your chosen scent at roughly one ounce of fragrance per pound of wax, then pour slowly into glass jars with the wick held centered using a pencil laid across the top.
Scent combinations are where it gets fun. Coconut and lime, vanilla and cedar, or fresh mint mixed with eucalyptus all work really well for summer.
Let the candles cure for 24 to 48 hours before burning so the scent fully binds to the wax.
8. Outdoor Leaf Print Textiles


Head outside and collect leaves with interesting shapes — oak, maple, and fern all work great. The more defined the veins, the sharper your print will look on fabric.
Lay a leaf vein-side up on a piece of scrap cardboard, then place your fabric — a plain tote, a pillowcase, or a cotton bandana — flat on top. Press fabric paint directly onto the leaf with a foam brush, flip it onto your textile, and press down firmly with your palm for about ten seconds.
Peel it back slowly. You get a crisp, detailed print every time.
Layer prints in different colors or overlap two leaves slightly to build up a pattern. Heat-set everything with an iron once it dries so the design actually holds through washing.
9. Resin Jewelry Casting Basics
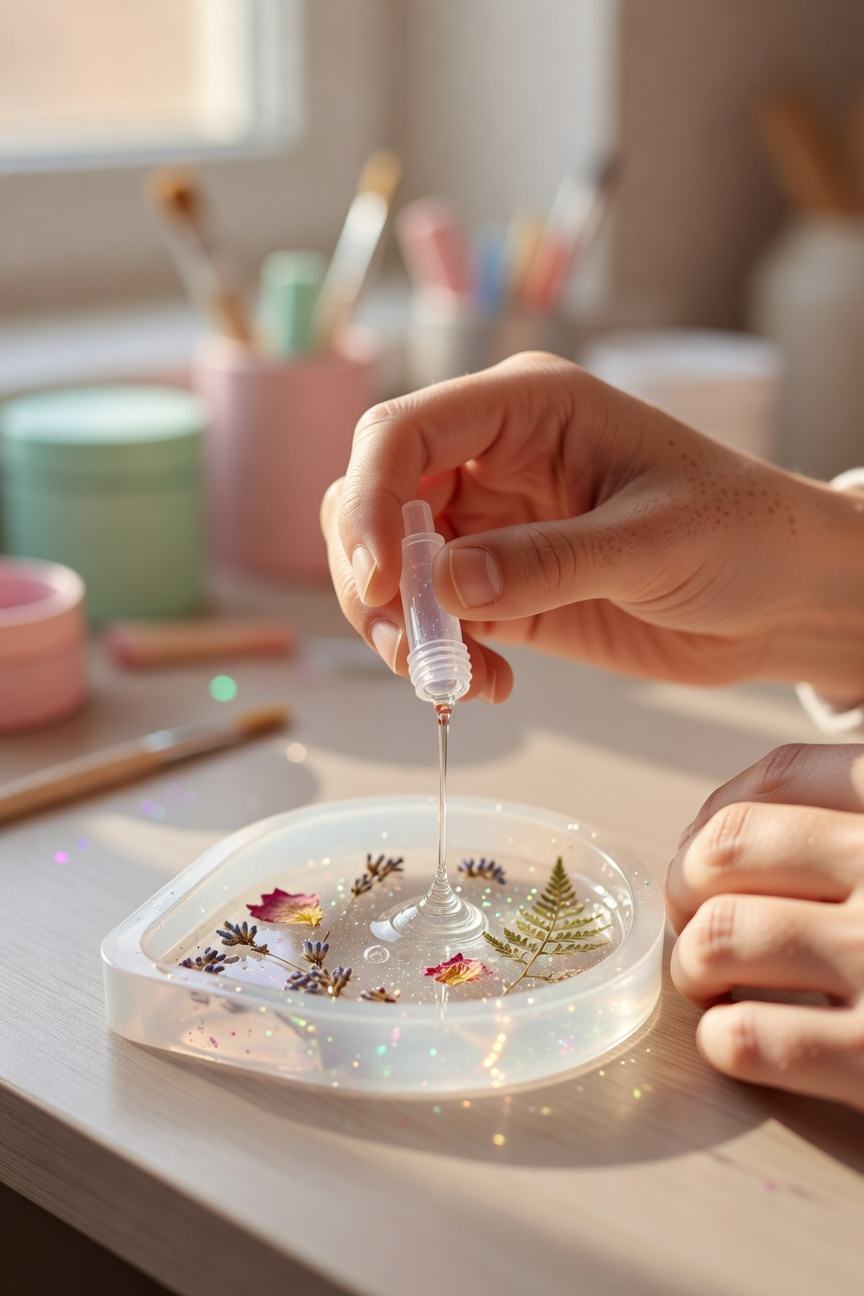


Resin jewelry casting turns a lazy summer afternoon into something you’ll actually want to wear. You’ll need UV or epoxy resin, silicone molds in shapes like teardrops or circles, resin dye, and a UV lamp or direct sunlight to cure everything.
Mix your resin and hardener in the exact ratio on the packaging — getting this wrong means your piece stays sticky forever.
Drop in dried flowers, glitter, tiny shells, or even a photo cut to size before the resin sets. Pour slowly to avoid air bubbles, or use a toothpick to pop any that appear on the surface.
Once cured, sand the edges with fine-grit sandpaper and add a jump ring to turn it into a pendant or charm.
10. Custom Painted Sneaker Designs
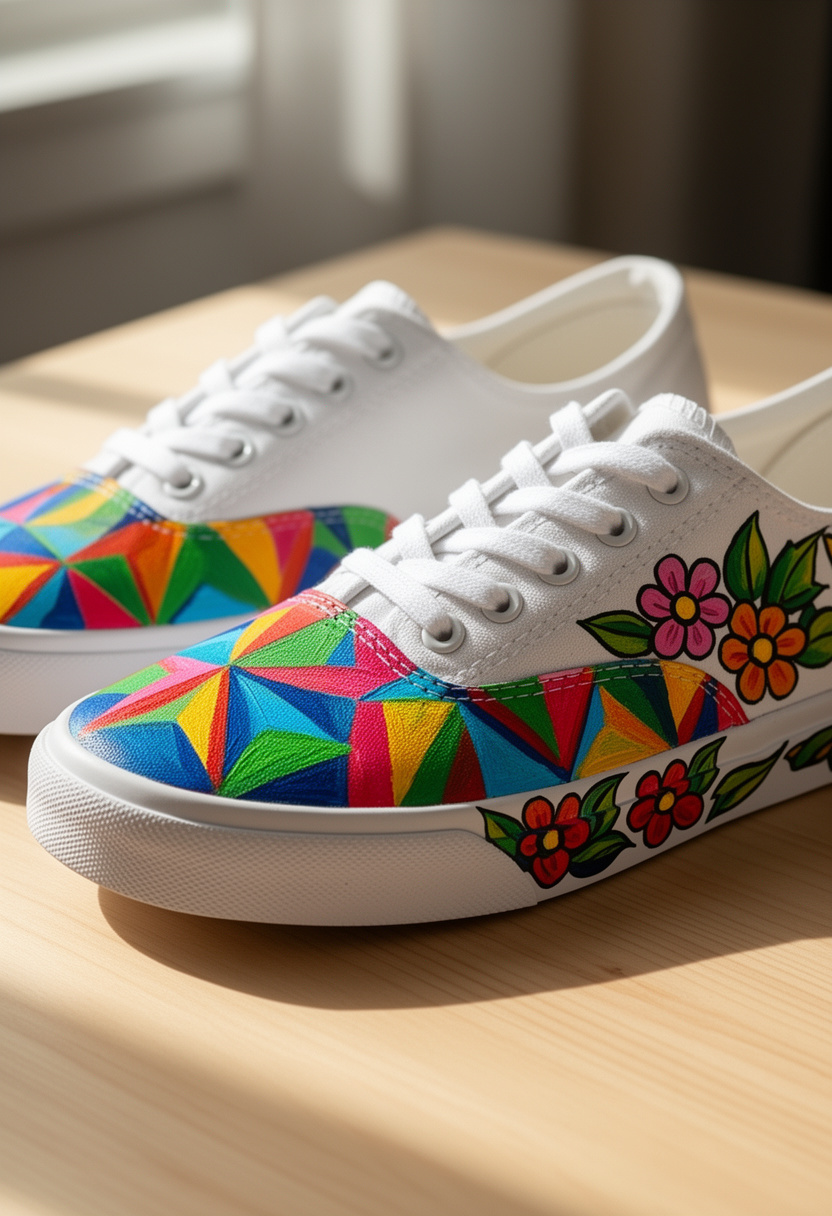


Grab a pair of plain white canvas sneakers and some acrylic paint made specifically for fabric, like Angelus brand, and you have everything you need to start. Tape off the soles with painter’s tape to keep lines clean.
Sketching your design lightly in pencil first saves a lot of frustration later. Geometric patterns, floral clusters, and cartoon characters all work well on the flat side panels.
Thin coats dry faster and layer better than one thick glob of paint. A fine-tipped brush handles details, while a flat brush covers larger sections quickly.
Finish with a flexible sealant spray so the design holds up through actual wear, not just display.