15 Creative Letter L Crafts for Toddlers and Preschool Kids
Introducing the letter L through hands-on play helps young children connect sounds with shapes in a joyful way. These crafts use simple materials you likely have at home and turn learning into something colorful, tactile, and fun.
Each project builds fine motor skills while reinforcing letter recognition. You'll find paint, pasta, stickers, and more — all focused on one friendly letter.
1. L Is for Ladybug Craft
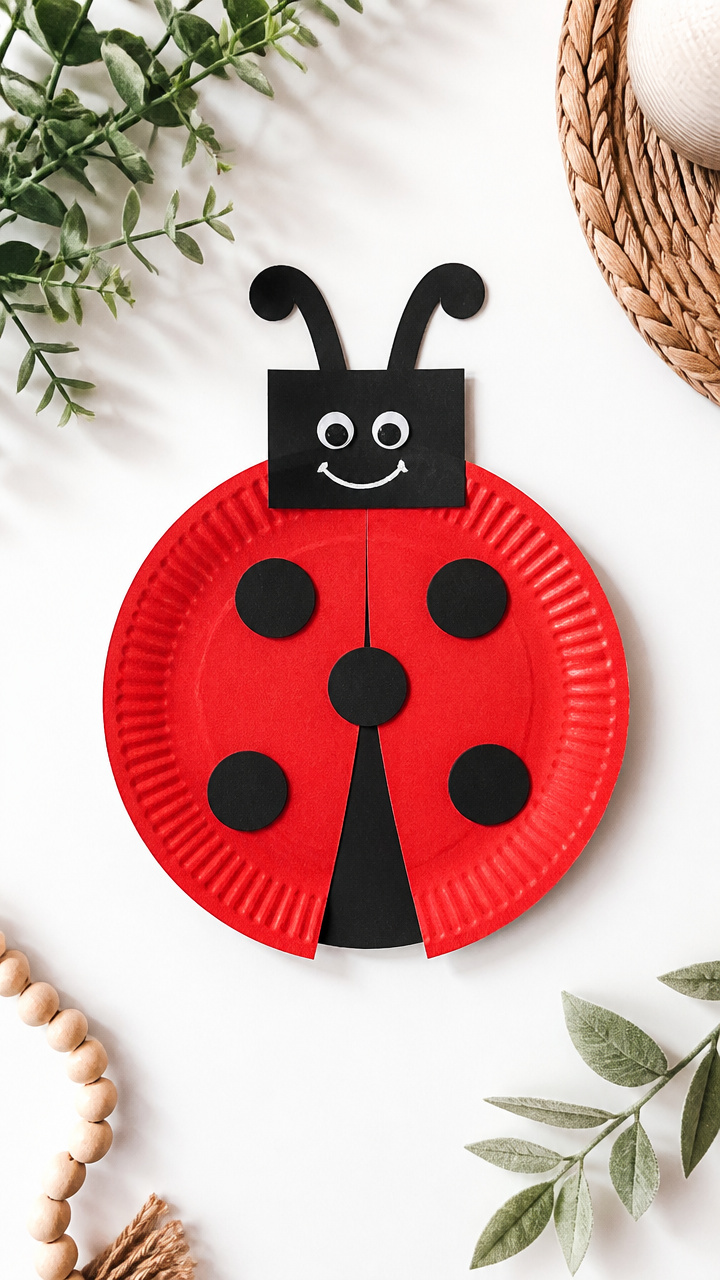
A bright red ladybug with black spots teaches symmetry while focusing on the letter L in its name. This paper craft sticks together quickly and makes a sweet wall display.
Materials Needed
- One 6-inch red paper plate
- Two 3×5-inch black construction paper rectangles
- One 2×2-inch black construction paper square
- White school glue
- Five 0.5-inch black foam circles
- One pair child-safe scissors
- Black washable marker
How to Make It
- Cut the red paper plate in half using child-safe scissors, then draw a curved line down the center of one half to divide the body into two wings.
- Glue the black square at the top of the plate half to form the head, then draw eyes and antennae with the black marker.
- Fold each black rectangle in half lengthwise to make antenna bends, then glue them to the head.
- Glue five foam circles along one wing side, mirror them on the other side for symmetry, and let dry completely before display.
2. Lego Letter L Build
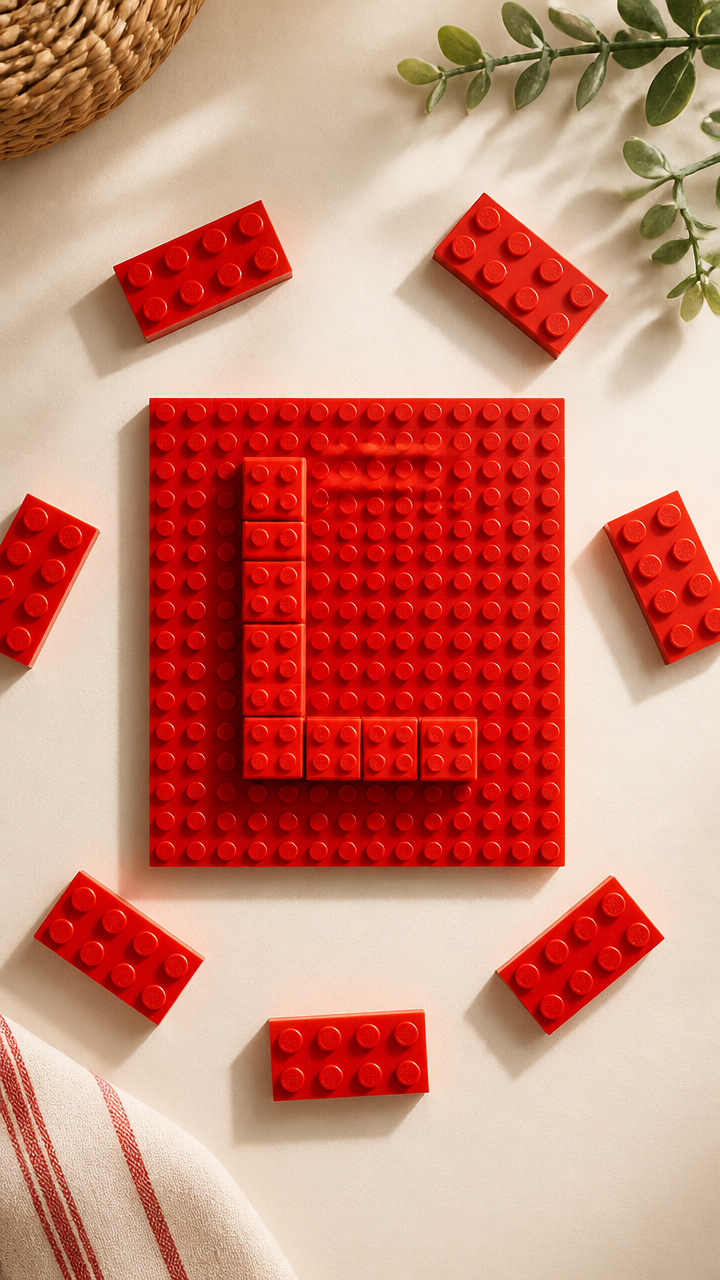
Snap-together bricks form a sturdy uppercase L that toddlers can touch, trace, and rebuild again. This sensory-friendly build strengthens hand muscles and letter memory.
Materials Needed
- Twelve 2×2 red Lego bricks
- Six 2×4 red Lego baseplates
- One flat 10×10 red Lego baseplate
How to Make It
- Place the large baseplate on a stable surface, then snap six 2×2 bricks vertically in a straight column on the far left edge.
- Attach a row of six 2×2 bricks horizontally starting from the bottom of the vertical line, forming a right angle.
- Reinforce the shape by placing a 2×4 baseplate under each section if needed, ensuring the L stands firmly.
3. L is for Leaf Rubbing Art
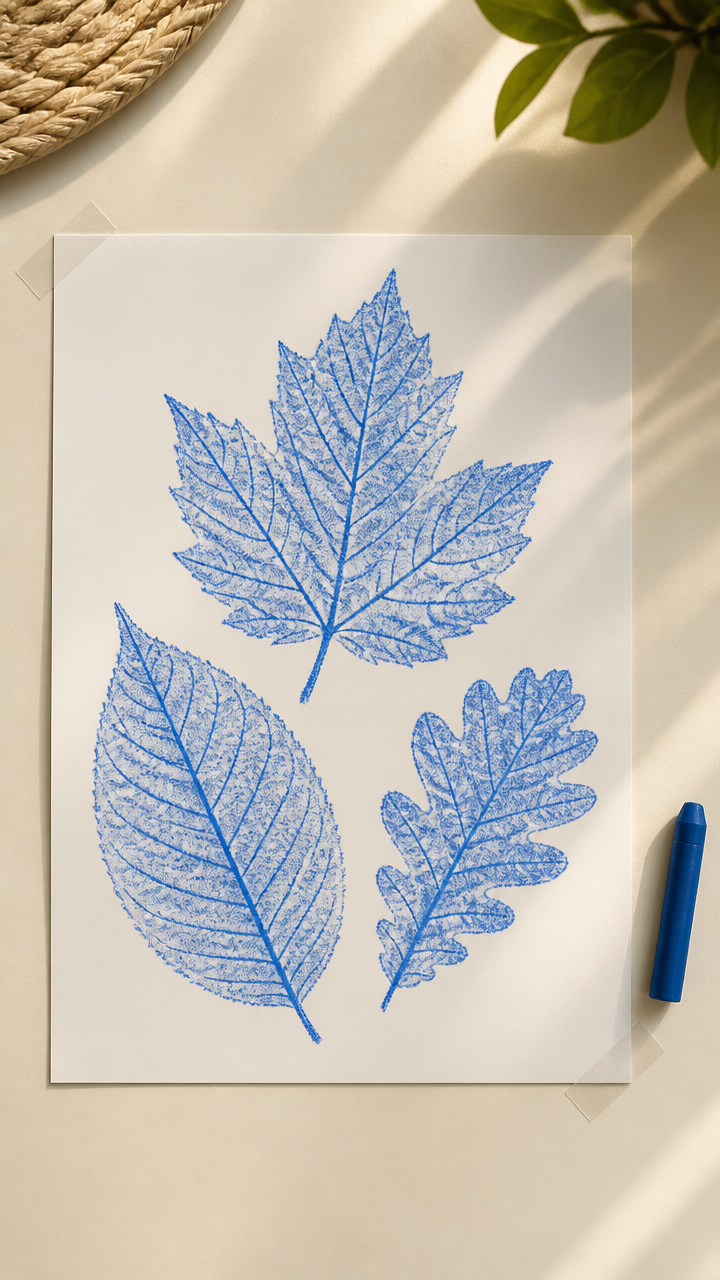
Real leaves pressed under paper reveal natural patterns shaped like the letter L when arranged just right. This outdoor-inspired activity blends nature and literacy.
Materials Needed
- Three large broad leaves (like maple or magnolia)
- One sheet A4 white printer paper
- One blue crayon with wrapper removed
- Clear tape
How to Make It
- Tape one end of the printer paper to a flat sidewalk or table, then place two leaves side by side to form an L shape underneath.
- Hold the crayon on its side and rub gently over the paper where the leaves are, applying even pressure to reveal the texture.
- Lift the tape and turn the paper to see how the leaf veins mimic the curves and lines of the letter L.
4. Lacing Letters with Yarn
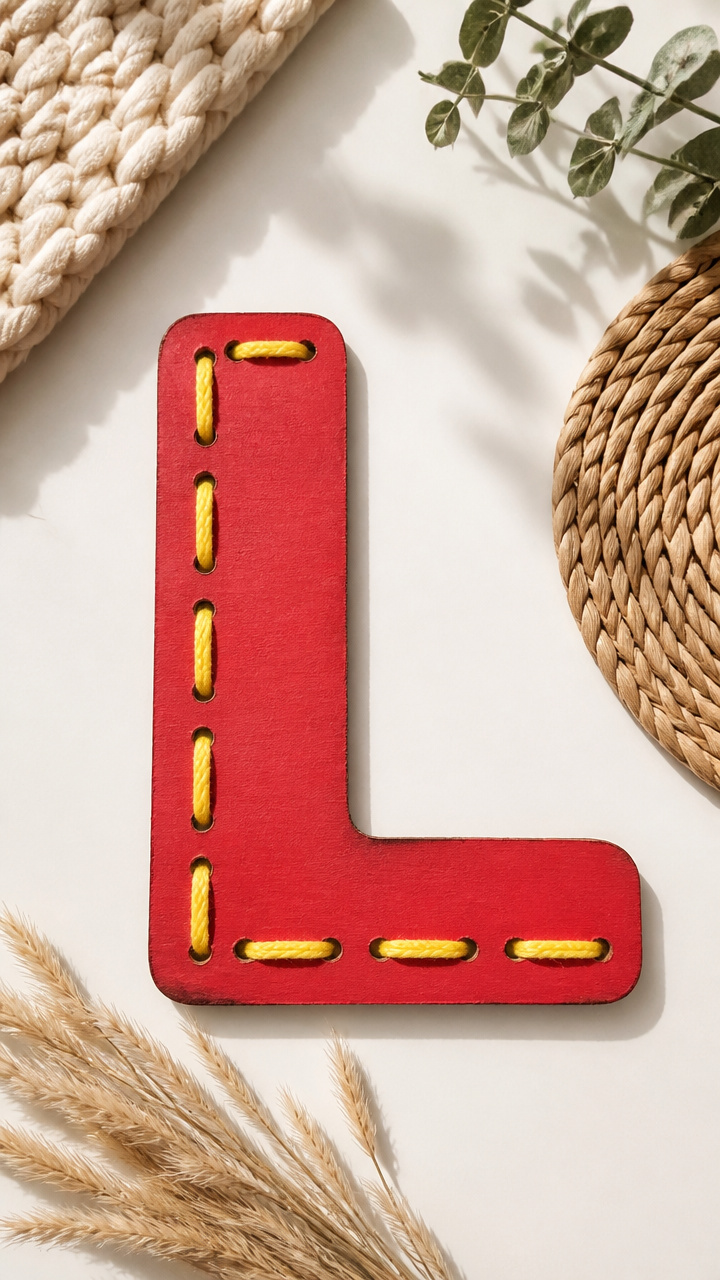
A thick cardboard L with punched holes lets little hands practice threading using soft yarn. This quiet activity builds coordination and focus.
Materials Needed
- One 8×10-inch piece brown corrugated cardboard
- Red acrylic paint
- Paintbrush
- Hole punch
- Two feet of yellow yarn
- Scissors
- Tape
How to Make It
- Paint a large uppercase L onto the cardboard using red paint, let dry completely for 20 minutes.
- Use the hole punch to make eight evenly spaced holes along the outline of the L, starting at the top left corner.
- Tape one end of the yarn to the back of the starting hole, then thread the yarn through each hole in order, pulling gently as you go.
5. Lollipop Letter L Decor

Colorful lollipops arranged in the shape of an L make a sugary-sweet decoration that doubles as a letter lesson. Safe for little hands with no eating allowed.
Materials Needed
- Five fruit-flavored lollipops with round heads
- One sheet 9×12-inch green construction paper
- White school glue
- Ruler
- Pencil
How to Make It
- Draw a light pencil L on the green paper using the ruler to keep lines straight, making it about 8 inches tall.
- Apply glue to the stick end of each lollipop, then place four vertically in a column and one horizontally branching right from the bottom.
- Press each lollipop gently into place and let sit undisturbed for 30 minutes until the glue sets.
6. Pasta Letter L Frame
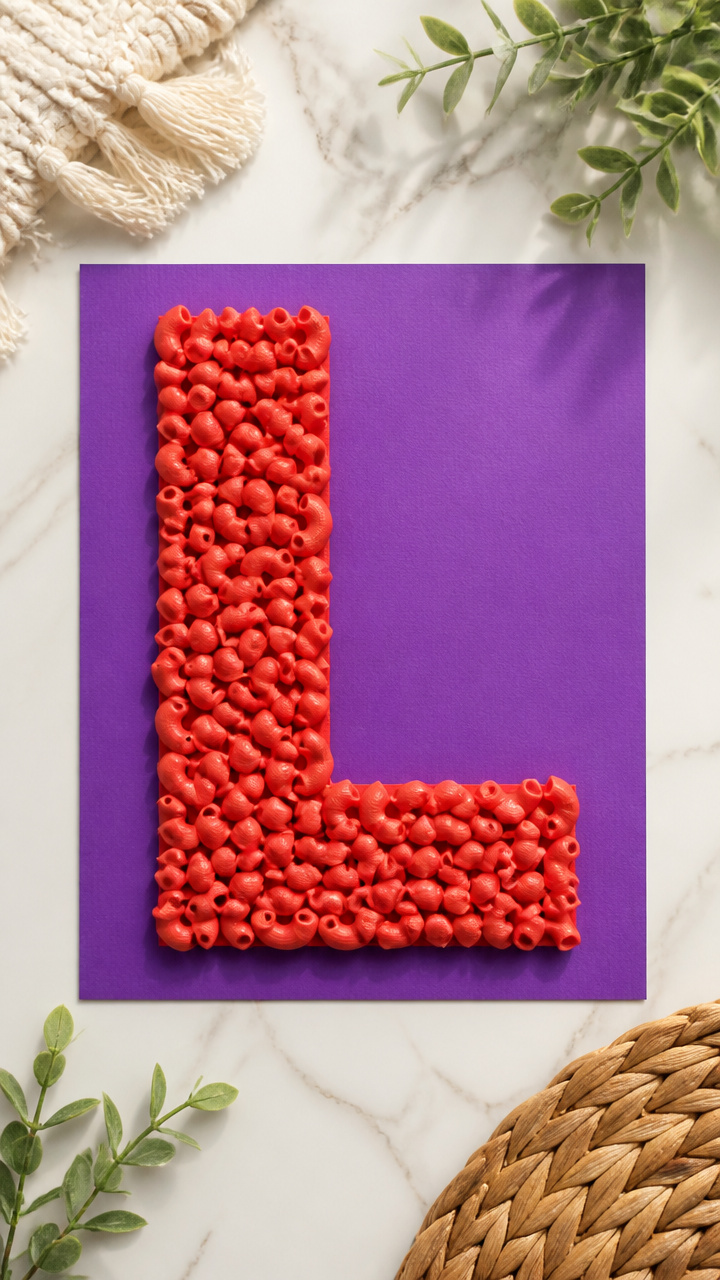
Elbow macaroni glued in rows creates a textured uppercase L with satisfying crunch and color. Dried pasta holds paint well and stays strong.
Materials Needed
- Fifteen elbow macaroni noodles
- One sheet 8.5×11-inch purple cardstock
- White glue in bottle
- Red food coloring
- Small bowl
- Toothpick
How to Make It
- Mix ten drops of red food coloring into one tablespoon of white glue in the bowl, stir with the toothpick until uniform.
- Draw a bold uppercase L on the purple cardstock with a pencil, wide enough to fit three rows of pasta.
- Dip each macaroni noodle into the colored glue, place them side by side along the pencil lines, and let dry flat overnight.
7. L is for Lion Paper Plate Mask
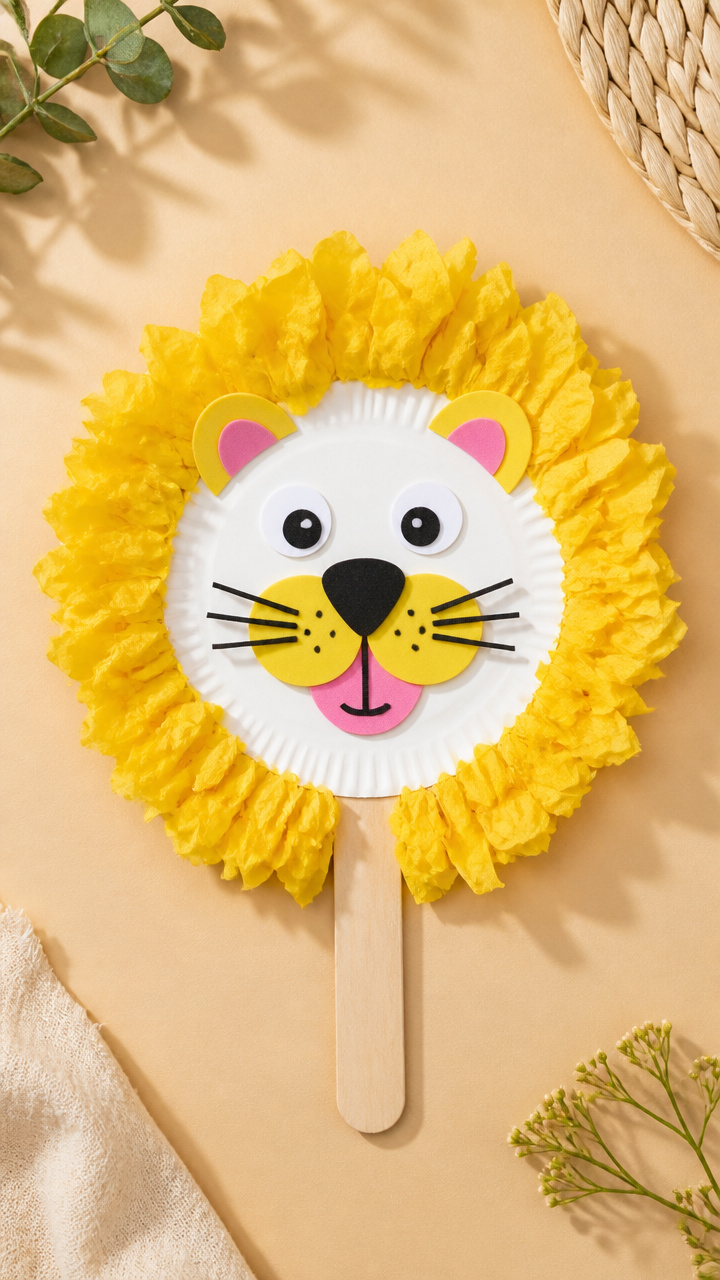
A fuzzy golden mane surrounds a smiling lion face with a clear L-shaped nose line. Worn with a craft stick, this mask invites playful storytelling.
Materials Needed
- One 7-inch white paper plate
- Yellow tissue paper (8×8-inch sheet)
- One 1-inch black foam circle
- One 0.5-inch pink foam circle
- White school glue
- One 6-inch wooden craft stick
- Child-safe scissors
- Glue stick
How to Make It
- Cut out eye holes on either side of the plate center and trim the nose area into a slight L-shaped dip at the bottom.
- Crumple small pieces of yellow tissue paper and glue them around the back edge of the plate to form a mane.
- Glue the black foam circle for the nose and pink circle above it for the muzzle, then attach the craft stick to the bottom with a glue stick.
8. Liquid Watercolor L Drip Art
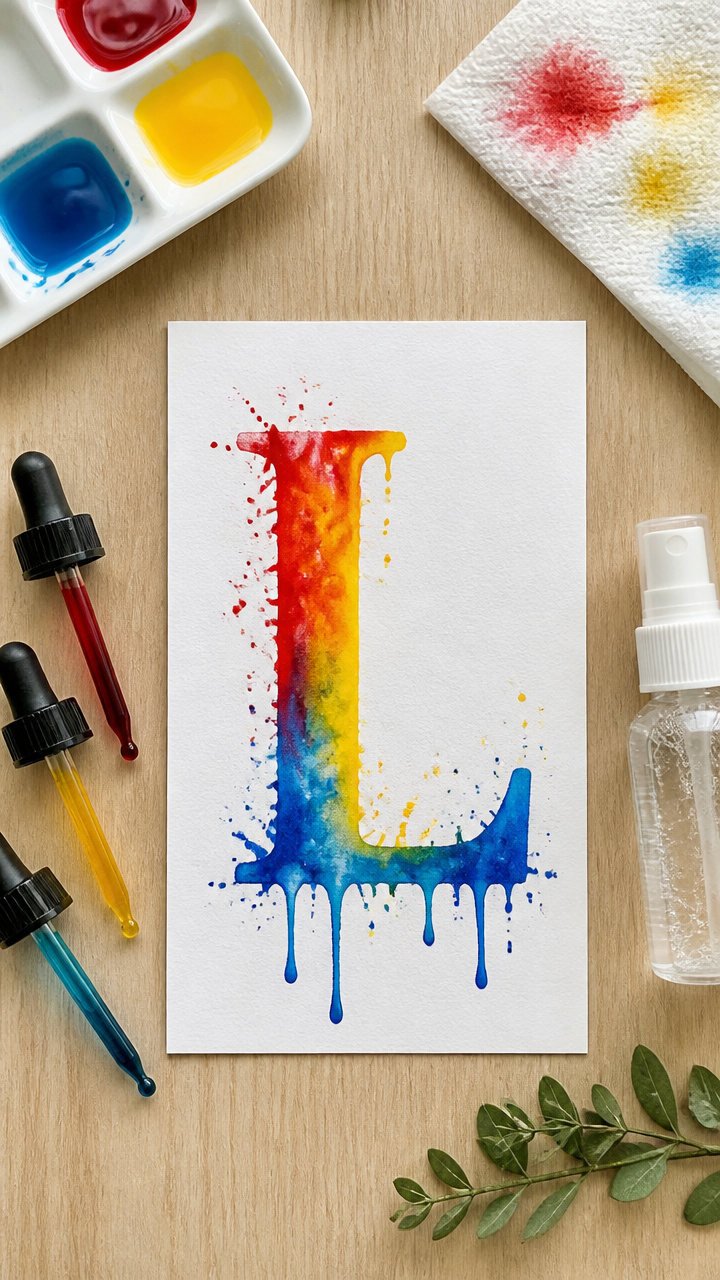
Swirling colors bleed across wet paper in unpredictable ways, forming organic L shapes as they flow. This open-ended art invites happy accidents.
Materials Needed
- One sheet watercolor paper (5×7-inch)
- Spray bottle with water
- Three liquid watercolor droppers (red, yellow, blue)
- Plastic tray
- Paper towels
How to Make It
- Lay the watercolor paper on the plastic tray and mist it lightly with the spray bottle until damp but not pooling.
- Squeeze one drop each of red, yellow, and blue near the top left corner, letting them begin to run downward.
- Tilt the tray slowly so the colors trail down and right, creating a natural L path, then set aside to dry for 1 hour.
9. L Is for Lightning Bolt Drawing
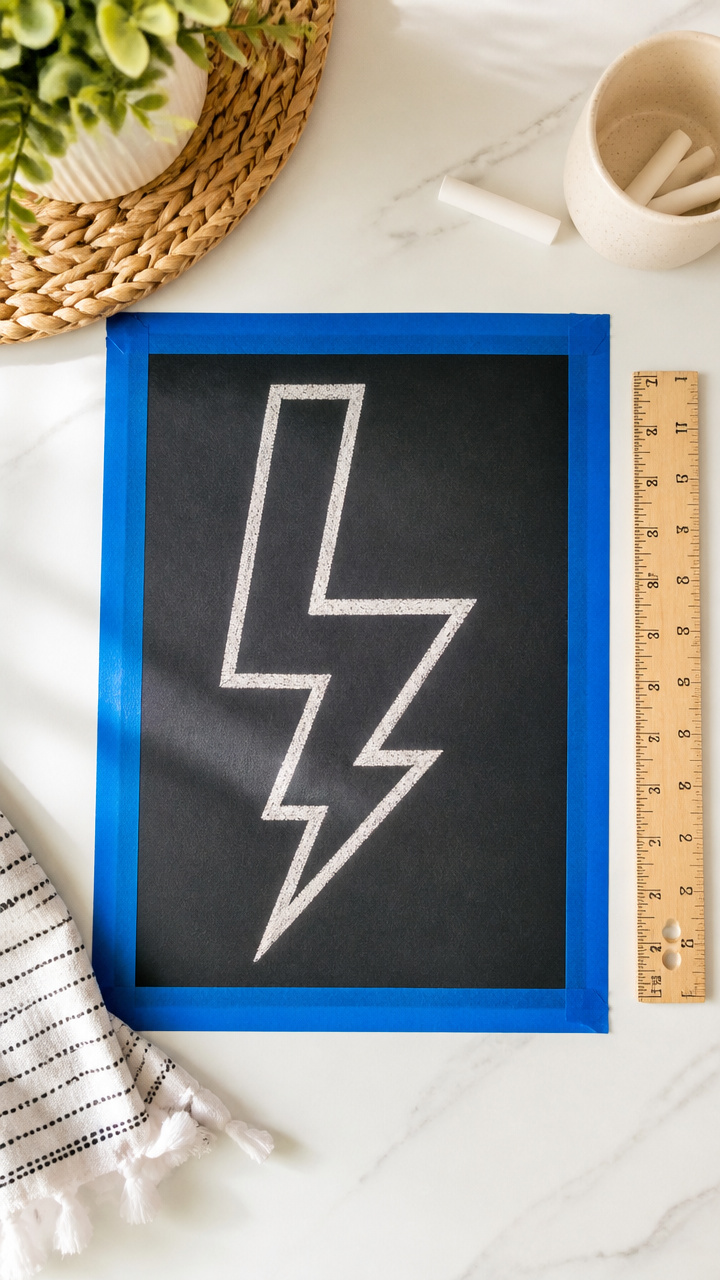
Zigzag chalk lines on dark paper mimic lightning and resemble a slanted L. This energetic outdoor craft burns energy and teaches sharp angles.
Materials Needed
- One sheet black construction paper (9×12-inch)
- White sidewalk chalk
- Ruler
- Blue painter's tape
How to Make It
- Tape the black paper to the sidewalk with blue tape at each corner to prevent slipping.
- Use the ruler to guide a straight diagonal line from top left to bottom center, then add two quick zigzags upward to form a bolt.
- Trace over the entire shape with firm chalk pressure so it shines brightly against the dark background.
10. Lego Stamped Letter Prints
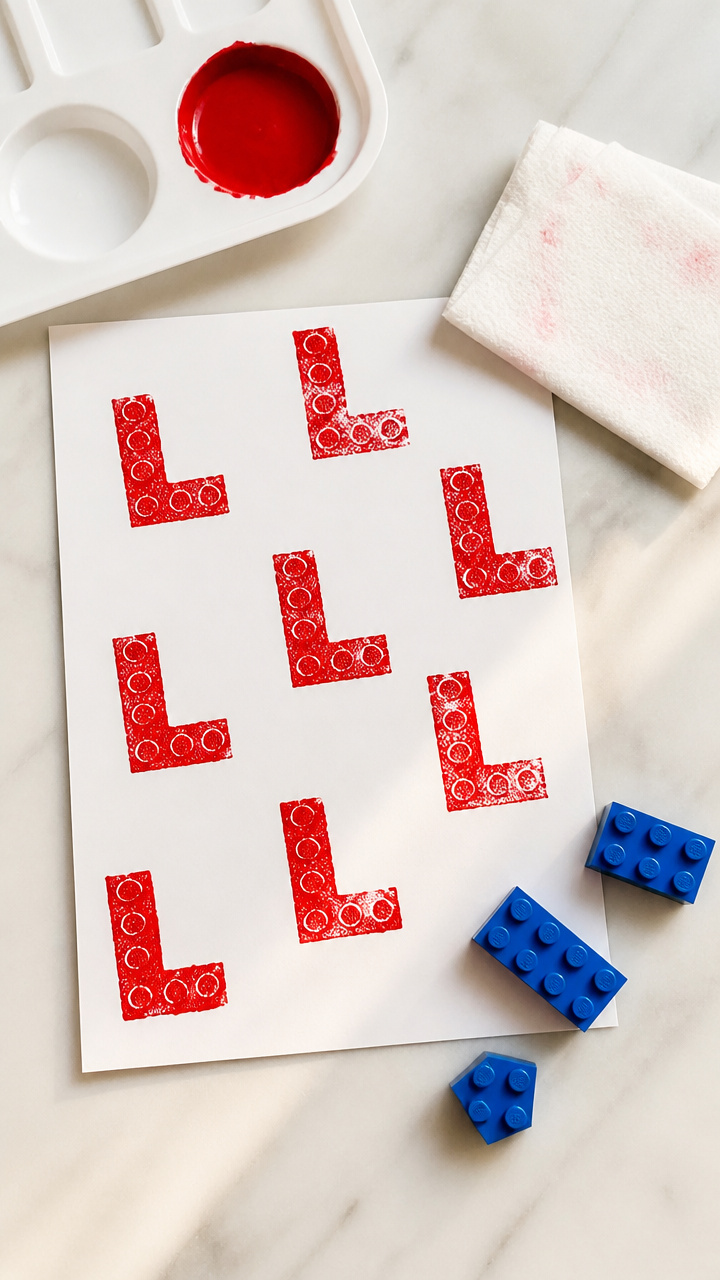
Mini Lego bricks dipped in paint leave blocky impressions that form a chunky uppercase L. Reusable stamps make this print easy to repeat.
Materials Needed
- Two 2×4 blue Lego bricks
- One 2×2 blue Lego brick
- Red acrylic paint
- Paint tray
- One sheet A4 white drawing paper
- Baby wipe
How to Make It
- Pour a dime-sized amount of red paint into the paint tray, then press the bottom of each Lego brick into the paint evenly.
- Stamp the 2×4 brick vertically on the left side of the paper, then stamp the second 2×4 at the bottom going right to form the L base.
- Use the 2×2 brick to fill in any gaps at the corner, clean bricks with the baby wipe after use.
11. Lined L Handprint Art
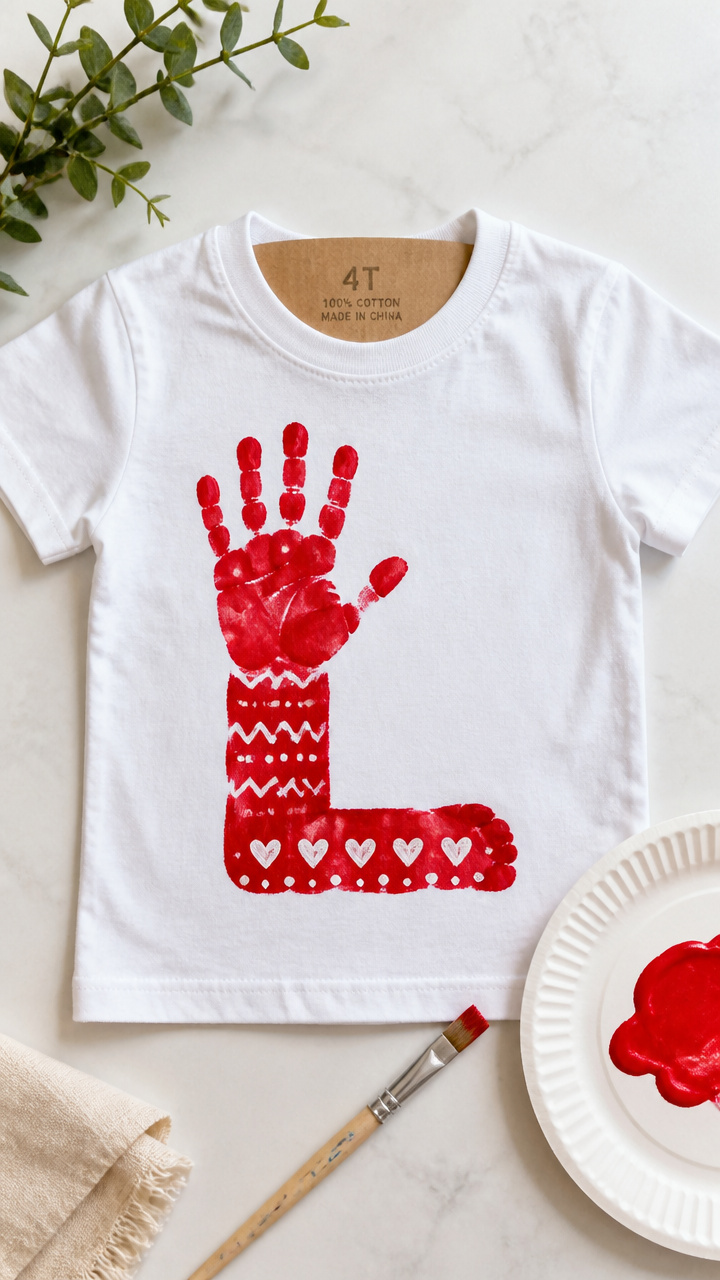
A child's handprint becomes the base of an L when fingers point up and the thumb extends right. Personal and lasting, this keepsake grows with them.
Materials Needed
- Washable red fabric paint
- Paintbrush
- One cotton t-shirt (white, size 4T)
- Cardboard insert
- Paper plate
How to Make It
- Slide the cardboard inside the t-shirt to prevent bleed-through, lay it flat on a table.
- Brush red paint evenly over the child’s palm and fingers, avoiding the wrist, then press hand vertically on the front of the shirt with thumb pointing right.
- Leave hand flat for 5 seconds, lift straight up, let dry 4 hours, then heat-set with an iron on cotton setting for 3 minutes.
12. Linking Chain Letter Loop
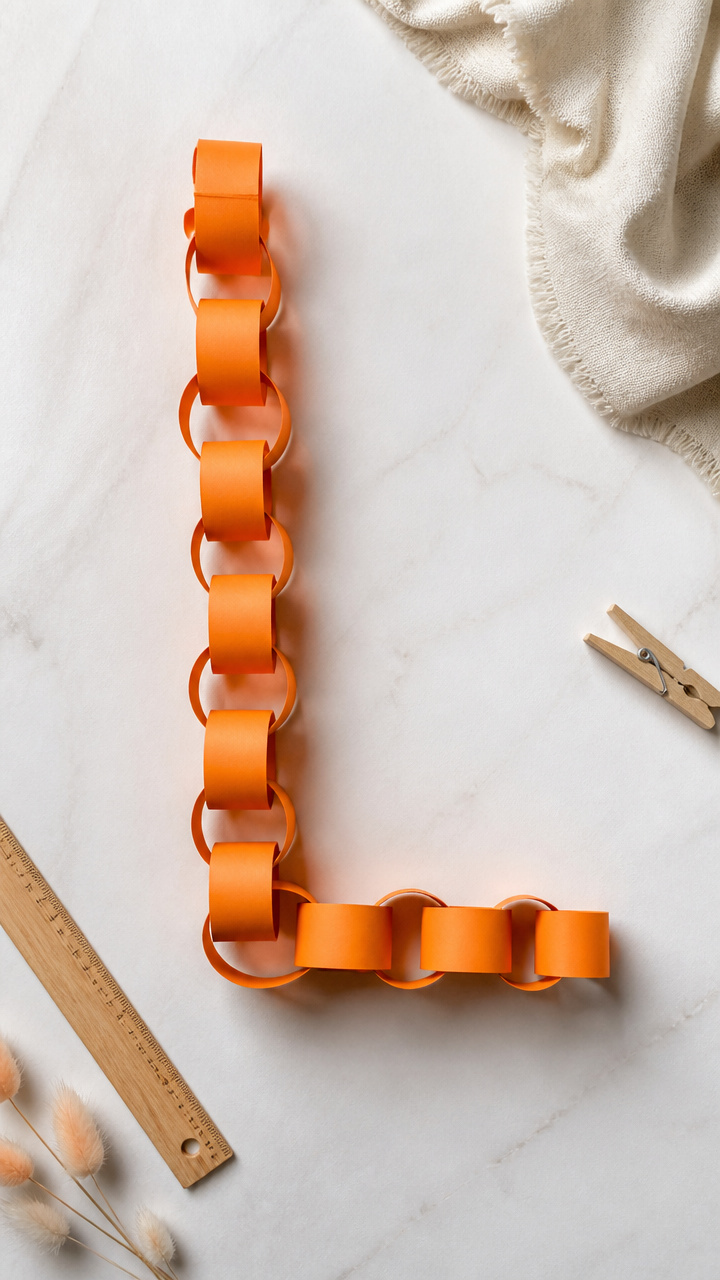
Interlocked paper strips twist into an L shape that hangs with gentle movement. Cutting and gluing these links builds sequencing and patience.
Materials Needed
- Ten 1×6-inch orange construction paper strips
- White school glue
- Clothespin
- Ruler
How to Make It
- Form a loop by bringing the ends of one strip together and gluing them, use a clothespin to hold until set (2 minutes).
- Thread a second strip through the first before gluing its ends, continue linking until all ten are connected in a chain.
- Bend the chain into an uppercase L shape and glue the third and seventh links together to hold the angle, let dry 15 minutes.
13. L Is for Ladder Craft
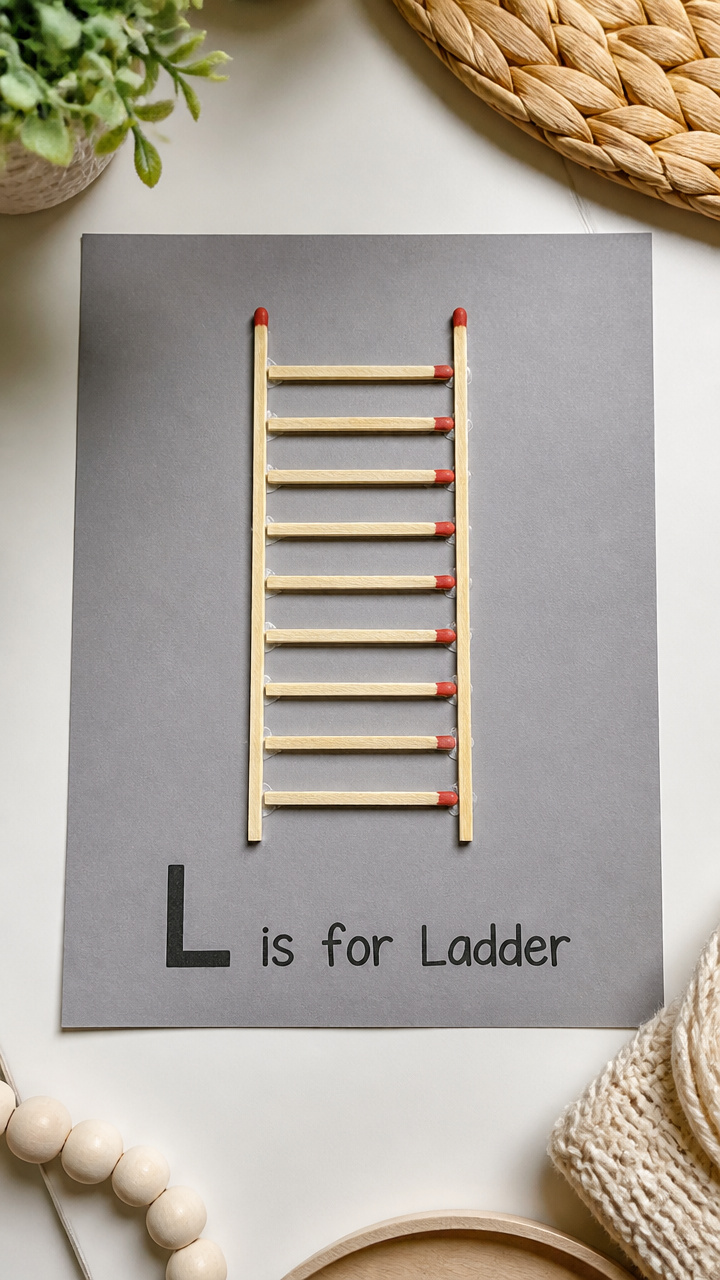
Matchsticks and glue form a tiny ladder with clear vertical and horizontal bars shaped like an L. This miniature build feels like real construction.
Materials Needed
- Twelve wooden matchsticks (heads cut off safely)
- White school glue
- Ruler
- Pencil
- One sheet A4 gray cardstock
How to Make It
- Draw two parallel vertical lines 4 inches long and 1 inch apart on the gray cardstock using the ruler and pencil.
- Glue one matchstick at the bottom between the lines, then space three more evenly up the sides to form rungs.
- Let the glue dry for 20 minutes, then trace a bold L around the outside of the ladder with pencil to highlight the letter shape.
14. L Shaped Sensory Bin Path
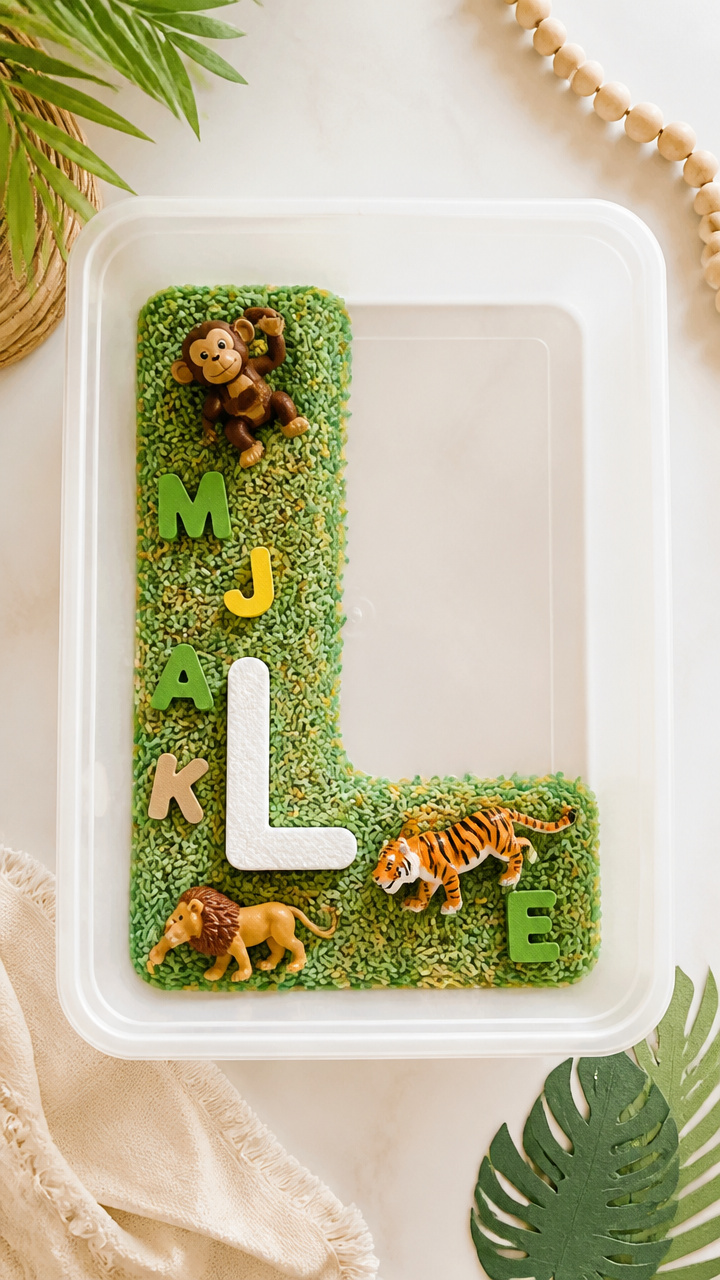
Rice dyed lime green fills a bin where kids trace an L with their fingers. Hidden letters and toys add surprise and texture.
Materials Needed
- Two cups uncooked white rice
- Five drops green food coloring
- One zip-top gallon bag
- One plastic storage bin (10×6-inch)
- Three plastic jungle animals
- Five foam alphabet letters (including one L)
How to Make It
- Add rice and food coloring to the zip-top bag, seal and shake for 1 minute until evenly tinted, then spread on paper to dry for 1 hour.
- Pour the green rice into the plastic bin, bury the three animals and five foam letters including the L somewhere in the middle.
- Use your finger to draw a large L in the rice from top left to bottom right, feel for hidden items as you go.
15. Lollipop Stick Letter Mobile
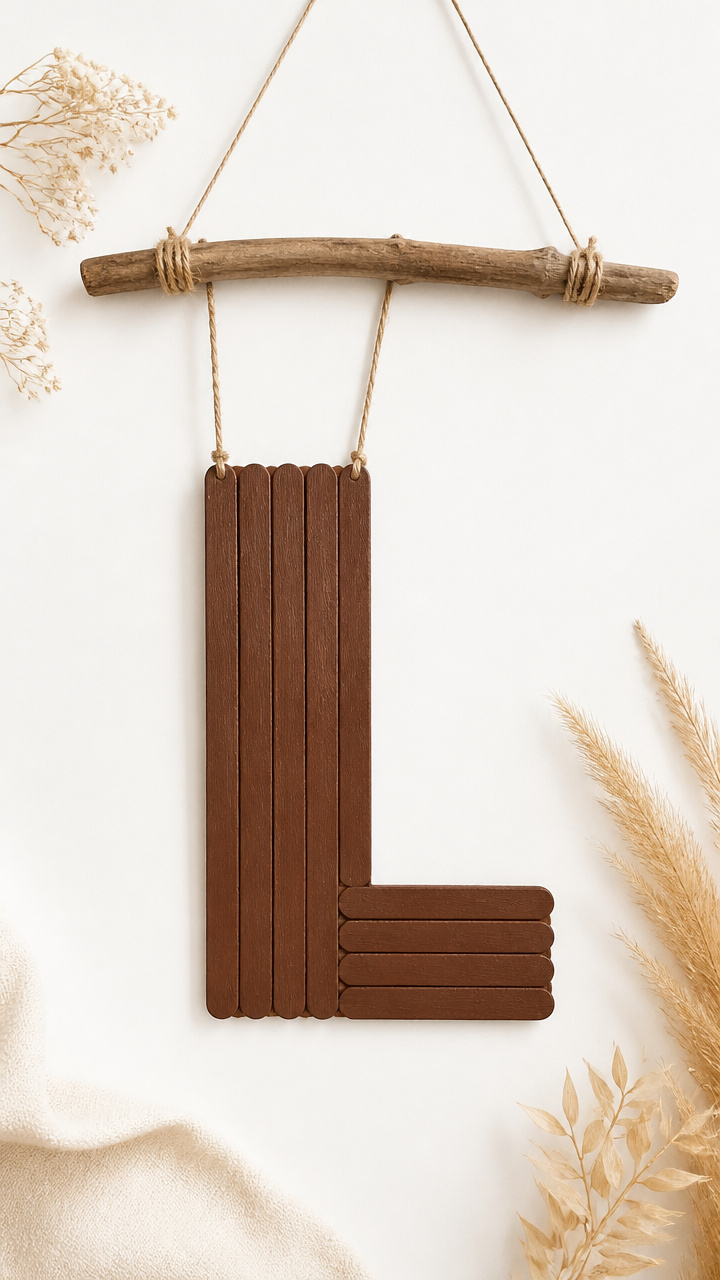
Craft sticks painted like logs stack into an L and hang with yarn from a branch. Rustic and calm, this mobile sways with air currents.
Materials Needed
- Eight jumbo craft sticks
- Brown acrylic paint
- Paintbrush
- Hole punch
- Twelve inches of thin hemp cord
- One small wooden branch (6 inches long)
- White school glue
How to Make It
- Paint all eight craft sticks brown, let dry for 15 minutes on a flat surface.
- Arrange five sticks vertically in a column and three horizontally at the base to form an L, glue the intersection point and let dry 10 minutes.
- Punch a hole at the top of the vertical section and another at the end of the horizontal bar, tie hemp cords through each and knot to the branch.
These letter L crafts bring learning to life with color, texture, and plenty of hands-on fun. Pick one that matches your child’s mood today and watch their confidence grow with every step.