15 Adorable Summer Crafts for Toddlers
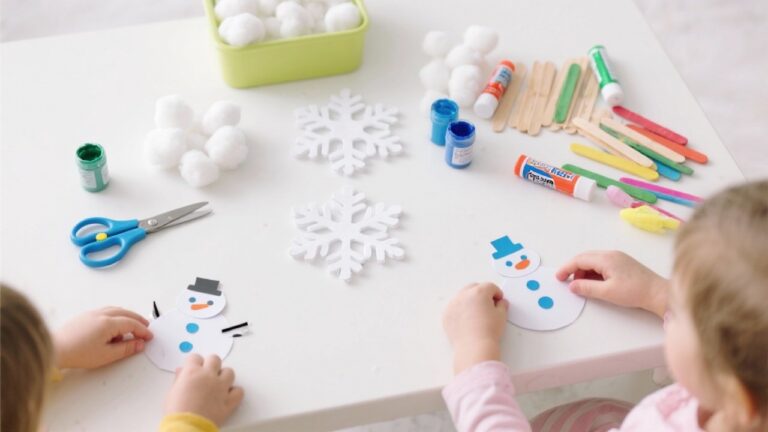
Summer light fills the room with golden warmth and invites little hands to create. These crafts meet toddlers where they are with textures, colors, and simple actions that spark joy and build fine motor skills.
Each idea uses safe, everyday materials and leads to a real keepsake you'll be happy to display. No prep stress, no mess overload—just joyful moments made together.
1. Paper Plate Sun
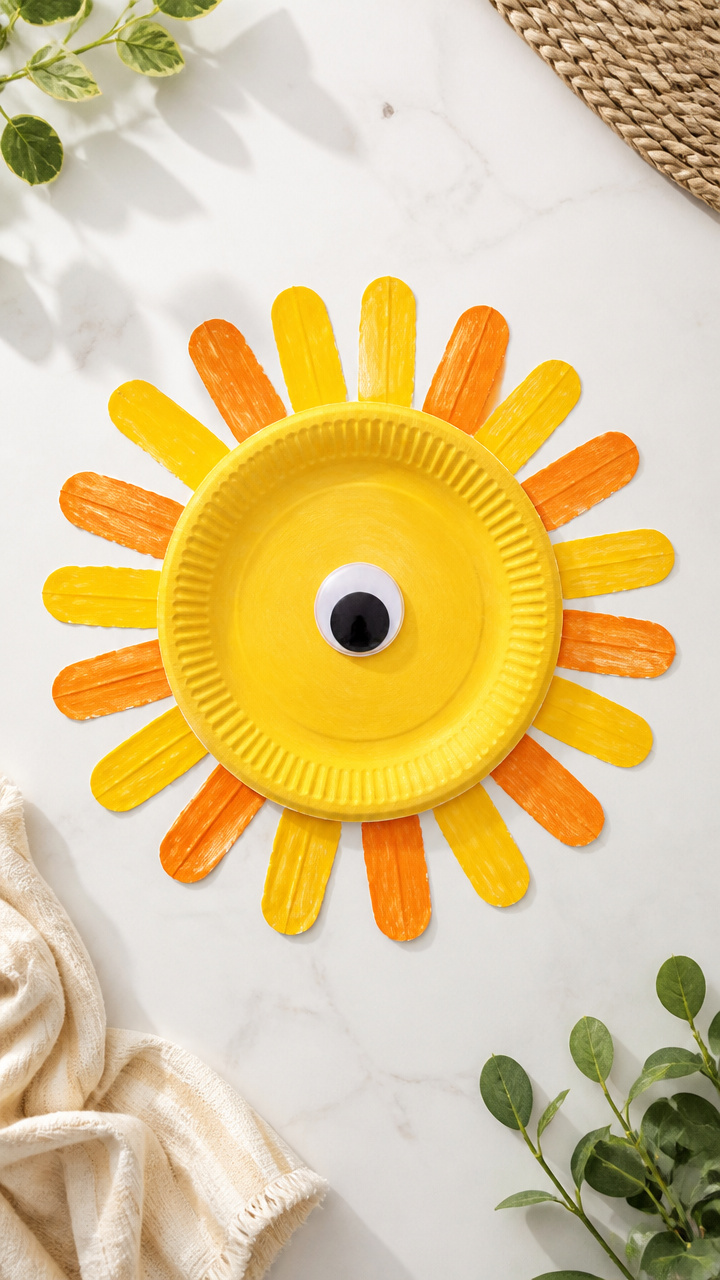
Bright yellow rays fan from a smiling face, capturing summer’s cheer in a lightweight, hangable keepsake. This craft builds scissor control and color recognition with zero stress.
Materials Needed
- 1 white paper plate
- Yellow washable finger paint
- Orange washable finger paint
- 1 black wiggle eye
- Glue stick
- Child-safe scissors
- 1 popsicle stick
How to Make It
- Place a dot of glue on the center of the paper plate and press the wiggle eye into it.
- Let your toddler spread yellow paint from the center outward using their fingers to create rays.
- While the paint is still wet, add thin lines of orange paint between rays for blended color.
- Let the plate dry flat for 90 minutes.
- Cut 8 slits around the edge of the plate, then fold every other ray outward to add dimension.
- Glue a popsicle stick to the back to make it a handheld sun.
2. Crayon Melts on Canvas
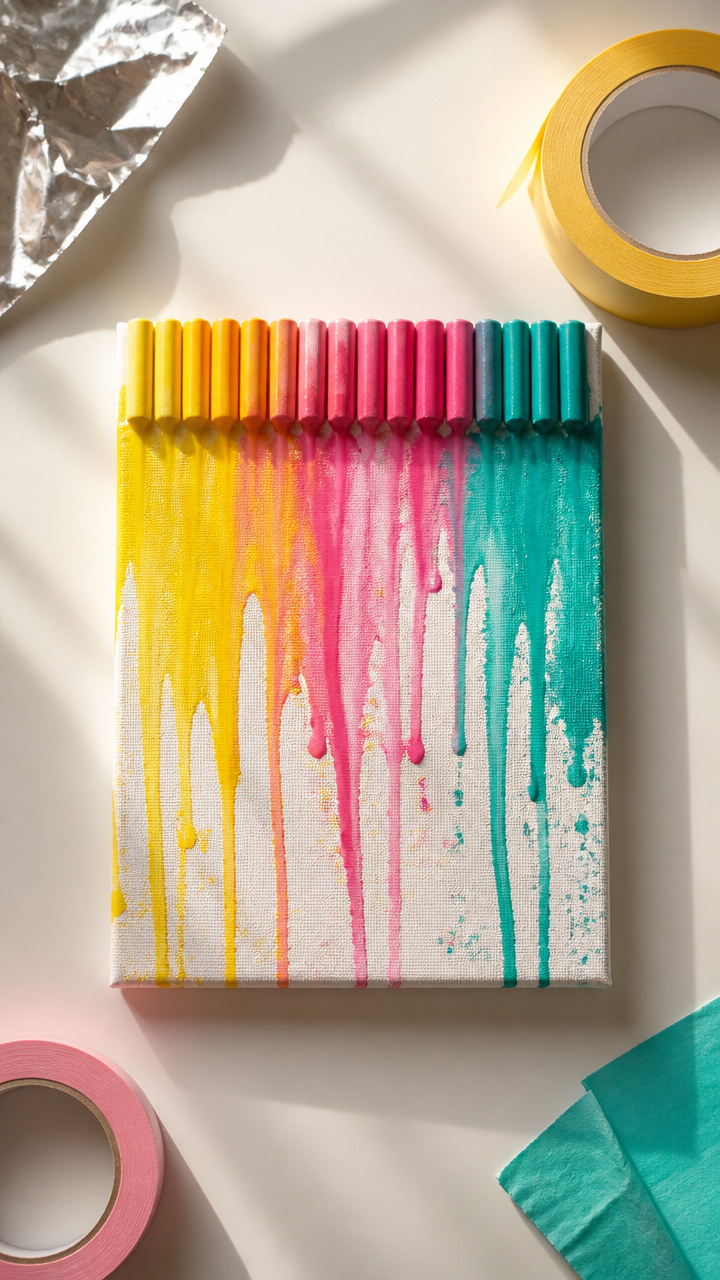
Vibrant drips of melted wax form abstract summer skies on sturdy canvas. This process art piece lets toddlers explore heat and change safely with adult help.
Materials Needed
- 3 broken crayons in summer colors (yellow, pink, turquoise)
- 1 small wooden canvas (20×25 cm)
- Hairdryer
- Painter’s tape
- Aluminum foil
How to Make It
- Peel crayons and break into small pieces no larger than 1 cm.
- Tape the canvas upright on a table edge with foil catching below.
- Place crayon pieces at the top edge of the canvas.
- Hold the hairdryer 15 cm from the crayons on low heat, moving slowly until wax begins to drip.
- Let dry completely for 2 hours before removing tape.
3. Popsicle Stick Puppets
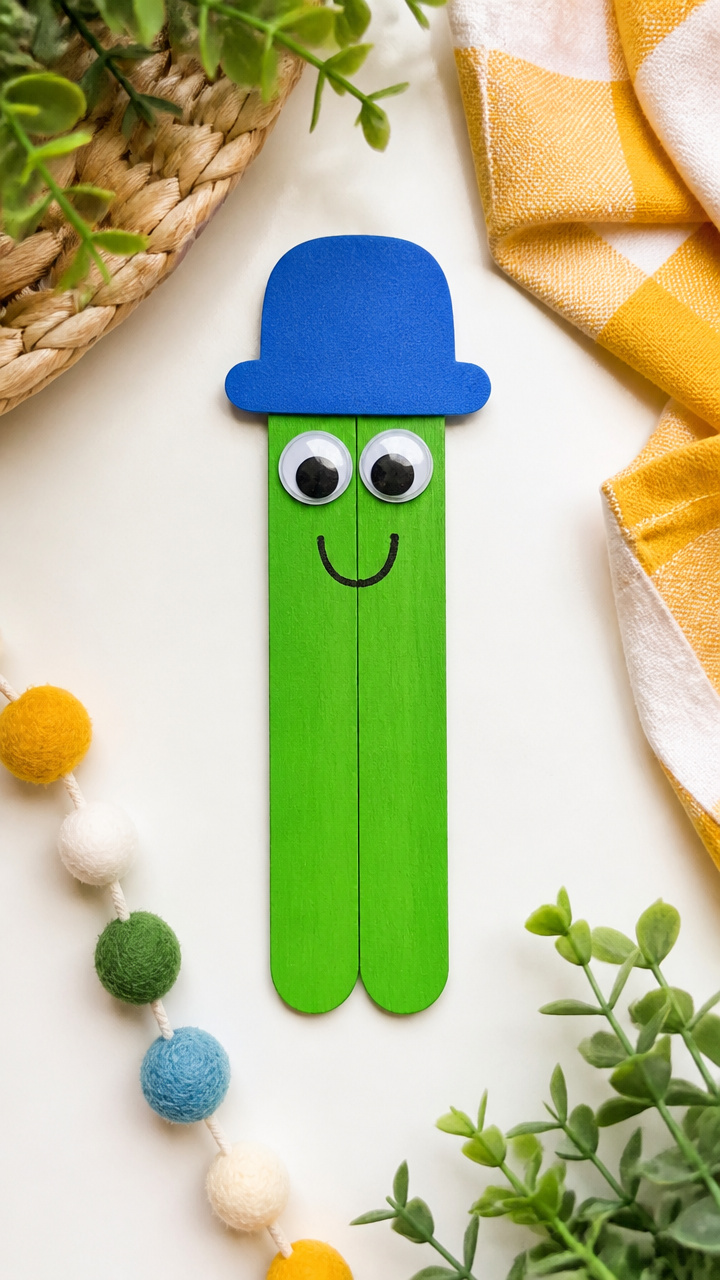
Friendly beach creatures with googly eyes and paper hats wiggle at story time. These puppets encourage imaginative play and hand-eye coordination.
Materials Needed
- 2 popsicle sticks
- Washable green paint
- Blue foam sheet (10×15 cm)
- 2 small googly eyes (1 cm)
- Glue stick
- Child-safe scissors
- Red craft foam scrap
How to Make It
- Paint one popsicle stick green and let dry for 30 minutes.
- Cut a 2 cm fish tail from blue foam and glue it to the end of the green stick.
- Glue on googly eyes just behind the tail.
- Cut a tiny hat from red foam and glue it above the eyes.
- Glue the second popsicle stick to the back as a handle.
4. Seashell Sorting Tray
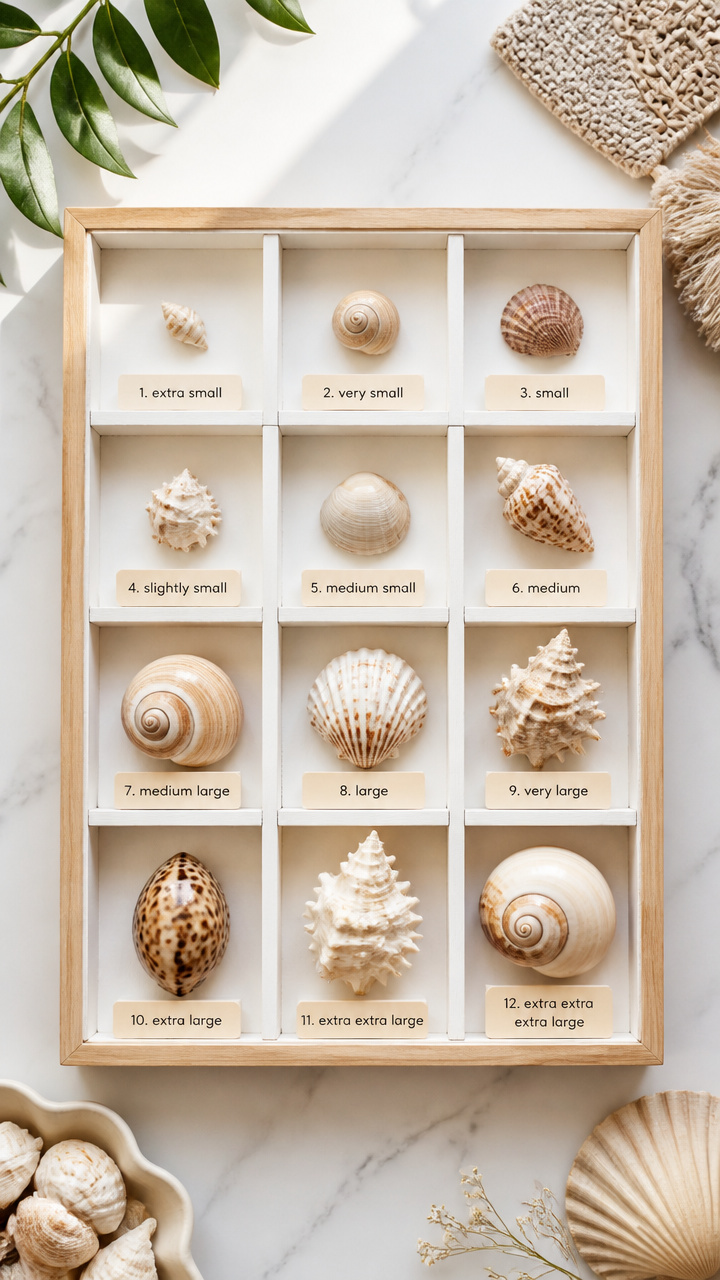
Natural shells in a divided tray invite tactile sorting by size, color, and texture. This calming craft doubles as a sensory activity and shelf display.
Materials Needed
- 1 wooden divided craft tray (20×15 cm, 6 sections)
- 12 clean seashells (3 small, 6 medium, 3 large)
- White acrylic paint
- Small foam brush
- Label stickers (6)
How to Make It
- Paint the outer edge of the tray white using the foam brush and let dry for 1 hour.
- Label each section with words: Small, Medium, Large, Spiral, Smooth, Bumpy.
- Let your toddler place each shell in the matching section.
- Keep the tray on a low shelf for daily play and re-sorting.
5. Tissue Paper Kite
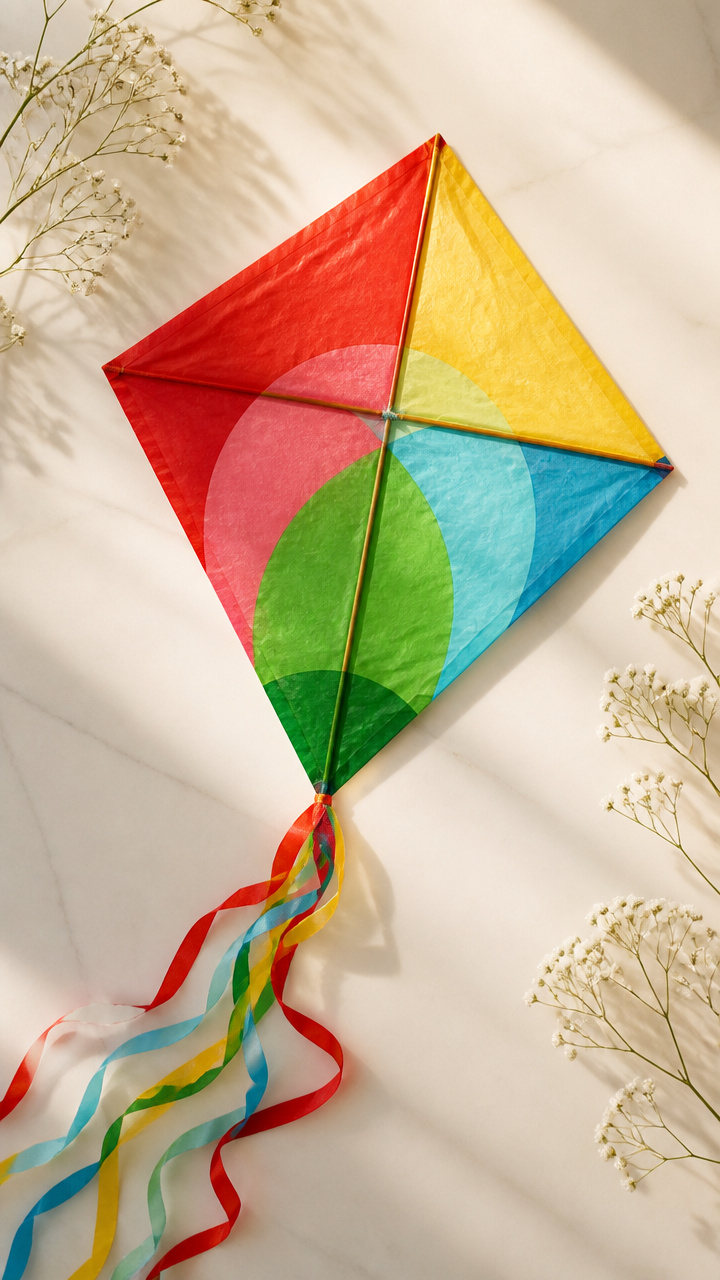
Sheer bursts of color float on a handmade frame, mimicking kites drifting in summer wind. This craft teaches color layering and light transmission.
Materials Needed
- 1 kite-shaped cardboard cutout (15 cm tall)
- 4 colors of tissue paper (red, yellow, blue, green), 10×10 cm each
- White school glue
- Small sponge brush
- Ribbon scrap (20 cm, assorted colors)
- Glue stick
How to Make It
- Cut tissue paper into 2 cm squares.
- Apply a thin layer of glue to one section of the kite with the sponge brush.
- Place tissue squares close together without overlapping.
- Repeat until the entire kite is covered.
- Let dry for 2 hours.
- Glue ribbon fringe to the bottom edge using the glue stick.
6. Yarn-Wrapped Ice Cream
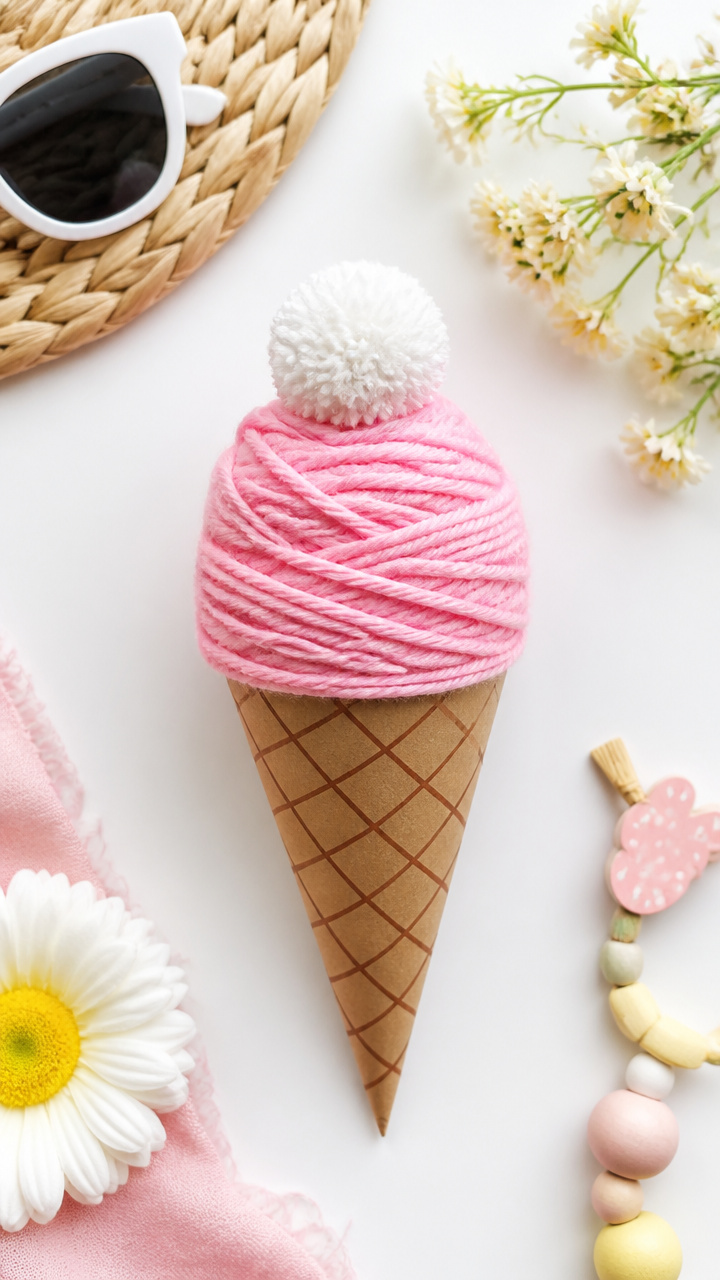
Fluffy pink yarn swirls around a paper cone, creating a soft sculpture that stands up. This craft develops finger strength and color matching.
Materials Needed
- 1 paper ice cream cone template (cut from brown cardstock)
- Pink yarn (2 meters)
- White glue
- Small foam brush
- Pom-pom (2 cm, white)
How to Make It
- Brush glue onto the top half of the cone with the foam brush.
- Start wrapping yarn at the base of the cone, spiraling upward.
- Press each wrap firmly into the glue.
- Stop 1 cm from the top and trim the yarn.
- Glue a pom-pom on top as a cherry.
7. Fingerpaint Flip-Flops
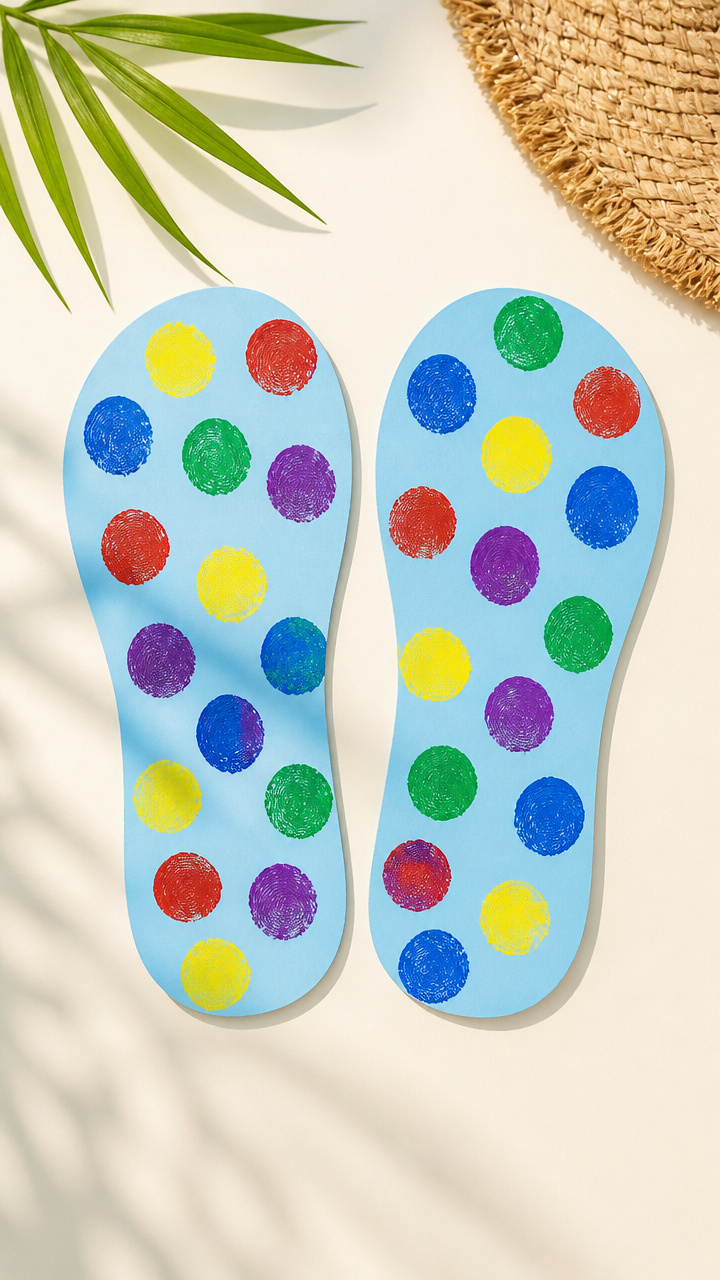
Two matching flip-flops in rainbow prints line up like real beach footwear. This craft builds symmetry awareness and color choice.
Materials Needed
- 1 sheet blue construction paper (A4)
- Washable paints: red, yellow, blue, green, purple
- Pencil
- Scissors
- Glue stick
How to Make It
- Draw two flip-flop shapes on the paper, each 10 cm long, and cut them out.
- Let your toddler press their fingers into different paints and stamp toes and straps.
- Allow prints to dry for 60 minutes.
- Glue both flip-flops side by side on a fresh A4 sheet to show a matching pair.
8. Cotton Ball Clouds
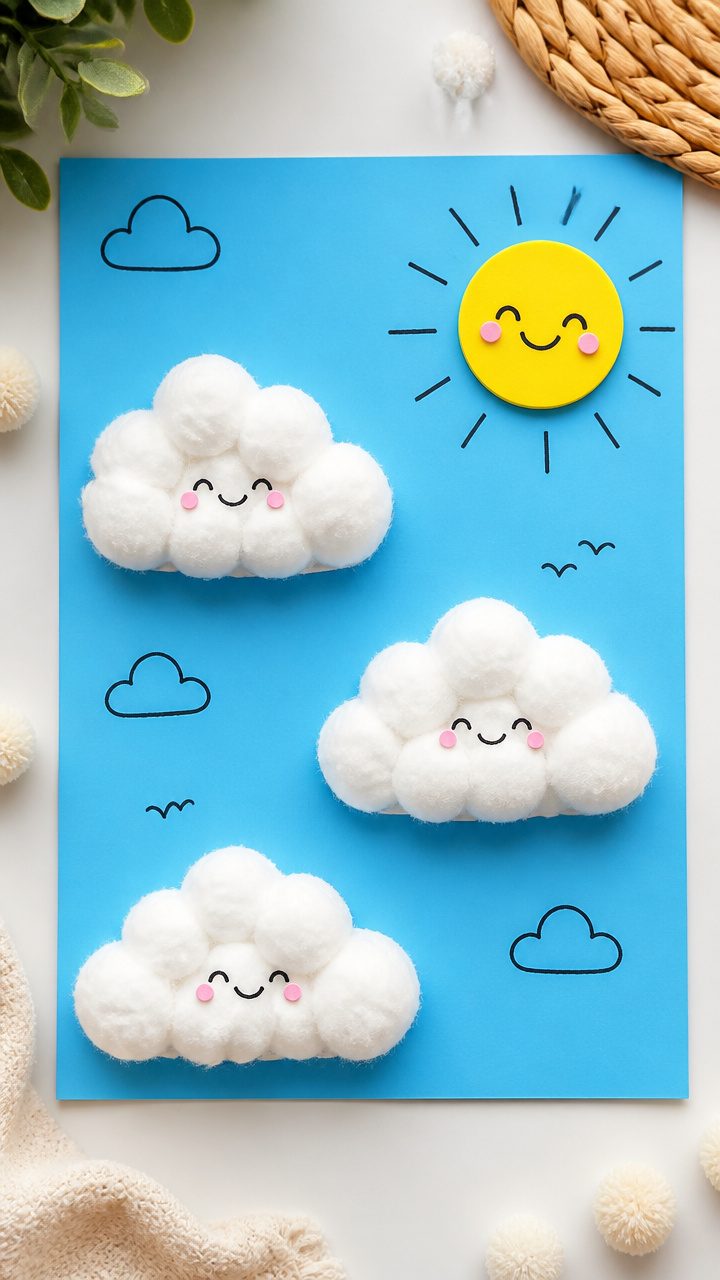
Puffy white clusters float above a blue horizon with smiling suns. This craft introduces texture contrast and sky elements.
Materials Needed
- 1 sheet blue cardstock (A4)
- Cotton balls (15)
- White school glue
- Small sponge brush
- Yellow foam circle (5 cm)
- Black marker
How to Make It
- Draw a curved horizon line 8 cm from the bottom of the cardstock.
- Glue the yellow foam circle in the top corner.
- Draw a simple face on the sun with the black marker.
- Brush glue in three fluffy shapes above the horizon.
- Press cotton balls into the glue, layering lightly for puffiness.
- Let dry for 2 hours.
9. Straw Windsock
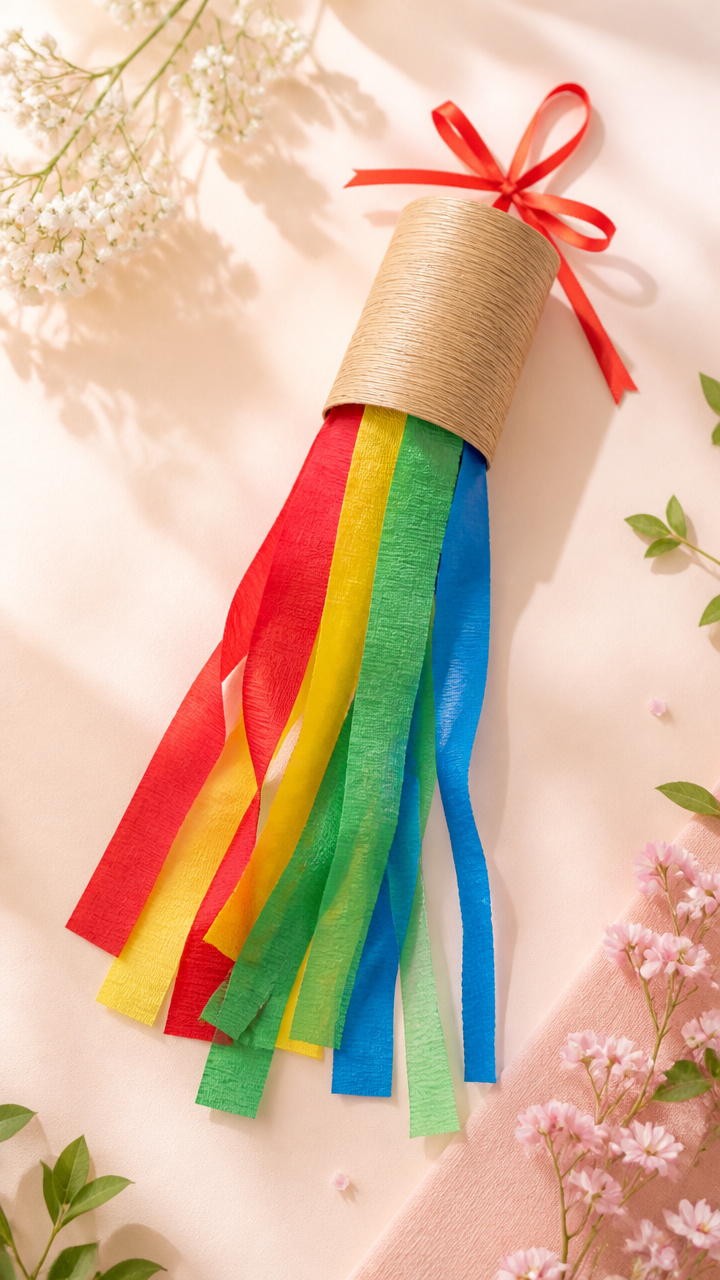
Colorful streamers flutter from a paper tube when held up to summer breezes. This craft captures motion and teaches cause and effect.
Materials Needed
- 1 cardboard tube (from paper towels)
- 4 crepe paper strips (30 cm long, red, yellow, blue, green)
- Hole punch
- Scissors
- Glue stick
- Ribbon (30 cm)
How to Make It
- Glue one end of each crepe paper strip to the bottom inside edge of the tube.
- Let the glue dry for 15 minutes.
- Punch two holes on opposite sides of the top edge.
- Thread ribbon through both holes and tie into a loop for hanging.
- Hold outside on a breezy day to watch the streamers dance.
10. Painted Rock Turtles
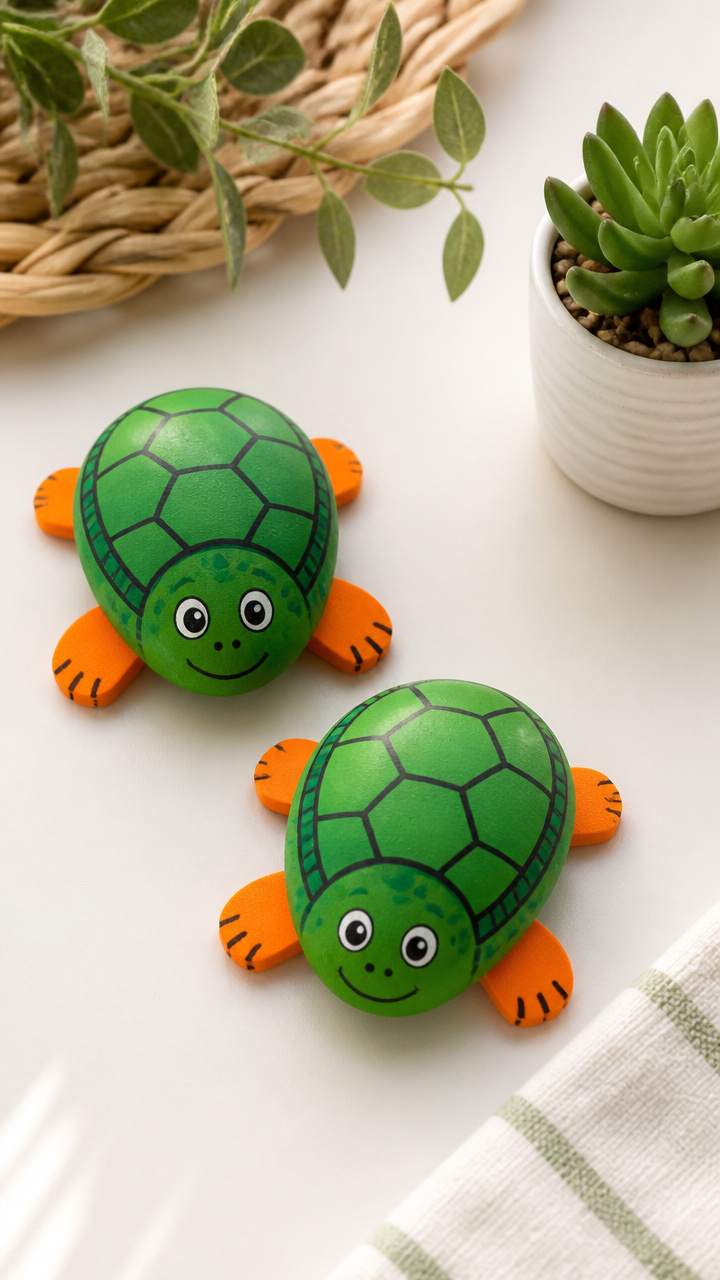
Smooth river rocks become tiny turtles with hand-painted shells and marker faces. These nature-based figures inspire outdoor storytelling.
Materials Needed
- 2 smooth river rocks (5-6 cm long)
- Green acrylic paint
- Small paintbrush
- Black permanent marker
- Orange craft foam
- Scissors
- Glue stick
How to Make It
- Paint the top half of each rock green and let dry for 1 hour.
- Draw a face below the shell using the black marker.
- Cut four small flippers and a tiny head from orange foam.
- Glue two flippers on each side, one on the front, and one on the back.
- Add the head at the front edge.
11. Sponge Stamp Boats
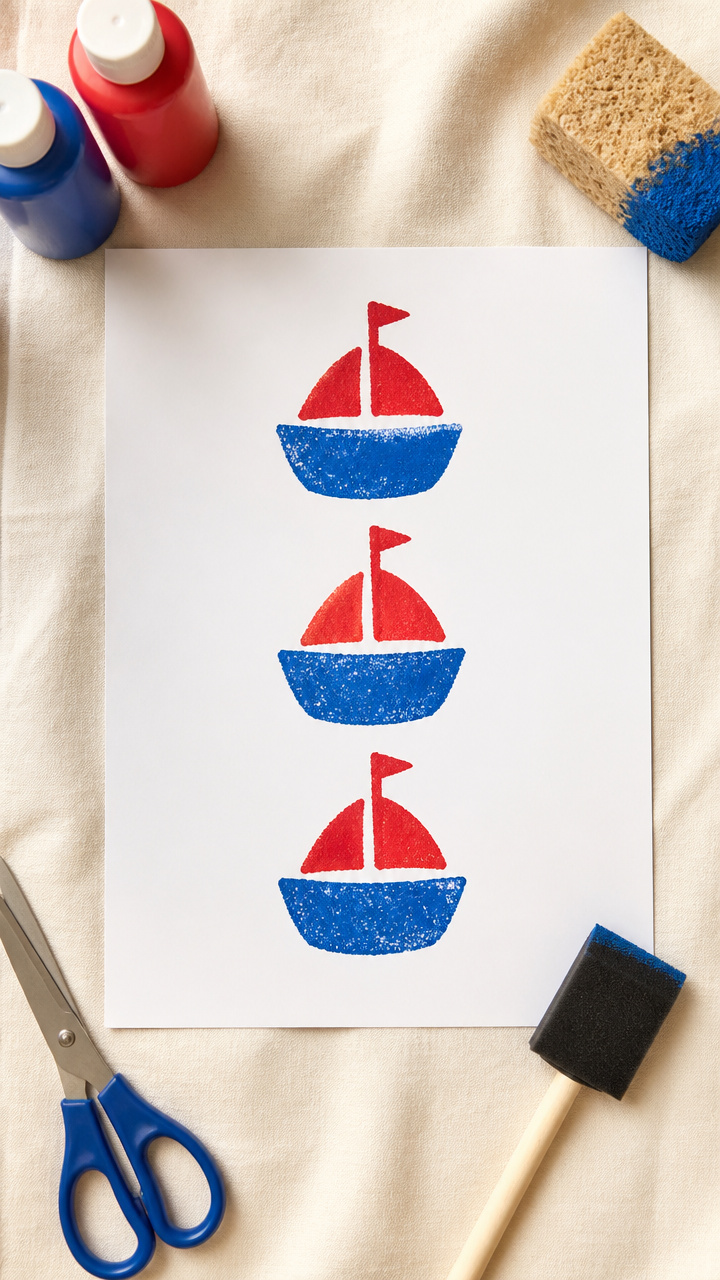
Chunky sponge shapes press into paper to form simple sailboats on wavy lines. This craft builds pattern awareness and grip control.
Materials Needed
- 1 kitchen sponge
- Scissors
- Blue and red washable paint
- A4 white drawing paper
- Black washable marker
- Foam brush
How to Make It
- Cut the sponge into a triangle (sail) and a rectangle (hull).
- Pour red paint on a plate and press the triangle sponge into it.
- Stamp the sail onto the paper.
- Wipe the sponge, press the rectangle into blue paint, and stamp below as the hull.
- Draw 3 wavy lines beneath each boat with the black marker.
- Let dry for 45 minutes.
12. Lego Sandcastle
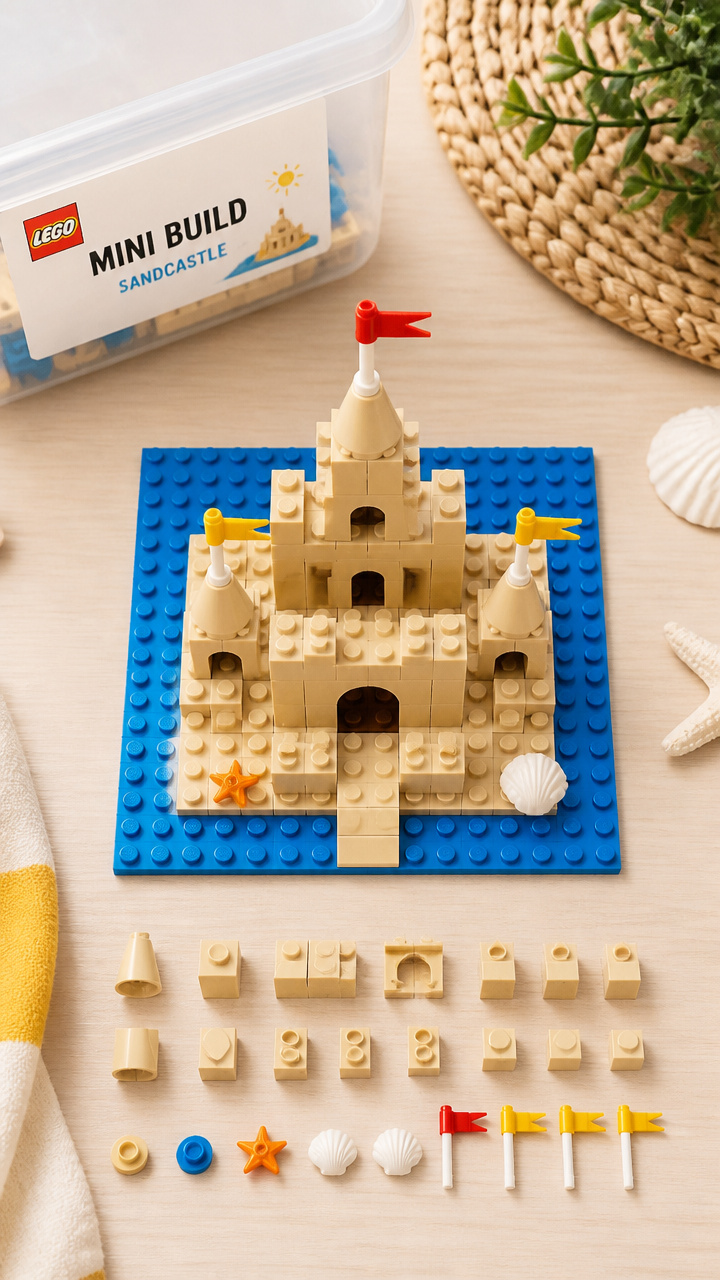
Bright interlocking blocks stack into a sturdy, reusable castle with turrets and flags. This craft supports construction skills and imaginative play.
Materials Needed
- 20 assorted Lego bricks (2×4 and 1×2 sizes)
- 4 small Lego flags
- Blue baseplate (20×20 cm)
- Plastic storage box
How to Make It
- Snap four 2×4 bricks together to form a square base.
- Stack three layers to build walls.
- Add 1×2 bricks along the top to form battlements.
- Place a flag on each corner.
- Build two smaller towers on either side using 2×2 bricks.
- Store in the box for repeated play.
13. Feather Butterflies
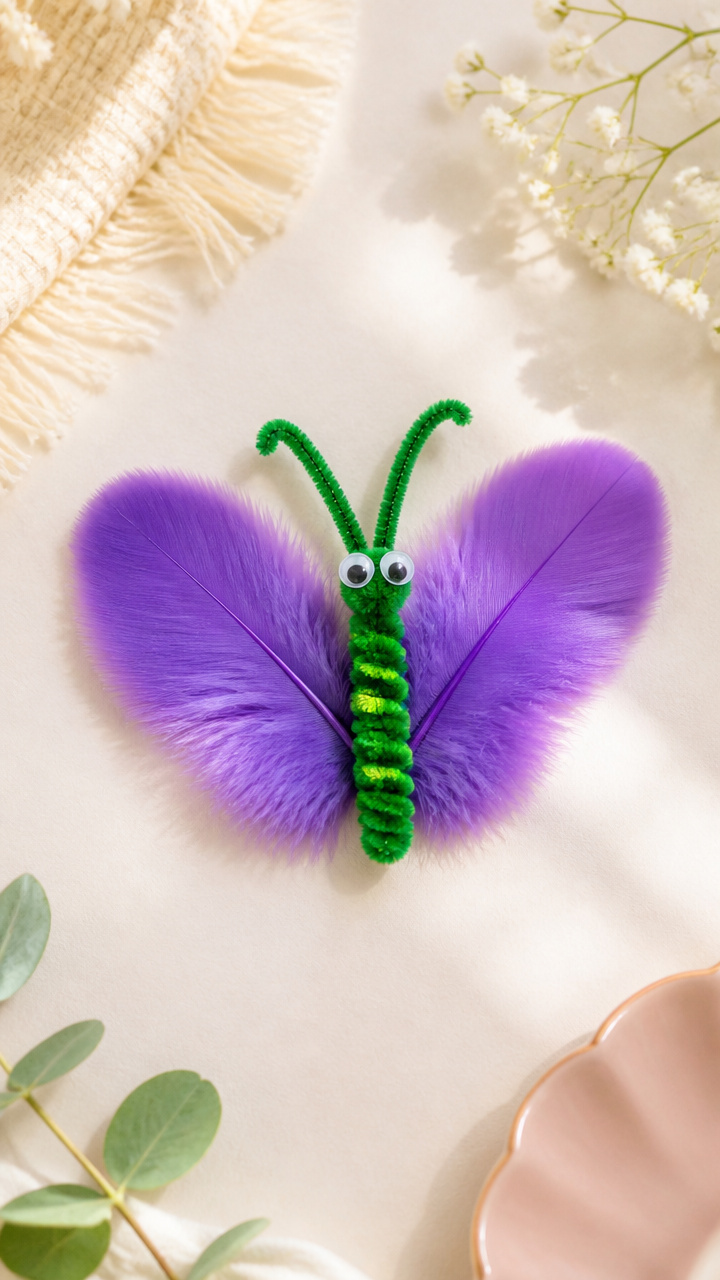
Soft dyed feathers fan out as wings with pipe cleaner bodies. This craft blends fine motor work with nature-inspired beauty.
Materials Needed
- 2 purple craft feathers (10 cm)
- 1 green pipe cleaner
- Glue stick
- Googly eyes (2, 0.5 cm)
- Scissors
How to Make It
- Fold the pipe cleaner in half and twist the top 2 cm to form antennae.
- Place glue along the folded edge of each feather.
- Press the pipe cleaner between both feathers at the fold.
- Glue googly eyes just above the body.
- Let dry for 20 minutes before handling.
14. Pasta Necklaces
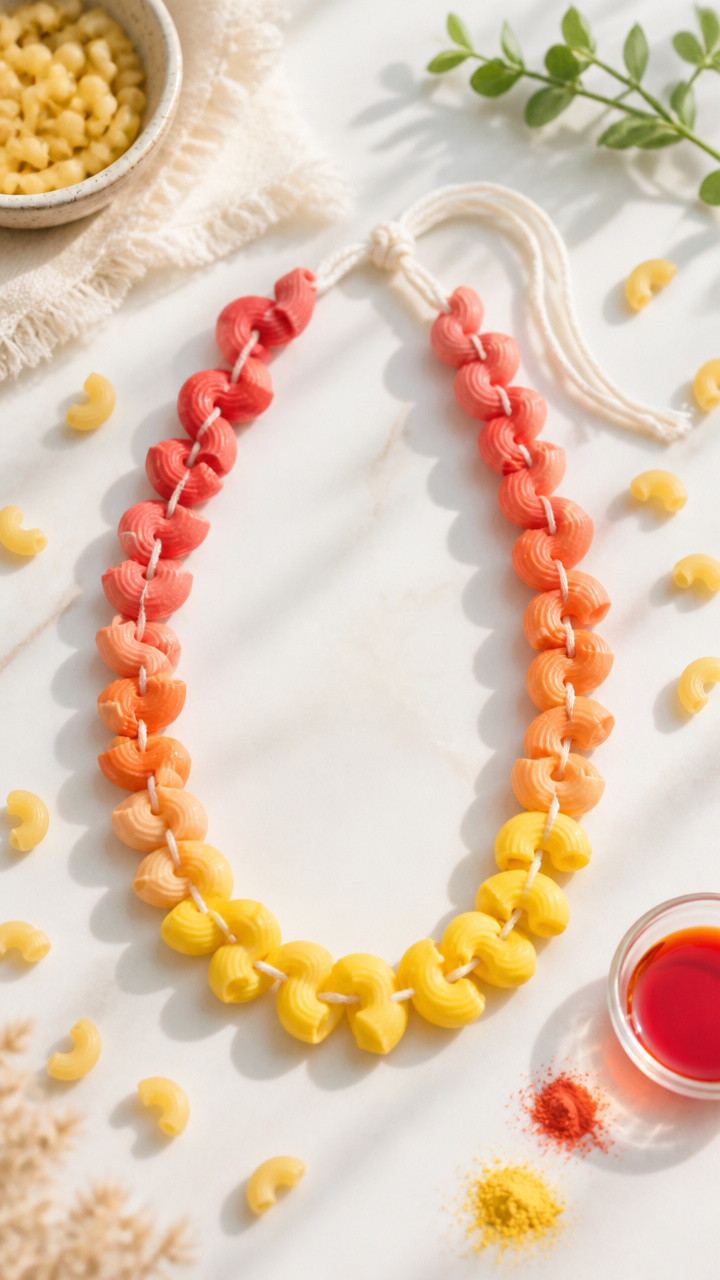
Rainbow dyed macaroni loops onto yarn to make wearable summer jewelry. This craft strengthens hand control and color sequencing.
Materials Needed
- Uncooked elbow macaroni (50 pieces)
- Ziplock bag
- Rubbing alcohol (1 tablespoon)
- Food coloring (5 drops red, 5 drops yellow)
- Yarn (60 cm, doubled)
- Tape
How to Make It
- Place macaroni in the bag with rubbing alcohol and food coloring.
- Shake gently for 1 minute until pieces are coated.
- Spread pasta on paper to dry for 3 hours.
- Tape one end of the yarn to the table.
- Let your toddler thread 20 dyed pieces onto the yarn.
- Tie the ends together to wear.
15. Bubble Wrap Octopus
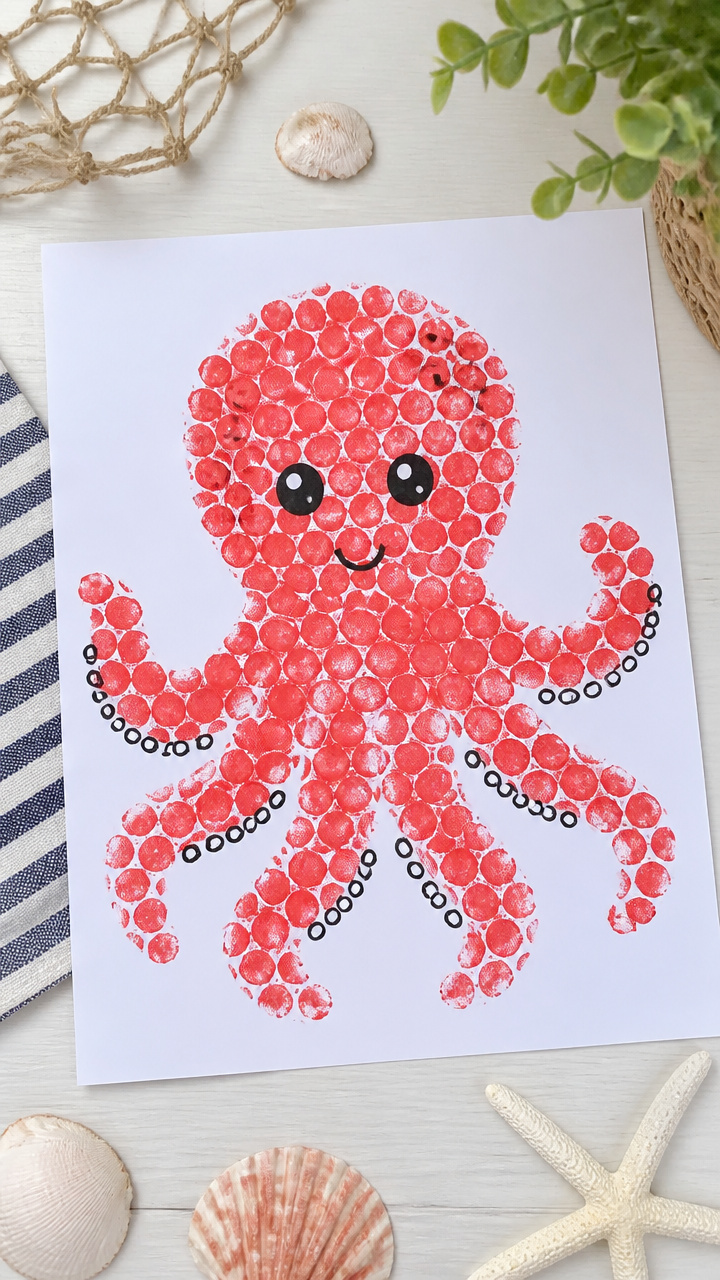
Inky tentacles splay from a bubbled head, made by pressing paint-covered wrap to paper. This craft explores texture and marine life.
Materials Needed
- Bubble wrap piece (10×15 cm)
- Red washable paint
- Foam brush
- A4 white paper
- Black marker
- Glue stick
- White craft foam (5×5 cm)
How to Make It
- Cut 8 tentacle strips from bubble wrap, each 2 cm wide and 10 cm long.
- Brush red paint evenly over one side of each tentacle.
- Press paint-side down onto the paper in a fan shape.
- Cut a circle from white foam and glue it on top as the face.
- Draw two eyes and a smile with the black marker.
- Let dry for 60 minutes.
Each of these crafts holds the light of summer and the magic of small hands at work. Gather what you have, sit beside your toddler, and let the making begin.