12 Easy Dollar Tree Summer Crafts on a Budget
Summer is the perfect time to get creative with simple supplies and a little imagination. With just a trip to Dollar Tree, you can make cheerful, handmade pieces that add personality to your home, patio, or next gathering.
These projects are designed to be approachable for crafters of all levels. Each one uses affordable, easy-to-find materials and delivers something truly unique.
1. Painted Mason Jar Lanterns
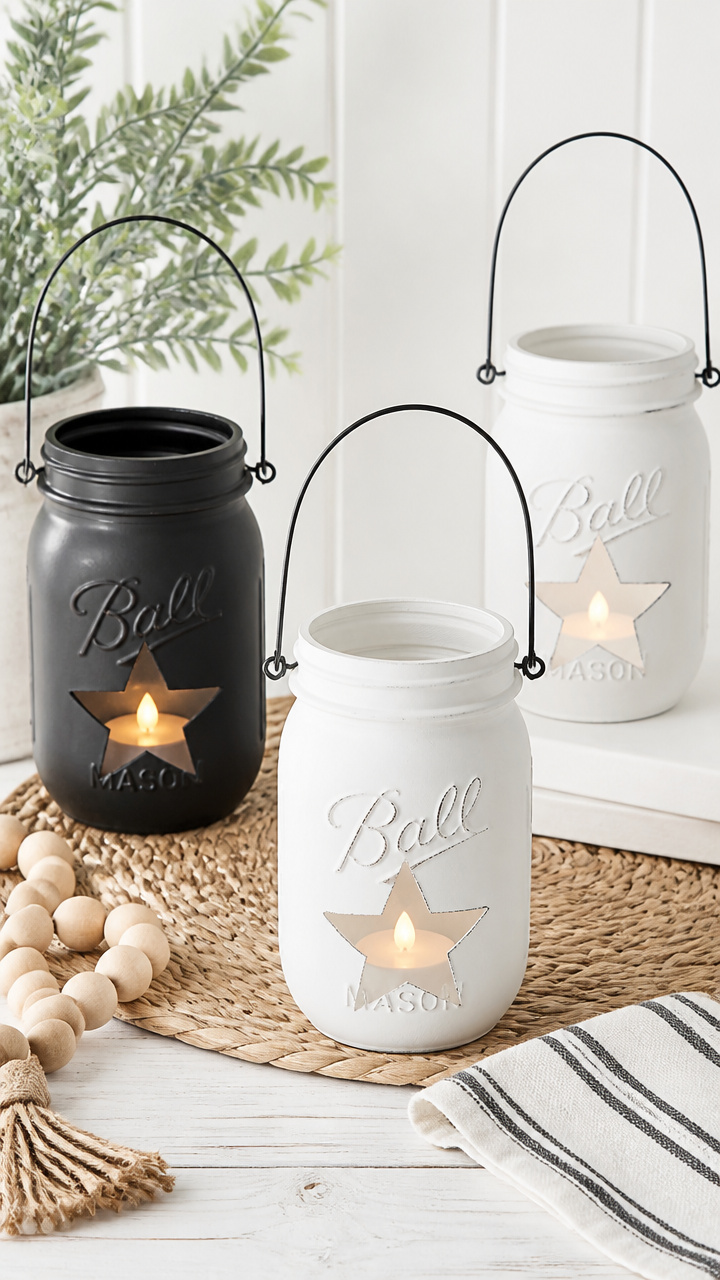
Smooth glass jars glow warmly when lit from within. This version uses outdoor paint that won’t wash off in the rain.
Materials Needed
- 3 pint-sized mason jars
- 1 small bottle matte white acrylic paint
- 1 small bottle black acrylic paint
- 1 foam brush, 1 inch
- 1 plastic palette or paper plate
- Tealight candles, battery-operated, 3
How to Make It
- Wipe each mason jar with a damp cloth to remove dust and let it dry completely.
- Pour a dime-sized amount of white paint onto the palette. Use the foam brush to coat the outside of the first jar completely.
- Let the painted jar sit undisturbed for 15 minutes, then apply a second coat if any glass shows through.
- Once the white layer is dry, use the black paint to draw simple dots, stripes, or tribal patterns around the jar.
- Let the final coat dry for at least 30 minutes before placing a tealight inside.
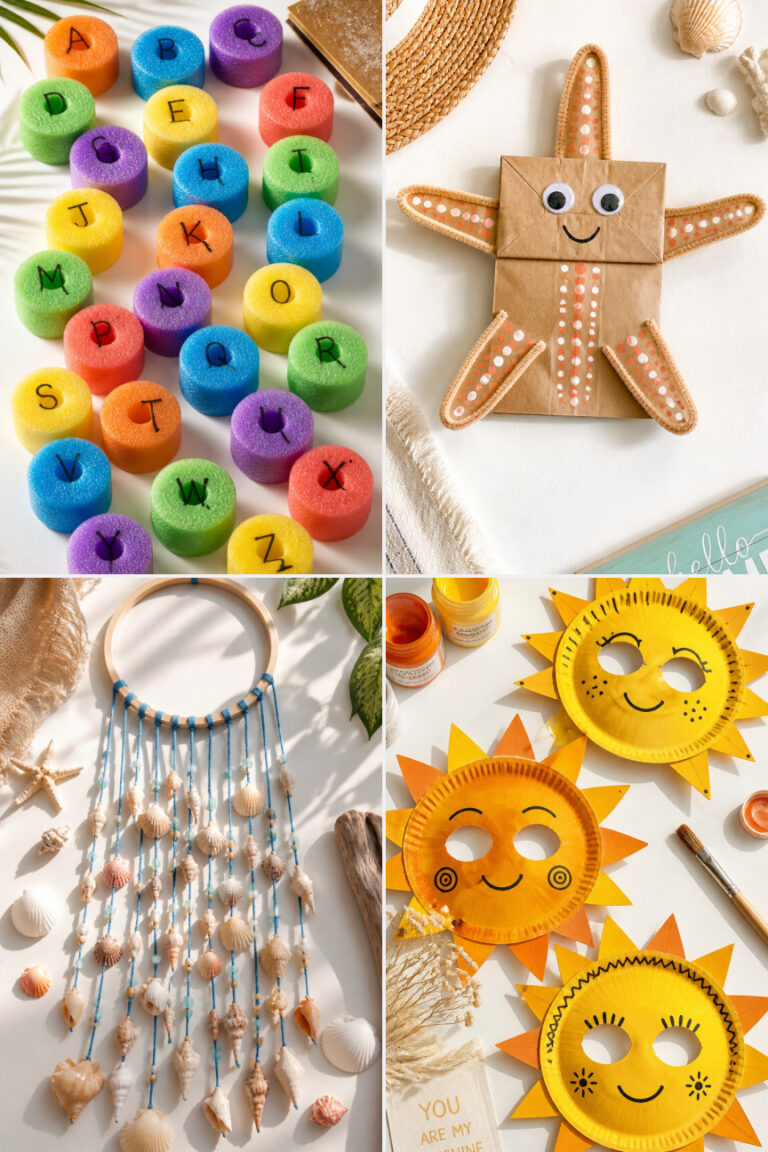
2. Seashell Wind Chime

Delicate clinking sounds drift through the air as wind moves these natural shells. Hang it near your back door or porch railing.
Materials Needed
- 1 wooden embroidery hoop, 8 inches
- 5 medium seashells with holes
- 1 roll thin jute twine
- 1 small pair of scissors
- 1 hot glue gun
- 1 small clear-drying craft glue
How to Make It
- Separate the two rings of the embroidery hoop and set aside the smaller inner ring.
- Cut five 10-inch lengths of jute twine. Tie one end of each piece evenly spaced around the outer hoop using a double knot.
- Slide one seashell onto each dangling twine strand and secure it with a single knot below the shell to hold it in place.
- Add a dab of clear-drying craft glue to each knot to prevent slipping over time.
- Tie the ends of all five strands together above the hoop and trim excess for a clean finish.
3. Popsicle Stick Photo Frame
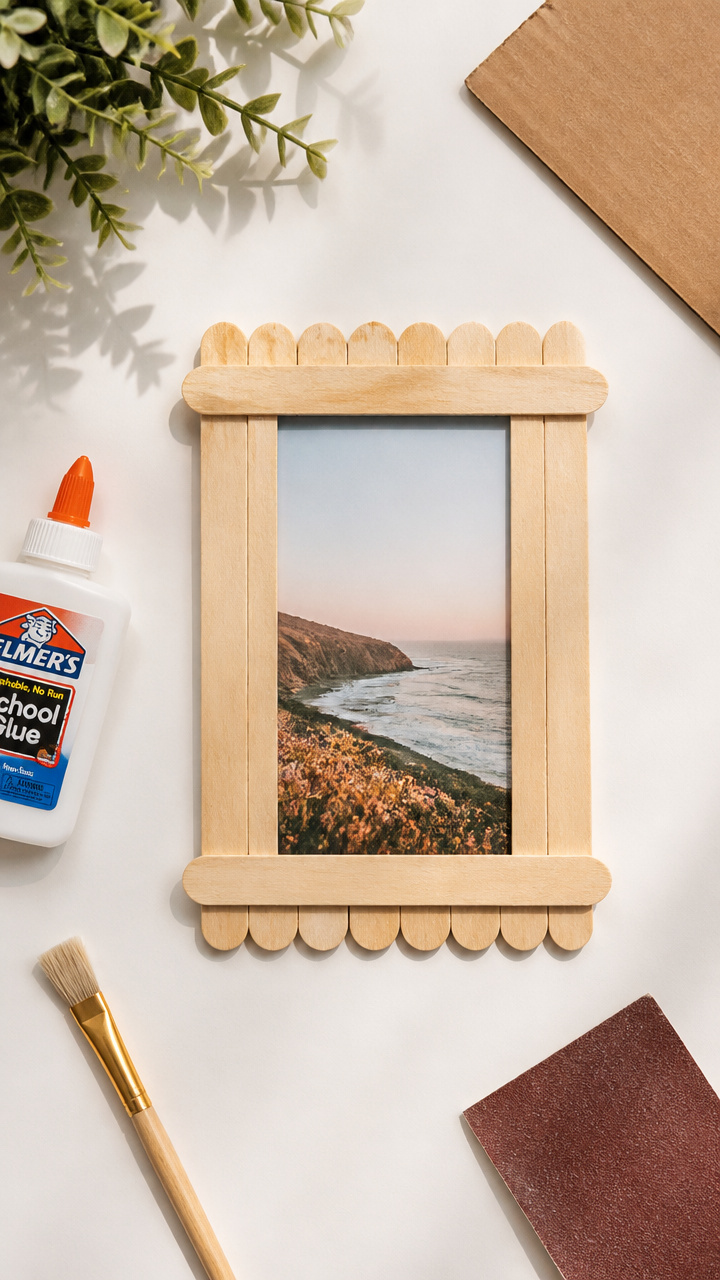
A chunky rustic frame holds a favorite summer snapshot. The sticks give it a handmade charm perfect for gifting.
Materials Needed
- 20 flat wooden craft sticks, 4.5 inches
- 1 bottle white school glue
- 1 small paintbrush
- 1 printed photo, 3×5 inches
- 1 sheet sandpaper, fine grit
- 1 small rectangle of cardboard, 5×7 inches
How to Make It
- Lay eight craft sticks side by side on a flat surface, touching edge to edge. Brush glue across the top edges and lay four sticks perpendicularly across them to form a grid.
- Let the glued grid dry flat for 20 minutes, then flip and repeat on the other side for added strength.
- Glue two more sticks vertically along the left and right sides of the front for a border, letting glue dry between layers.
- Sand any rough edges lightly with sandpaper. Place the cardboard on the back and center the photo on the front.
- Slide the photo into place behind the top row and secure the bottom with a dot of glue on the back stick.
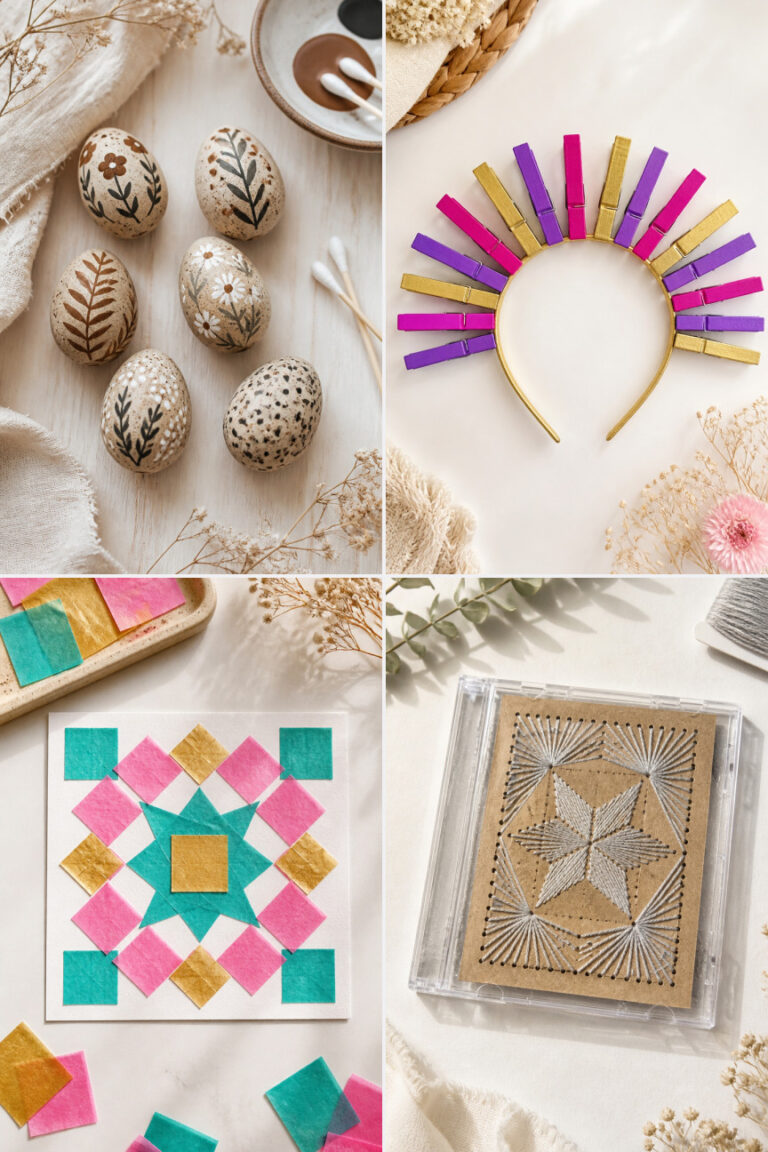
4. Colorful Tissue Paper Banner
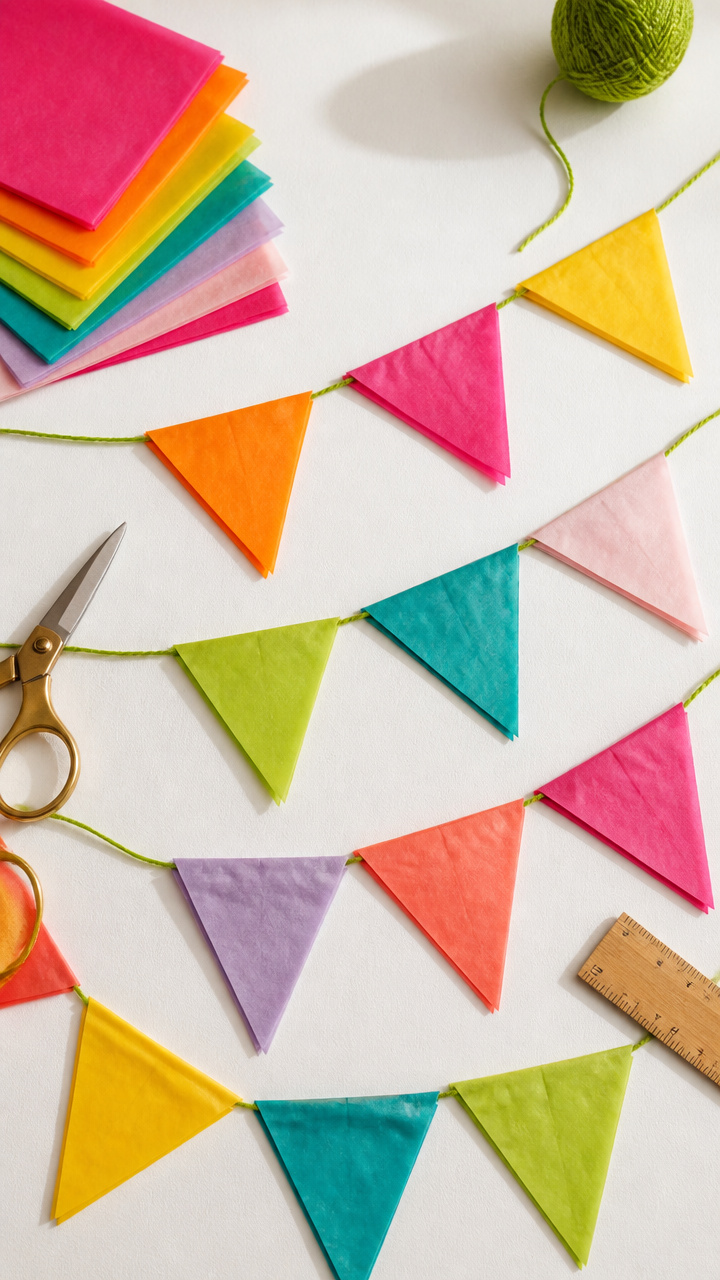
Bright triangles flutter from a string line, adding instant festivity to a backyard party. You can match any color scheme.
Materials Needed
- 1 roll bright green yarn, 50 feet
- 1 pack assorted tissue paper sheets, 20 count
- 1 pair sharp scissors
- 1 ruler
- 1 pencil
How to Make It
- Cut each tissue paper sheet into quarters to make 80 small squares, each about 6×6 inches.
- Fold one square diagonally into a triangle, then fold it in half again to create a smaller triangle.
- Use scissors to cut small shapes along the folded edges, like half hearts or arches, then unfold to reveal a lacy pattern.
- Unfold the triangle and sandwich its top point between two adjacent folds of the green yarn every 6 inches.
- Continue until the entire yarn length is filled, alternating colors and patterns for visual interest.
5. Mini Succulent Planters
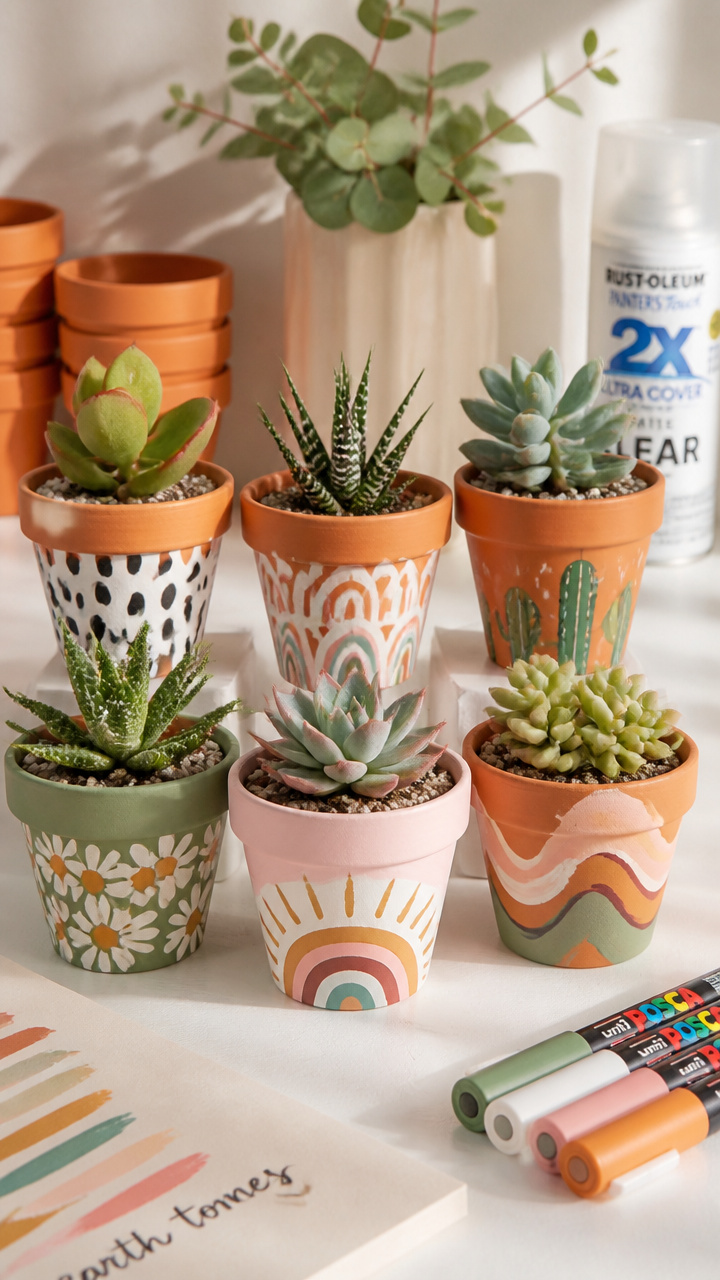
Tiny clay pots hold real succulents and fit on windowsills or desks. Painted designs make each one personal.
Materials Needed
- 6 small terracotta pots, 2 inches tall
- 1 set acrylic paint markers, assorted colors
- 1 small spray bottle of sealant
- 6 succulent plants in 1-inch pots
- 1 bag of cactus soil mix, 1 quart
How to Make It
- Wipe each terracotta pot with a dry cloth to remove dust before decorating.
- Draw polka dots, zigzags, or sunbursts on the pots using the paint markers. Let the ink dry for 10 minutes.
- Apply one light coat of spray sealant to each decorated pot, holding the can 10 inches away.
- Fill each pot halfway with cactus soil, then gently place a succulent on top and press soil around its base.
- Water lightly once after planting, then only when soil feels dry to the touch.
6. Beach Towel Tote Bag
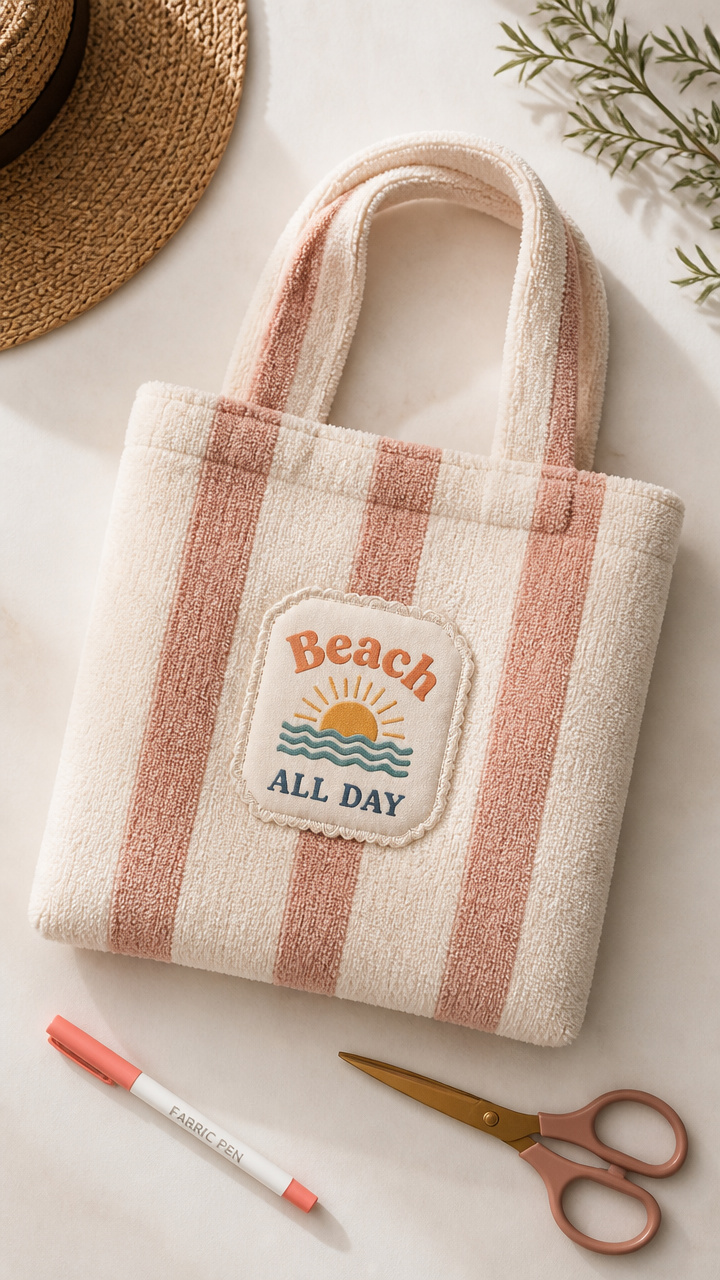
A soft cotton towel becomes a roomy tote with sturdy handles. It’s ideal for carrying books, snacks, or extra sunscreen.
Materials Needed
- 1 plain cotton beach towel, 30×60 inches
- 1 roll wide double-stick tape
- 1 fabric pen
- 1 pair sharp sewing scissors
- 1 iron-on patch, 3×3 inches
How to Make It
- Lay the towel flat with the shorter edges facing left and right. Fold the top third down toward you to create a deep pocket.
- Use double-stick tape to secure the sides of the folded section, forming the bag body.
- Cut two 20-inch strips from leftover towel fabric for handles. Position one strip at each top corner, extending into the folded pocket.
- Press an iron-on patch centered over each handle where it meets the bag to reinforce the seam.
- Use the fabric pen to write your name or a fun word on the front to keep it from getting lost.
7. Glitter Flip-Flop Ornaments
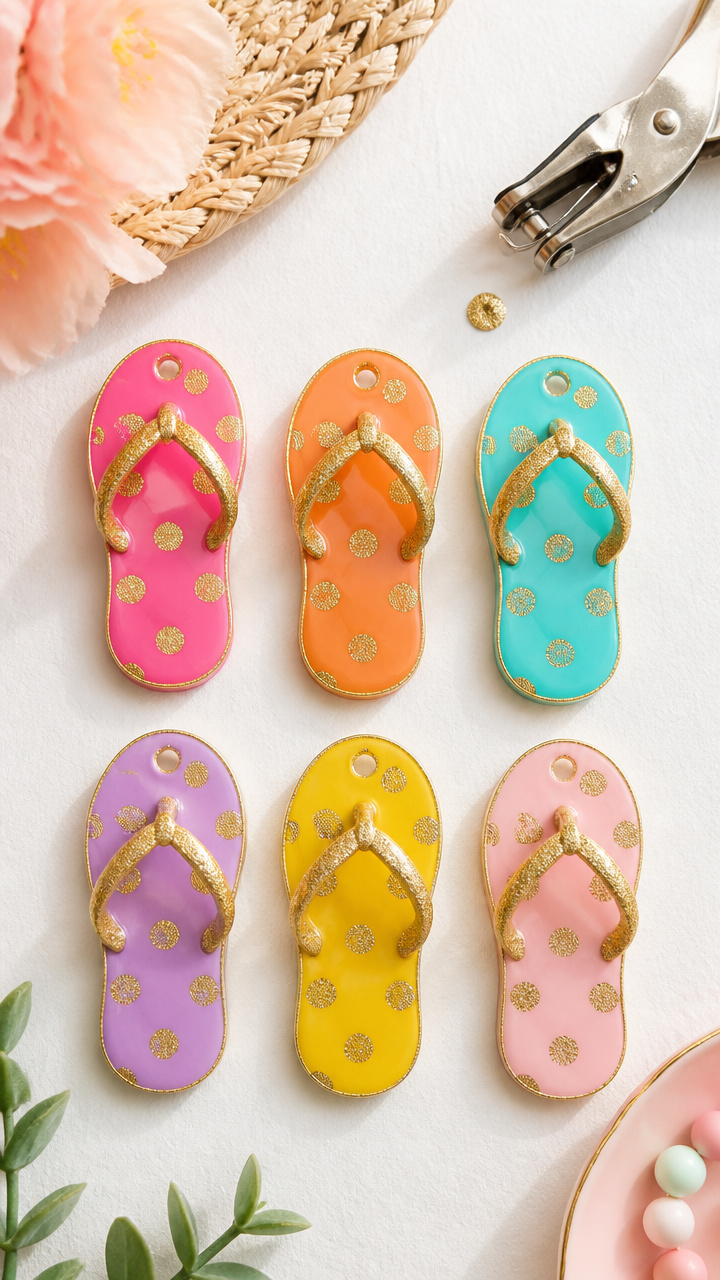
These tiny sandals sparkle on shelves or walls. They’re lightweight and fun, capturing summer vibes year-round.
Materials Needed
- 3 pairs foam flip-flops, assorted colors
- 1 small bottle fine gold glitter
- 1 small paintbrush
- 1 bottle liquid school glue
- 1 hole punch, round
How to Make It
- Separate each flip-flop into two parts: the sole and the strap. Set aside the straps.
- Brush a thin layer of liquid glue over the top of one sole and sprinkle gold glitter evenly across it.
- Tap off excess glitter over a trash can and let the sole dry face-up for 15 minutes.
- Use the hole punch to make a hole at the top of each glittered sole.
- Thread a 6-inch piece of thread through the hole to hang as decoration.
8. Sun-Catcher Bottle Cap Magnets
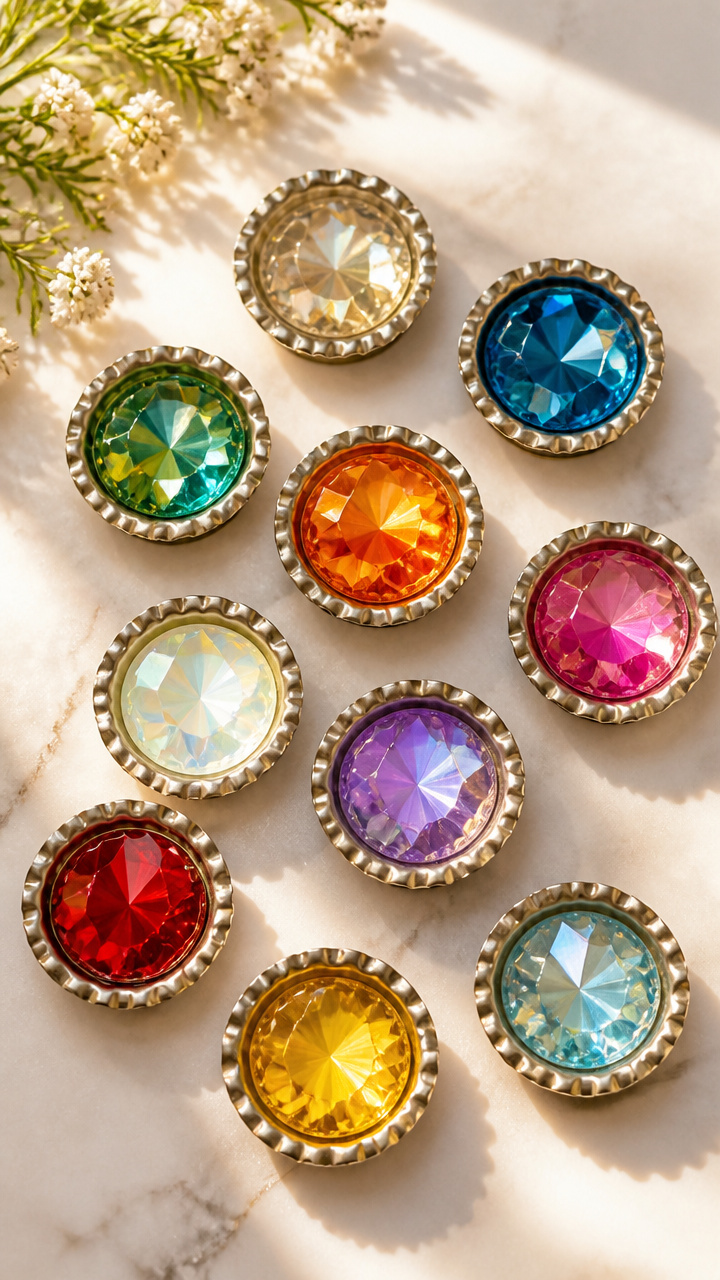
Shiny caps reflect light and stick to metal surfaces. They’re playful accents for fridges or magnetic boards.
Materials Needed
- 12 aluminum soda bottle caps
- 1 tube strong craft glue
- 1 pack self-adhesive magnet discs, 12 count
- 1 small tray of colorful resin gems, assorted sizes
- 1 pair tweezers
How to Make It
- Lay all bottle caps open-side up on a clean table.
- Use tweezers to place three to five resin gems in the center of each cap, arranging by color or size.
- Squeeze a small drop of craft glue under each gem to secure it without covering the top.
- Let the glue dry completely for 25 minutes before handling.
- Press one magnet disc into the back of each cap, centering it carefully.
9. Paper Fan Wall Decor
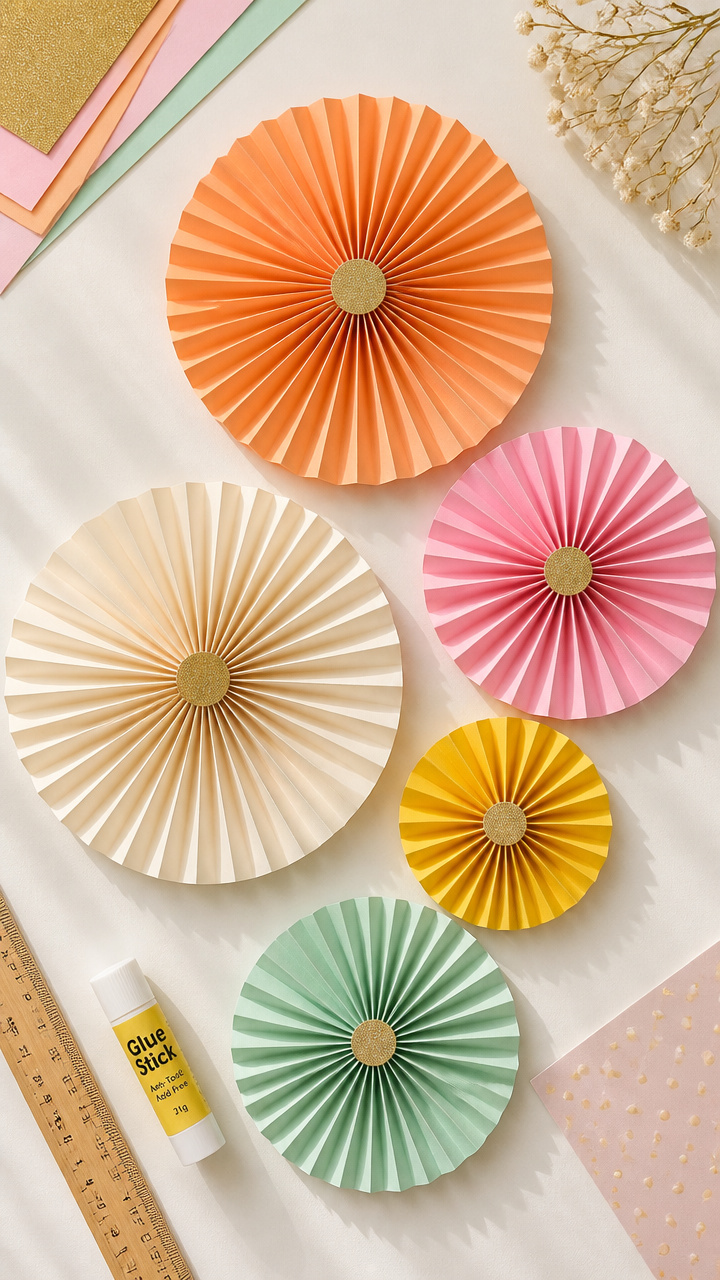
Accordion-folded fans pop with bold patterns. Mount them side by side for a retro look behind a desk or bed.
Materials Needed
- 6 sheets A4 colored construction paper
- 1 ruler
- 1 pencil
- 1 glue stick
- 1 roll double-sided mounting tape
How to Make It
- Use the ruler and pencil to mark 1-inch lines across the short edge of one paper sheet.
- Fold along each line, alternating direction to create an accordion pattern all the way across.
- Once fully folded, bring both ends together and glue the last panel to the first to form a circle.
- Repeat with remaining sheets to make six fans total.
- Use mounting tape to attach each fan to the wall in a staggered row, leaving 2 inches between.
10. Beaded Drink Charms
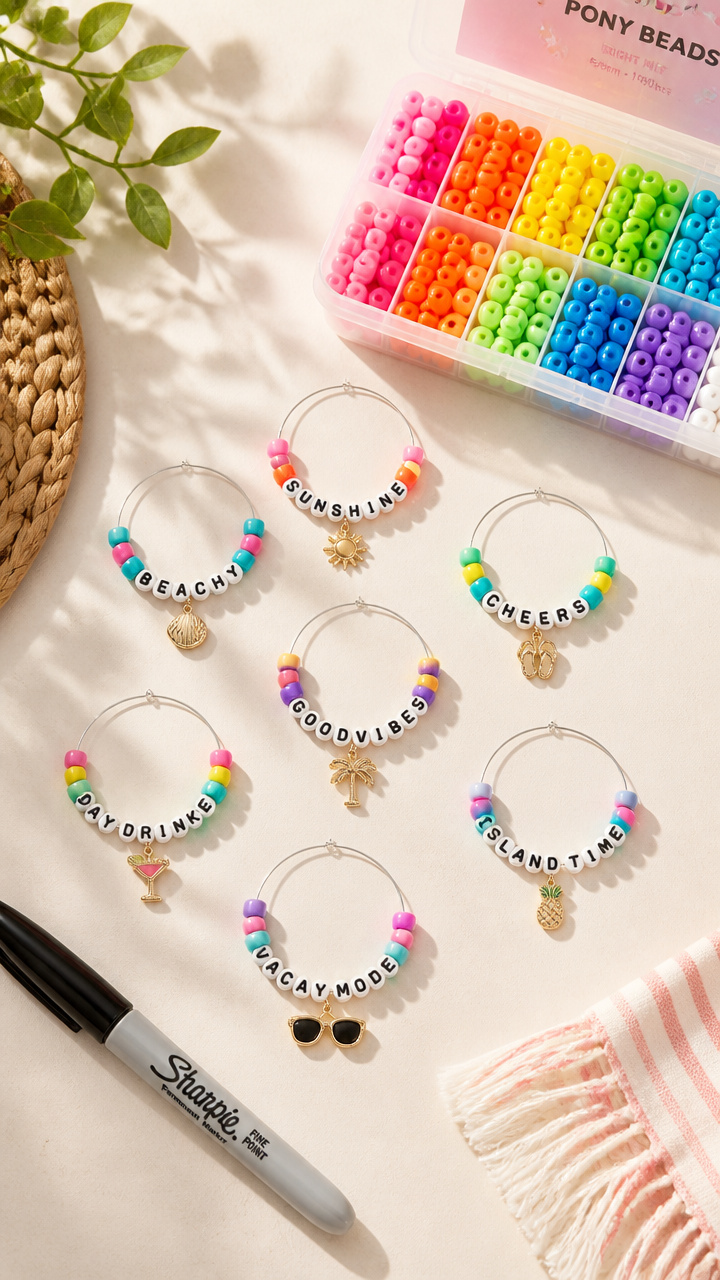
Colorful beads slide onto wire loops to identify each person’s drink. No more guessing which glass is yours.
Materials Needed
- 1 pack plastic pony beads, multicolor
- 1 spool thin craft wire, silver
- 1 wire cutter
- 1 pair needle-nose pliers
- 1 permanent marker
How to Make It
- Cut 8-inch lengths of craft wire using the wire cutter. Make 6 pieces.
- Use needle-nose pliers to bend one end of a wire into a small loop, then wrap the other end around to form a circle.
- Slide three to five beads onto the wire circle, spacing them evenly.
- Twist the ends together at the back to secure the beads in place.
- Use the marker to write a name on one bead per charm for easy identification.
11. Washi Tape Picture Grid
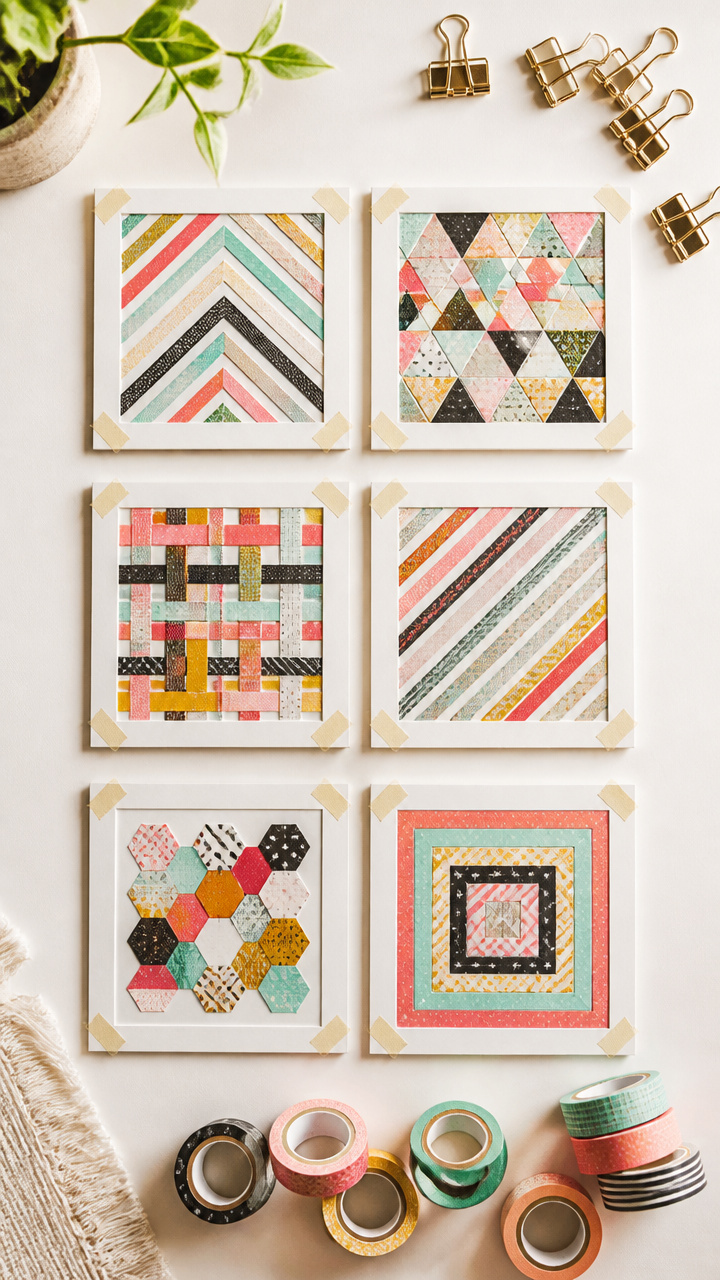
Strips of patterned tape turn blank walls into a gallery. No nails needed, so it’s safe for rentals.
Materials Needed
- 3 rolls washi tape, different patterns
- 1 roll painter’s tape
- 1 ruler
- 4 small binder clips
- 1 set of 6 matching photo frames, 3×3 inches
How to Make It
- Choose a flat wall space and use painter’s tape to mark a 24×24 inch square lightly.
- Clip the top of each photo frame with a binder clip to create a hanging tab.
- Cut four 24-inch strips of washi tape and press one horizontally across the upper part of the wall within the taped square.
- Press vertical strips every 6 inches to form a grid, using different patterns for contrast.
- Hang each frame by attaching the binder clip to a horizontal tape line.
12. Frosted Glass Beverage Jars
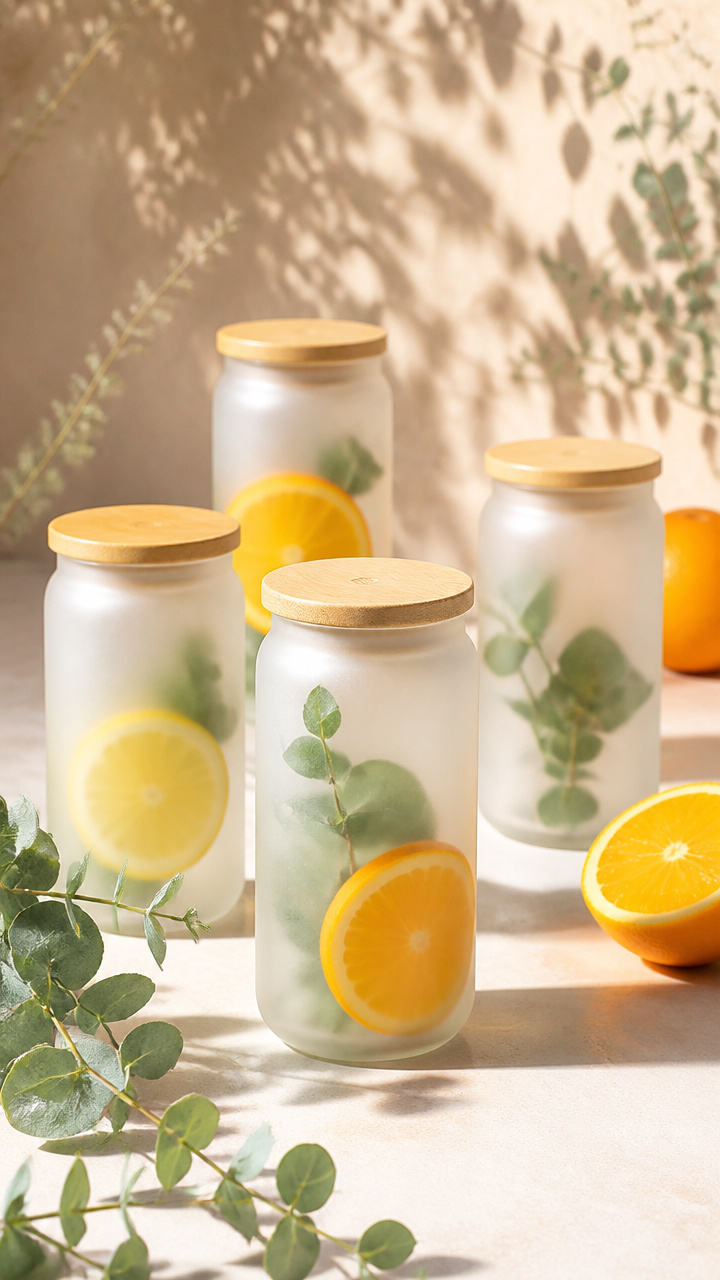
Clear jars look elegant with a frosted finish that hides fingerprints. Perfect for lemonade or iced tea service.
Materials Needed
- 4 glass jars with lids, 16 oz
- 1 can matte white spray paint
- 1 roll paper towels
- 1 bottle rubbing alcohol
- 1 cotton ball
How to Make It
- Remove lids and wash jars thoroughly with warm soapy water. Rinse and dry completely.
- Wipe the outside of each jar with a cotton ball dipped in rubbing alcohol to remove oil residue.
- Shake the spray paint can for 30 seconds and hold it 8 inches from the first jar.
- Spray in slow, even strokes, rotating the jar for full coverage. Let dry 15 minutes.
- Apply a second coat if any glass shows through, then let cure for 1 hour before use.
You’ve got everything you need to start crafting today. Grab your basket and head to Dollar Tree with this list in hand. These ideas are simple enough to finish in an afternoon and special enough to enjoy all season long.