13 Thanksgiving Leaf Crafts to Make With Kids
The air turns crisp, the trees blush with color, and your home starts to feel like a cozy gathering place. This season, invite your kids to create keepsakes that celebrate fall’s beauty using simple materials and joyful hands-on time.
These crafts blend natural charm with kid-friendly fun, turning leaves into art that decorates your walls, tables, and hearts. Each one is easy to complete in an afternoon and made to last as a sweet memory.
1. Leaf Print Place Mats
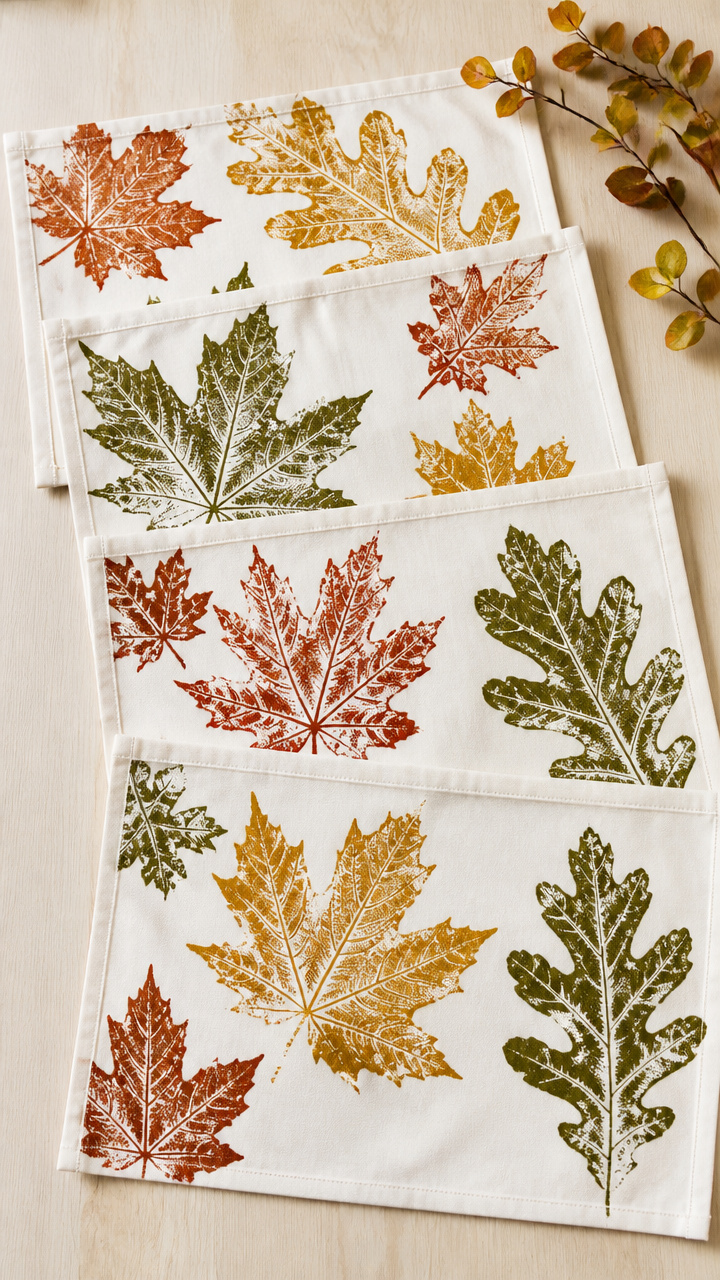
Bold leaf patterns stamped on fabric make durable, reusable place mats that bring autumn to your table. Kids love pressing real leaves into paint and seeing the detailed prints emerge.
Materials Needed
- 4 pieces of white cotton fabric, 18 x 14 inches each
- Fabric paint in rust, gold, and olive green
- Paintbrushes, 1-inch flat tip (3)
- Real maple and oak leaves, cleaned and dried
- Iron
- Parchment paper, 1 sheet
How to Make It
- Lay one fabric piece flat on a protected surface. Use a paintbrush to apply a thin, even layer of rust fabric paint onto the back of a maple leaf.
- Press the painted side of the leaf firmly onto the fabric near one corner. Lift straight up without sliding to reveal the print.
- Repeat with different leaves and colors, spacing prints across the mat. Let dry completely for 2 hours.
- Once dry, cover the printed side with parchment paper and press with a hot iron for 30 seconds to set the paint.


2. Crayon Leaf Rubbings Banner
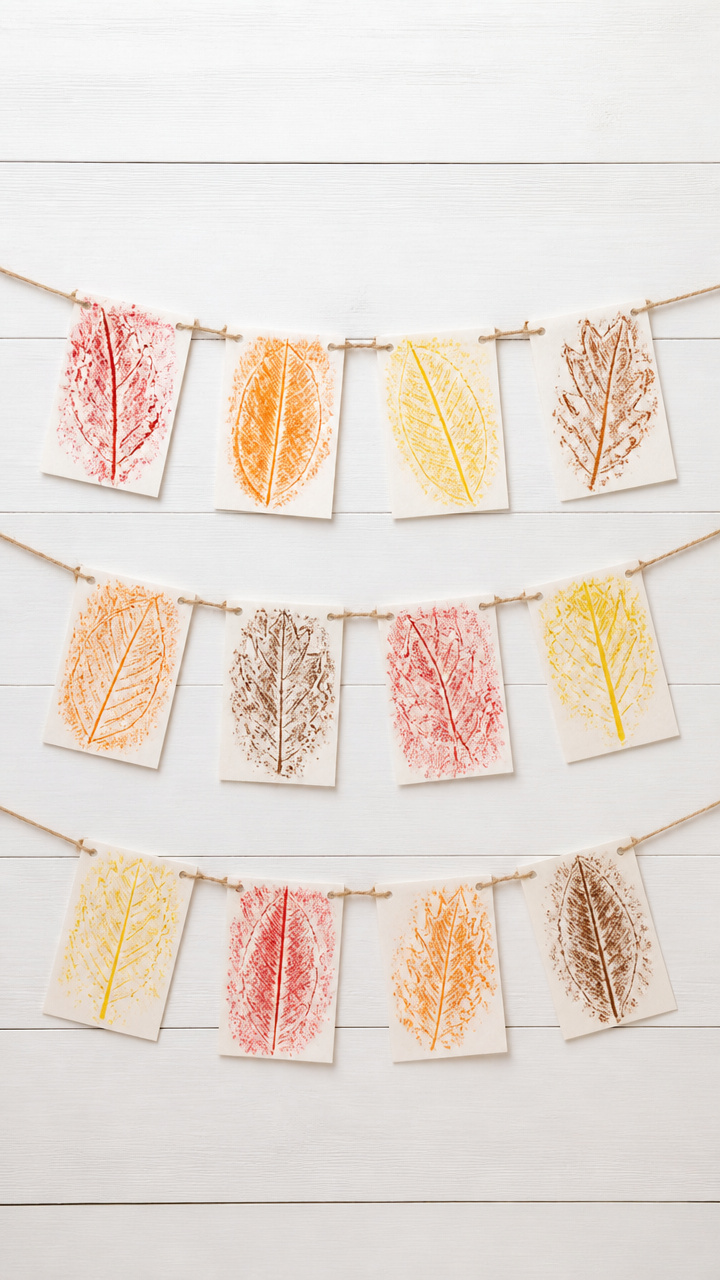
Delicate rubbings capture the fine veins and edges of real leaves, strung together into a fluttering garland. The soft scratch of crayon on paper feels satisfying and meditative for little hands.
Materials Needed
- 12 assorted fallen leaves, flat and not brittle
- White drawing paper, cut into 6 x 4 inch rectangles (12)
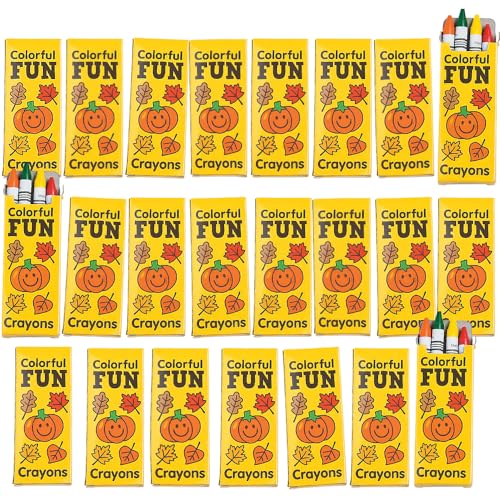
- Autumn-colored crayons with no paper wrappers: red, orange, brown, yellow
- Scissors
- Hole punch
- Jute twine, 6 feet
How to Make It
- Place one leaf under a paper rectangle, vein side up. Hold it flat with one hand.
- Use the side of a red crayon to rub gently over the paper where the leaf lies. Apply light pressure to see the texture clearly.
- Repeat with all leaves and papers using different crayon colors. Let kids choose their combinations.
- Cut any ragged paper edges. Punch one hole in each top corner of the rectangles.
- Thread jute twine through the holes, tying knots between each piece to space them evenly.

3. Pinecone and Leaf Wreath
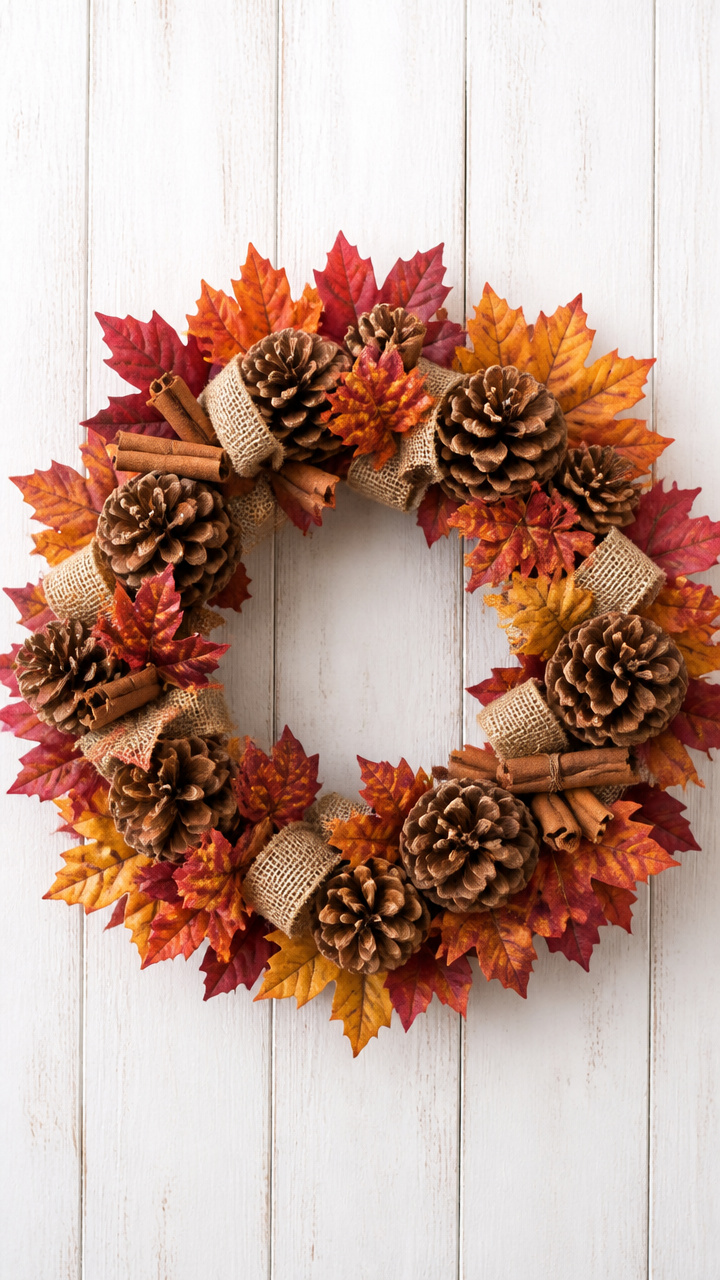
A full, textured wreath made from pinecones and colorful leaves becomes a front door welcome. It’s sturdy enough to hang outside and looks richer each day.
Materials Needed
- Wire wreath frame, 12 inches in diameter
- Hot glue gun and glue sticks (low-temp)
- 8 medium pinecones
- 15 pressed fall leaves in red, gold, and maroon
- Small cinnamon sticks, 6
- Ribbon, burlap, 1 inch wide, 2 feet
How to Make It
- Plug in the glue gun and let it heat. Work on a heat-safe surface.
- Glue one pinecone to the outer edge of the wreath frame, holding it in place for 15 seconds until set.
- Add leaves by gluing their stems to the frame behind and around pinecones, overlapping slightly for fullness.
- Tuck cinnamon sticks between clusters, gluing at the base. Continue until the frame is covered.
- Tie the ribbon into a bow and glue it at the bottom of the wreath.


4. Leaf Mosaic Picture Frame
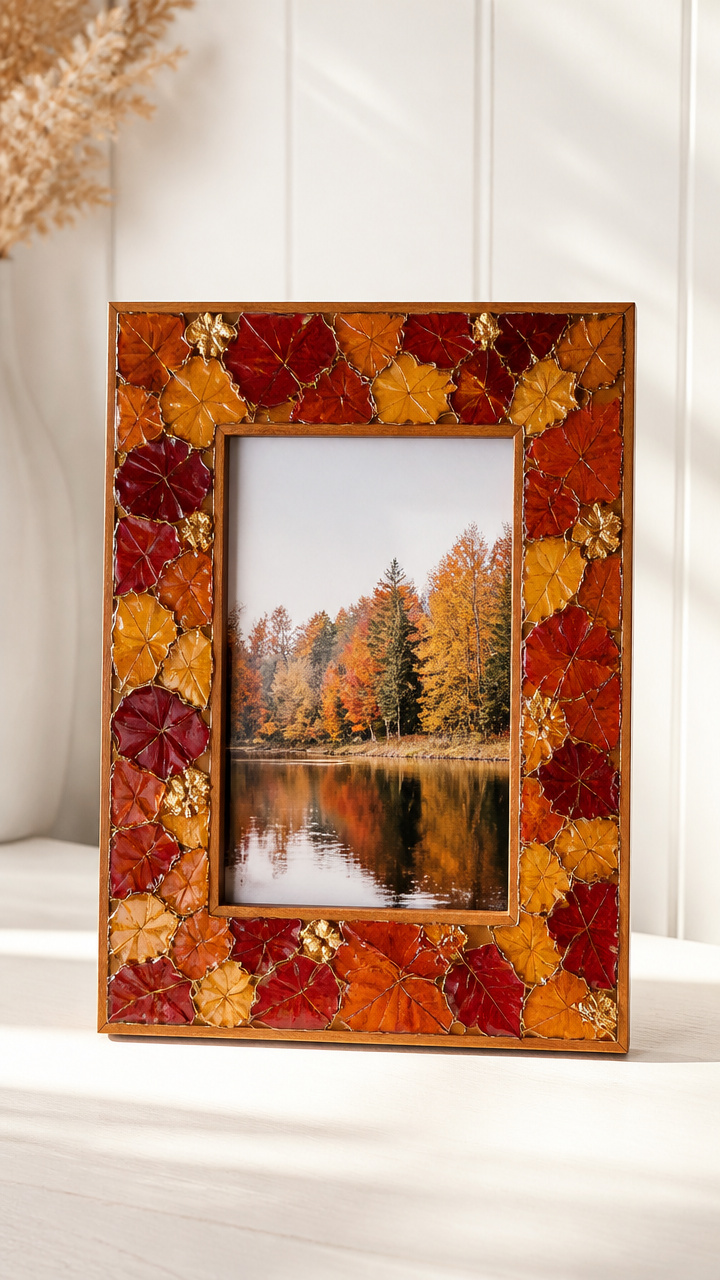
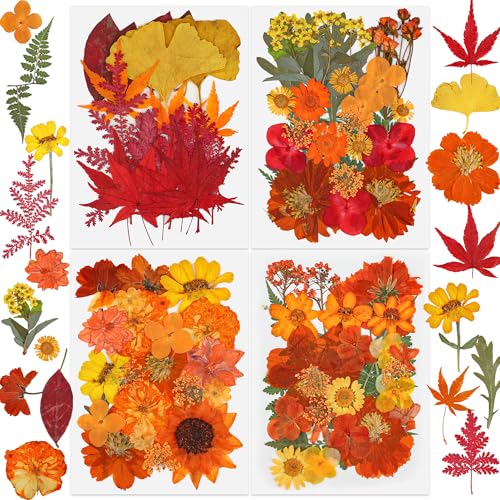
Tiny leaf pieces arranged like a puzzle form a shimmering border around a family photo. The glossy finish makes it perfect for holiday mantels.
Materials Needed
- Plain wooden photo frame, 5 x 7 inches
- Decoupage glue
- Craft brush, 1-inch
- Fall leaves, small and flexible, 10
- Scissors
- Gold metallic pen
- Family photo, 5 x 7 inches
How to Make It
- Use scissors to cut leaves into 1-inch pieces, removing thick stems. Sort by color.
- Apply a thin layer of decoupage glue to the front outer inch of the frame using the brush.
- Press leaf pieces glue-side down, close together, to form a mosaic border. Overlap slightly and mix colors.
- Let dry for 1 hour. Outline each piece with the gold pen for definition.
- Apply a final coat of decoupage glue over all the leaves. Dry overnight. Insert the photo.


5. Salt Dough Leaf Ornaments
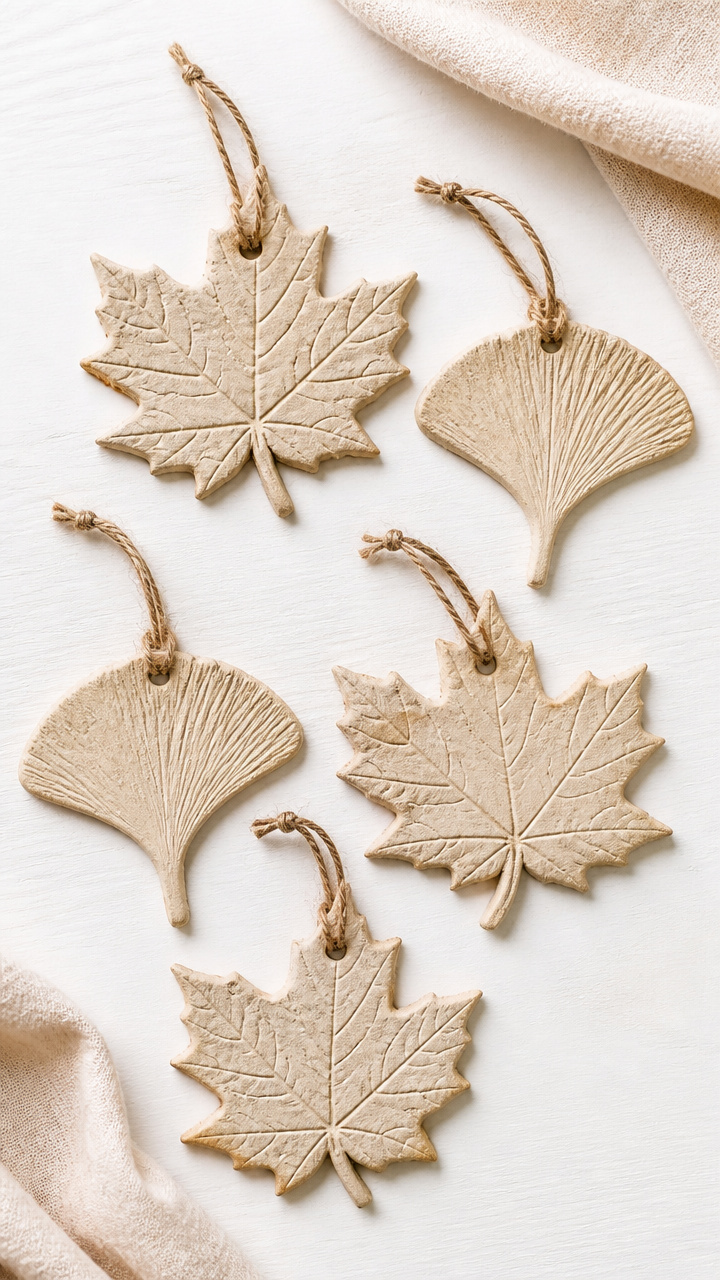
Soft salt dough shaped around real leaves bakes into keepsake ornaments you can paint and hang year after year. They hold every vein and ripple perfectly.
Materials Needed
- 2 cups all-purpose flour
- 1 cup table salt
- 3/4 cup warm water
- Mixing bowl
- Rolling pin
- Maple and ginkgo leaves, clean and dry
- Straw
- Acrylic paint in deep red, mustard, chocolate brown
- Clear varnish spray
- Red yarn, 12 inches per ornament
How to Make It
- In the bowl, mix flour and salt. Slowly add water and stir until a smooth dough forms. Knead 2 minutes on a floured surface.
- Roll the dough to 1/4 inch thick. Press a maple leaf firmly into the dough, then lift carefully.
- Use the straw to poke a hole near the top edge for hanging. Repeat to make 6 ornaments.
- Bake at 250°F on a parchment-lined tray for 2 hours, flipping halfway. Cool completely.
- Paint each ornament to match real leaf colors. Let dry, then spray with varnish. Thread yarn through holes.


6. Leaf and Cotton Ball Turkey
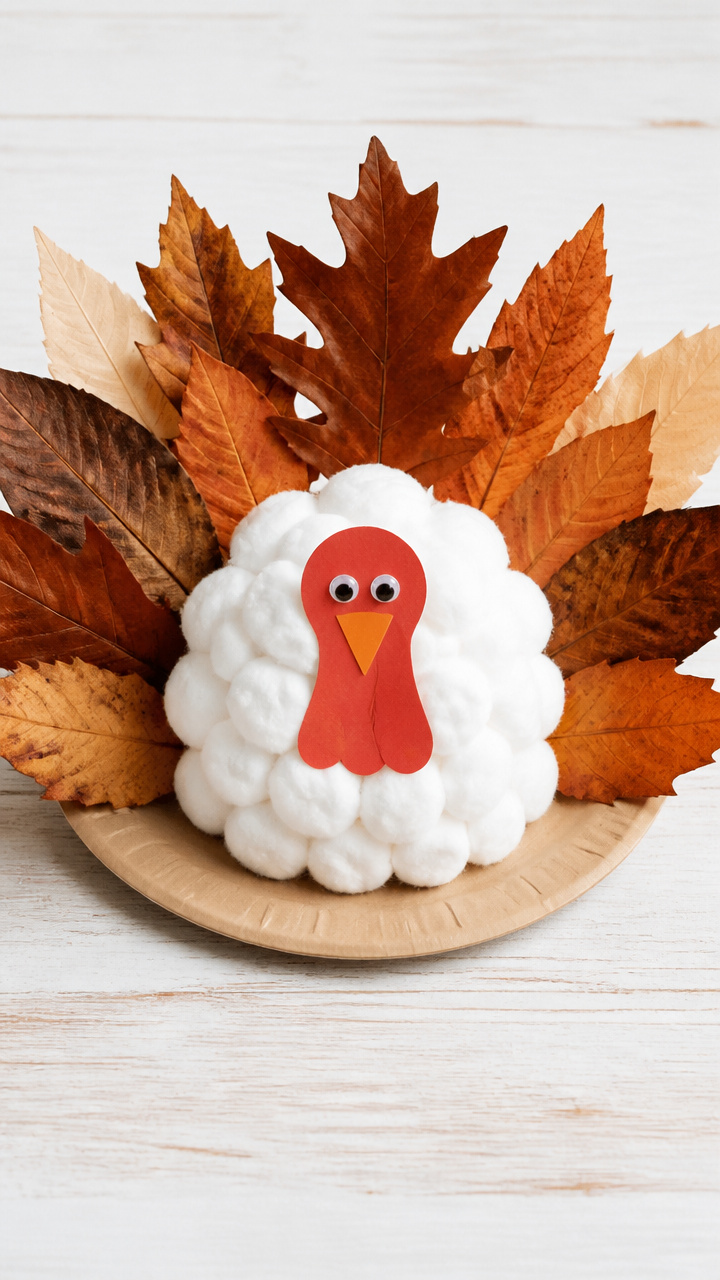
A fluffy turkey body made of cotton balls with leaf feathers stands proudly on a paper plate base. It’s a cuddly centerpiece full of texture and charm.
Materials Needed
- 1 paper plate per turkey
- Green, orange, and red craft foam sheets
- Scissors
- Hot glue gun and glue sticks
- Cotton balls, 1 cup
- Real oak and birch leaves, 5 per turkey
- Googly eyes, 2 per turkey
- Pencil
How to Make It
- Cut the center circle out of the paper plate, leaving a ring. Flip it over and lay it flat.
- Draw a turkey head shape on orange foam and cut it out. Draw a wattle on red foam and cut it smaller.
- Glue the head to the edge of the ring. Glue the wattle below it. Add googly eyes above the beak.
- Glue cotton balls tightly together in the center of the ring to form the body.
- Arrange leaves around the back half of the ring, tips pointing outward. Glue each stem to the plate.


7. Pressed Leaf Suncatcher
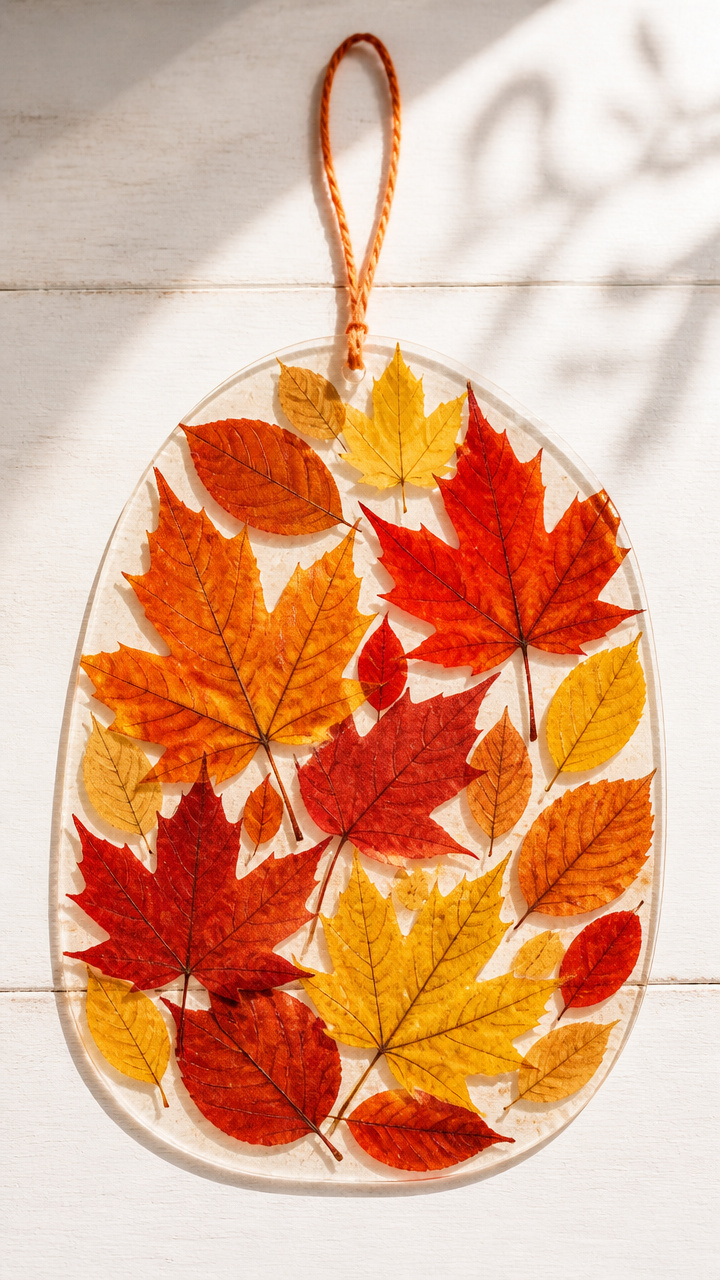
Translucent leaves sandwiched in contact paper glow like stained glass when hung in a sunny window. The process teaches patience as kids learn to press and preserve.
Materials Needed
- Contact paper, 12 x 18 inches, clear
- Fall leaves, flat and colorful, 8 per suncatcher
- Rolling pin
- Heavy books, 3
- Scissors
- Yarn, 10 inches
- Hole punch
How to Make It
- Layer 2 sheets of printer paper with a leaf inside. Roll over it firmly with the rolling pin for 1 minute.
- Slide the leaf between heavy books and leave for 2 days to press completely flat.
- Cut a 10-inch circle from contact paper, peel the backing halfway.
- Place leaves on the sticky side in a sunburst pattern. Avoid overlapping.
- Peel the rest of the backing and fold the top half over to seal. Trim edges smooth.
- Punch a hole at the top and thread yarn through for hanging.


8. Leaf Crown with Pipe Cleaners
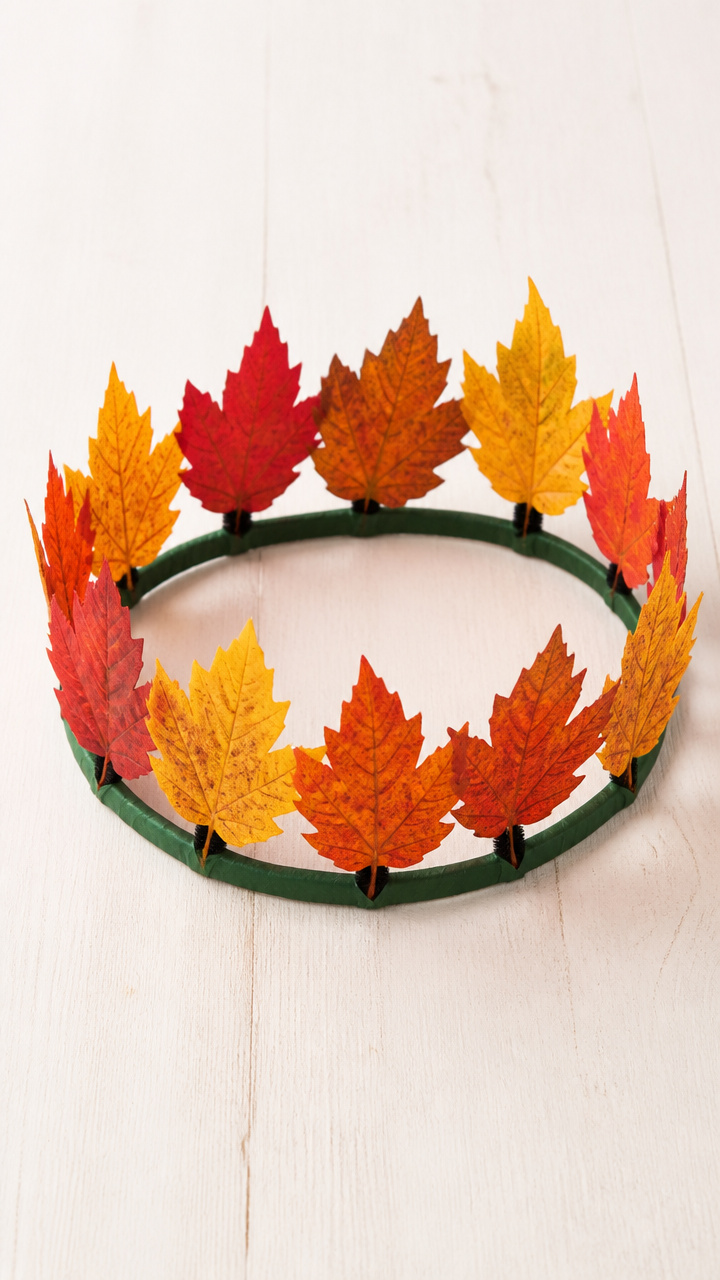
A wearable crown lets kids parade their favorite leaves like woodland royalty. Flexible pipe cleaners make it easy to shape and fit any head size.
Materials Needed
- 12 colorful fall leaves, supple and uncracked
- Black pipe cleaners, 6
- Green pipe cleaners, 2
- Needle-nose pliers
- Floral tape, green
How to Make It
- Twist three black pipe cleaners end to end to form one long strand. Shape it into a circle that fits around the child’s head with a little overlap.
- Wrap the ends with floral tape to secure. Repeat to make a second, slightly smaller ring.
- Lay a leaf on the table. Slide a black pipe cleaner piece through the stem end, wrapping it once to hold.
- Attach each leaf-covered pipe cleaner between the two rings by twisting both ends securely.
- Weave green pipe cleaners around the base rings to hide connections and add vine-like detail.


9. Leaf Stamped Napkin Rings
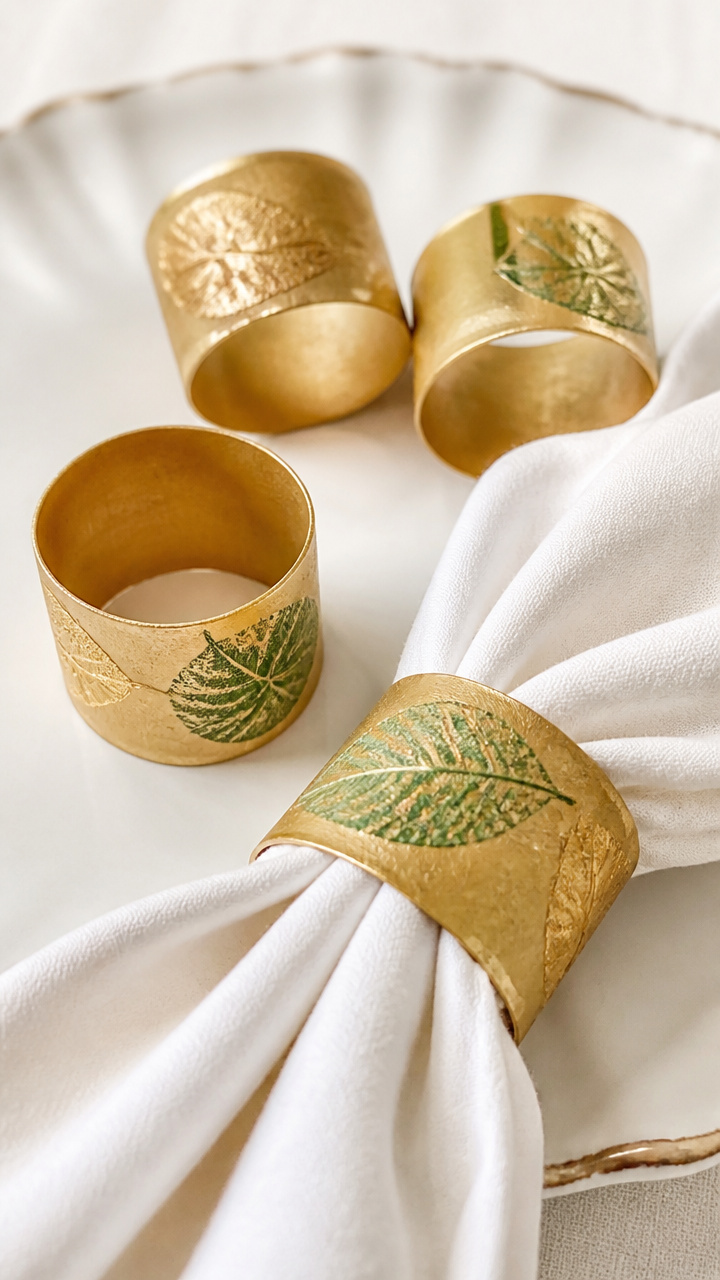
Mini napkin rings decorated with tiny leaf stamps add handmade grace to your dinner table. Kids use fingertips to stamp and personalize each one.
Materials Needed
- Cardboard toilet paper tubes, 6
- Scissors
- Gold acrylic paint
- Paint sponge, 2 inches square
- Small ivy and sumac leaves, 12 total
- Mod Podge
- Brush, 1/2 inch
- Ruler
How to Make It
- Cut each tube into 1.5-inch wide rings. You need 6. Flatten slightly with your palm.
- Use the sponge to dab gold paint evenly over each ring. Let dry 1 hour.
- Dip a small leaf in Mod Podge and press it onto a ring near the top. Lift straight off.
- Repeat with different leaves, placing 1 or 2 per ring. Let dry 2 hours.
- Brush a thin coat of Mod Podge over all stamped areas to seal. Dry overnight.


10. Handprint Leaf Tree
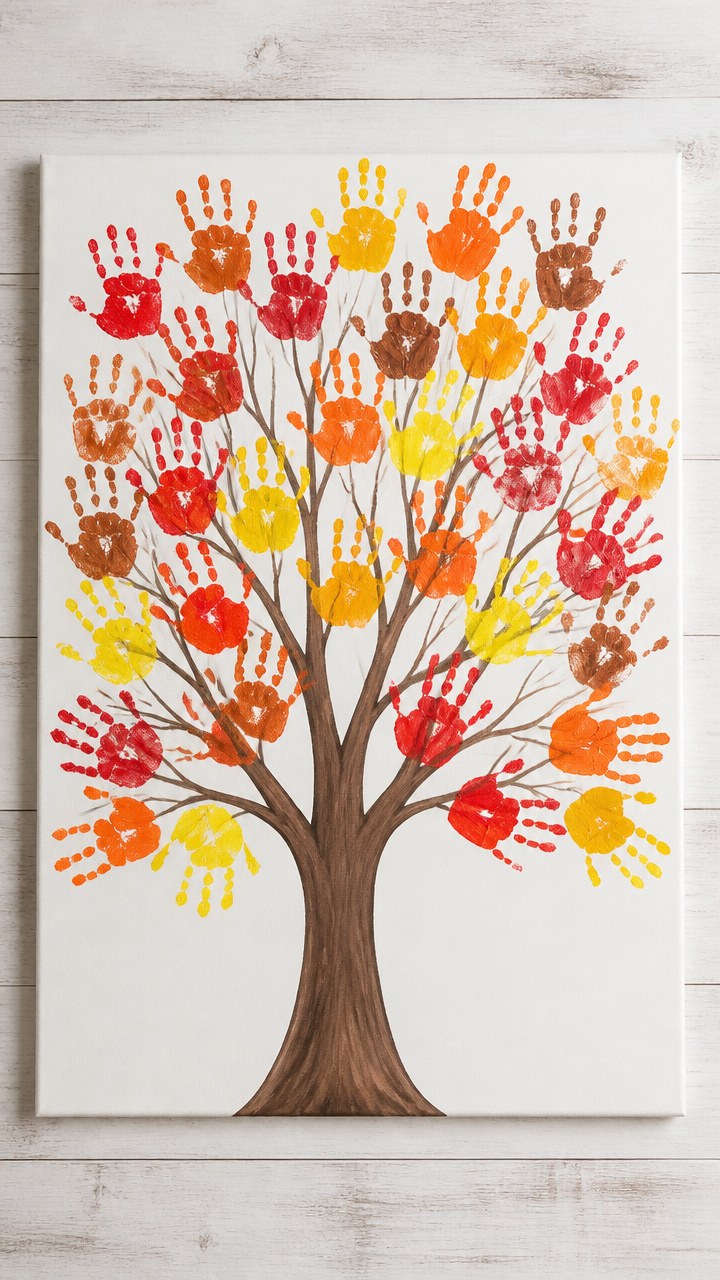
A bare branch drawn on paper becomes a tree filled with handprint leaves in autumn hues. Each splash of color marks a child’s growth and presence.
Materials Needed
- Large white poster board, 18 x 24 inches
- Brown acrylic paint
- Foam brush, 2-inch
- Red, yellow, orange, and brown washable paints
- Paper plates
- Water cup
- Baby wipes
How to Make It
- Pour a small pool of brown paint on a plate. Use the foam brush to draw a thick trunk and branches on the poster board.
- Let the paint dry 30 minutes. Pour finger paints onto separate plates.
- Have the child dip one hand in red paint, fingers together. Press it firmly near a branch tip, then lift straight off.
- Repeat with other hands and colors to fill the tree. Use wipes between colors.
- Write the child’s name and year at the bottom with a paintbrush.


11. Leaf Confetti Gift Tags
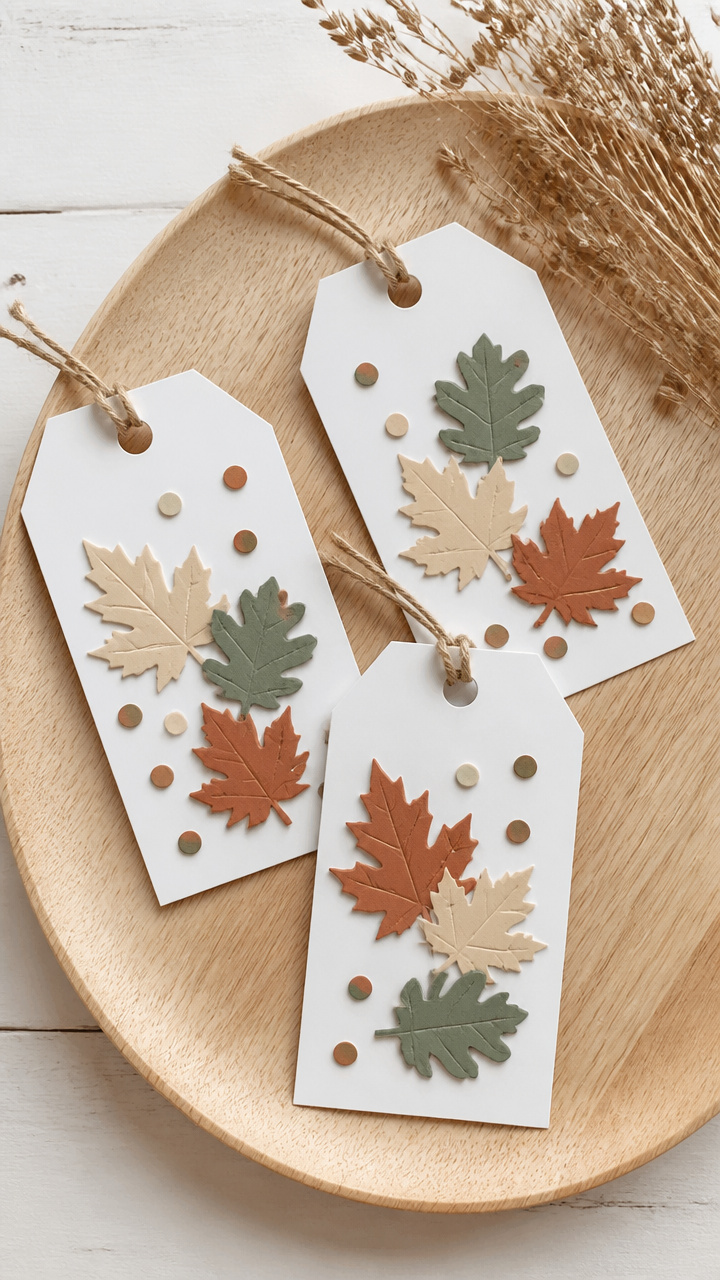
Tiny leaf punches add festive specks to homemade gift tags that flutter like fall itself. Hole-punched paper becomes instant decoration.
Materials Needed
- Colored cardstock in cream, terracotta, and sage, 8.5 x 11 inches
- Leaf-shaped paper punch, 3/4 inch
- White gel pen
- Twine, 6 inches per tag
- Hole punch
- Ruler
- Scissors
How to Make It
- Cut cardstock into 3 x 2 inch rectangles. You need 8 tags.
- Use the leaf punch to make 5 confetti leaves from each remaining scrap of colored paper.
- Sprinkle confetti leaves randomly on one tag. Spritz lightly with glue from a spray bottle.
- Press another tag on top to create a sandwich. Let dry 1 hour.
- Use the hole punch to make a top hole. Thread twine through. Write messages with the gel pen.


12. Foil-Imprinted Leaf Art
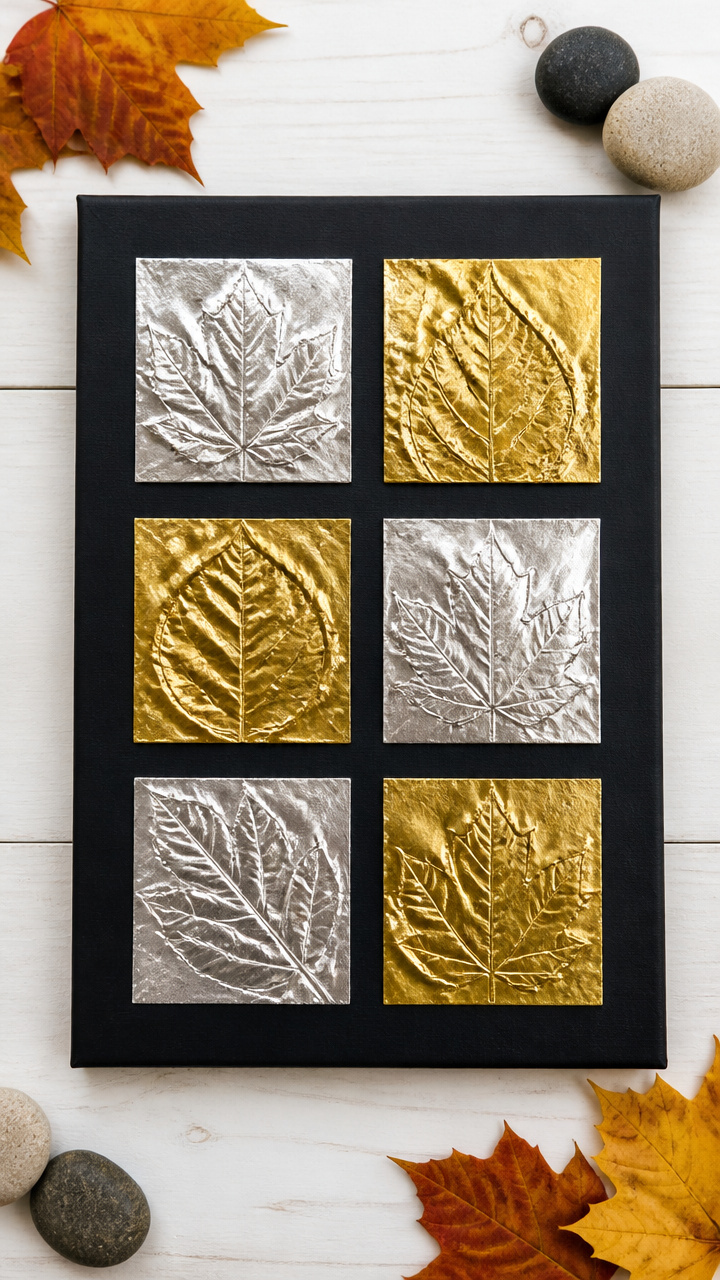
Polished foil captures the intricate details of real leaves with a shiny, elegant result. The rubbing technique reveals hidden textures like magic.
Materials Needed
- Aluminum foil, 12 x 12 inches squares (6)
- Smooth river stones, 2
- Fall leaves, veiny and firm, 6
- Tape
- Black construction paper, 12 x 12 inches (6 sheets)
- Glue stick
How to Make It
- Lay a leaf on the table, vein side up. Place foil over it and tape the edges flat to the table.
- Use a river stone to rub firmly in small circles over the foil, following the leaf shape. Keep pressure steady.
- Remove tape and foil. You’ll see a raised impression of the leaf.
- Trim excess foil, leaving a 1/2 inch border. Glue the foil leaf centered on black paper.
- Repeat for all six. Display on a shelf or as part of a gallery wall.


13. Leaf Chain Garland
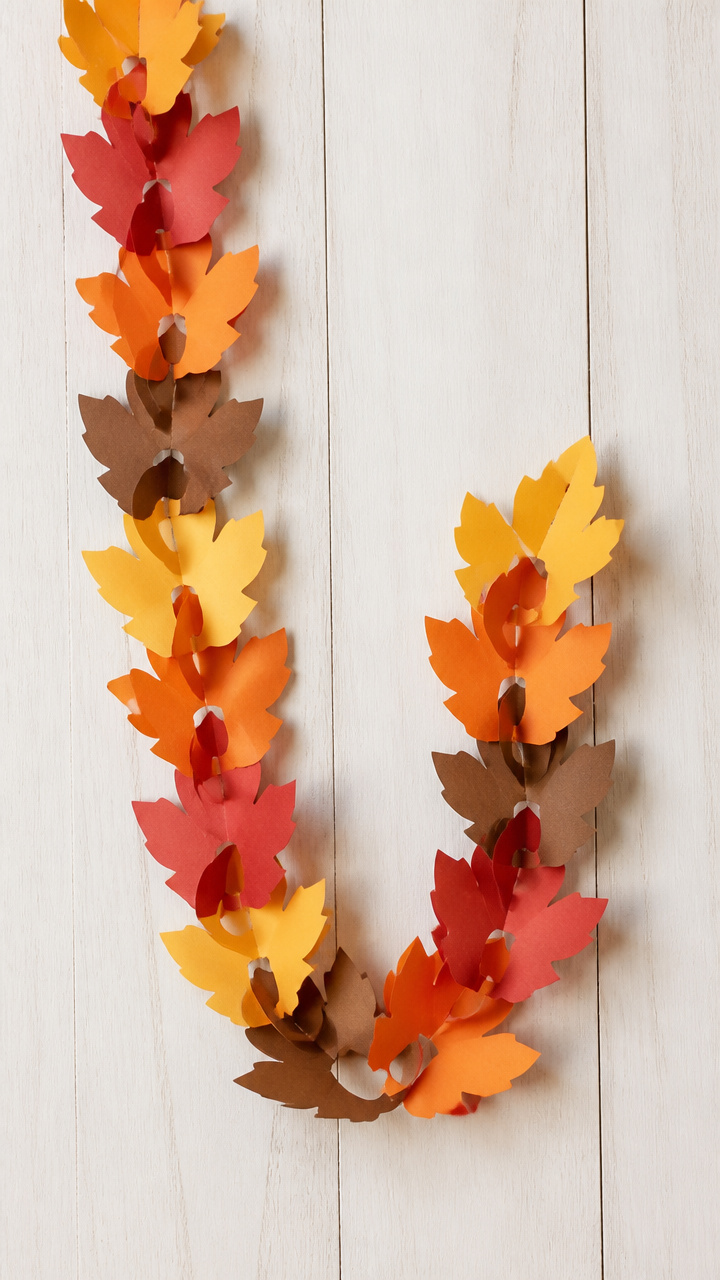
Interlocking paper leaves form a bright chain that sways across the room. Cutting curved shapes builds fine motor skills while creating instant cheer.
Materials Needed
- Construction paper in red, orange, yellow, and brown, 8.5 x 11 inches (4 sheets each color)
- Pencil
- Scissors
- Ruler
- Glue stick
How to Make It
- Draw a 3-inch leaf shape on a blank sheet using pencil and ruler for symmetry. Cut it out to make a template.
- Trace the template onto colored paper, making 5 leaves per sheet. You need 60 total.
- Cut out all leaves carefully along the lines.
- Take one leaf and apply glue to one pointed end. Press the opposite end of another leaf over it to form a loop. Hold 10 seconds.
- Continue linking leaves in random colors until the chain reaches 8 feet. Hang with tape or clips.


These crafts turn simple moments into memories that last far beyond the season. Grab what you have and start creating with hands that are ready to explore and connect.