15 Easy Letter A Crafts for Preschool Apple Theme Activities
Bringing the alphabet to life through hands-on play helps little learners connect sounds with symbols in a joyful way. Apple-themed crafts make learning the letter A feel like a celebration, not a lesson.
Each of these ideas uses simple materials you likely already have or can grab quickly. They’re designed for small hands, big imaginations, and classrooms or kitchen tables alike.
1. Apple Handprint Painting
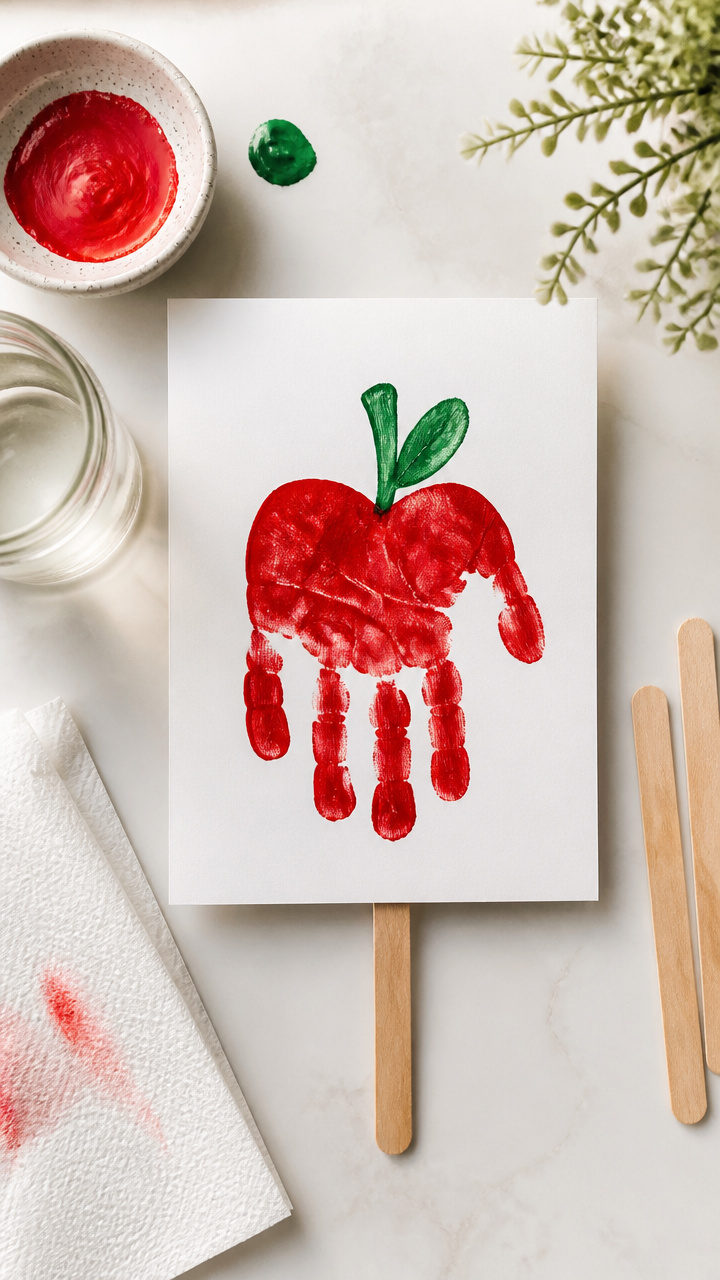
Bold red handprints turn into cheerful apples with just a few brushstrokes. This keepsake craft captures tiny fingers in action and teaches the shape of the letter A.
Materials Needed
- Red washable tempera paint
- Green washable tempera paint
- A4 white cardstock
- Popsicle stick
- Cup of water
- Paper towel
How to Make It
- Press your child’s palm flat into the red paint on a paper plate, then carefully press it onto the left side of the cardstock to make a handprint.
- Use the popsicle stick dipped in green paint to draw a short stem and a curved leaf at the top of the print.
- Let the painting dry completely, about 20 minutes on a flat surface.
- Write a large letter A in pencil near the bottom of the page and let your child trace it with a black crayon.


2. Alphabet A Collage
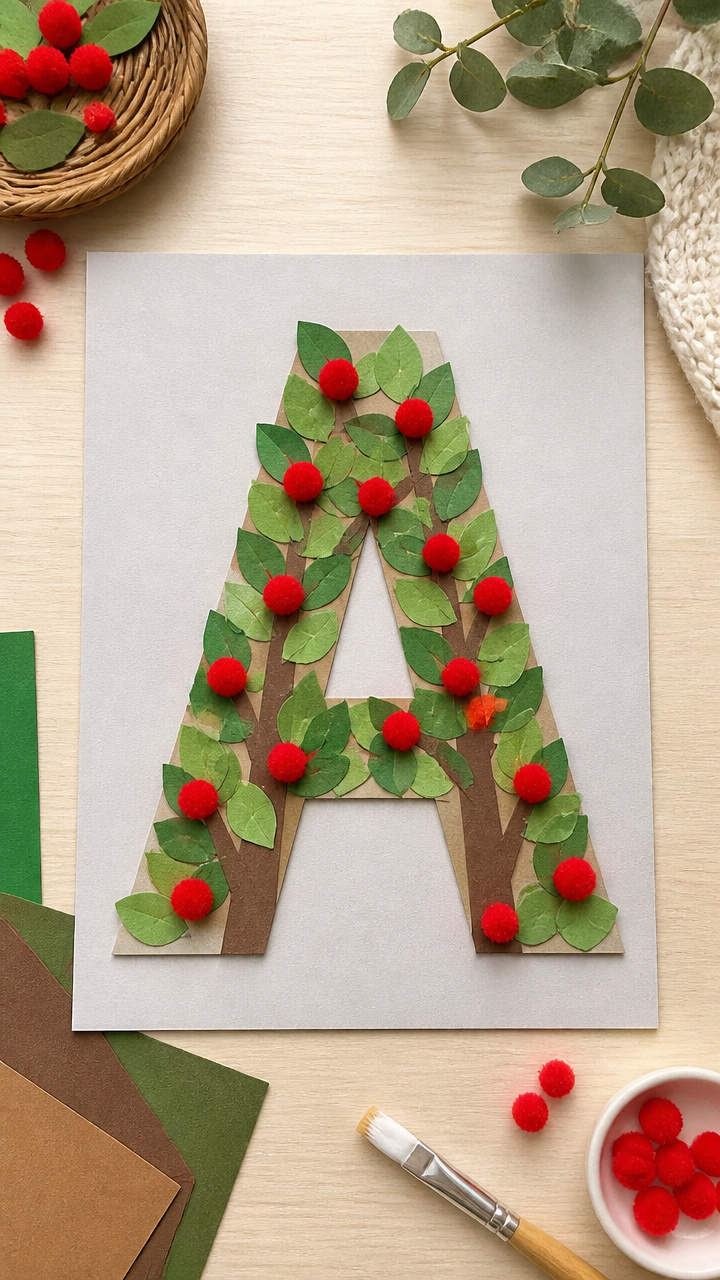
Textures come alive as kids glue down apple-themed items to form a giant letter A. It builds fine motor skills while reinforcing recognition.
Materials Needed
- A4 light gray cardstock
- Scissors
- White school glue
- Glue brush
- Tiny red pom-poms
- Brown construction paper scraps
- Green tissue paper squares (1 inch)
- Ruler
How to Make It
- Cut a thick capital A shape from the gray cardstock using scissors, about 6 inches tall.
- Brush a thin layer of glue along one stroke of the A using the glue brush.
- Sprinkle pom-poms along the wet glue to represent apples, pressing gently to adhere.
- Glue brown scraps at the base of each leg for tree trunks and place small pieces of green tissue at the top for leaves.


3. Apple Seed Counting Craft
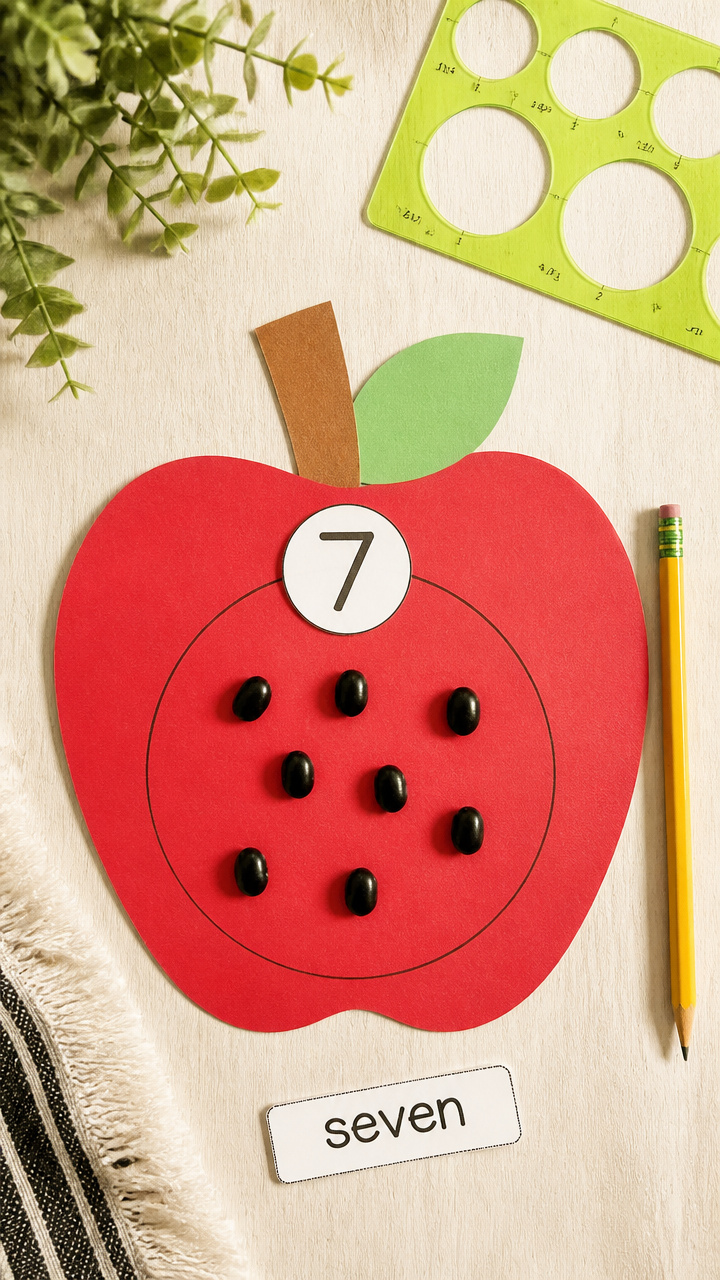
Black beans become apple seeds tucked inside a paper apple, teaching counting and the sound of short A. It’s quiet, focused fun.
Materials Needed
- Red construction paper
- Black dried black beans (10 per apple)
- School glue
- Small bowl
- Pencil
- Circle stencil (3 inch diameter)
How to Make It
- Trace two apple shapes using the stencil on red construction paper and cut them out.
- Draw a lowercase a in the center of one apple with pencil.
- Glue one apple flat on the table and place exactly 5 beans inside to be seeds.
- Press the second apple on top, sandwiching the beans, and press edges to seal.


4. Apple Tree Fingerprint Activity
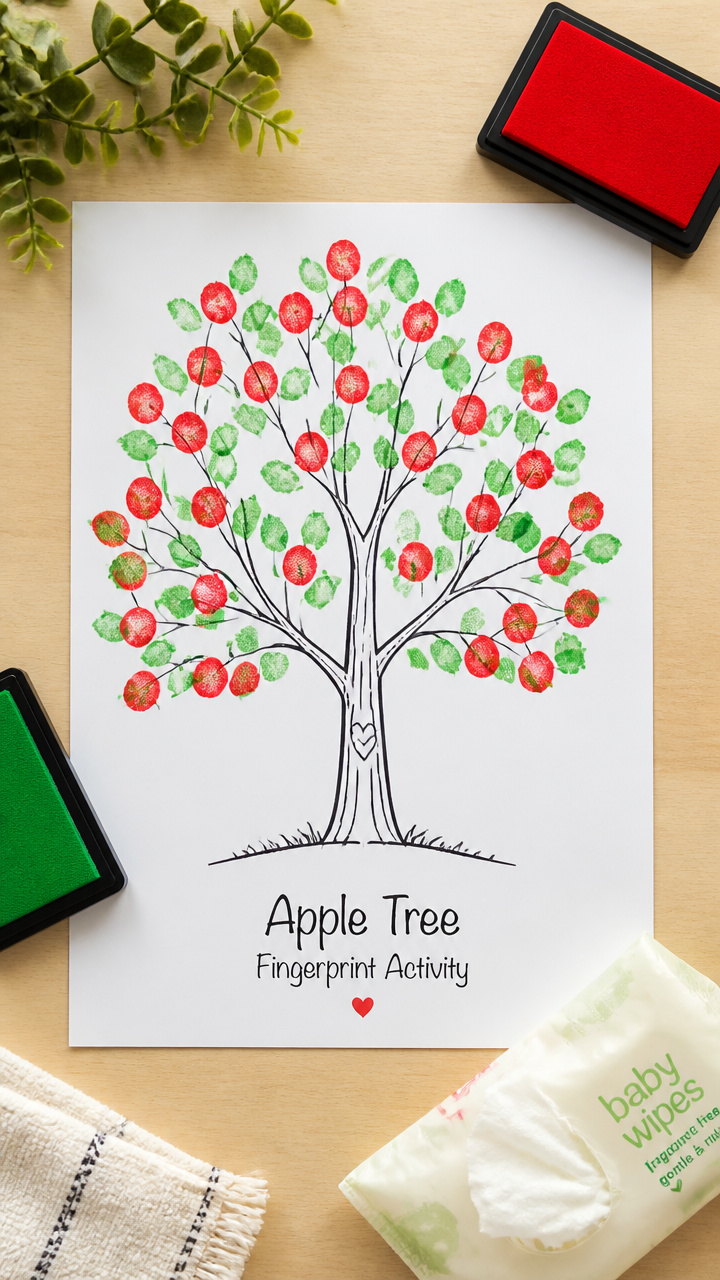
Dabs of ink from fingertips bloom into whole apple trees shaped like the letter A. It’s sensory, simple, and full of character.
Materials Needed
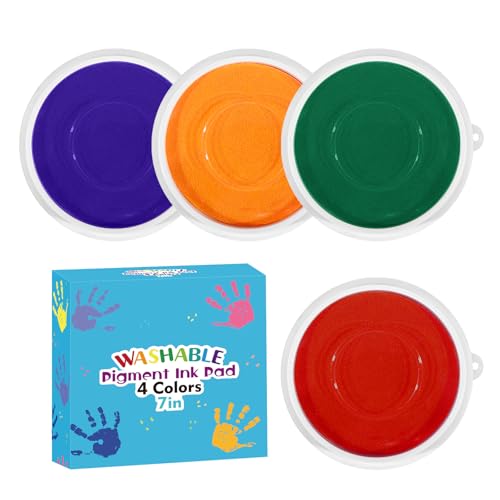
- Red rubber stamp pad
- Green washable stamp pad
- A4 white drawing paper
- Fine-tip black marker
- Baby wipe
How to Make It
- Press each fingertip into the red stamp pad and dot ten apples around the upper half of the paper.
- Use the green pad on a fingertip to add a small dab above each apple for a leaf.
- With the black marker, draw a trunk and two upward branches that meet to form an A shape.
- Wipe fingers clean with the baby wipe immediately after stamping.


5. Alphabet A Sensory Bottle
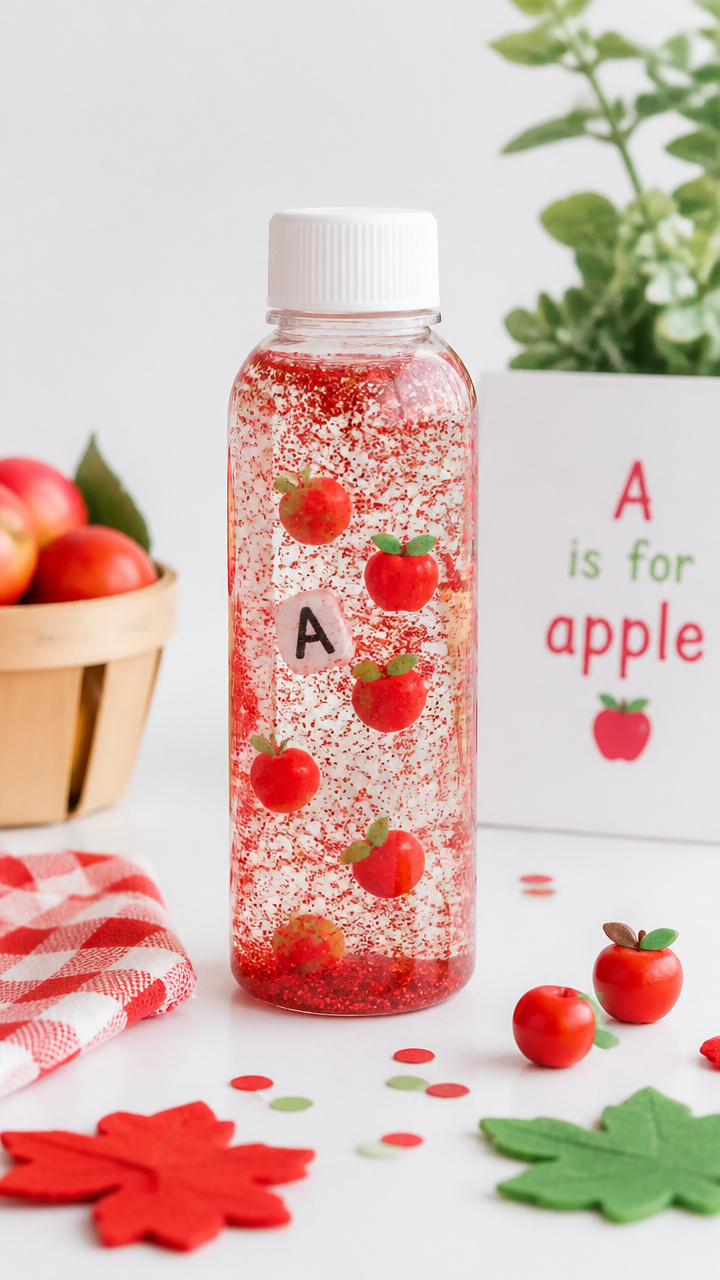
A swirling bottle filled with apple signs dances every time it's tipped. It calms active hands while keeping the theme front and center.
Materials Needed
- Empty 8 oz clear plastic bottle with lid
- Clear school glue (1/4 cup)
- Red glitter
- Mini foam apples (5 pieces)
- Alphabet beads (1 uppercase A bead)
- Funnel
- Water
How to Make It
- Use the funnel to pour 1/4 cup glue into the bottle, then add 1 cup of water and shake gently to mix.
- Add a pinch of red glitter, five foam apples, and one A bead.
- Screw the lid on tight and wrap duct tape around the cap to secure it shut.
- Turn the bottle slowly to watch everything swirl from top to bottom.


6. Apple Core Rubbing Art
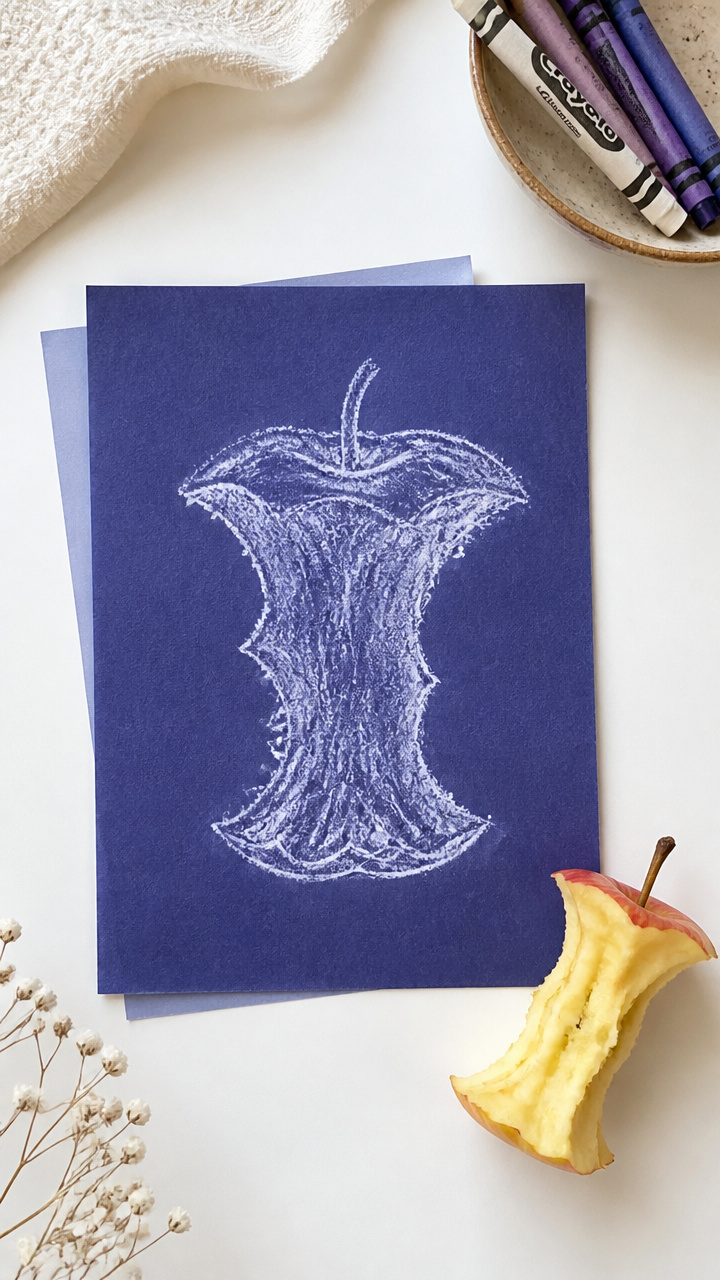
Real apple cores reveal hidden texture under paper, creating a nature-based rubbing that doubles as a letter A display.
Materials Needed
- Fresh apple core (eaten down to center)
- Blind carbonless copy paper (8×10 inches)
- White crayon
- Tape
- Cardboard scrap
How to Make It
- Place the apple core flat on the cardboard and tape one end of the copy paper over it.
- Hold the paper taut and rub the white crayon firmly back and forth above the core.
- Peel the core away to reveal the textured impression beneath.
- Draw a letter A in the corner using the same crayon to tie it to the theme.


7. Apple Slice Sticker Scene
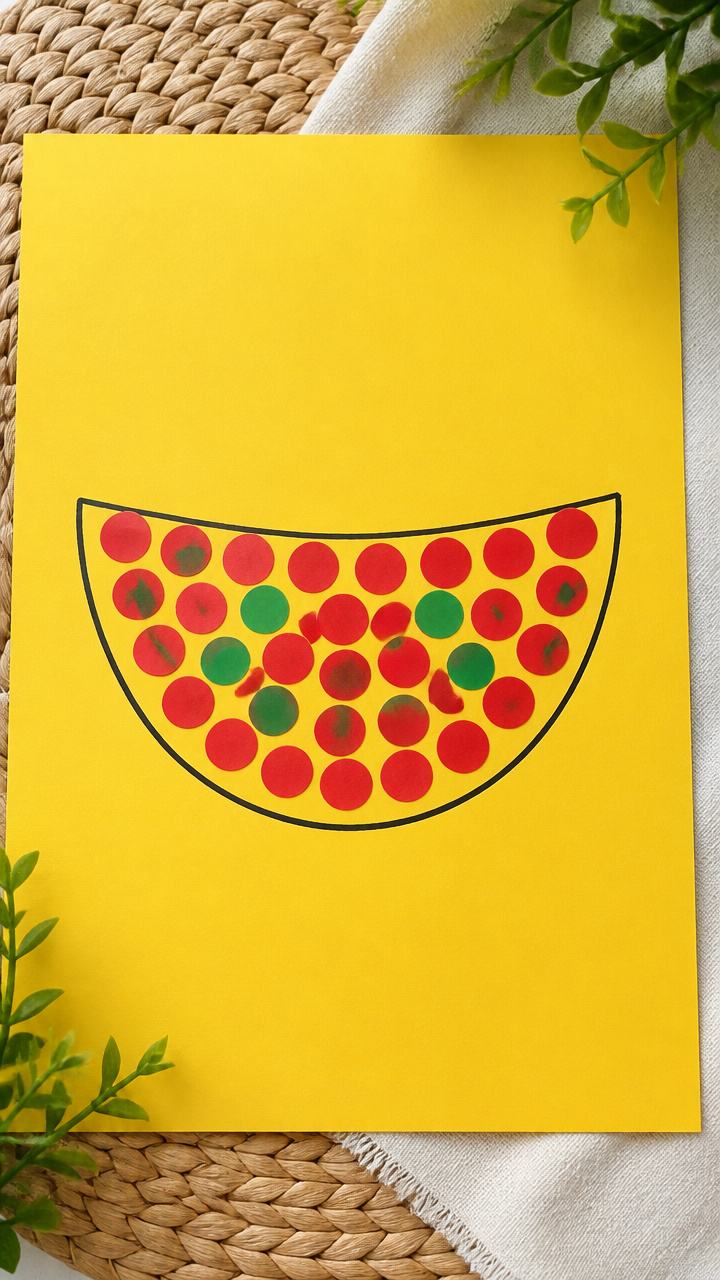
Round stickers stack into apple slices tucked inside a letter A outline. It’s tidy, colorful, and perfect for beginners.
Materials Needed
- A4 yellow construction paper
- Red round stickers (3/4 inch, 12 per child)
- Green round stickers (1/4 inch, 6 per child)
- Black fine-line marker
- Ruler
How to Make It
- Use the ruler and marker to draw a large letter A, about 7 inches tall, in the center of the paper.
- Fill the inside of the A with red stickers placed edge to edge like apple wedges.
- Place one green sticker at the top center of each red row to look like stems.
- Leave space between stickers if needed so the design stays neat.


8. Apple Leaf Wind Chime
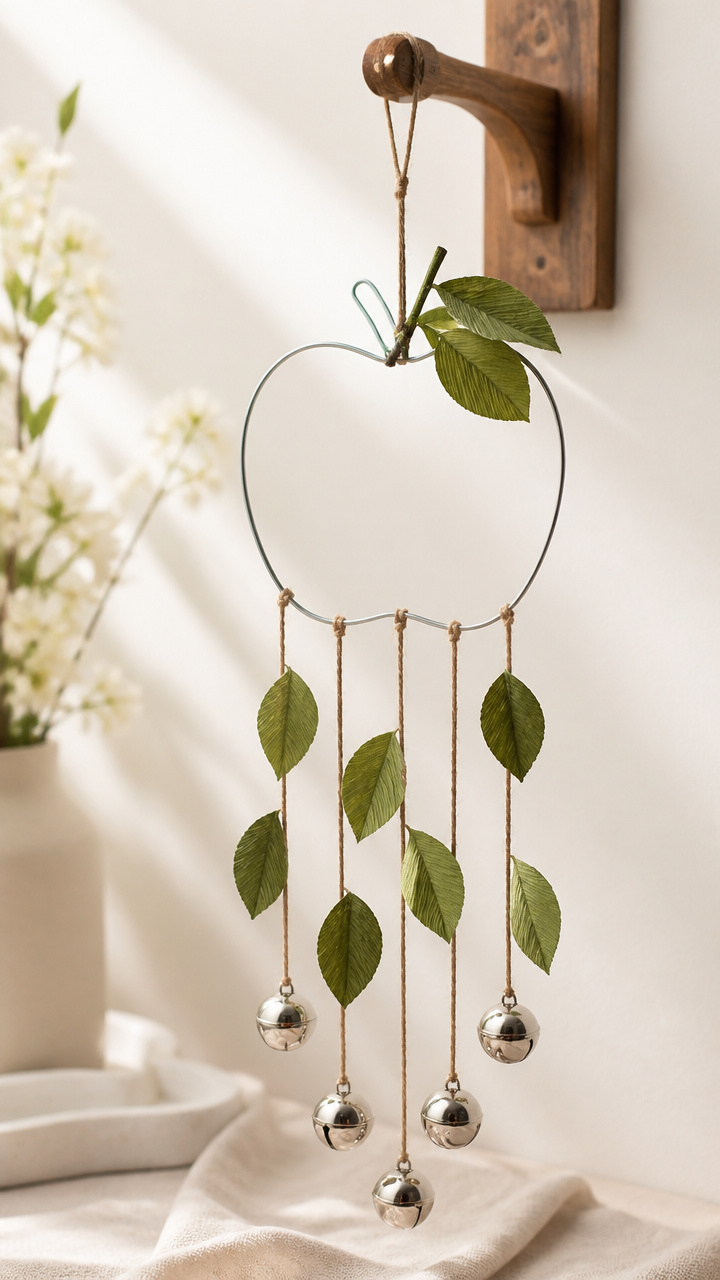
Jingle bells and curling paper leaves hang from a bent coat hanger shaped like an A. It jingles with every breeze.
Materials Needed
- Metal wire coat hanger
- Pliers
- Green crepe paper roll
- Five silver jingle bells (1/2 inch)
- Scissors
- Twine (12 inches)
How to Make It
- Unbend the hanger and reshape it into a capital A using pliers to bend sharp corners.
- Cut ten 6-inch strips from the crepe paper and twist each into a curly leaf.
- Tie one bell to the end of each of five twine pieces, each 6 inches long.
- Attach the twine strands evenly along the crossbar of the A and tape leaves near each bell.


9. Apple Dot Painting Pages
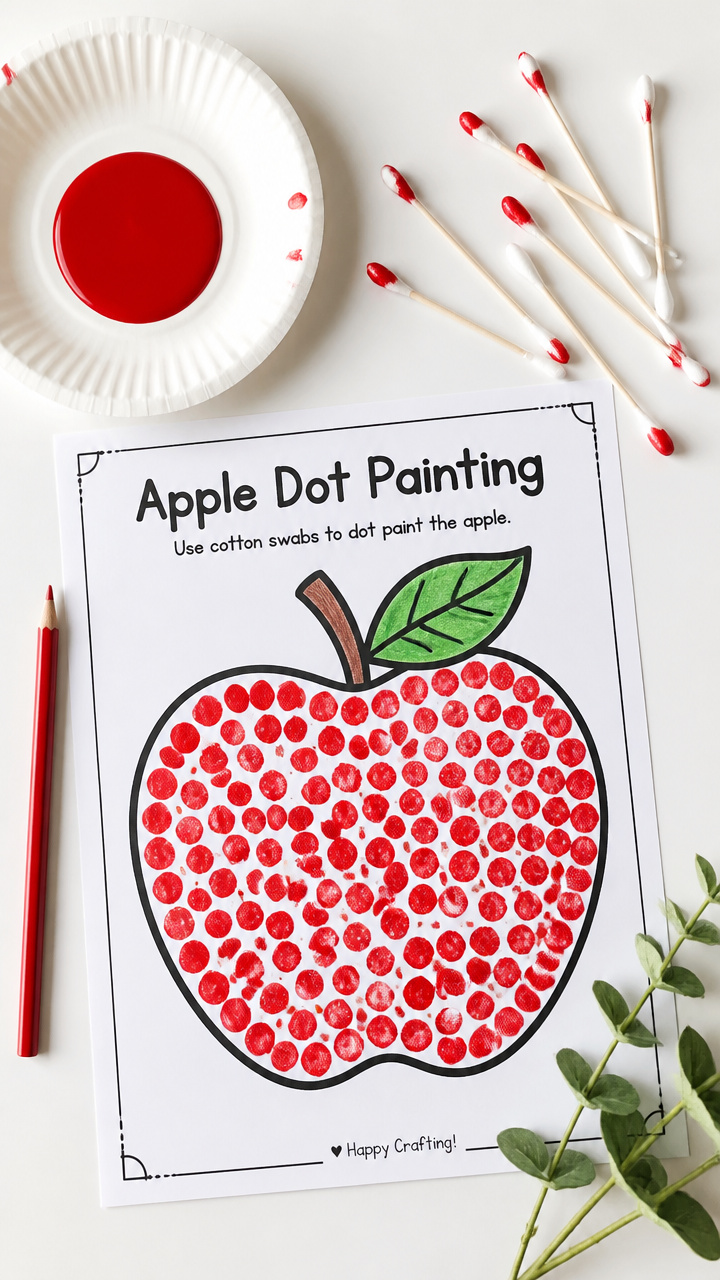
Cotton swabs and paint fill printable apple outlines while building pencil grip. Each dot lands with purpose inside the letter A zone.
Materials Needed
- Printed apple coloring sheet with thick borders
- Cotton swabs (10 per child)
- Red acrylic paint
- Small paper plates
- Pencil
How to Make It
- Pour a dime-sized puddle of red paint onto a paper plate.
- Dip one end of a cotton swab into the paint and dot it inside the apple shape on the sheet.
- Continue until the apple is full, then use the pencil to write a dotted line forming an A beside it.
- Set aside to dry for 15 minutes before displaying.


10. Apple Pocket Puppets
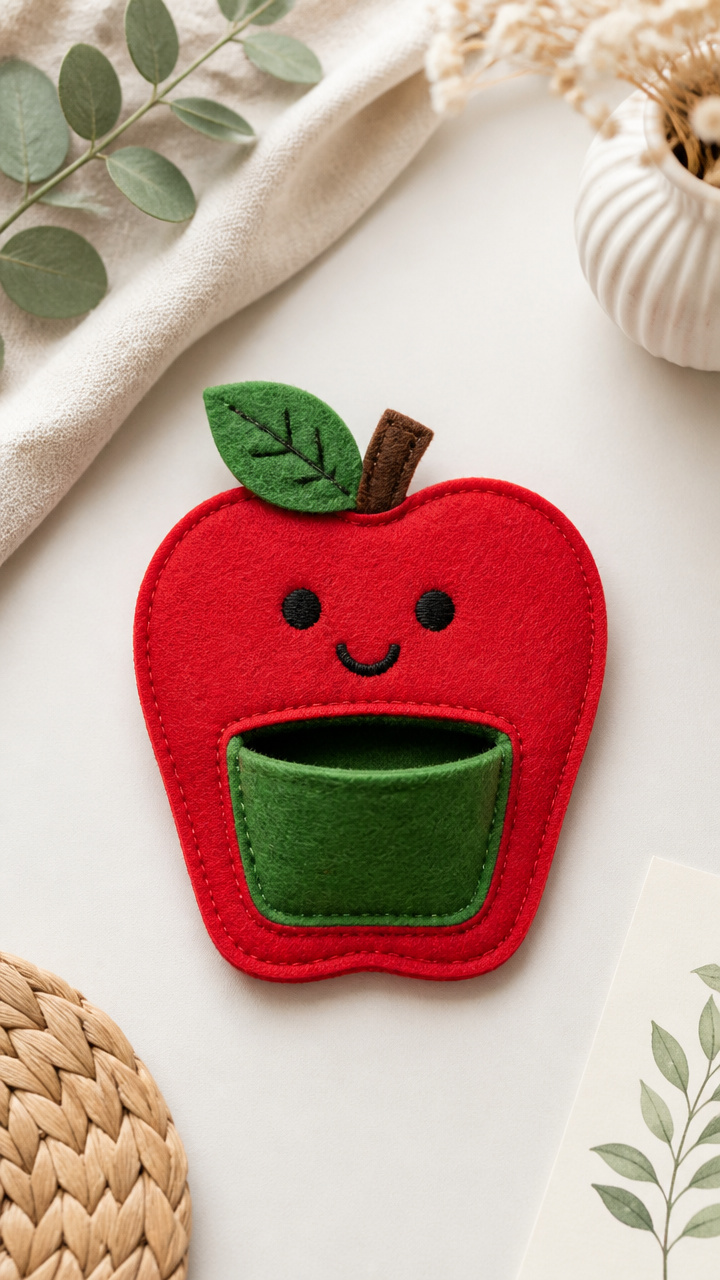
Felt apples with smiling faces slip over fingers and act out stories starting with A. Playtime becomes phonics practice.
Materials Needed
- Red felt sheet (6×6 inches)
- Green felt sheet (2×2 inches)
- Scissors
- Needle and thread
- Embroidery floss (black)
- Hot glue gun
How to Make It
- Cut one apple shape from red felt and one leaf from green felt, about 3 inches tall.
- Sew the leaf to the top of the apple using green thread in small stitches.
- Use black floss to stitch eyes and a smile near the bottom third of the apple.
- Apply hot glue along both sides of the bottom edge and press together to form a pocket for fingers.


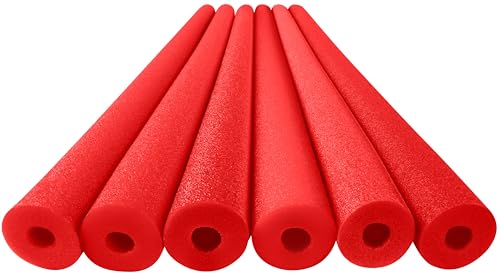
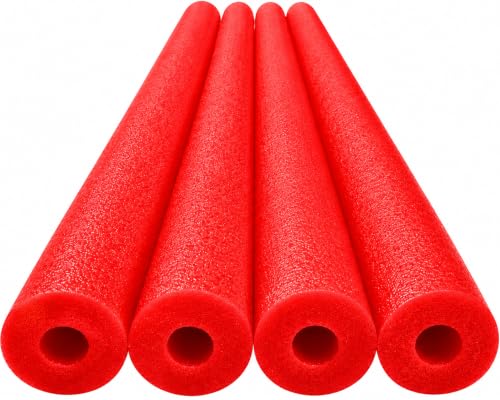
11. Apple Ring Toss Game
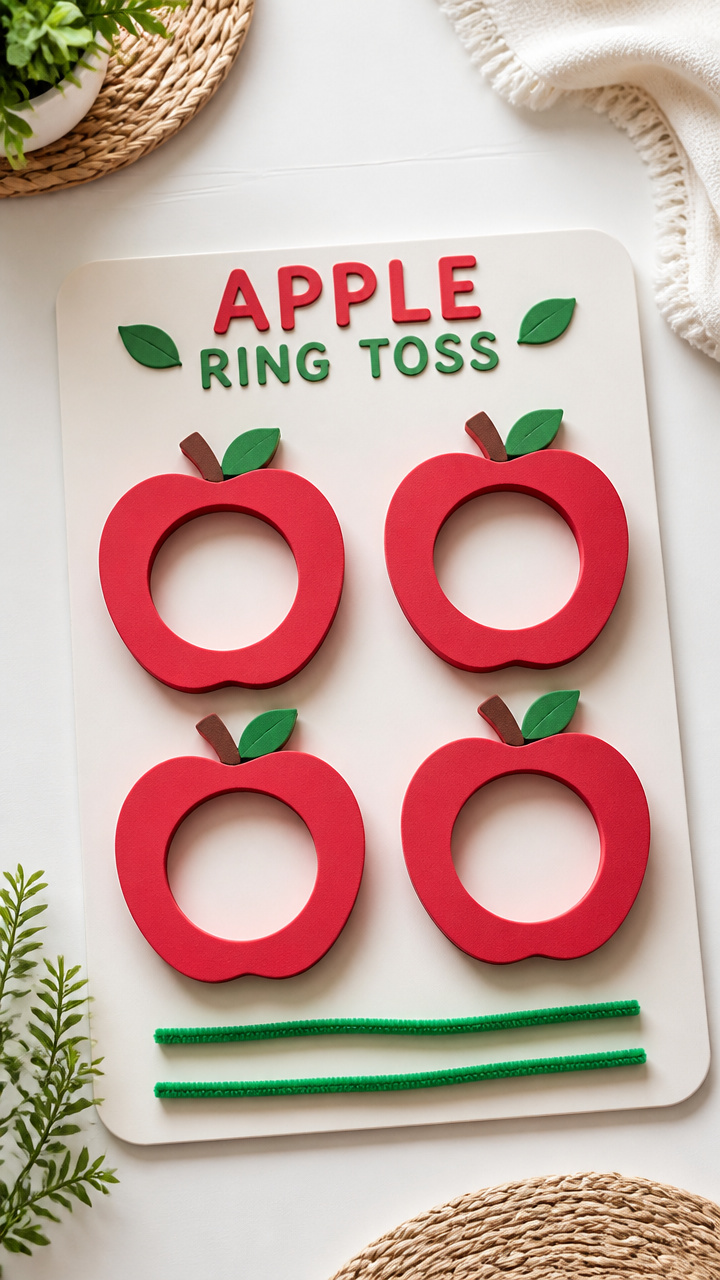
Foam apple rings fly toward a letter A made of pool noodles. It mixes gross motor play with letter recognition.
Materials Needed
- Four red foam pool noodles (each 1 inch thick)
- Two green pipe cleaners
- Craft knife
- Pool noodle cutter or sharp scissors
- Large foam board
How to Make It
- Cut each pool noodle into eight 1-inch rings using the craft knife.
- Bend one green pipe cleaner into a leaf and insert it into the top of one ring to make a special target apple.
- Shape the large foam board into a freestanding capital A using scored folds.
- Toss rings from behind a line drawn on the floor, aiming for the A frame.

12. Apple Crayon Resist Drawing

White crayon drawings hide beneath red watercolor washes, revealing apples and the letter A only when painted over.
Materials Needed
- White crayon
- A4 watercolor paper
- Red liquid watercolor
- Paintbrush (1/2 inch)
- Cup of water
- Paper towel
How to Make It
- Draw a large apple and a bold letter A on the paper using the white crayon, pressing hard.
- Mix red watercolor with water in a cup to a light cherry color.
- Paint over the entire page with the brush, watching the wax resist create visible shapes.
- Blot excess paint with a paper towel and set flat to dry.


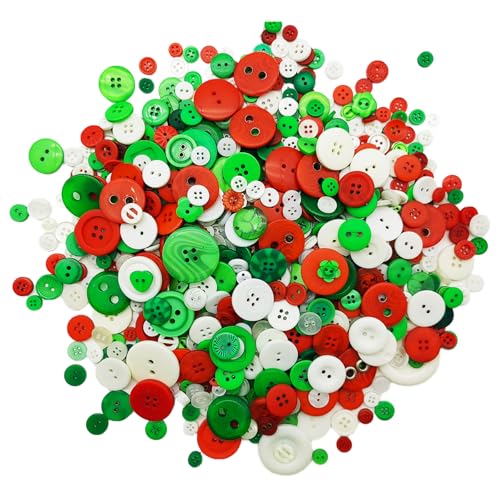
13. Apple Button Match-Up
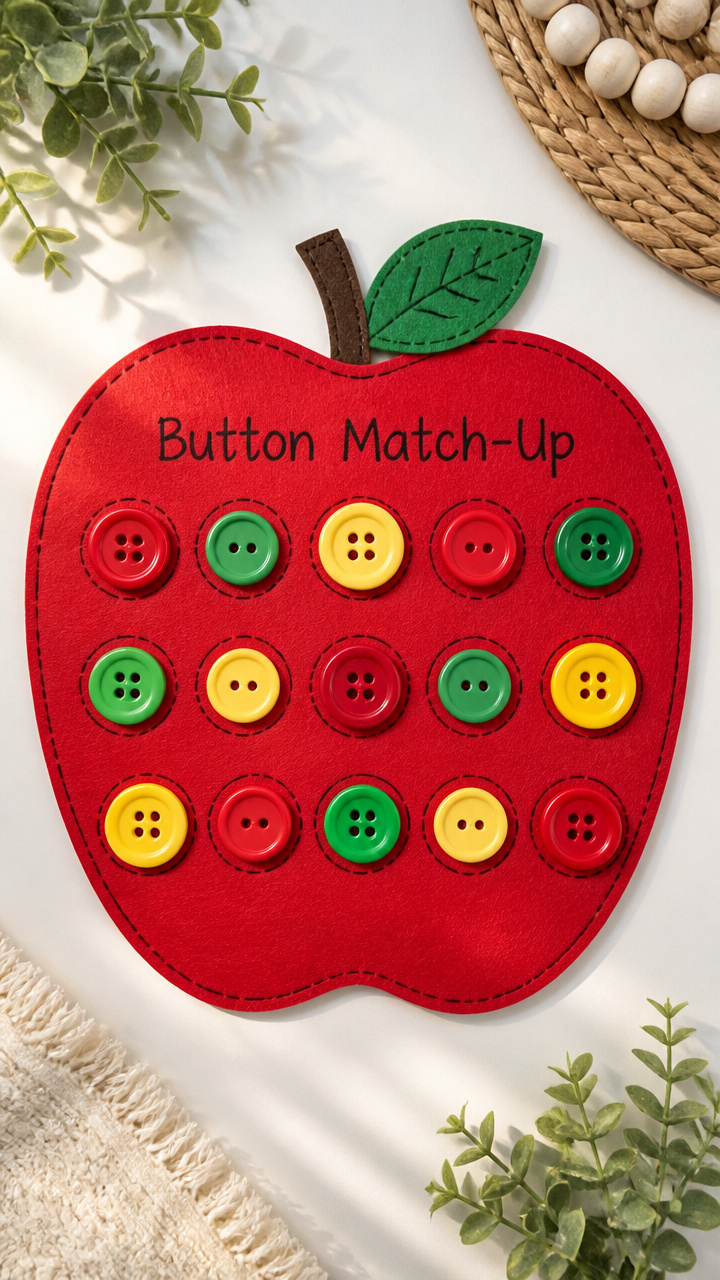
Color-coordinated buttons snap onto felt apples inside a letter A layout. It strengthens sorting and matching skills.
Materials Needed
- Red felt sheet (9×12 inches)
- Assorted buttons (red, green, yellow; 15 total)
- Fabric marker
- Ruler
- Glue dots
How to Make It
- Use the fabric marker and ruler to draw a large letter A on the felt sheet.
- Place glue dots randomly inside the A and attach one button to each spot.
- Sort remaining buttons by color into three small bowls.
- Invite your child to find matching buttons and place them directly on top of the ones glued down.

14. Apple Scented Playdough
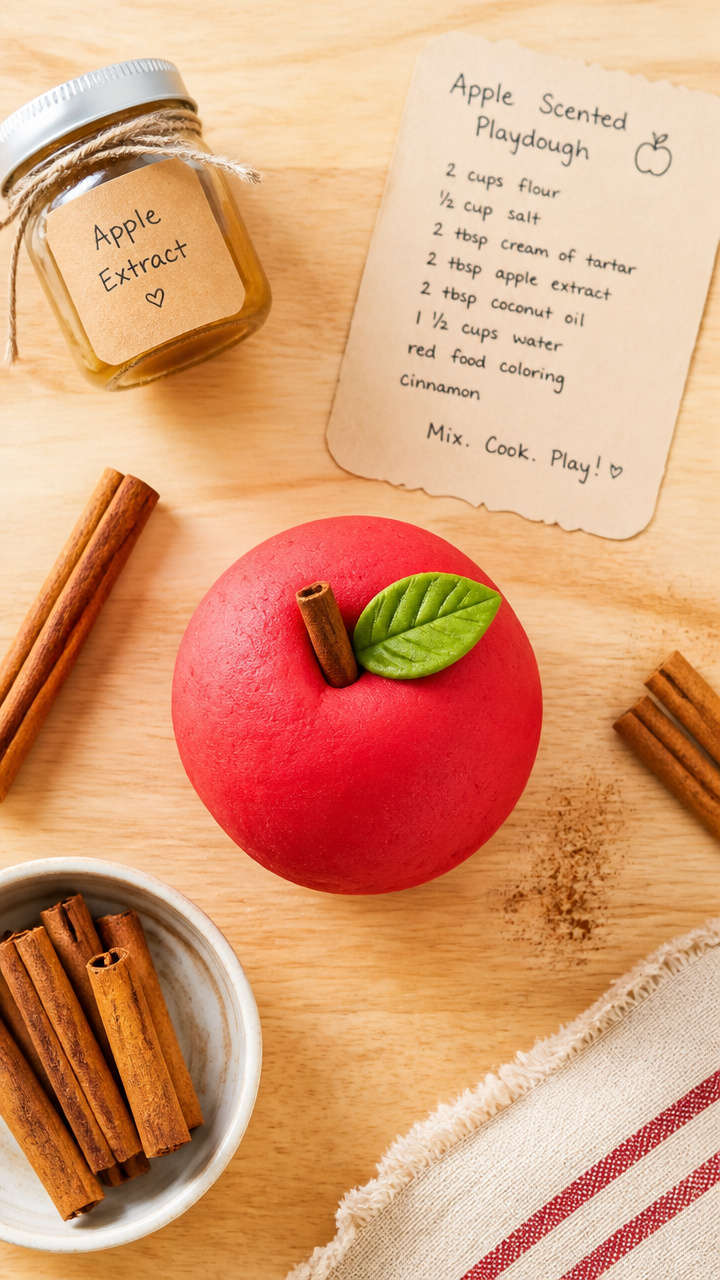
Homemade dough flavored with cinnamon and apple extract rolls into mini apples that sit inside a paper A tray.
Materials Needed
- 2 cups all-purpose flour
- 1/2 cup salt
- 1 tbsp cream of tartar
- 1 cup boiling water
- 2 tbsp vegetable oil
- 1 tsp apple extract
- 1 tsp ground cinnamon
- Red food coloring
- Muffin tin
How to Make It
- Mix flour, salt, and cream of tartar in a bowl, then stir in boiling water, oil, extract, and cinnamon.
- Add red food coloring drop by drop until dough is uniformly pink, then knead for 3 minutes.
- Roll small balls and place one in each muffin cup labeled with a letter A on paper underneath.
- Let dry overnight if keeping as keepsakes.


15. Apple Tree String Art
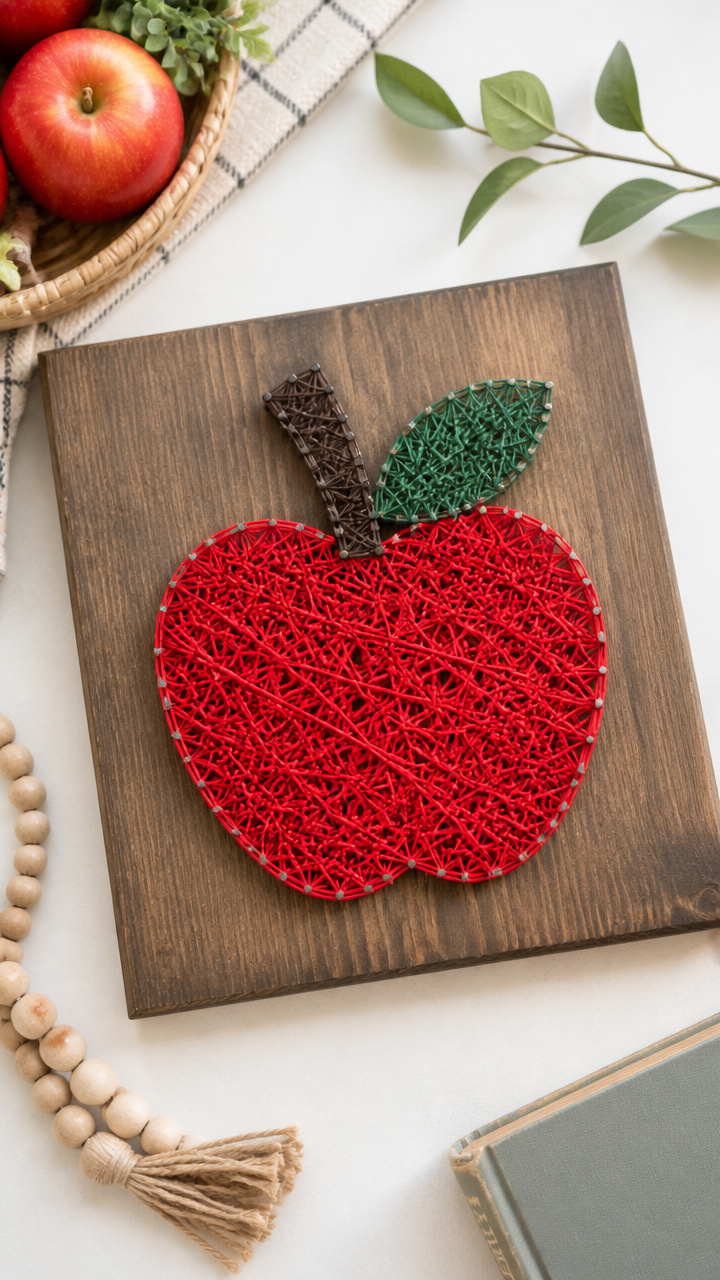
Nails and red yarn build a raised letter A shaped like an apple tree. It’s tactile and striking on classroom walls.
Materials Needed
- Wooden board (6×8 inches)
- Small hammer
- 16 penny nails (1 inch)
- Red embroidery floss
- Black permanent marker
- Ruler
How to Make It
- Use the marker and ruler to draw a capital A on the wooden board, 5 inches tall.
- Hammer nails evenly along the outline of the A, spacing them 1 inch apart.
- Tie the end of the floss to the bottom left nail and wrap it diagonally across to other nails to fill the shape.
- Continue crisscrossing until the A looks full of branches, then knot and trim the end.


You’ve got everything you need right at your fingertips to bring letter A learning to life. Grab a few supplies and let the little hands start creating.