15 Thanksgiving Crafts for Kids to Make Before Dinner
The kitchen is warm, the smells are building, and the little ones are full of energy. These crafts give them a meaningful way to join the day’s joy without needing hours or fancy supplies.
Each one fits neatly into the quiet hours before guests arrive. They result in keepsakes, decorations, and small surprises that feel like part of the meal itself.
1. Handprint Turkey Placemats
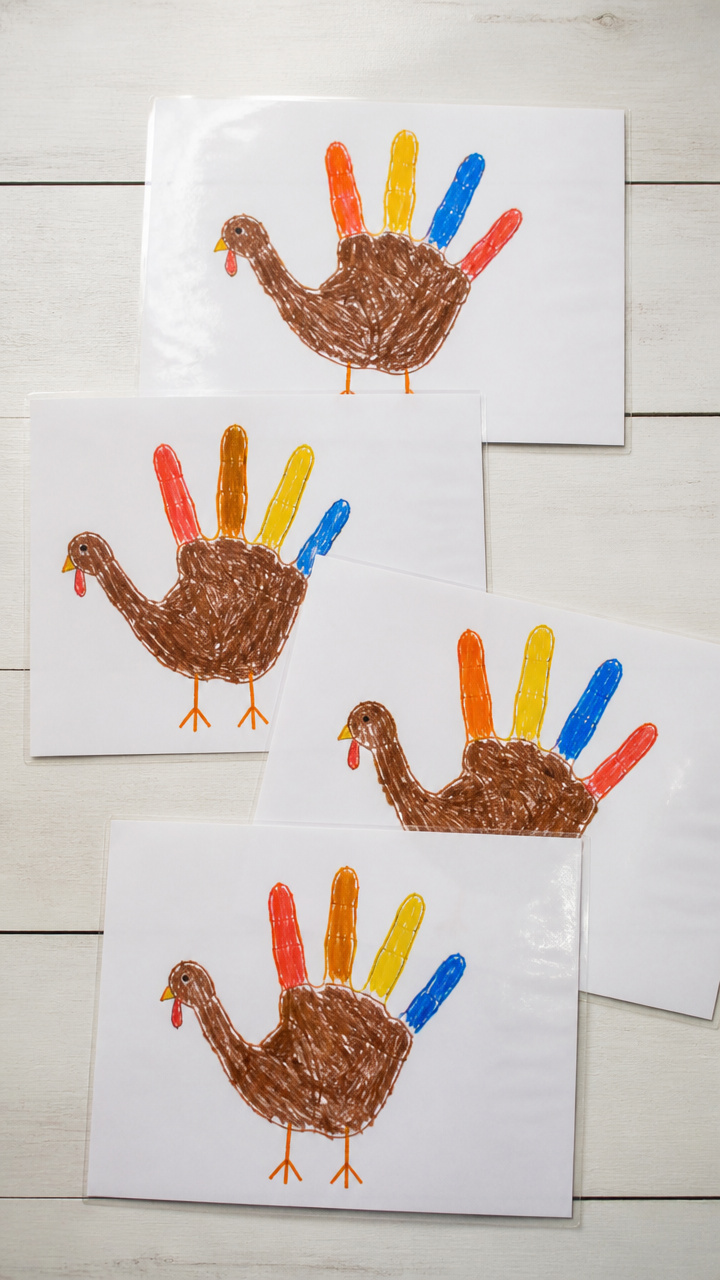
Bright handprint turkeys become festive placemats your kids can use at the table. Washable and practical, these double as souvenirs from this year’s gathering.
Materials Needed
- 4 sheets of A4 white cardstock
- Crayola washable markers (brown, red, orange, yellow, blue)
- Clear contact paper (12 x 18 inches)
- Scissors
- Ruler
- Pencil
How to Make It
- Place your child’s palm flat on the cardstock and trace around it with pencil, leaving space above the wrist line.
- Use brown marker to fill in the hand shape as the turkey body, then draw a small oval head and beak above.
- Draw feathers in red, orange, and yellow radiating from the top of the hand using the markers.
- Cut two 12 x 18 inch rectangles of contact paper and press one over the front of each decorated sheet, smoothing out bubbles.
- Trim excess contact paper with scissors to seal the edges and create a wipeable placemat.


2. Pinecone Gratitude Trees
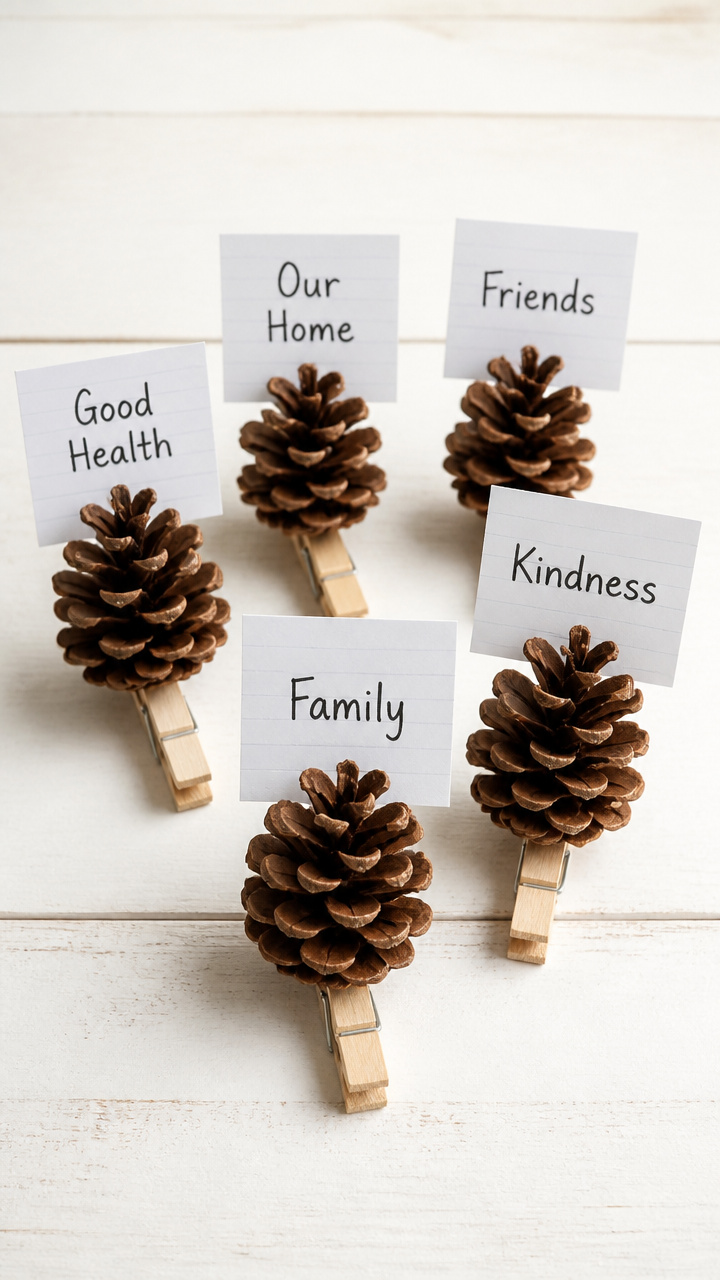
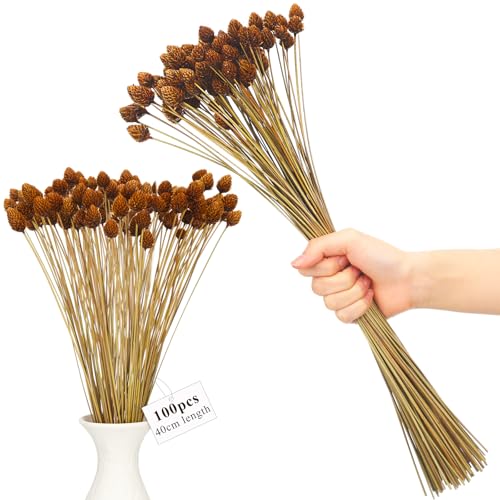
Tiny pinecones become trunks for gratitude trees that hold handwritten notes. Kids love tucking their thankful thoughts into the branches.
Materials Needed
- 5 small dried pinecones
- 5 clothespins
- Brown craft paint
- Paintbrush
- White index cards (3 x 5 inches)
- Black fine-tip marker
- Glue stick
How to Make It
- Glue the flat end of each pinecone to the wooden end of a clothespin using a glue stick.
- Paint the entire pinecone with brown craft paint and let dry for 20 minutes on a scrap paper.
- Cut each index card into three leaf shapes using scissors.
- Have your child write one thing they’re thankful for on each leaf with the black marker.
- Clip the tree to the edge of a plate or napkin holder and tuck the leaves into the pinecone scales.


3. Crayon-Resist Cornucopia Cards
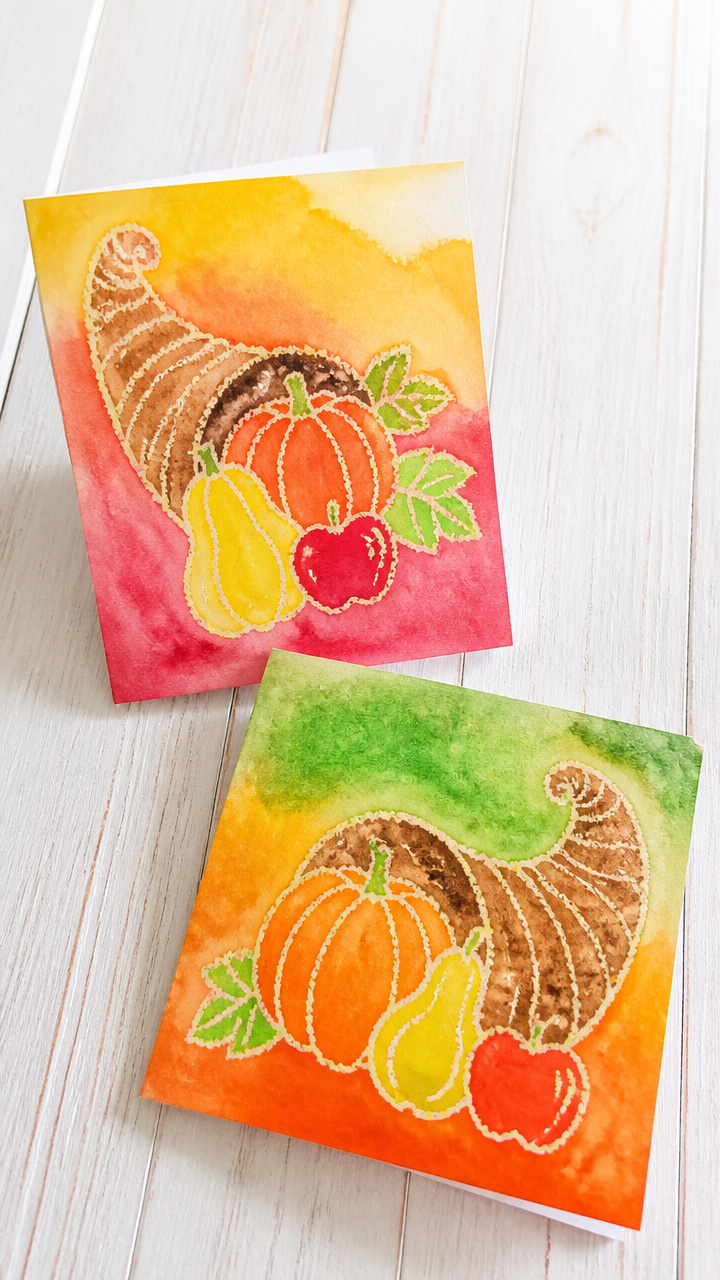
Waxy crayons resist watercolor to make glowing cornucopia greeting cards. Each one feels handmade and bright enough to display.
Materials Needed
- 5 sheets of A4 watercolor paper
- Crayola crayons (orange, yellow, green, brown)
- Watercolor set
- Small paintbrush
- Cup of water
- Pencil
How to Make It
- Fold one watercolor paper sheet in half to make a 5.5 x 8.5 inch card.
- Use orange, yellow, and brown crayons to draw a horn-shaped basket spilling fruit and vegetables on the front.
- Press firmly while coloring to lay down thick wax layers.
- Dip the paintbrush in water and lightly brush over the drawing with any watercolor shade.
- Let the card dry flat for 30 minutes before adding a message inside.


4. Paper Plate Pilgrim Hats
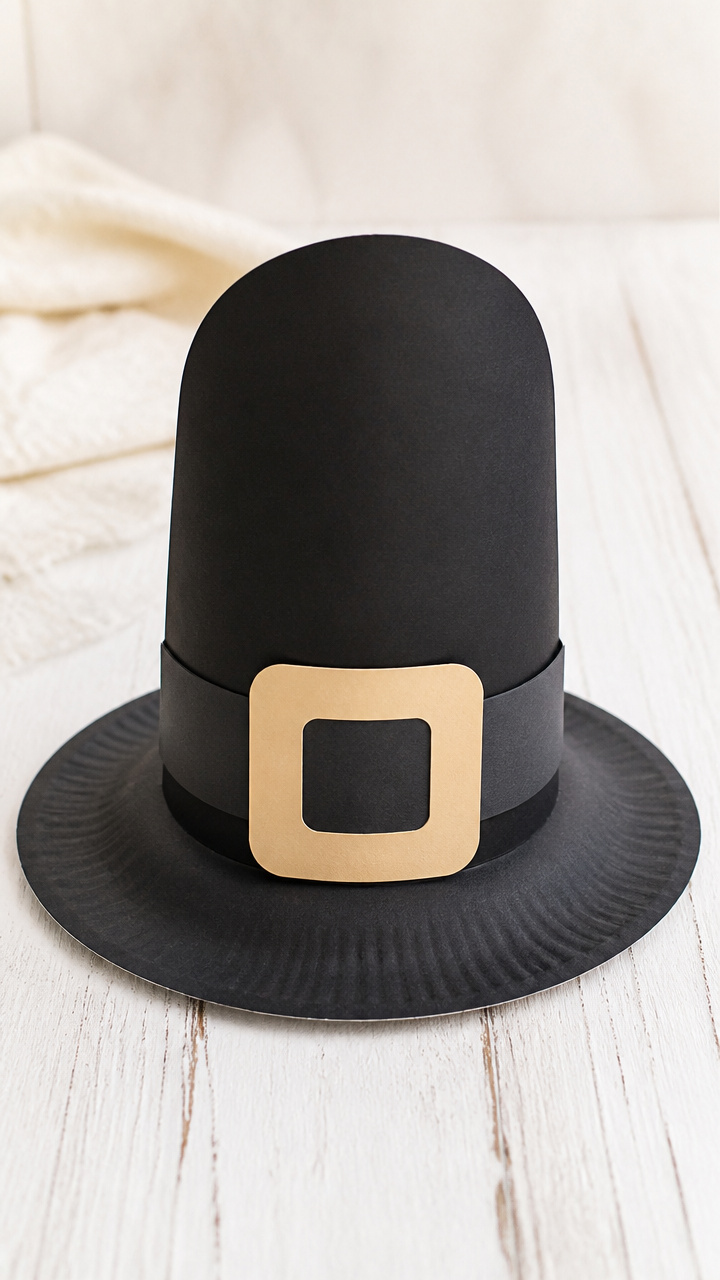
Sturdy paper plates turn into wearable hats with buckles and tall crowns. These stay intact through hours of play and photo ops.
Materials Needed
- 5 paper plates
- Black construction paper (9 x 12 inches)
- Tan craft foam sheet
- Scissors
- Glue stick
- Double-sided tape
- Ribbon (black, 1/4 inch wide, 12 inches per hat)
How to Make It
- Cut a U-shape from the rim of a paper plate to form the hat brim, leaving the opposite side attached as the crown base.
- Cut a 2 x 6 inch rectangle from black construction paper and roll it into a tube, gluing the seam.
- Glue the tube upright in the center of the plate’s uncut side.
- Cut a buckle shape from tan foam and glue it to the front of the brim.
- Tape ribbon ends under the brim to tie the hat under the chin.


5. Salt Dough Leaf Ornaments
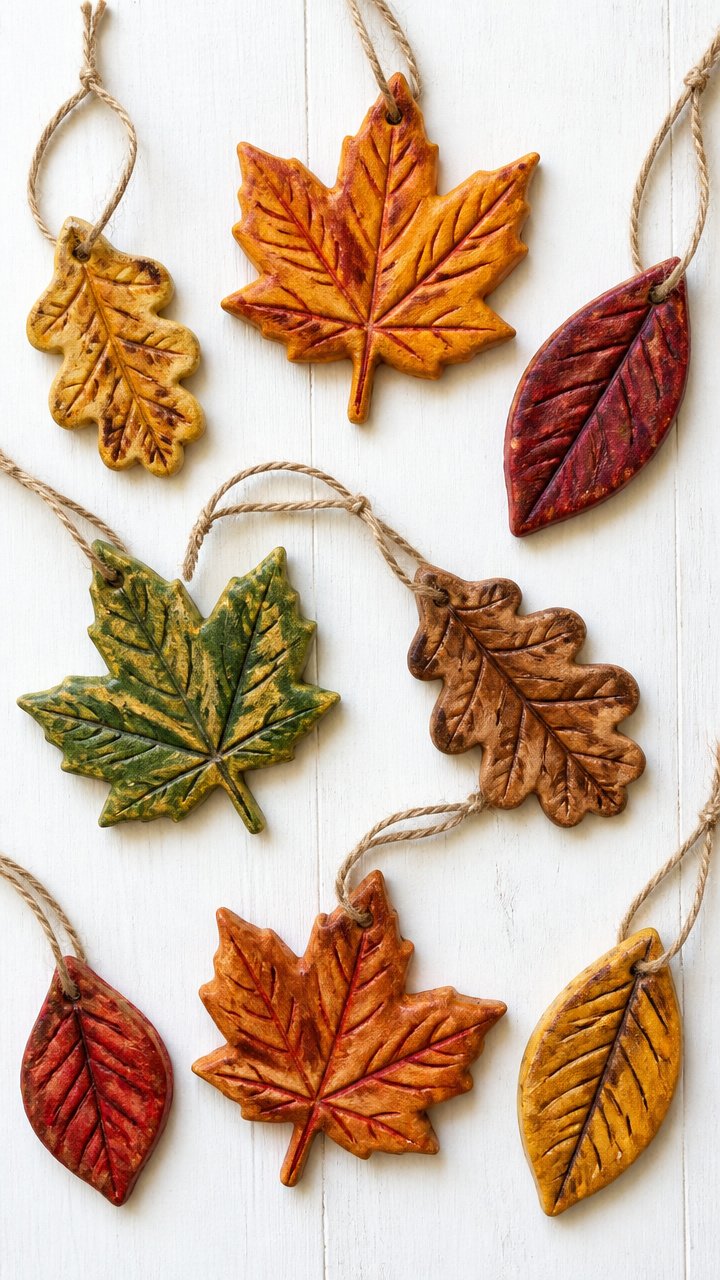
Soft salt dough bakes into crisp leaf shapes that hang on the centerpiece or tree. Kids can decorate each with initials and colors.
Materials Needed
- 2 cups all-purpose flour
- 1 cup table salt
- 3/4 cup warm water
- Rolling pin
- Leaf-shaped cookie cutters (assorted sizes)
- Straw
- Baking sheet
- Parchment paper
- Acrylic paint (red, gold, green)
- Paintbrush
- Ribbon (brown, 6 inches per ornament)
How to Make It
- Mix flour, salt, and warm water in a bowl until a smooth dough forms, kneading by hand for 3 minutes.
- Roll dough to 1/4 inch thickness on a floured surface and press leaf cutters into it.
- Lift shapes onto a parchment-lined baking sheet and poke a hole near the stem with a straw.
- Bake at 250°F for 2 hours, then let cool completely.
- Paint each ornament and thread ribbon through the hole to hang.


6. Cotton Ball Sheep Centerpiece
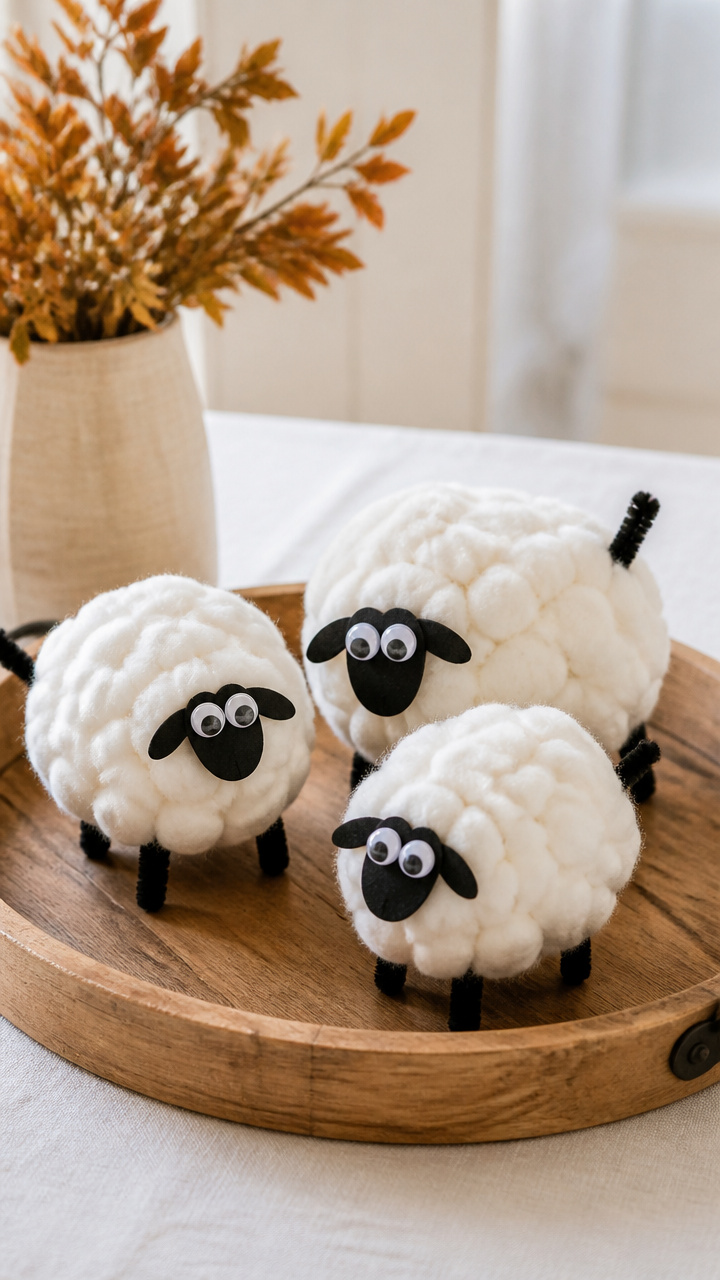
Fluffy cotton balls pile into sheep shapes that sit in a rustic dish. This soft centerpiece draws giggles and stays put during dinner.
Materials Needed
- 1 round wooden tray (10 inches)
- 10 jumbo googly eyes (1 inch)
- White school glue
- Cotton balls (1 large bag)
- Black pipe cleaners (5 strands)
- Scissors
- Hot glue gun
How to Make It
- Place a dollop of white school glue in the center of the tray and start pressing cotton balls into it, layering outward.
- Keep adding glue and cotton balls until the pile is about 3 inches high and dome-shaped.
- Cut four 2-inch legs from black pipe cleaners and push them into the underside with hot glue.
- Glue two googly eyes near the top front of the cotton mound.
- Let the glue dry for 1 hour before placing on the table.


7. Fingerprint Harvest Vines
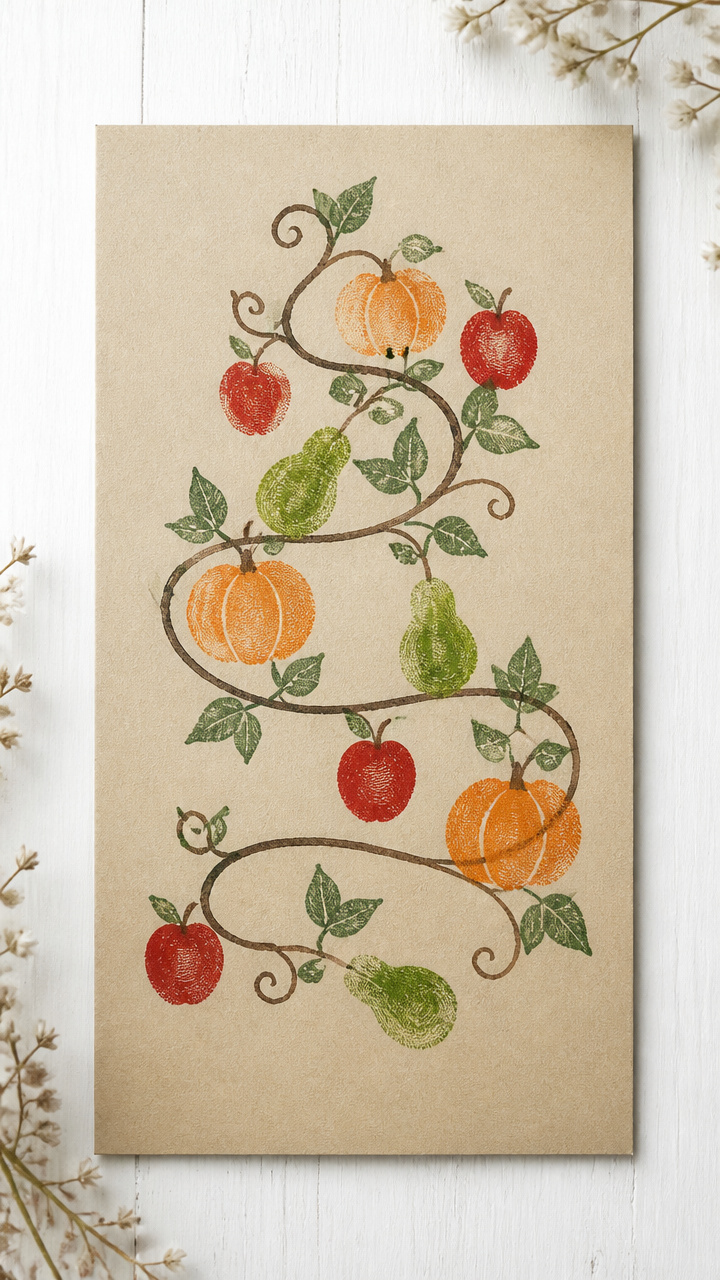
Inky fingerprints become pumpkins, apples, and gourds along a winding vine. Pressed on kraft paper, these make instant garlands.
Materials Needed
- Black ink pad
- Kraft paper roll (12 inches wide, 3 feet long)
- Red, orange, green acrylic paint
- Small paintbrush
- Pencil
- Ruler
- Twine (3 feet)
How to Make It
- Cut the kraft paper into a 12 x 36 inch strip and draw a wavy vine line down the center with pencil.
- Have your child press their fingertip into the ink pad and stamp clusters of three prints along the vine for pumpkins.
- Use red paint and a fingertip to make apple shapes beside some pumpkins.
- Paint tiny green ovals at the base of each fruit with the brush to represent stems and leaves.
- Punch holes at both ends and thread twine through to hang.


8. Construction Paper Corn Rows
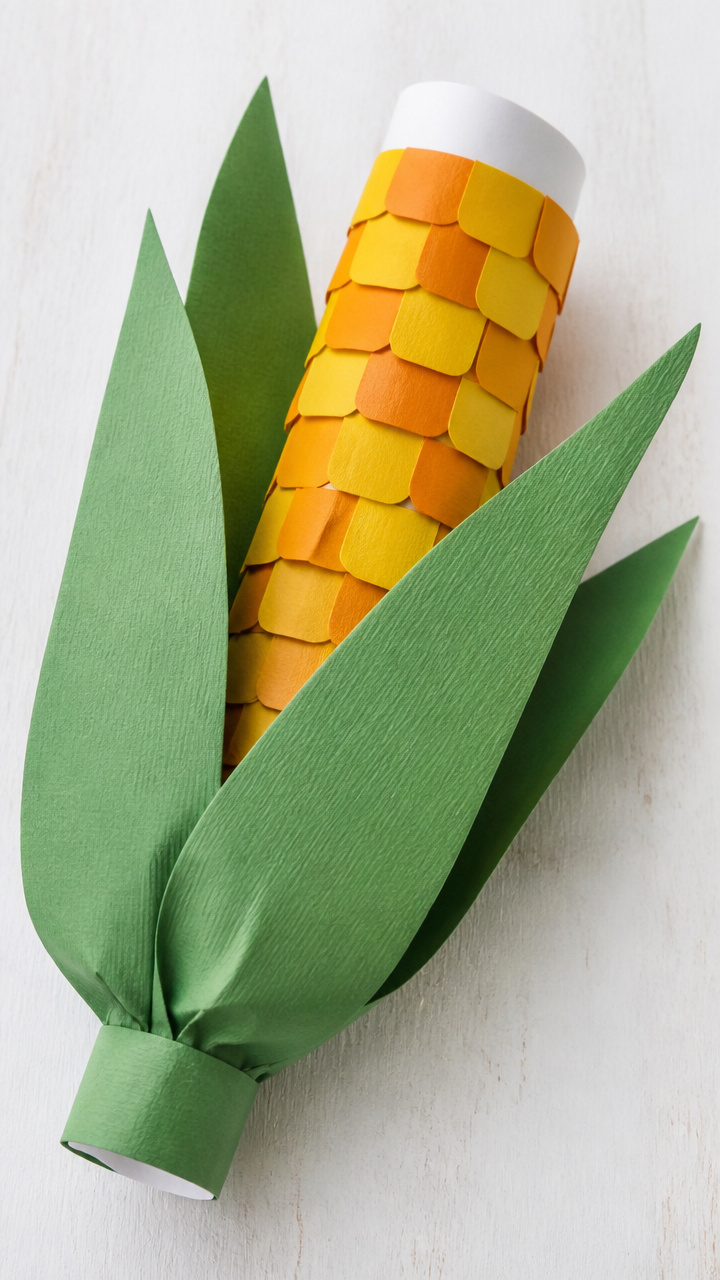
Layered paper kernels stack into colorful ears of corn. These lightweight decorations hang in windows or string into a short banner.
Materials Needed
- Yellow, white, and orange construction paper (9 x 12 inches)
- Green construction paper (9 x 12 inches)
- Scissors
- Glue stick
- Pencil
- Ruler
How to Make It
- Cut a 6 x 2 inch brown rectangle from leftover paper and draw diagonal rows of dots with pencil.
- Cut 24 small ovals (kernel shapes) from yellow, white, and orange paper.
- Glue one oval into each dot, alternating colors in staggered rows.
- Cut two long green husk shapes from green paper and curl slightly around the sides.
- Glue the husks behind the kernel section so they peek out at both ends.


9. Popsicle Stick Weaving Frames
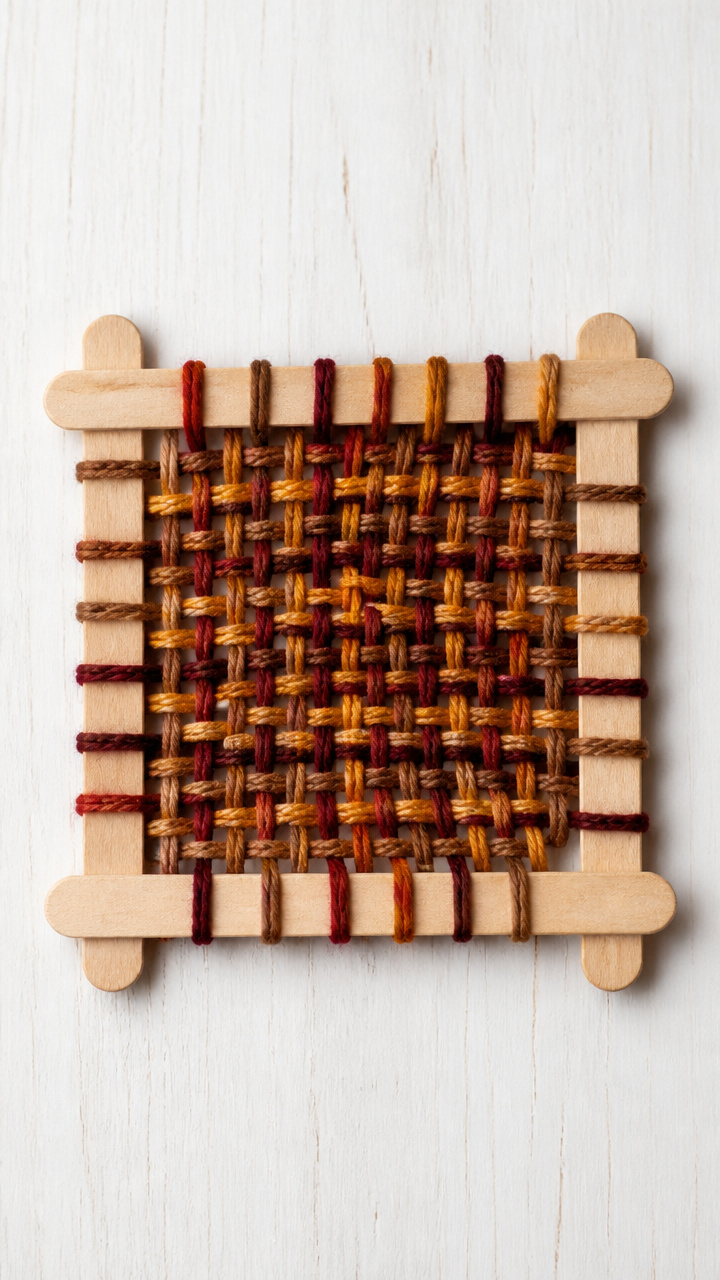
Mini looms made from popsicle sticks hold woven yarn squares in autumn shades. These tiny textiles can be framed or taped to place cards.
Materials Needed
- 4 craft sticks per child
- Yarn scraps (red, gold, brown, 12 inches each)
- Scissors
- White glue
- Clothespin
How to Make It
- Glue three sticks together in a square frame, leaving one side open, and let dry for 15 minutes.
- Tie one end of a yarn piece to the bottom stick and weave it up and over, under, over across the vertical stick spaces.
- Switch colors every few rows by tying new yarn to the old end and trimming excess.
- When the weaving reaches the top, tie off the end and trim loose tails.
- Clip the clothespin to the top stick to hang it like a wall tapestry.
![Popsicle Stick Cottage Model Kit – 350+ Pre-Cut Wooden Pieces – Rustic DIY House Craft for Kids and Adults – Complete Kit [Everything Included] by POPSI KITS](https://m.media-amazon.com/images/I/41ipWx9Y9CL._SL500_.jpg)


10. Button Pie Art
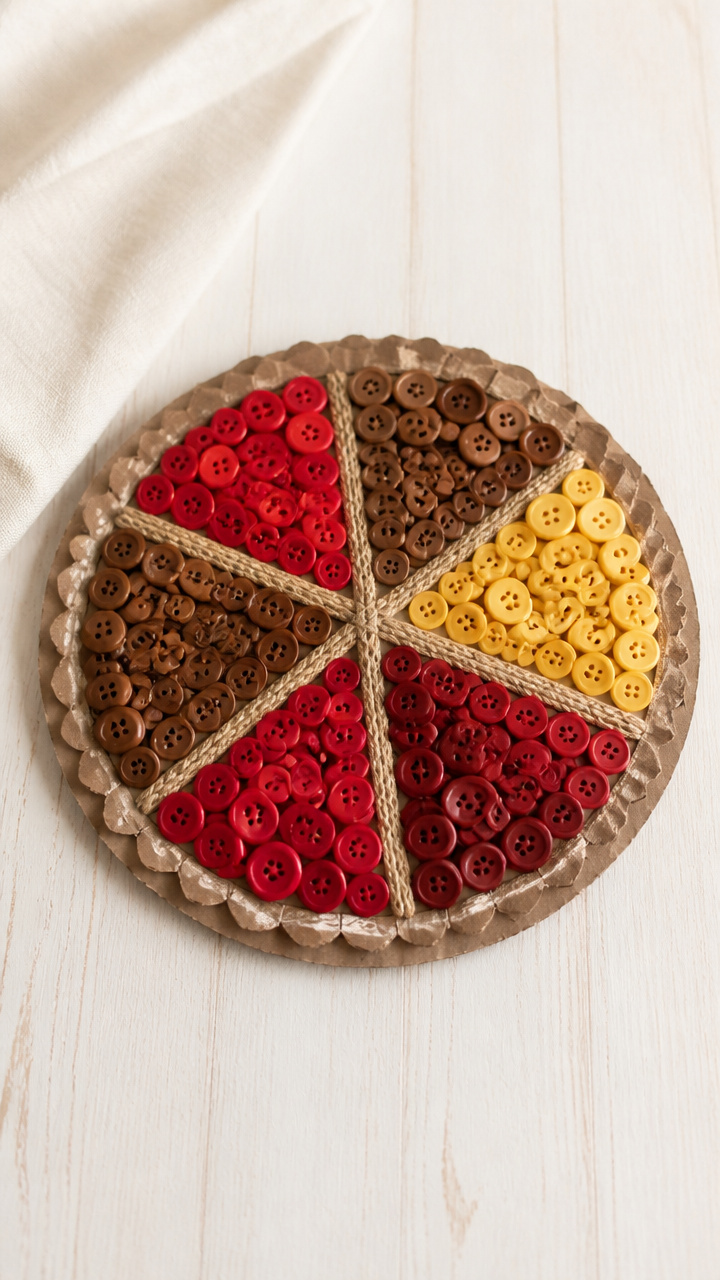
Colorful buttons press into pie-shaped cardboard to mimic fruit slices. These sweet little pies sit on shelves or serve as napkin weights.
Materials Needed
- Cardboard (cereal box thickness, 6 x 6 inches)
- Round lid (3 inch diameter)
- Buttons (brown, red, yellow, assorted sizes)
- White school glue
- Craft knife
- Glue brush
How to Make It
- Trace the lid onto cardboard twice and cut out both circles with a craft knife.
- Glue one circle to the other, creating a thicker base, and let dry for 20 minutes.
- Brush glue on the top surface and arrange buttons tightly in concentric circles to resemble apple or cherry pie filling.
- Press each button firmly and let the piece dry facedown for 1 hour.
- Use as a decorative accent next to each napkin.


11. Tissue Paper Window Sun Catchers
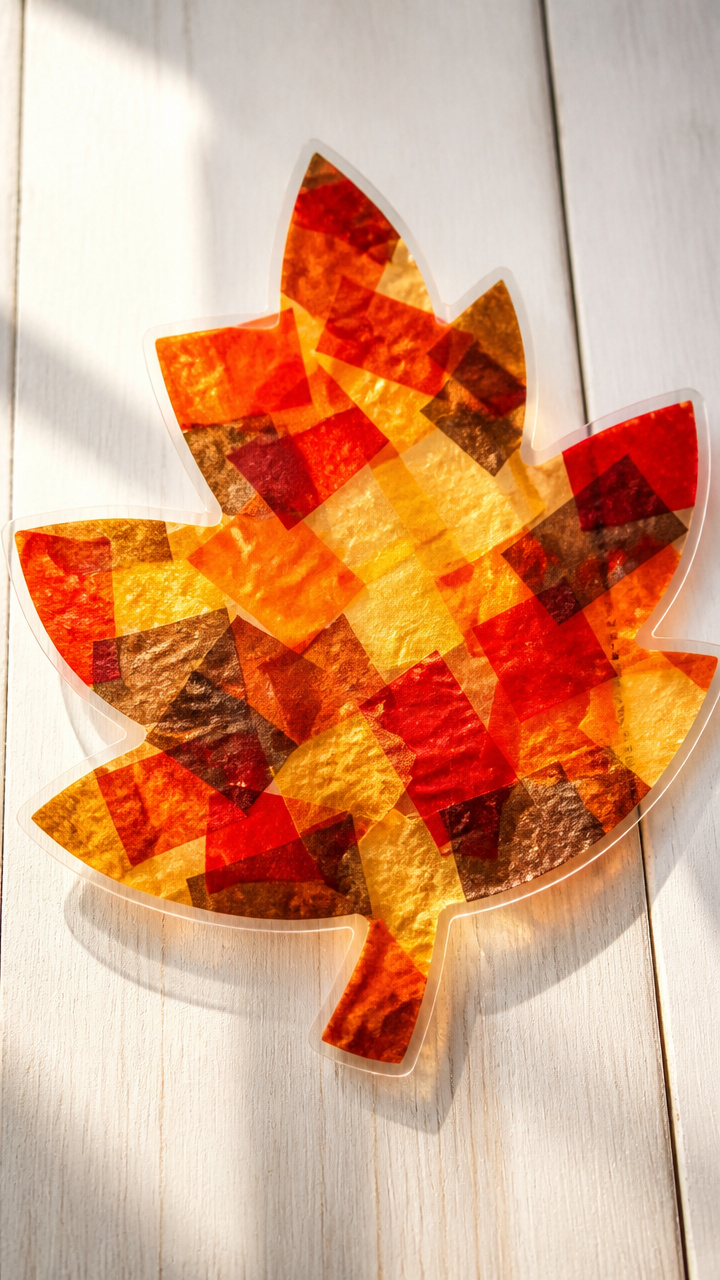
Translucent tissue squares stick to contact paper to make glowing harvest scenes. Natural light turns these into radiant table borders.
Materials Needed
- Clear contact paper (12 x 18 inches)
- Orange, yellow, red, and brown tissue paper
- Scissors
- Circle stencil (2 inches)
- Pencil
- Ruler
How to Make It
- Cut contact paper into a 10 x 12 inch rectangle and peel off the backing.
- Trace ten 2-inch circles on the sticky side using the stencil and pencil.
- Cut tissue paper into 1 inch squares and have your child fill each circle with layered pieces, color mixing as they go.
- Once covered, place a second identical contact paper sheet on top, sticky sides together.
- Trim edges and tape to a sunny window with masking tape.

12. Clay Pumpkin Toothpick Holders
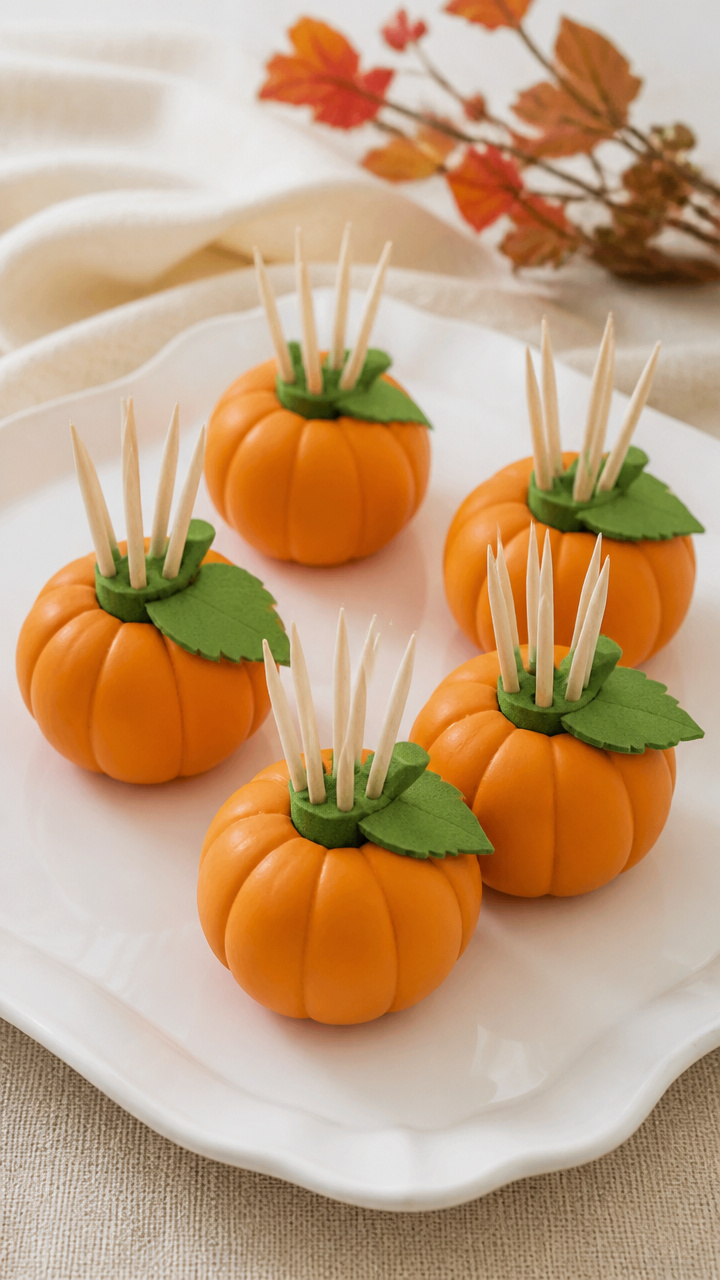
Air-dry clay rolls into smooth pumpkins that cradle toothpicks for appetizers. These functional sculptures add whimsy to the snack table.
Materials Needed
- White air-dry clay (4 oz block)
- Orange acrylic paint
- Paintbrush
- Toothpicks (5 per pumpkin)
- Green craft foam
- Scissors
- Glue stick
How to Make It
- Roll clay into a 2 inch ball and gently press five vertical lines with a toothpick to create segments.
- Flatten the top and bottom slightly so it sits level and insert a toothpick halfway into the top center.
- Let clay dry overnight on a paper towel.
- Paint the entire pumpkin orange and let dry for 2 hours.
- Cut a small stem and leaf from green foam and glue to the top around the toothpick.

13. Feather and Cork Turkeys
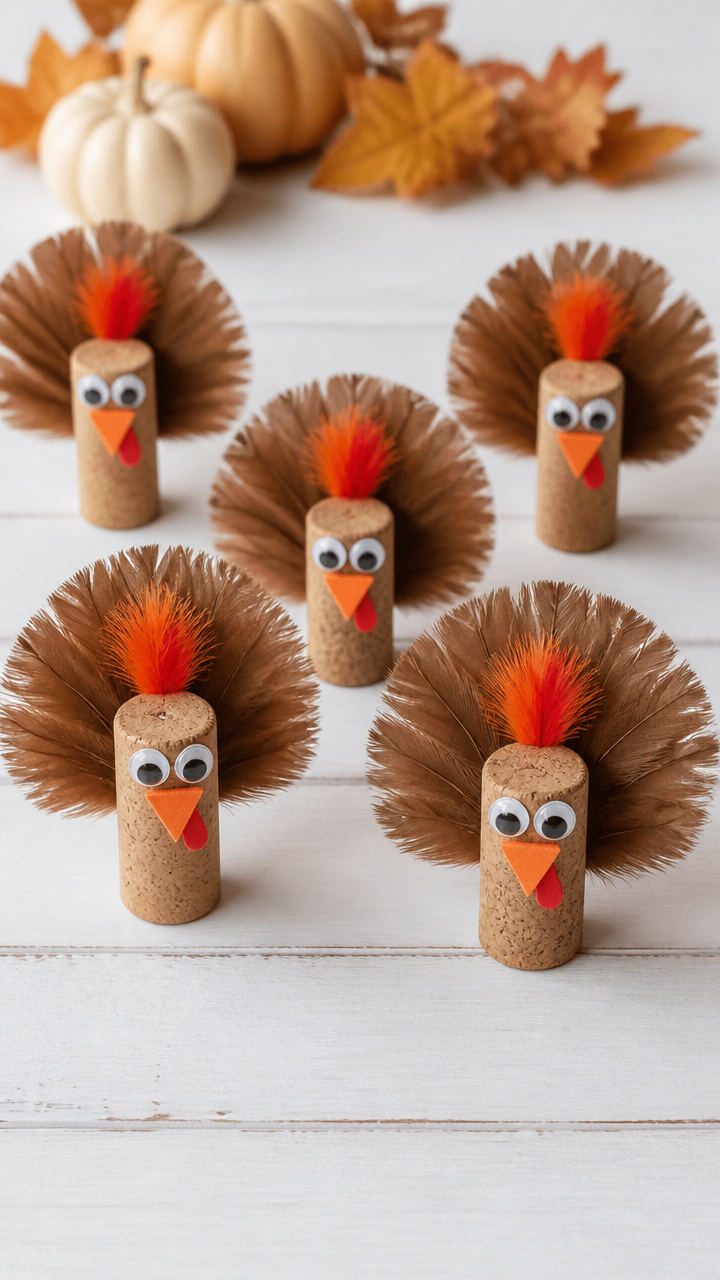
Cork bottle stoppers grow feather fans and painted faces to become mini turkeys. These stand upright on the table and take just minutes.
Materials Needed
- 5 natural cork stoppers
- Colored craft feathers (brown, red, orange, 3 inches long)
- Hot glue gun
- Googly eyes (1/2 inch, 5 pairs)
- Orange and red craft foam
- Scissors
- Acrylic paint (brown)
- Paintbrush
How to Make It
- Paint each cork brown and let dry for 30 minutes on a paper plate.
- Cut small triangle beaks and waddles from orange and red foam.
- Glue one googly eye, beak, and waddle to the front of the cork with hot glue.
- Bundle five feathers together and glue the quills to the back of the cork.
- Let glue cool completely before placing on the table.


14. Apple Stamp Name Tags
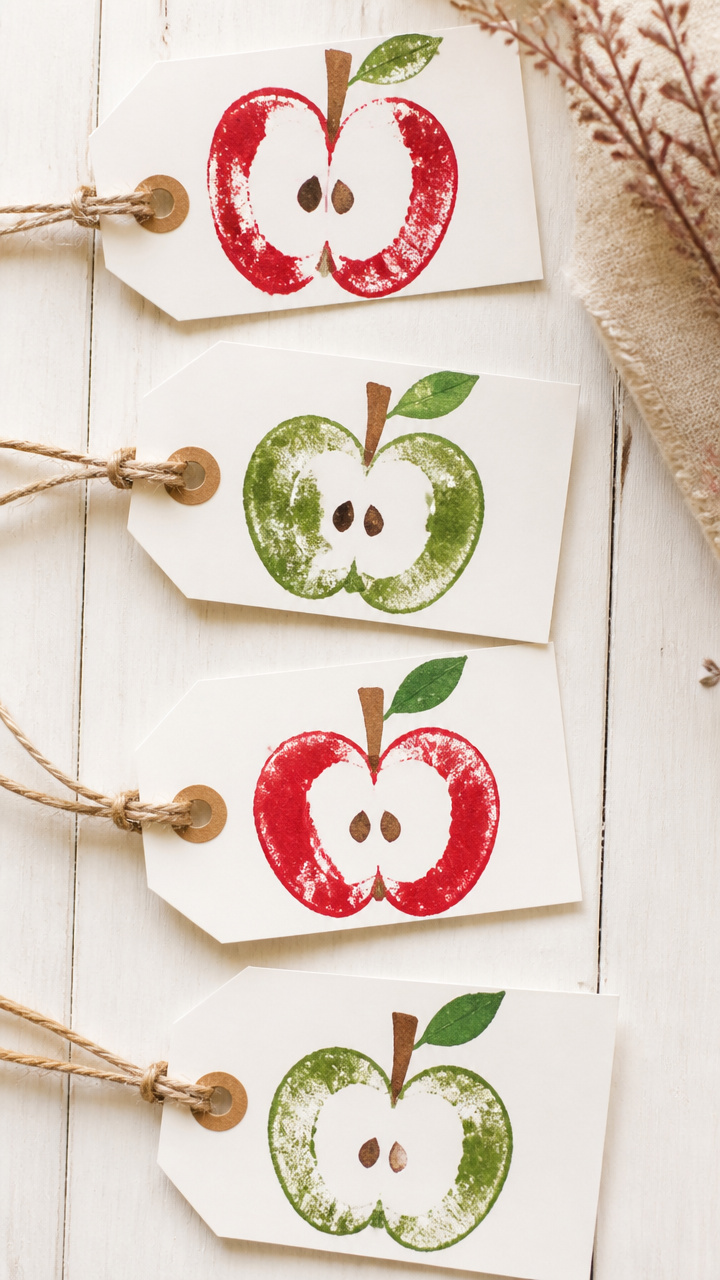
Halved apples dip into paint to stamp names on cardstock tags. These double as place cards and party favors.
Materials Needed
- 5 red apples
- Knife
- Paper plates
- Red, green, and brown acrylic paint
- Paintbrush
- A4 white cardstock
- Hole punch
- Twine (6 inches per tag)
- Black marker
How to Make It
- Cut each apple in half crosswise and pat the seed side dry with a paper towel.
- Pour paint onto paper plates and brush a thin coat onto the apple’s cut surface.
- Press the apple firmly onto a cardstock rectangle and lift straight up.
- Write a guest’s name below the print with black marker and let dry for 20 minutes.
- Punch a hole and thread twine through to tie around napkins.


15. Yarn-Wrapped Thankful Jars
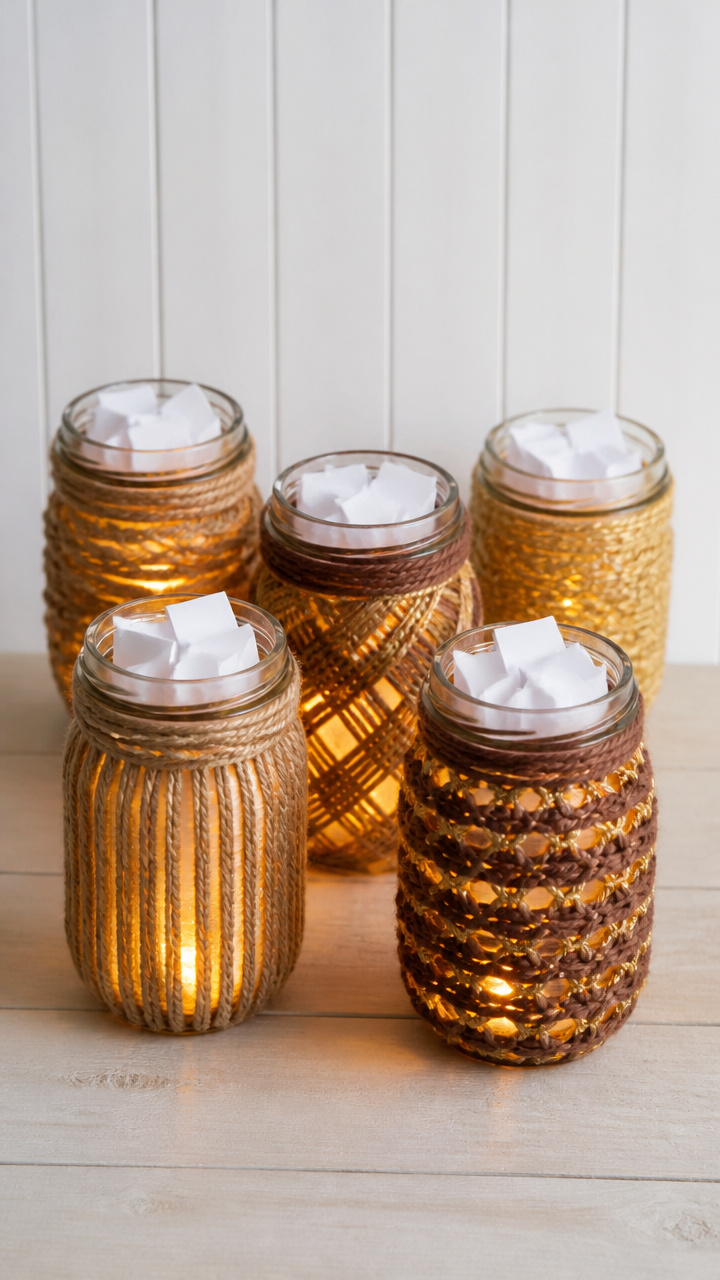
Glass jars wrap in warm yarn to hold folded notes of gratitude. These glow softly when lit from within.
Materials Needed
- 5 clean glass jelly jars
- Brown and gold yarn (size 4, 10 yards each)
- White school glue
- Paintbrush
- Small LED tea light
- Small paper squares (2 x 2 inches, 10 per jar)
How to Make It
- Brush a thin line of glue down the side of a jar and press the yarn end to it.
- Wrap yarn tightly around the jar, adding more glue every inch to keep it stuck.
- Continue until the jar is half-covered, then trim and glue the end.
- Let dry for 30 minutes, then place an LED light inside.
- Invite guests to write what they’re thankful for on paper squares and drop them in.


These crafts settle busy hands and spark real moments before the big meal. Pick one that fits your table, grab what you have, and start creating.