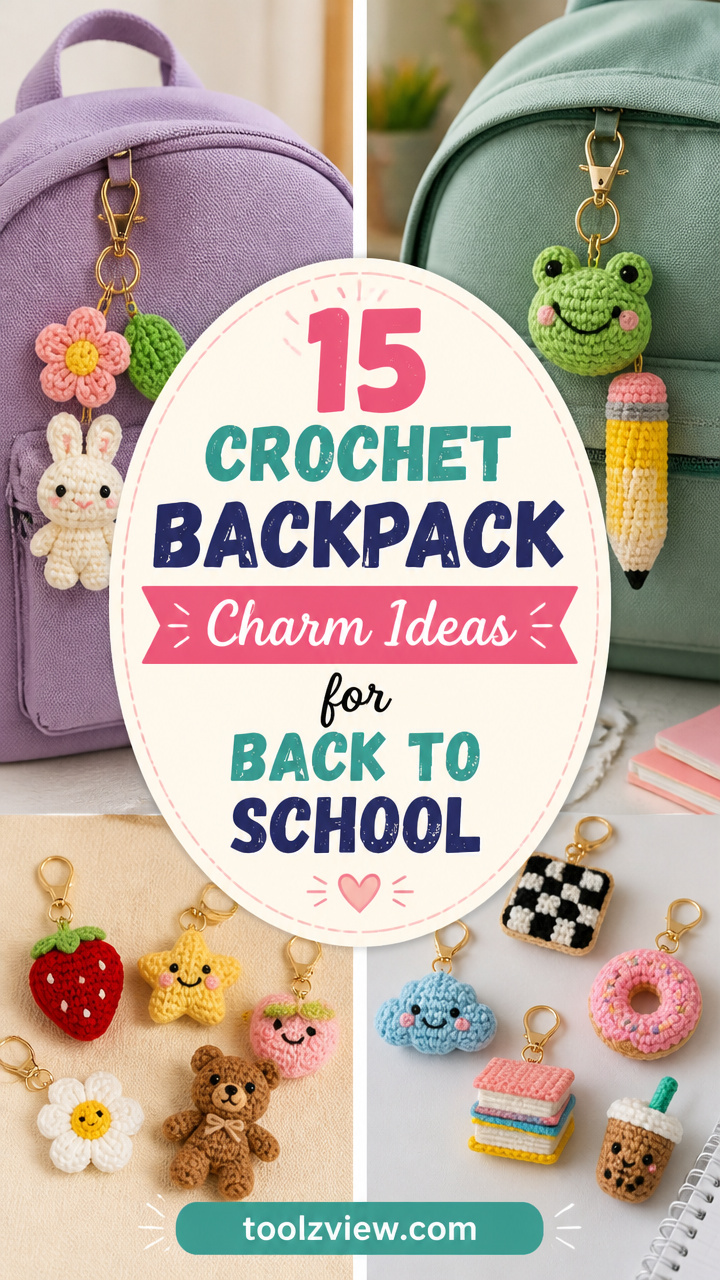
15 Crochet Backpack Charm Ideas for Back to School
Backpack charms are more than just cute add-ons, they’re a chance to show off personality and make the everyday a little brighter. These small projects let you play with color, texture, and shape while practicing essential crochet techniques in a low-stakes way.
From tiny plushies to structured mini bags, each charm uses different stitches and construction methods so you can build skills across the set. You’ll find options that work up fast and others that invite slow, mindful stitching — all perfect for clipping onto zippers or straps.
What You’ll Need
Most of these patterns use hooks between 3.5mm (E-4) and 5.0mm (H-8) and yarn in weights from DK to worsted. Keep stitch markers, a tapestry needle, scissors, and polyfill handy as many involve amigurumi or seaming.
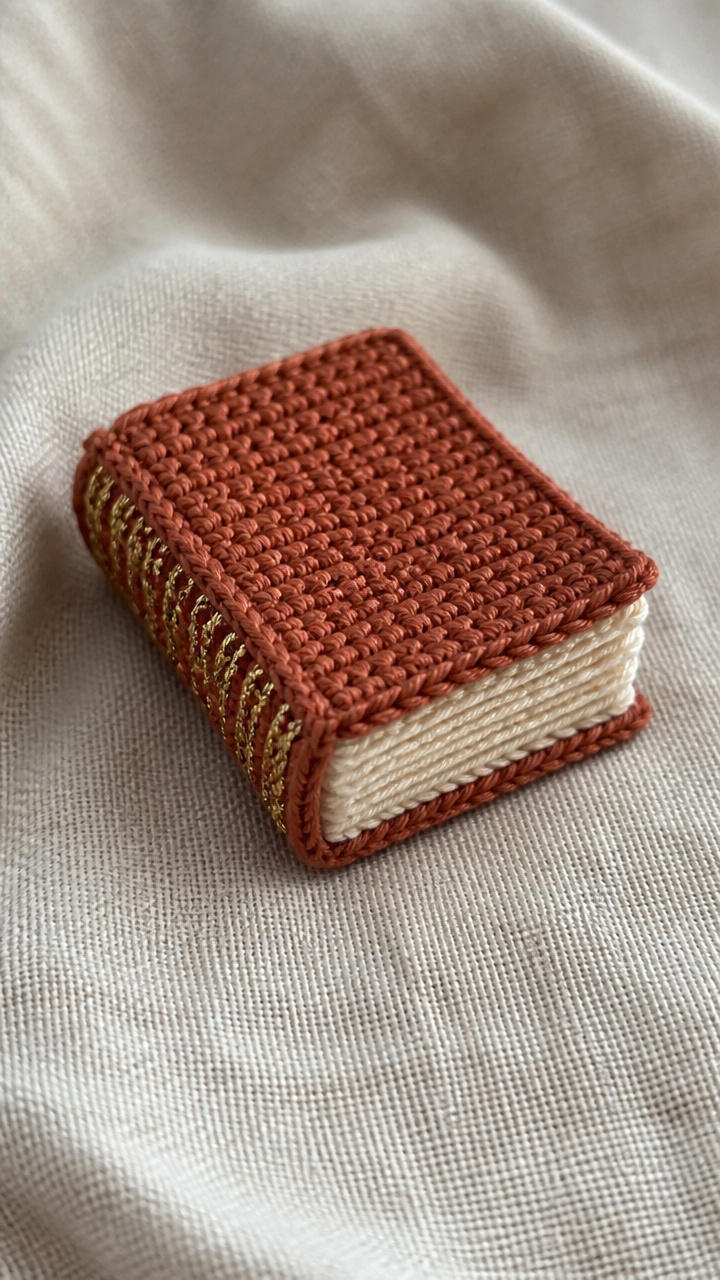
1. Mini Puff Stitch Book
Additional materials: stitch markers x2, tapestry needle, polyfill stuffing, thin cardboard square (3cm x 3cm)
Stitches used: magic ring, single crochet, puff stitch, slip stitch join
This tiny book charm has soft, quilted-looking pages made with puff stitches and a flat spine for realism. It’s ideal for book lovers and looks great in school colors or with contrasting cover and page shades.
How it’s made: Begin with a magic ring and work in continuous rounds, alternating single crochet and puff stitch rows to create textured pages. After shaping the cover, insert a small cardboard square for structure before closing and adding a crocheted spine strip.
Key technique: The puff stitch is worked by yarn over, insert hook, pull up a loop (repeat 5 times in same stitch), then yarn over and pull through all 11 loops on hook. Top it off with a chain 1 to lock the stitch. Keep tension even so the puffs don’t lean or collapse.
⚠️ Watch out for: Puff stitches can get too loose if you don’t snug the final chain down. Mark the first stitch of each round clearly since switching between single crochet and puff rows can throw off the count.
Finishing: Weave in all ends through the back loops only to avoid visible bumps. Sew the spine strip on neatly with matching thread and attach a jump ring at the top center.
Tips: Try using a metallic yarn for the spine to mimic a real book binding.
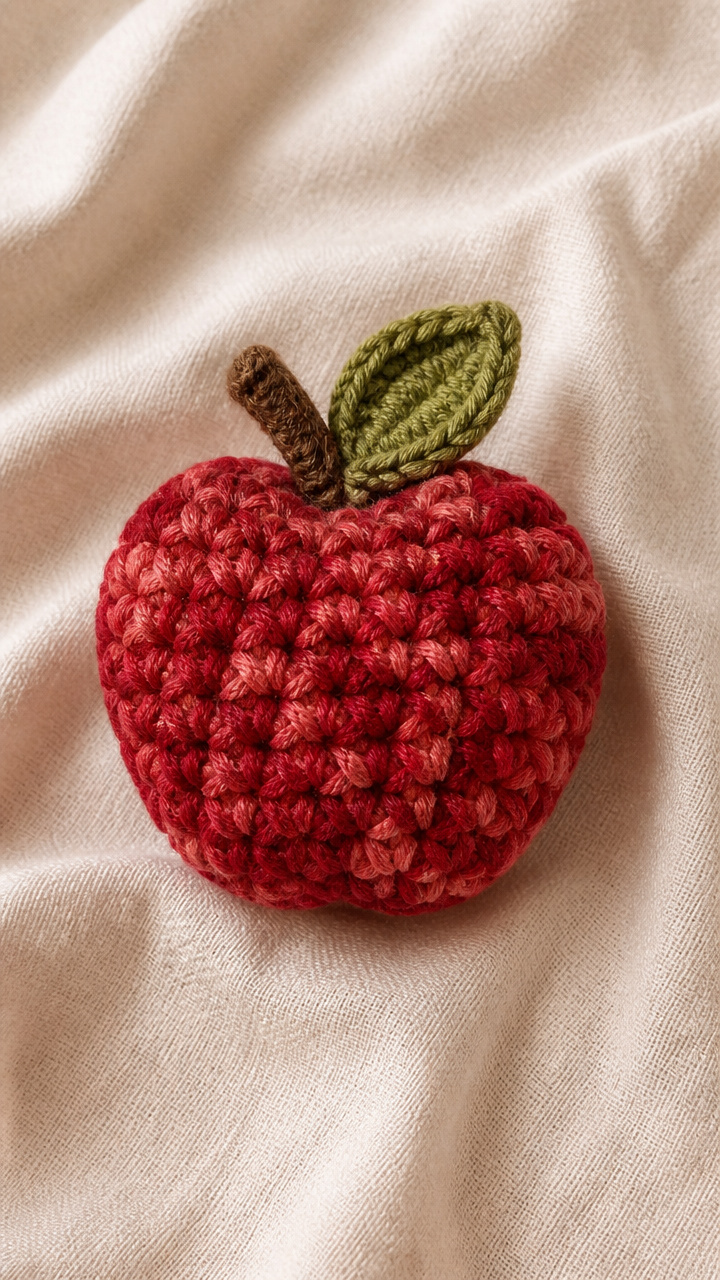
2. Bobble Apple Charm
Additional materials: tapestry needle, polyfill stuffing, small green scrap yarn, jump ring
Stitches used: magic ring, single crochet, bobble stitch, invisible decrease
A plump red apple with a crisp green leaf and brown stem, this charm uses bobbles to give dimension without bulk. The texture makes it stand out on any backpack zipper pull.
How it’s made: Worked in continuous rounds from a magic ring, increasing evenly to form a sphere. Bobble stitches are placed in staggered rounds to mimic apple skin texture. Stem and leaf are made separately and hand-sewn on after assembly.
Key technique: The bobble stitch is made by working 5 incomplete double crochets in one stitch (each left with 2 loops on hook), then yarn over and pull through all 11 loops. This creates a tight, rounded bump. Space bobbles evenly and avoid twisting the base loops.
⚠️ Watch out for: Bobbles can pop to the back if the final pull-through isn’t snug. Work them all on the right side and check orientation after each one. Stuff lightly so the shape stays round but not overstuffed.
Finishing: Close the opening with an invisible finish, weave in tail through inner edge, and cinch shut. Hand-stitch the twisted wire stem and leaf securely using green and brown yarn scraps.
Tips: Use a variegated red yarn with subtle streaks to mimic real apple coloring.
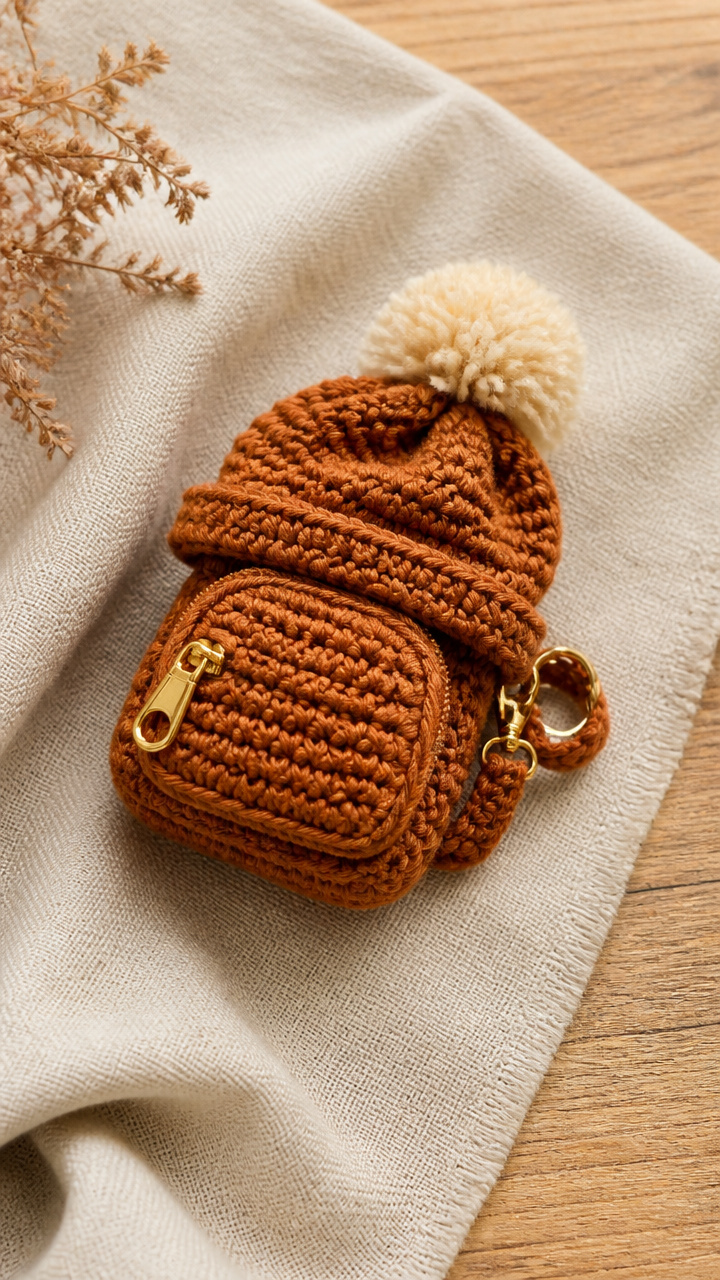
3. Slouchy Beanie Mini
Additional materials: tapestry needle, stitch marker, small pom-pom (1.5cm)
Stitches used: chain, single crochet, half double crochet, slip stitch
A tiny folded beanie with a fluffy pom-pom sits snugly on a zipper pull. Choose team colors or favorite hues to match seasonal outfits.
How it’s made: Start with a foundation chain, work flat in rows using half double crochet, then seam the edges together to form a tube. Fold the top edge down to create the cuff and slip stitch the pom-pom to the crown.
Key technique: The half double crochet is yarn over, insert hook into stitch, pull up a loop, yarn over and pull through all three loops on hook. This gives a tight but stretchy fabric ideal for the beanie’s body.
⚠️ Watch out for: Edges can curl if tension is too tight. Keep your foundation chain relaxed and maintain consistent stitch height throughout. Seam carefully so the join doesn’t twist.
Finishing: Weave in all ends inside the hat. Attach the pom-pom with strong thread through the crown and secure the jump ring inside the cuff fold.
Tips: Swap the pom-pom for a mini tassel made from embroidery floss for a different look.
4. Starburst Badge Charm
Additional materials: stitch markers, tapestry needle, thin felt circle (4cm diameter), pin backing or jump ring
Stitches used: magic ring, treble crochet, slip stitch, front post double crochet
Radiating yarn spikes give this charm a bold, medal-like appearance. The stiffened back keeps it flat and durable for daily wear.
How it’s made: Work from the center magic ring, making long treble crochet rays outward. After completing the starburst, work a round of front post double crochets around the outer edge to create a raised border. Felt is glued or stitched to the back for stability.
Key technique: Treble crochets for the rays are worked by yarn over twice, insert hook, pull up a loop, yarn over and pull through two loops (twice), then yarn over and pull through last two. Make all rays the same length by counting rows or using a ruler.
⚠️ Watch out for: Rays can splay unevenly if tension varies. Use a stitch marker to mark the first ray and work each in the same stitch of the central ring. Avoid pulling too tight on connecting slip stitches.
Finishing: Weave in all ends along the backside of the rays. Secure the felt disc with fabric glue or whip stitch it in place. Attach a pin clutch or jump ring to the top center.
Tips: Try a gradient yarn to make the rays fade from dark to light.
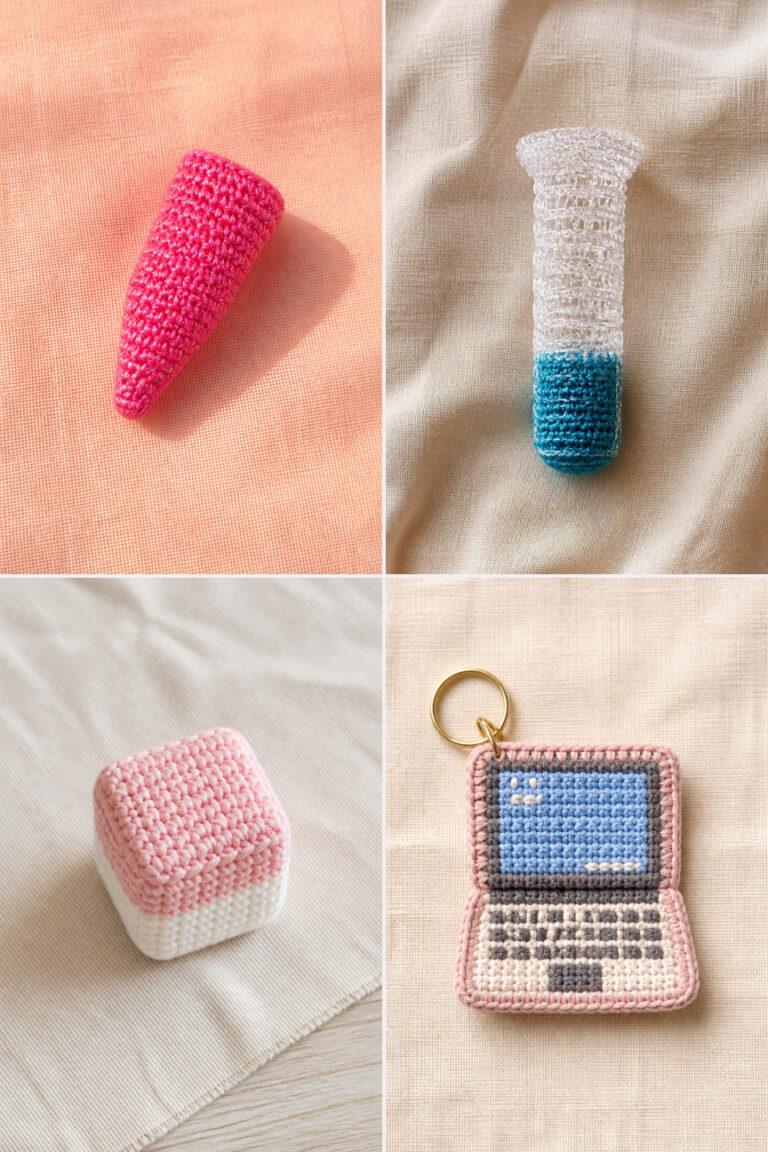
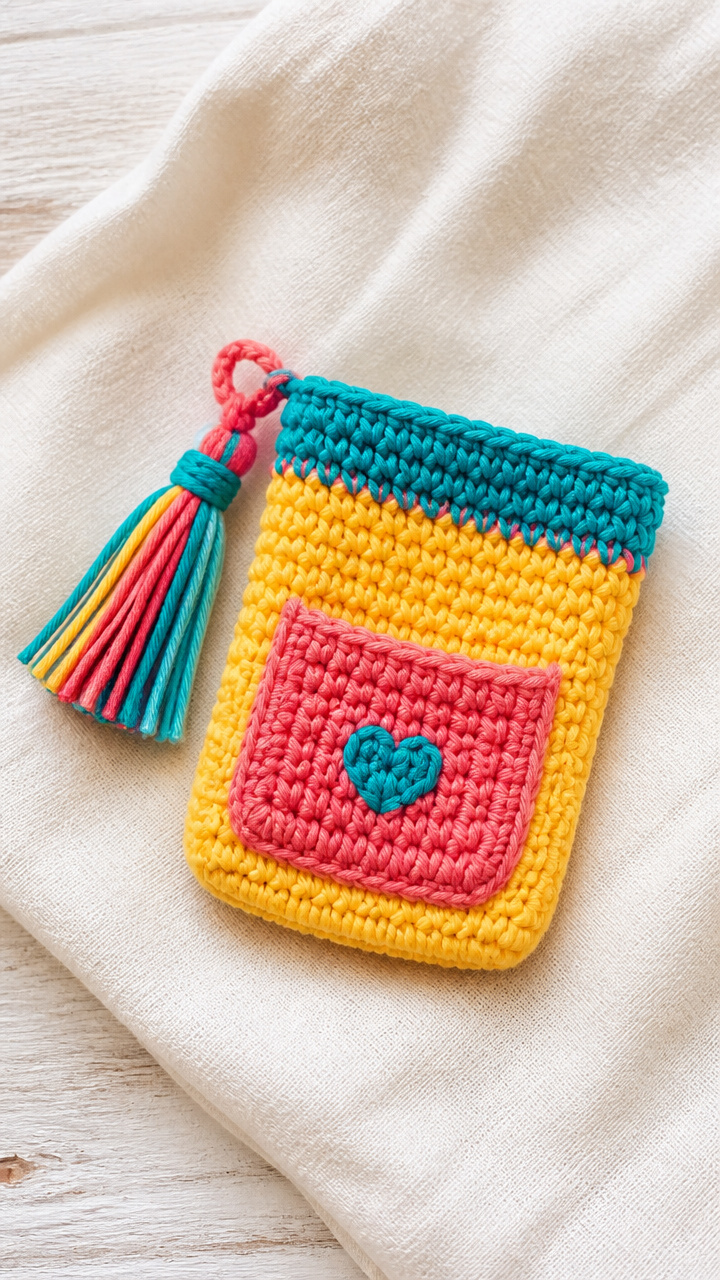
5. Tiny Tassel Pen Holder
Additional materials: tapestry needle, small plastic ring (1.5cm), embroidery floss for tassel, scissors
Stitches used: chain, single crochet, slip stitch
This functional charm holds a mini pen and dangles a colorful tassel. It’s both practical and playful, especially in bright contrast colors.
How it’s made: Chain a rectangle, then single crochet in rows until the piece wraps snugly around a standard pen tip. Join short ends with slip stitches, then attach a yarn tassel to the bottom corner and slide a plastic ring to the top edge for hanging.
Key technique: The tassel is made by wrapping embroidery floss around a card, tying near the top, cutting the bottom loop, and trimming evenly. Attach it by threading the tie ends through the corner stitch and knotting securely on the back.
⚠️ Watch out for: The band can be too tight or loose if gauge isn’t checked. Test wrap it around a pen before seaming. Don’t skip securing the tassel knot well—it gets tugged often.
Finishing: Weave in all seams and ends inside the band. Trim tassel to uniform length and attach jump ring to the top seam for clipping.
Tips: Make a set in different colors to match subject notebooks—red for math, blue for English, etc.
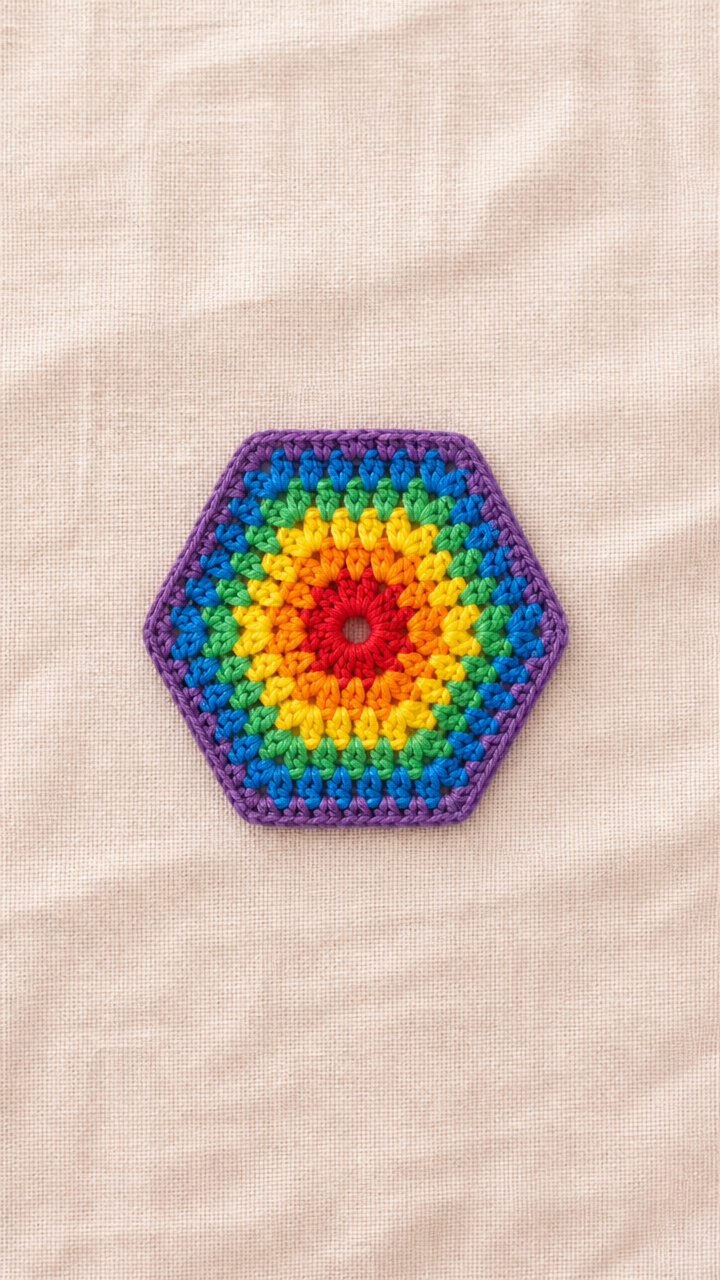
6. Hexagon Rainbow Pin
Additional materials: stitch markers, tapestry needle, felt backing (5cm hexagon), pin clutch
Stitches used: magic ring, double crochet, slip stitch, join-as-you-go
A compact rainbow made of interlocked hexagons stands out with clean color blocks. The flat design lies smoothly against a backpack.
How it’s made: Crochet seven hexagons in rainbow colors using a join-as-you-go method where each new hexagon attaches directly to the previous ones. Once complete, sew onto a felt backing and attach a pin clutch to the back.
Key technique: Join-as-you-go involves working the last side of each hexagon by slip stitching into the corresponding side of the adjacent piece instead of chaining. This creates a seamless join without sewing later.
⚠️ Watch out for: Hexagons can warp if tension differs between joins. Use stitch markers at corners and keep slip stitch joins aligned with the base of the receiving hexagon. Count sides carefully to avoid misalignment.
Finishing: Press gently with a damp cloth to block flat. Whip stitch the felt backing securely and attach the pin clutch centered at the top.
Tips: Use solid colors to keep the rainbow crisp, or try tonal shades for a softer effect.
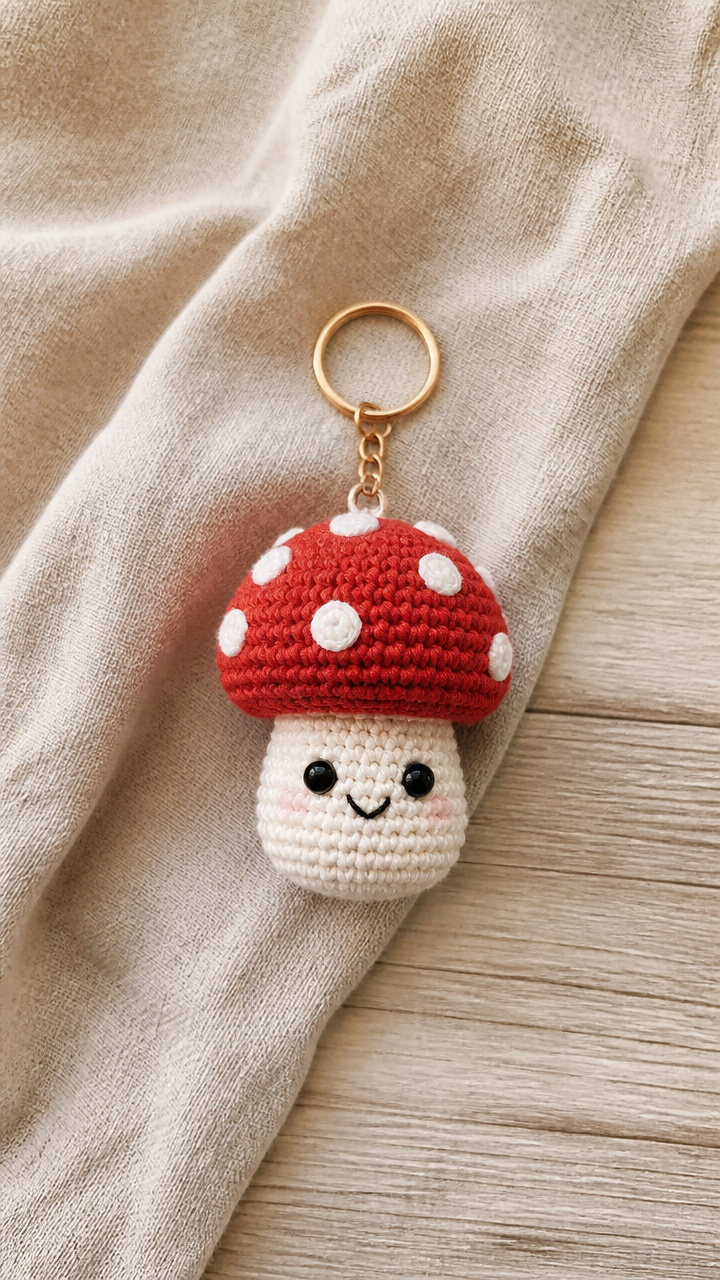
7. Mushroom Keycharm
Additional materials: tapestry needle, polyfill stuffing, 9mm safety eyes x2, jump ring
Stitches used: magic ring, single crochet, invisible decrease, slip stitch
A cheerful little mushroom with a spotted cap and friendly eyes brings forest magic to a backpack. Great for nature lovers and fairy tale fans.
How it’s made: Cap and stem are crocheted separately in spirals from magic rings. Cap uses red with white spot detailing, stem is white. After stuffing, sew cap to stem and attach safety eyes near the base for a whimsical face.
Key technique: The invisible decrease is done by inserting the hook into the front loops only of the next two stitches, then working a single crochet decrease. This hides the seam and keeps the surface smooth.
⚠️ Watch out for: Caps can flare if increases aren't spaced evenly. Use stitch markers every 6 stitches to track rounds. Don’t overstuff the stem—it should stay slender.
Finishing: Secure all internal ends by knotting and weaving through stuffing. Position eyes just above the stem joint and seal backs with a dab of clear nail polish.
Tips: Swap safety eyes for embroidered ones if gifting to young children.
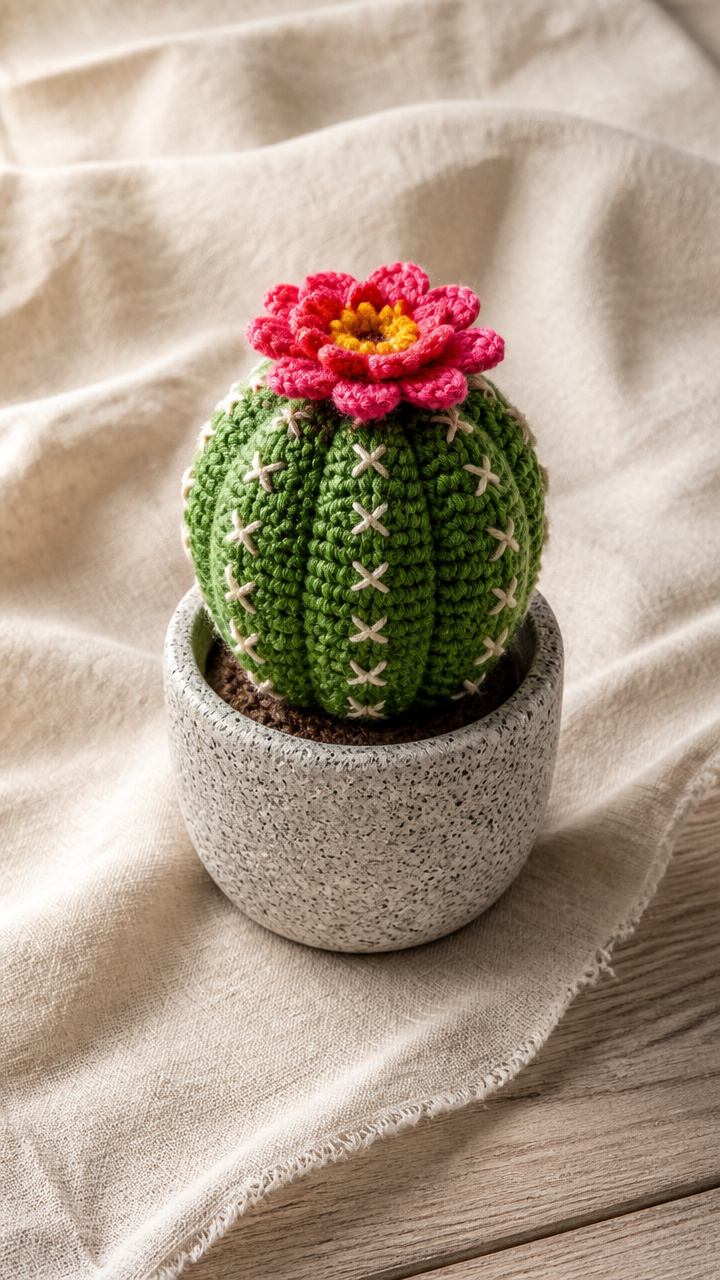
8. Cactus in Pot
Additional materials: tapestry needle, polyfill stuffing, small wooden bead (6mm), jump ring
Stitches used: magic ring, single crochet, increase, slip stitch
A squat green cactus peeks from a textured grey pot with a bright flower on top. The layered construction adds depth and realism.
How it’s made: Work cactus body in continuous rounds with strategic increases to form arms. Pot is worked bottom-up in single crochet with a tapered shape. Cactus is stuffed and inserted into the pot, then a wooden bead is glued to the top as a flower.
Key technique: Arm placement requires marking specific increase points. For each arm, work 2 single crochets in the same stitch, then continue around. Repeat at opposite point for second arm. Keep arms small and proportional.
⚠️ Watch out for: Arms can droop if not supported. Stuff them firmly and ensure increases are mirrored. The pot can flare if too many stitches are added—taper by decreasing every few rounds near the rim.
Finishing: Weave in all ends inside the pot or cactus. Glue the wooden bead flower securely to the cactus peak and attach a jump ring to the pot’s outer rim.
Tips: Try a speckled yarn for the pot to mimic concrete.
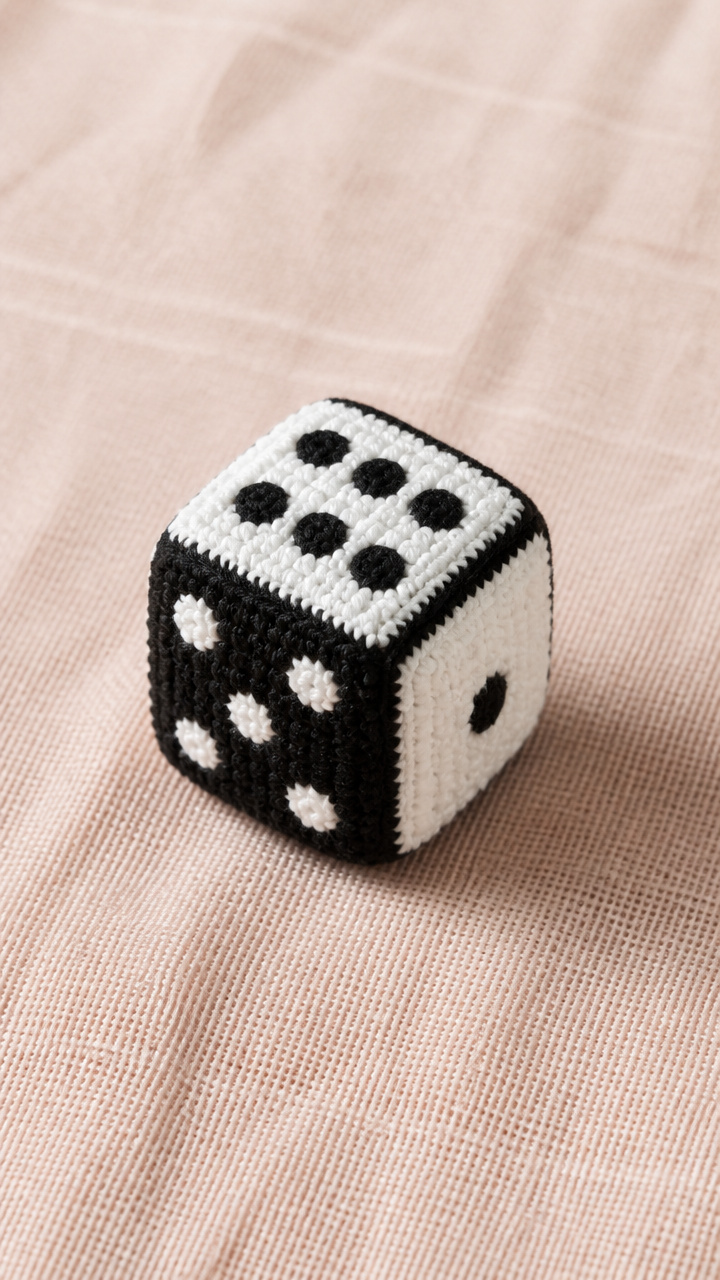
9. Checkerboard Dice Cube
Additional materials: stitch markers, tapestry needle, polyfill stuffing, cardboard template
Stitches used: magic ring, single crochet, intarsia colorwork, seaming
A fully 3D dice charm with accurate pip layouts on each face. The crisp colorwork makes it look like a real gaming die.
How it’s made: Six squares are crocheted individually using intarsia for the pip patterns. Each face is shaped to curve slightly. After blocking, sew faces together into a cube, stuffing lightly before closing the last seam.
Key technique: Intarsia is used to create the black dots on white background (and vice versa). Carry only the active color per section, twisting at color changes to prevent holes. Use bobbins to manage multiple strands.
⚠️ Watch out for: Holes form at color joins if yarns aren’t twisted. Always twist on the wrong side and carry tails along the edge for seaming. Seaming can distort shape if done too tightly—use a loose whip stitch.
Finishing: Block each square over a curved mold to help it dome. Seam five faces first, stuff, then close the sixth. Weave in all tails through adjacent color sections.
Tips: Make a pair and clip them together for a lucky duo charm.
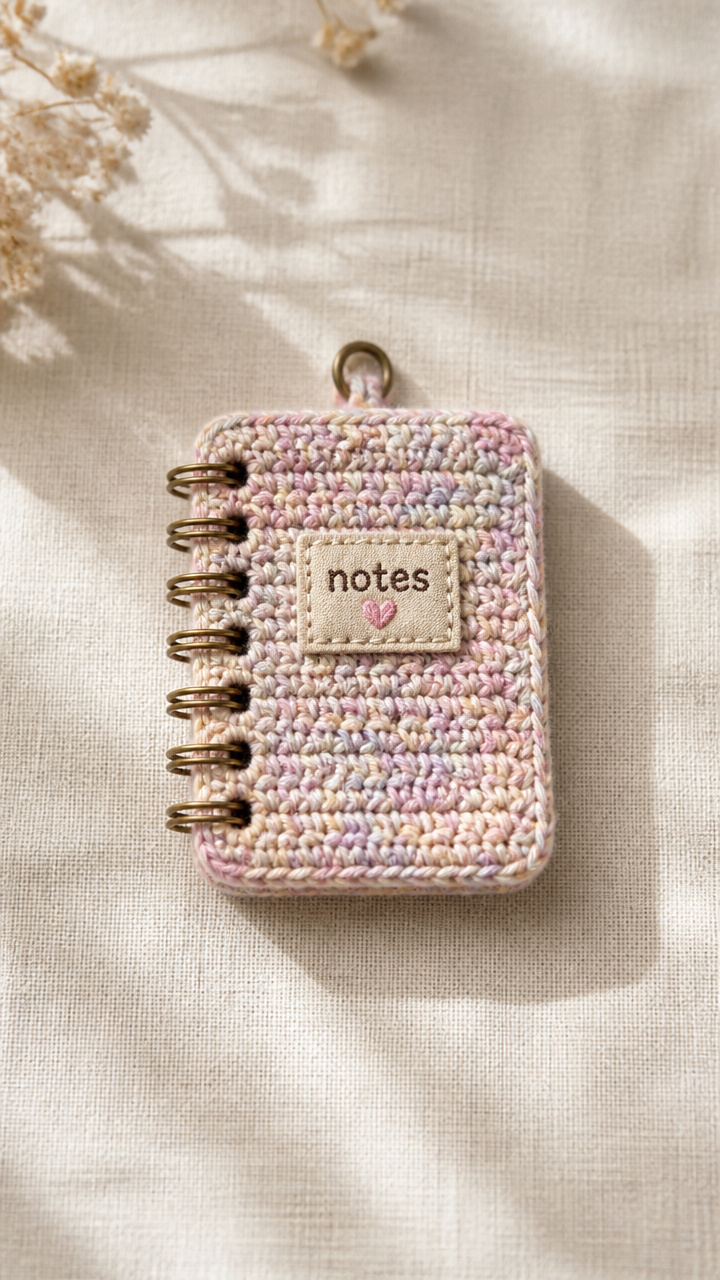
10. Spiral Notebook Faux Cover
Additional materials: tapestry needle, stitch marker, plastic spiral ring (from mini notebook), fabric glue
Stitches used: chain, single crochet, slip stitch
This miniature notebook charm mimics a real school supply with a soft crocheted cover and authentic metal spiral. It dangles realistically when clipped.
How it’s made: Chain a rectangle, then work in rows of single crochet until the piece fits snugly over a small spiral notebook cover. Fold in half, seam sides, and glue a real mini spiral ring to the top edge.
Key technique: Maintain straight edges by chaining 1 at the start of each row and working into the back bump of the foundation chain for a clean edge. Turn consistently in the same direction.
⚠️ Watch out for: Pieces can slant if you accidentally add or drop stitches. Count every row. The spiral ring may not stay put if not glued well—use a drop of fabric glue on each end.
Finishing: Weave in all ends along the seam lines. Press lightly if needed. Attach jump ring through the spiral loop.
Tips: Use marled yarn to mimic paper texture.
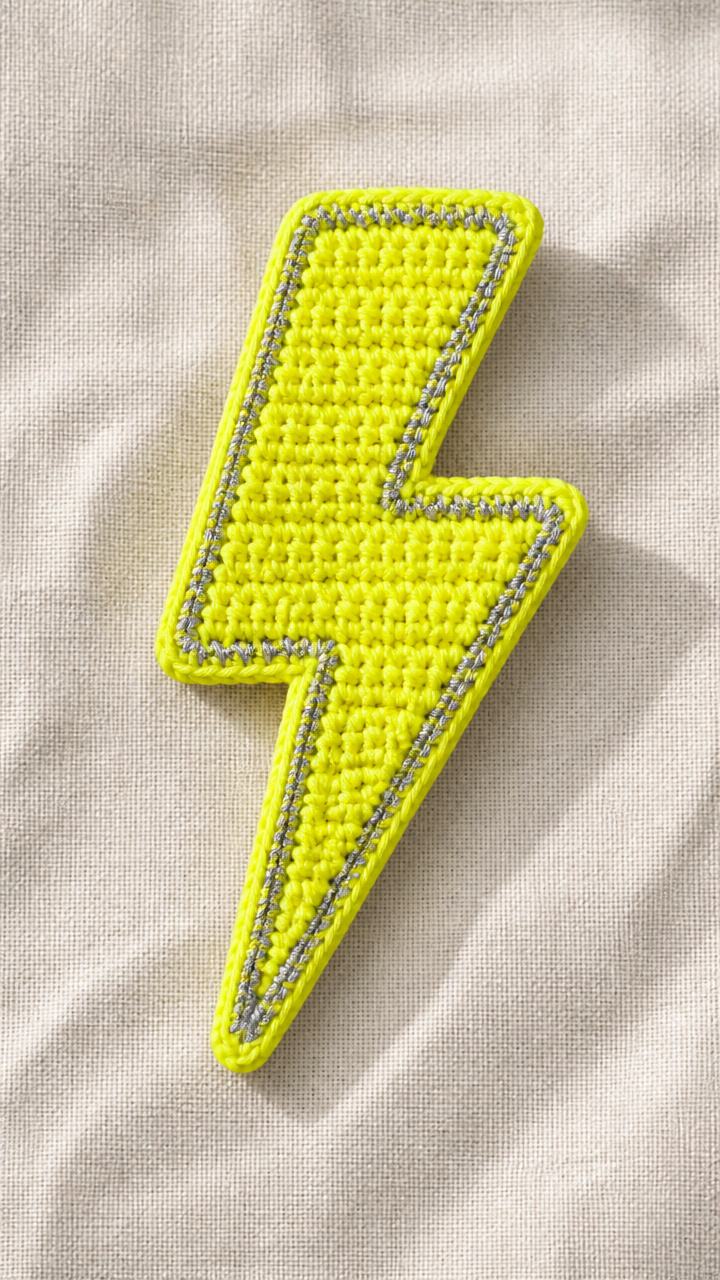
11. Bulky Yarn Lightning Bolt
Additional materials: tapestry needle, cardboard template, fabric stiffener
Stitches used: chain, double crochet, slip stitch
Thick and bold, this lightning bolt holds its shape thanks to stiffening and dense stitches. It pops with high contrast and energy.
How it’s made: Trace a lightning bolt shape onto cardboard, then chain around the edge and work one round of double crochet to build thickness. Do not turn—work continuously around the shape.
Key technique: Working in the round without turning means you crochet around the perimeter, always moving clockwise. Insert hook into the side of the chain edge to keep the shape sharp and defined.
⚠️ Watch out for: Corners can round off if you don’t place enough stitches in tight angles. Add 2-3 double crochets in each point. Skipping stiffener leads to floppiness—don’t skip it.
Finishing: Brush with fabric stiffener and let dry completely. Weave in ends along the back edge and attach a jump ring at the top point.
Tips: Use neon yellow with a silver accent for a stormy look.
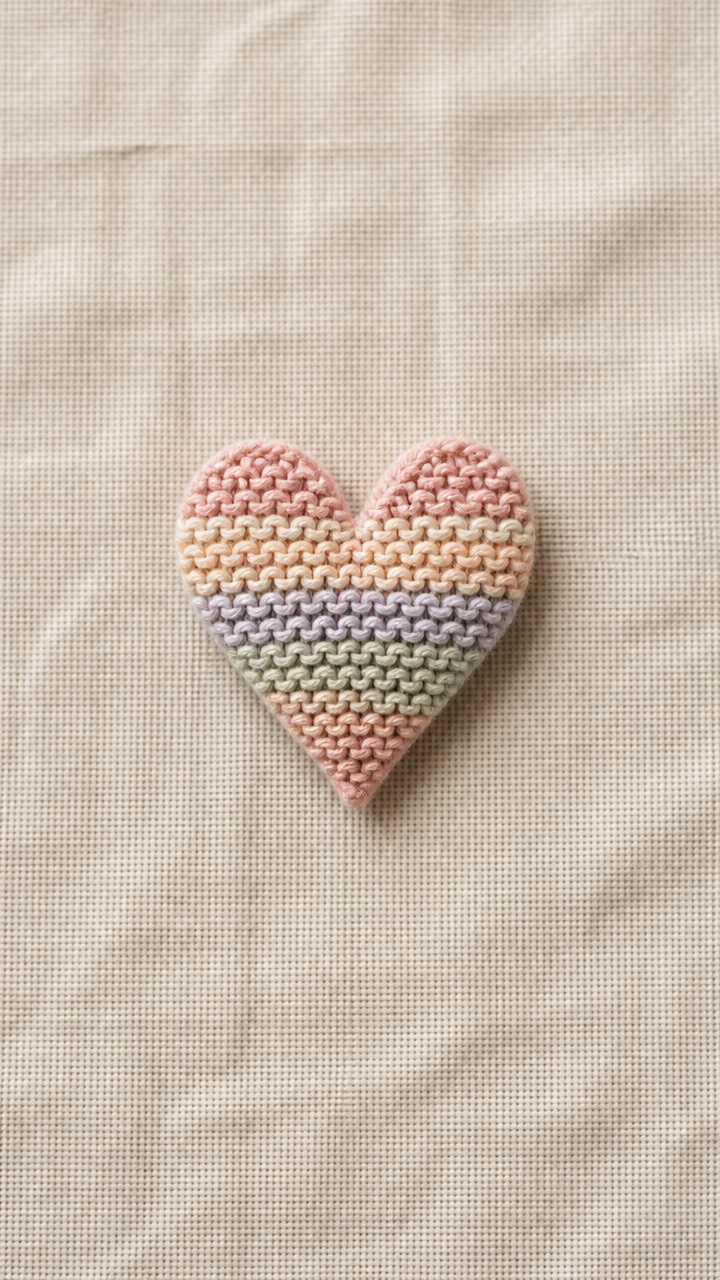
12. Mini Loom Woven Heart
Additional materials: mini loom (5 peg), loom hook, tapestry needle, stiff interfacing
Stitches used: e-wrap cast on, true knit stitch, garter stitch bind off
A delicate heart with a woven texture and crisp shape, this charm feels handmade in the best way. Ideal for gift-giving or sentimental touches.
How it’s made: Cast on in a heart shape using e-wrap on a mini loom, then work true knit stitches in garter pattern. After binding off, remove from loom, hand-sew edges, and back with interfacing for stability.
Key technique: The true knit stitch is made by inserting the loom hook under the loop, yarn over, and pulling a new loop through. This creates a flat, woven fabric. Maintain even tension to prevent warping.
⚠️ Watch out for: Stitches can ladder if tension is loose. Pull each new loop snug but not tight. Shaping the heart correctly on the loom requires skipping specific pegs—follow the layout closely.
Finishing: Hand-seam the cast-on and bind-off edges with matching yarn. Iron interfacing to the back and attach a jump ring with thread through the top curve.
Tips: Try a self-striping yarn to add quiet visual interest.
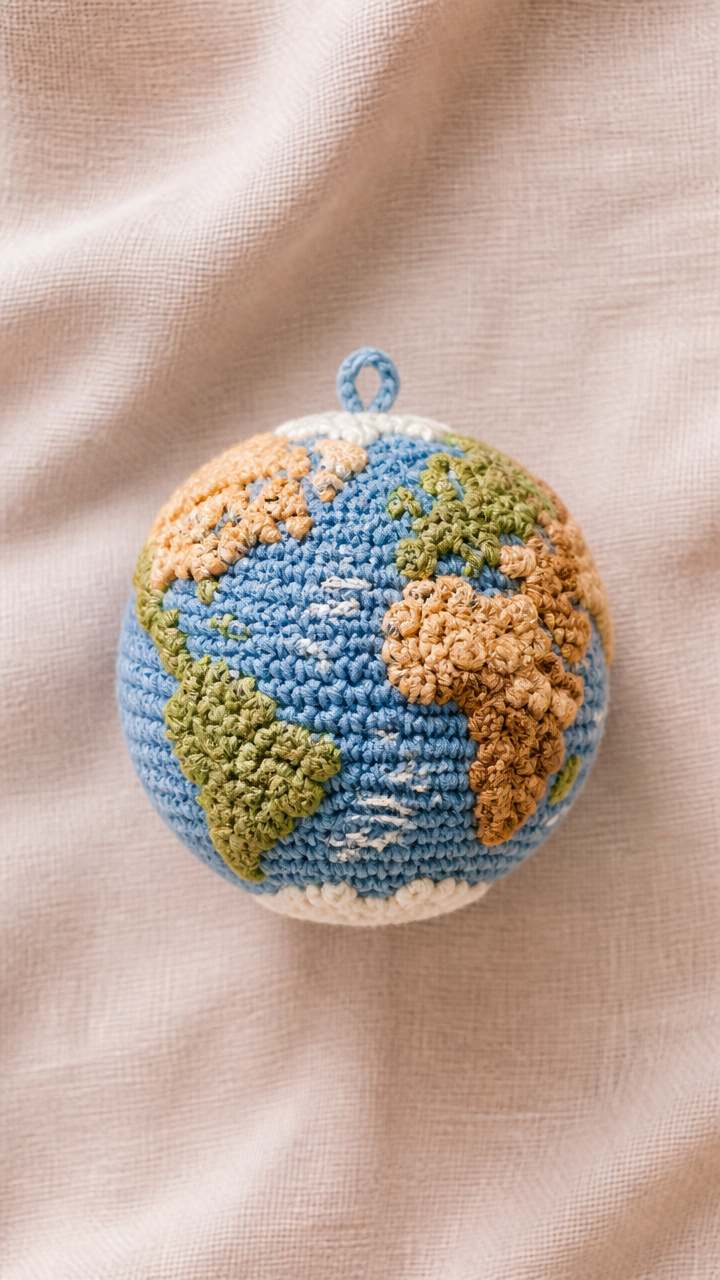
13. Popcorn Planet Charm
Additional materials: tapestry needle, polyfill stuffing, embroidery floss, jump ring
Stitches used: magic ring, single crochet, popcorn stitch, surface slip stitch
A squishy globe with textured continents stands out with playful dimension. The embroidery adds fine detail without bulk.
How it’s made: Work in continuous rounds from a magic ring, placing popcorn stitches in clusters to represent continents. After closing, embroider details with surface slip stitches and lightly stuff before finishing.
Key technique: A popcorn stitch is 5 double crochets in one stitch, remove hook, insert from front to back into first dc, rehook yarn and pull through. This closes the cluster. Place them strategically to suggest landmasses.
⚠️ Watch out for: Popcorns can unravel if not secured properly. Always complete the final pull-through step. Overstuffing distorts the shape—keep it light.
Finishing: Weave in ends inside the sphere. Use blue embroidery floss to add thin equator or meridian lines with surface slip stitches. Attach jump ring at the north pole.
Tips: Make a moon version with grey yarn and crater popcorns.
14. Tunisian Simple Stitch Arrow
Additional materials: Tunisian crochet hook (10" recommended), tapestry needle, fabric stiffener
Stitches used: foundation row, Tunisian simple stitch, bind off
A sleek, modern arrow with a woven fabric feel cuts a sharp profile. The stiffened finish ensures it won’t bend in a backpack.
How it’s made: Work a flat arrow shape using Tunisian simple stitch in rows, increasing and decreasing to form the head and shaft. After completion, block and apply fabric stiffener to hold rigid shape.
Key technique: Tunisian simple stitch: forward pass—insert hook between vertical bars, yarn over and pull loop onto hook. Repeat across. Return pass—yarn over, pull through one loop, then yarn over and pull through two loops until one remains. Keep edge chains even.
⚠️ Watch out for: Edges can curl if tension is uneven. Keep the return pass consistent and don’t pull too tight on the last loop. Miscounting increases ruins symmetry—mark center stitch.
Finishing: Bind off loosely, weave in ends along the back. Spray both sides with fabric stiffener and let dry flat. Attach jump ring at the nock end.
Tips: Use a variegated yarn to mimic wood grain.
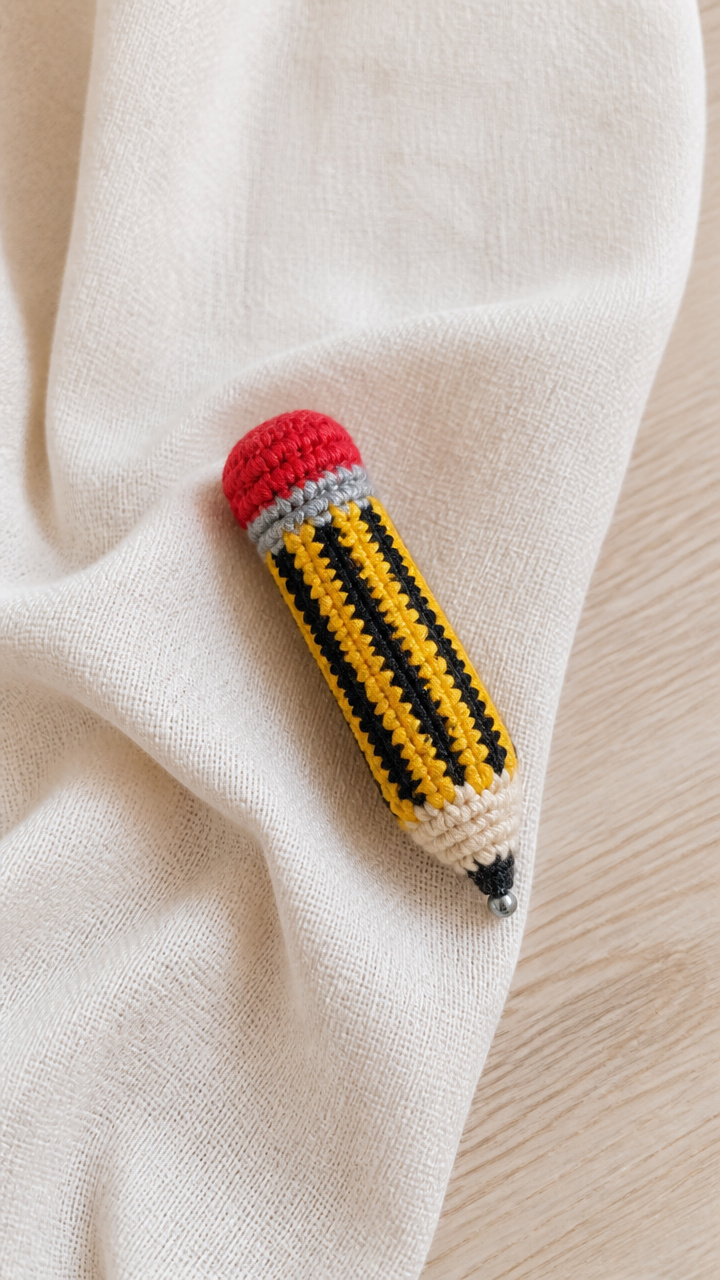
15. Granny Stripe Pencil
Additional materials: tapestry needle, polyfill stuffing, red felt triangle, jump ring
Stitches used: chain, double crochet, slip stitch, join with color change
A chunky pencil charm with classic yellow and black bands and a red eraser end. The textured stripes mimic real pencil grooves.
How it’s made: Chain a long rectangle, then work rows of granny stripe pattern (groups of 3 double crochets separated by chain 1) in yellow and black. Seam into a tube, stuff lightly, and sew on a red felt eraser tip.
Key technique: Granny stripes are worked by doing 3 double crochets, chain 1, repeat across row. Change color at end of row by finishing the last yarn over of the final dc with the new color. Keep edges straight by working into the chain-1 spaces.
⚠️ Watch out for: Stripes can skew if color changes aren’t aligned. Always change color in the last pull of the final dc. Gaps form in chain-1 spaces if skipped—be sure to work into them.
Finishing: Seam with mattress stitch for invisibility. Attach the felt eraser with fabric glue and hide the jump ring under the tip seam.
Tips: Add a tiny silver bead at the tip for a metal ferrule detail.
Each of these charms carries a bit of joy and a lot of craft. Pick one that calls to you and give it a go—you might just start a collection. Happy hooking, and may your backpack never be boring again.