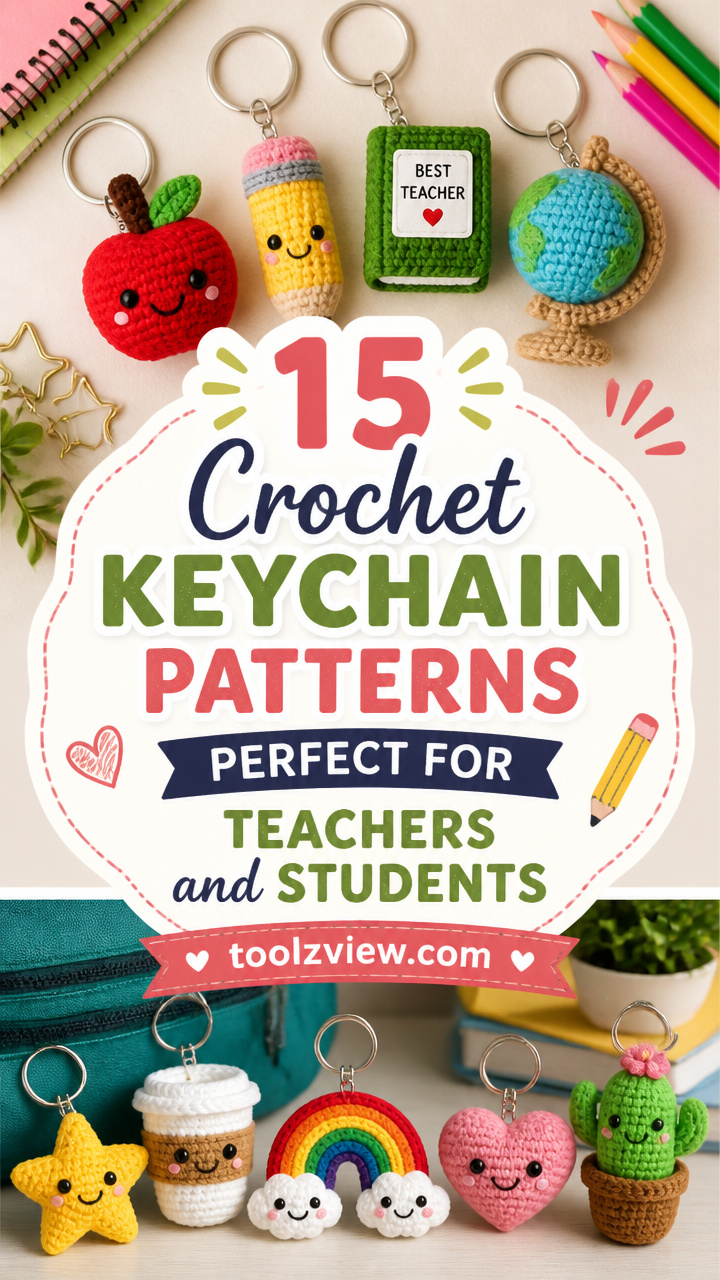
15 Crochet Keychain Patterns Perfect for Teachers and Students
Keychains are small enough to finish in a weekend but meaningful enough to carry every day. These patterns blend function and charm, designed with teachers and students in mind — from classroom essentials to school spirit symbols.
You'll find amigurumi shapes, flat appliqués, textured stitches, and clever constructions. Each one uses common yarn weights and standard hooks, making them easy to start with supplies you likely already have.
What You’ll Need
Most of these patterns require a 3.5mm to 5.5mm hook depending on yarn weight. You’ll also need stitch markers, a tapestry needle, scissors, and keychain rings or lobster clasps. Small amounts of polyfill may be needed for stuffed designs.
1. Apple Slice Amigurumi
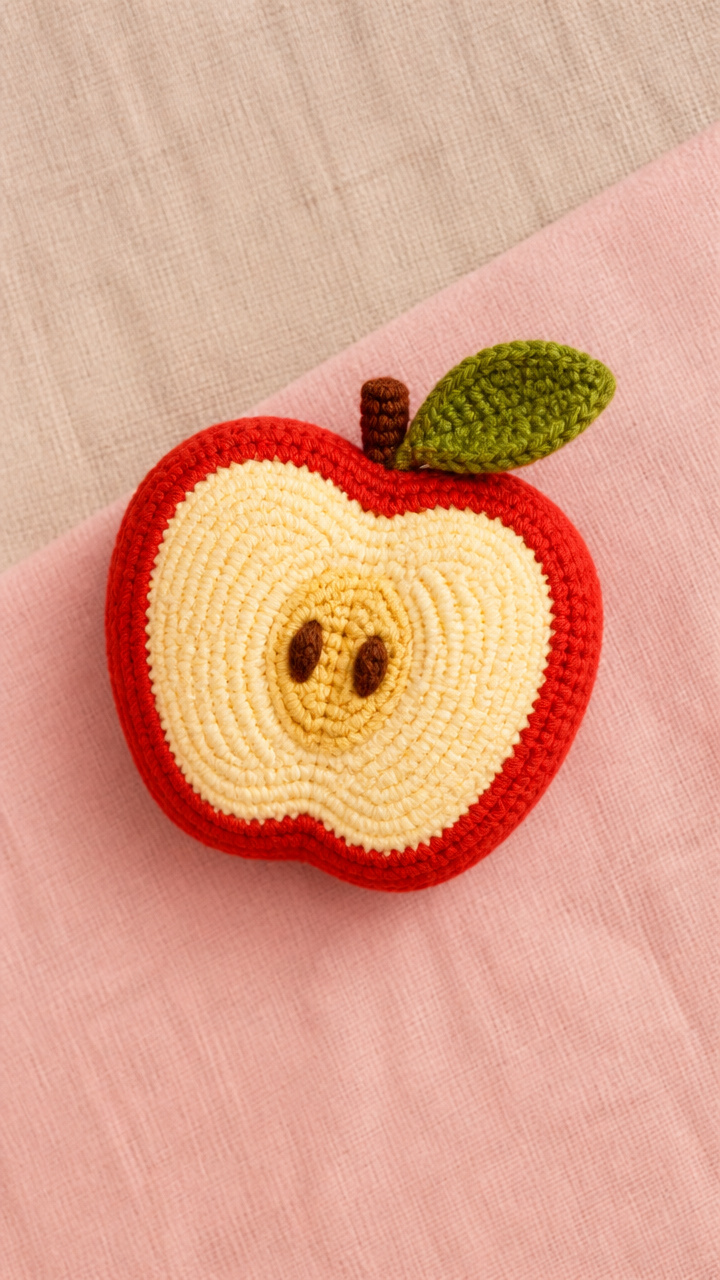
Additional materials: stitch markers x2, tapestry needle, polyfill stuffing, keychain ring
Stitches used: magic ring, single crochet, invisible decrease, slip stitch join
A bright red apple slice with a pale yellow core and green leaf detail. The curved body mimics a real fruit slice and fits perfectly on a backpack or teacher's bag. Lightweight and durable, it’s a cheerful nod to classroom traditions.
How it’s made: Worked in continuous rounds from a magic ring, increasing evenly to form the curved slice shape. The piece is worked flat after the curve to create the cut edge, then seamed and stuffed before attaching the keychain ring.
Key technique: The invisible decrease (inv dec) blends two single crochets into one neat stitch without a bump. Insert hook into front loops only of next two sts, yarn over, pull through both, yarn over and pull through all three on hook. This keeps the surface smooth for amigurumi.
⚠️ Watch out for: Overstuffing can distort the curve of the slice. Add polyfill slowly and check shape as you go. Also, skipping the slip stitch join at the end leaves a gap where the tail shows.
Finishing: Weave in all ends through the back loops only to hide them. Sew the flat edge seam with mattress stitch for invisibility. Attach the keychain ring through the top loop near the leaf.
Tips: Swap red for green or yellow to make a variety pack — great for student rewards.
2. Pencil Roll Key Fob
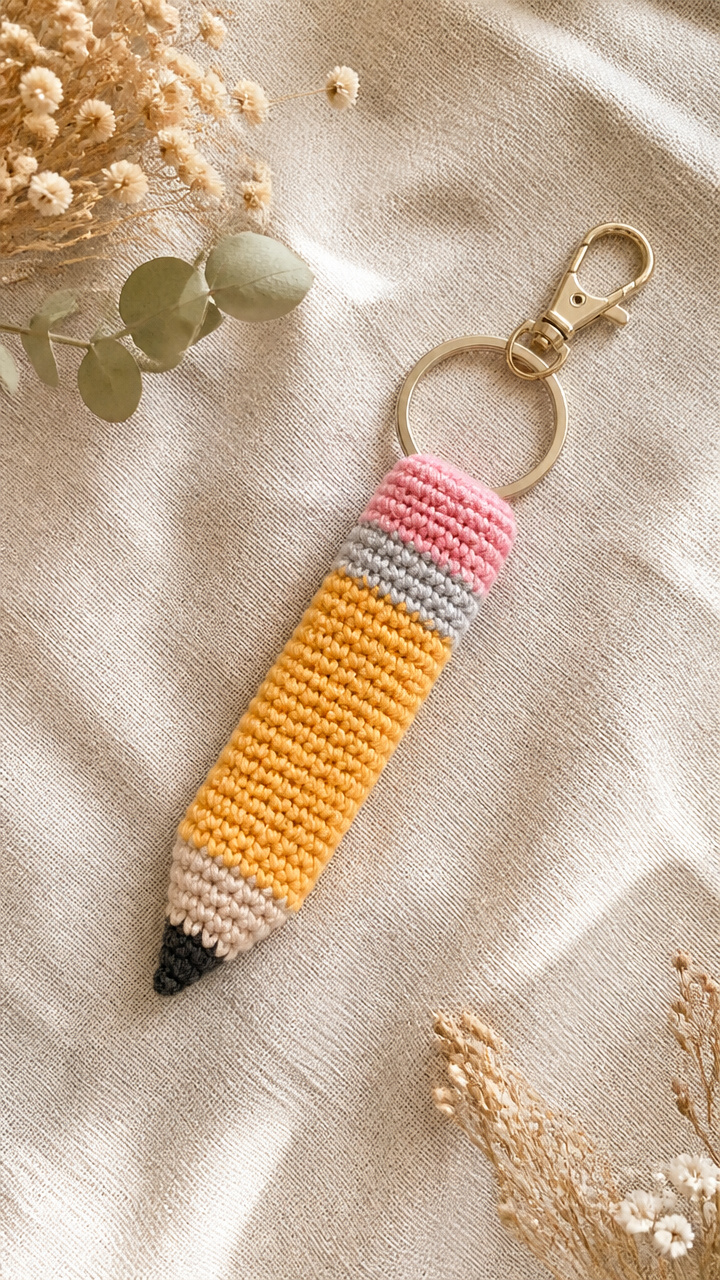
Additional materials: tapestry needle, stitch marker, keychain ring, thin cardboard tube (from tea bag wrapper)
Stitches used: chain, half double crochet, back loop only, slip stitch
A soft pencil-shaped fob with a realistic barrel texture and pointed tip formed by folding. Fits neatly on a zipper pull or lanyard. Great for students who lose pens or teachers who collect quirky accessories.
How it’s made: Chain long enough to wrap around a small cardboard tube, then work even rows of half double crochet in back loop only. Seam the short ends together, fold in half and slip stitch across the top to close. Attach keychain ring at the fold point.
Key technique: Working in back loop only creates a raised ridge along one side that mimics the grip of a real pencil. It also gives the fabric more stretch so it hugs the tube snugly without slipping off.
⚠️ Watch out for: Using too thick a tube prevents the piece from closing smoothly. The tea bag wrapper size works best. Also, not working tightly enough causes sagging over time.
Finishing: Weave in side seam ends along the edge. Close the top fold with tight slip stitches. Slide the keychain ring through the center of the folded top before final stitching.
Tips: Use school colors for the tip and eraser bands to personalize for different grades.
3. Book Stack Charm
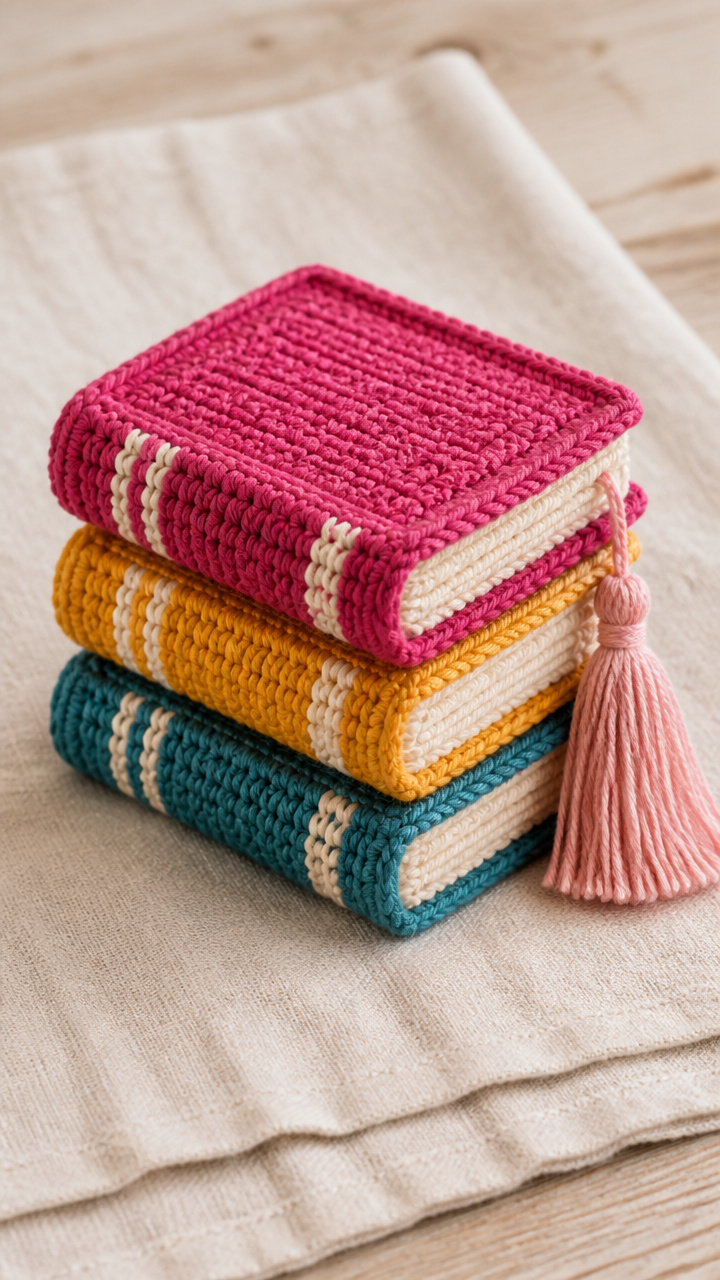
Additional materials: tapestry needle, stitch markers x3, keychain ring, small pom-pom maker (optional)
Stitches used: magic ring, single crochet, increase, slip stitch join
Three colorful mini books stacked like a library pile, each with a visible spine stripe. The tassel adds movement and elegance. Ideal for English teachers or avid readers.
How it’s made: Each book is a flat circle worked in spiral rounds from a magic ring, changing color mid-round to show cover and spine. Stack three books by slip stitching centers together, then attach a tiny pom-pom tassel to the top.
Key technique: Color pooling within a round requires carrying the unused color up the inside. When switching colors, drop old color and pick up new, leaving tails to weave in later. Keep tension loose on carried strand to avoid puckering.
⚠️ Watch out for: Twisting the second color when joining causes diagonal stripes instead of straight spines. Always rotate your work to keep the color change on the same side.
Finishing: Weave in all ends between layers. Secure the stack with a whip stitch through the center. Attach the tassel first, then the keychain ring through the base loop.
Tips: Try variegated yarn for a 'well-read' look with worn edges.
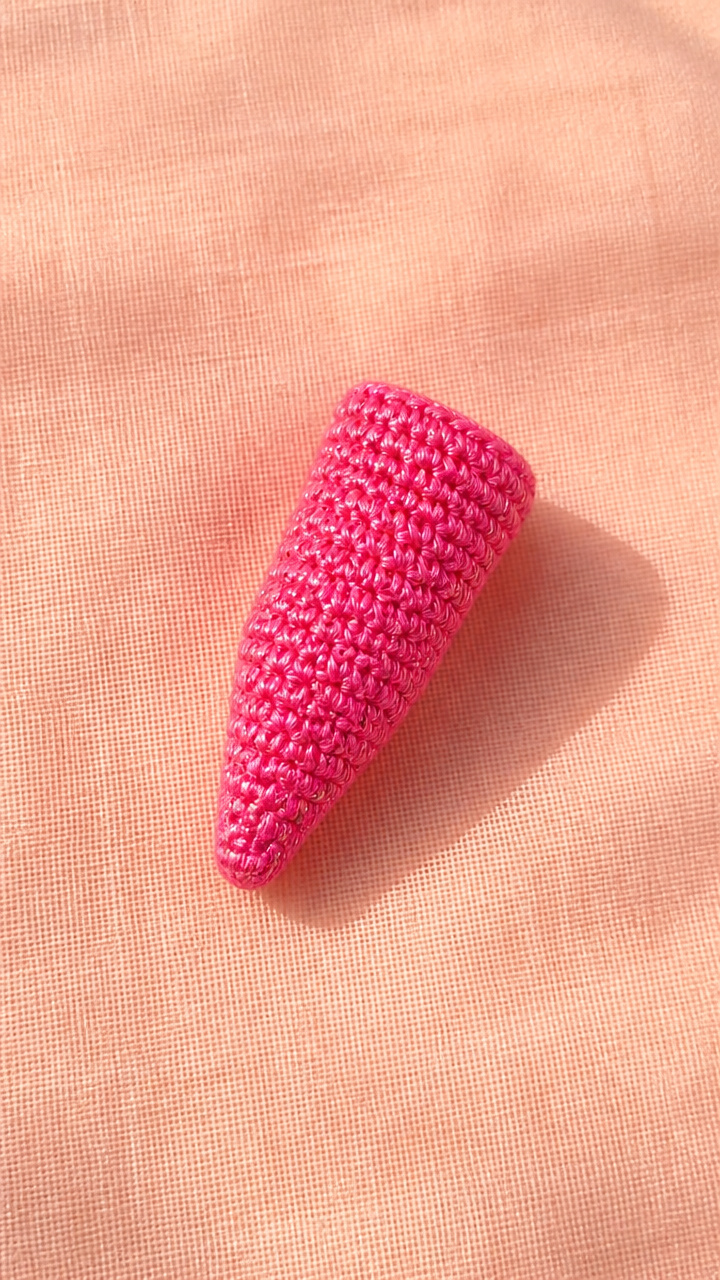
4. Glitter Pen Tip
Additional materials: tapestry needle, keychain ring, polyfill stuffing
Stitches used: chain, single crochet, slip stitch, invisible decrease
A cone-shaped charm with a rounded tip and wide opening base. Looks like the business end of a highlighter or glitter pen. Fast to make and fun in neon or metallic yarns.
How it’s made: Chain 2, work 6 single crochets in second chain from hook, increase evenly over next two rounds, then work even for height. Decrease gradually to close, stuff lightly, and finish with a slip stitch.
Key technique: Starting with a chain 2 instead of a magic ring gives a flatter base for this pen tip shape. After the initial 6 sc, increase by placing 2 sc in each st around for round 2, then alternate increase and plain sts in round 3.
⚠️ Watch out for: Pulling too tight on the final decreases closes the tip unevenly. Use a smaller hook for last round if needed. Skipping stuffing makes it collapse when clipped.
Finishing: Close the bottom with an invisible decrease round. Weave tail through remaining hole and pull tight. Attach keychain ring through the wide open end before final closure.
Tips: Use sparkly yarn to mimic real glitter pens — students love the flash.
5. Calculator Pixel Patch
Additional materials: tapestry needle, stitch markers, keychain ring, fabric backing (optional)
Stitches used: single crochet, color change, row turning, slip stitch border
An 8-stitch wide by 10-row tall calculator with screen, buttons, and solar panel details. Crisp cotton yarn holds the sharp lines well. A subtle nod to math class without being too literal.
How it’s made: Worked flat in rows using single crochet and color changes to create a pixel-style calculator image. After completing the rectangle, add a slip stitch edging, then sew on a keychain ring at the top corner.
Key technique: Intarsia colorwork in single crochet requires twisting yarns at each color change to prevent gaps. Hold old and new yarns together from behind, twist once, then continue with new color. Cut unused strands between sections.
⚠️ Watch out for: Forgetting to twist colors causes holes at change points. Also, inconsistent tension makes the patch curl — block gently after finishing.
Finishing: Add a single round of slip stitch around the edge to stabilize. Weave in all ends on the back. Optional: glue a felt square to the back for durability.
Tips: Change button colors to match school colors for extra personalization.
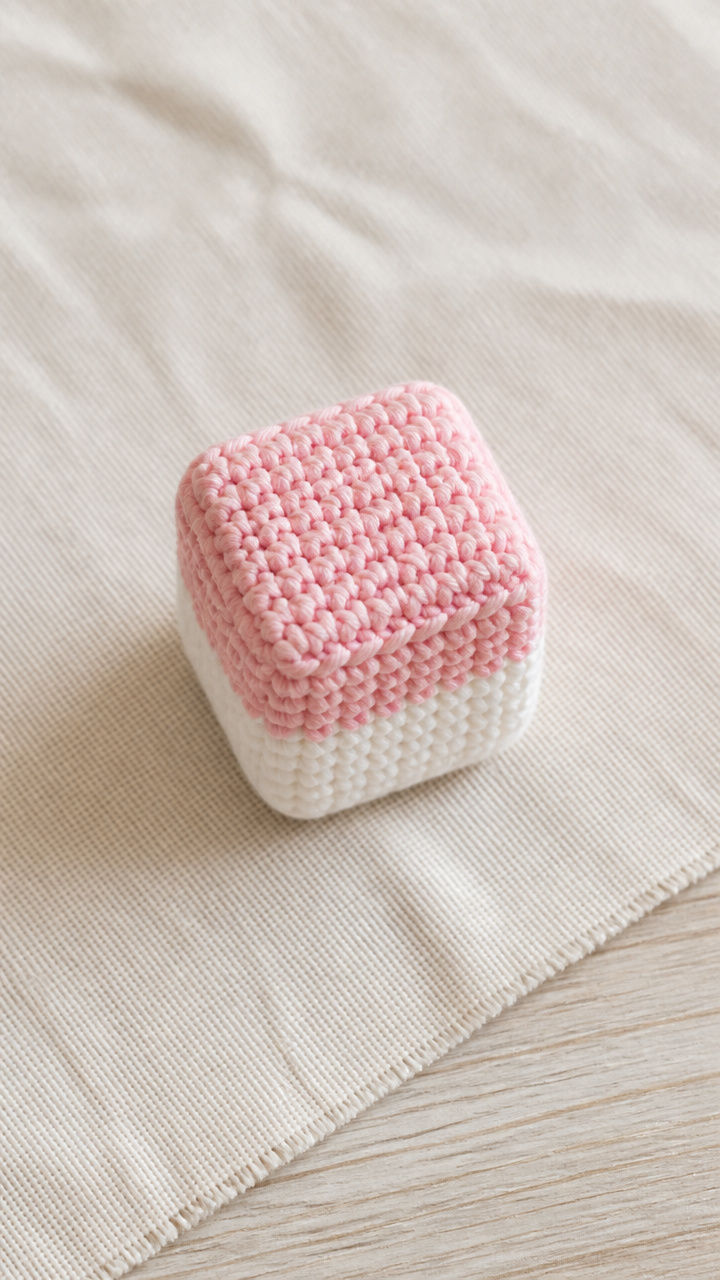
6. Eraser Topper Cube
Additional materials: tapestry needle, stitch markers x6, keychain ring, cardboard cube template (1 inch)
Stitches used: single crochet, corner increase, seaming, buttonhole stitch
A tiny plush eraser with a stretchy top that looks like the foam kind found in pencil cases. Slightly squishy and very tactile. Fits on a zipper or clips to a binder.
How it’s made: Crochet six identical squares using corner increases to maintain shape. Seam five sides together around a cardboard cube, leave one face open, then work a buttonhole edging on the rim for stretch.
Key technique: Corner increase involves placing 3 single crochets, chain 1, 3 single crochets all in the same corner stitch. This creates a clean right angle without pulling. Mark corners consistently to align during seaming.
⚠️ Watch out for: Seaming misaligned squares causes bulging. Pin opposite sides before sewing. Also, skipping the chain-1 in corner leaves a tight pivot.
Finishing: Use mattress stitch to seam edges invisibly. Fold open flap down and secure with a snap stitch if desired. Thread keychain ring through top edge before final seaming.
Tips: Use pink or white yarn — classic eraser colors — or try neon for modern flair.
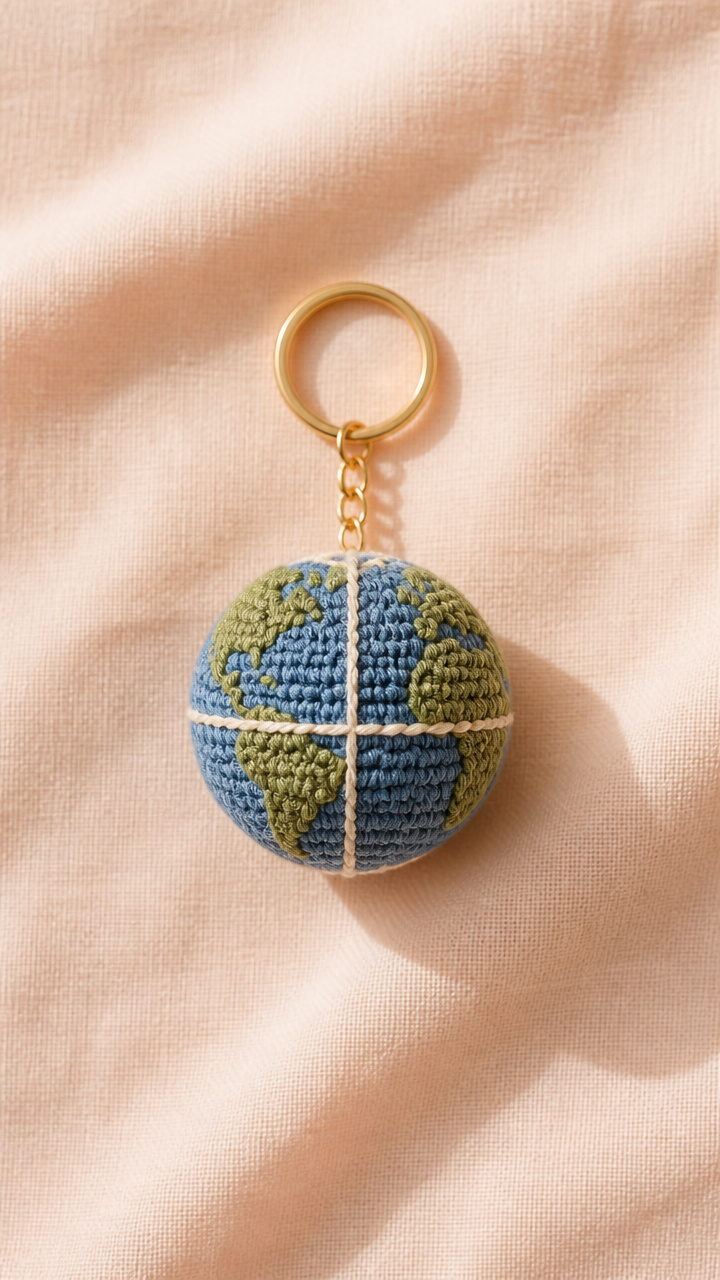
7. Globe Mini Ornament
Additional materials: tapestry needle, stitch markers, keychain ring, polyfill stuffing
Stitches used: magic ring, single crochet, increase, decrease, slip stitch join
A round globe with stitched equator and meridian lines. Use blue and green yarns for oceans and continents. Makes a thoughtful gift for geography teachers or exchange students.
How it’s made: Worked in continuous rounds from a magic ring, increasing to equator, then decreasing symmetrically to close. Seam along the prime meridian with contrasting thread to mark longitude, then attach keychain ring at the north pole.
Key technique: Even shaping for a sphere follows a specific increase and decrease pattern. Increase every other stitch for 3 rounds, then alternate increase and plain for 2 rounds, then work even, then reverse. This avoids flattening.
⚠️ Watch out for: Adding too much stuffing distorts the spherical shape. Fill just until firm. Also, miscounting decrease rounds leads to dimpled poles.
Finishing: Weave in tail through the final hole and pull tight. Use dark thread to backstitch the meridian line from pole to pole. Attach ring at top with a reinforced knot.
Tips: Leave a long tail at the start to use for hanging or attachment.
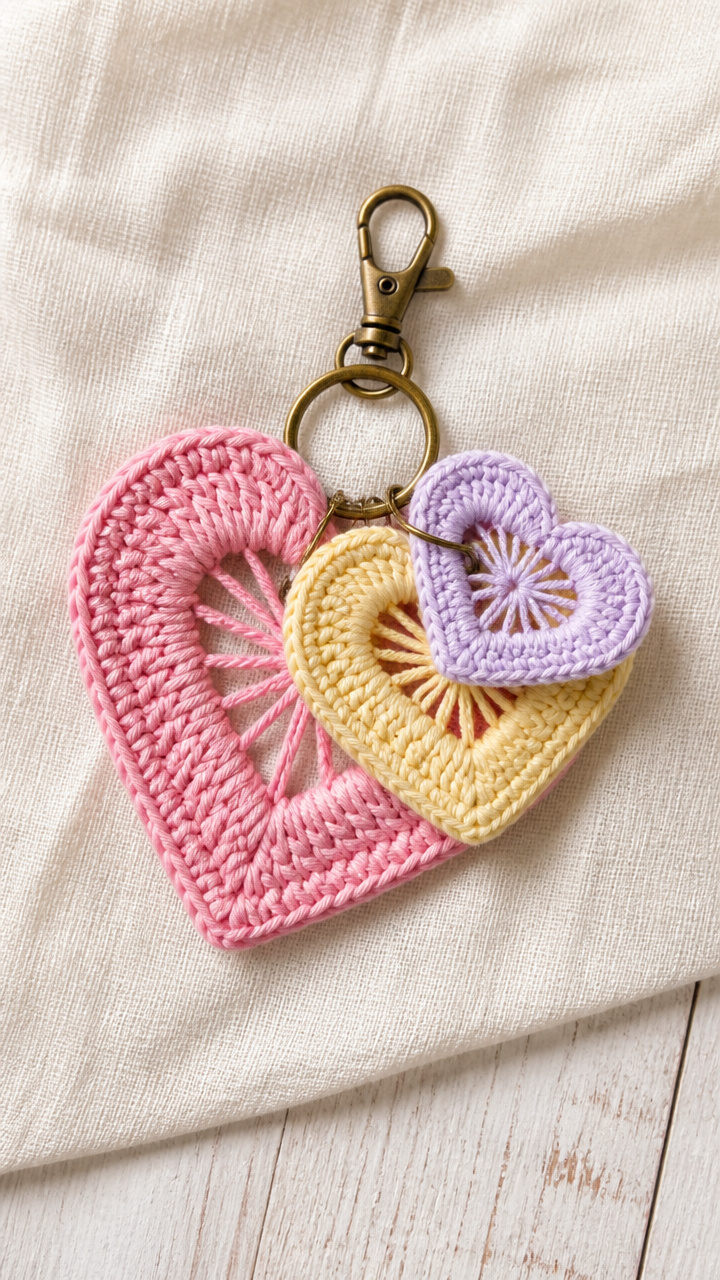
8. Notebook Doodle Heart
Additional materials: tapestry needle, keychain ring, fabric stiffener (optional)
Stitches used: chain, double crochet, slip stitch, fasten off
A flat, slightly puffy heart with open webbing between the lobes. Resembles a doodle from a student’s notebook margin. Works up quickly in bright or pastel shades.
How it’s made: Chain 2, work 4 dc in second chain, chain 3, turn, work 4 dc in base of chain, slip stitch to join. Repeat on opposite side to form heart points, then fasten off and attach keychain ring at the top curve.
Key technique: The heart shape forms by creating two mirrored shell clusters joined at the base. Each cluster is 4 dc in one stitch, followed by a ch-3 turning space. The slip stitch joins the tops of both shells to complete the peak.
⚠️ Watch out for: Tight turning chains pull the center closed. Chain loosely and don’t count the turn as a stitch. Forgetting to slip stitch between clusters leaves a gap at the top.
Finishing: Weave in starting tail through the base of the first cluster. Attach keychain ring by threading through the top arch. Dip in fabric stiffener for structure if desired.
Tips: Make a set in different sizes to clip together as a layered charm.
9. Ruler Stripe Marker
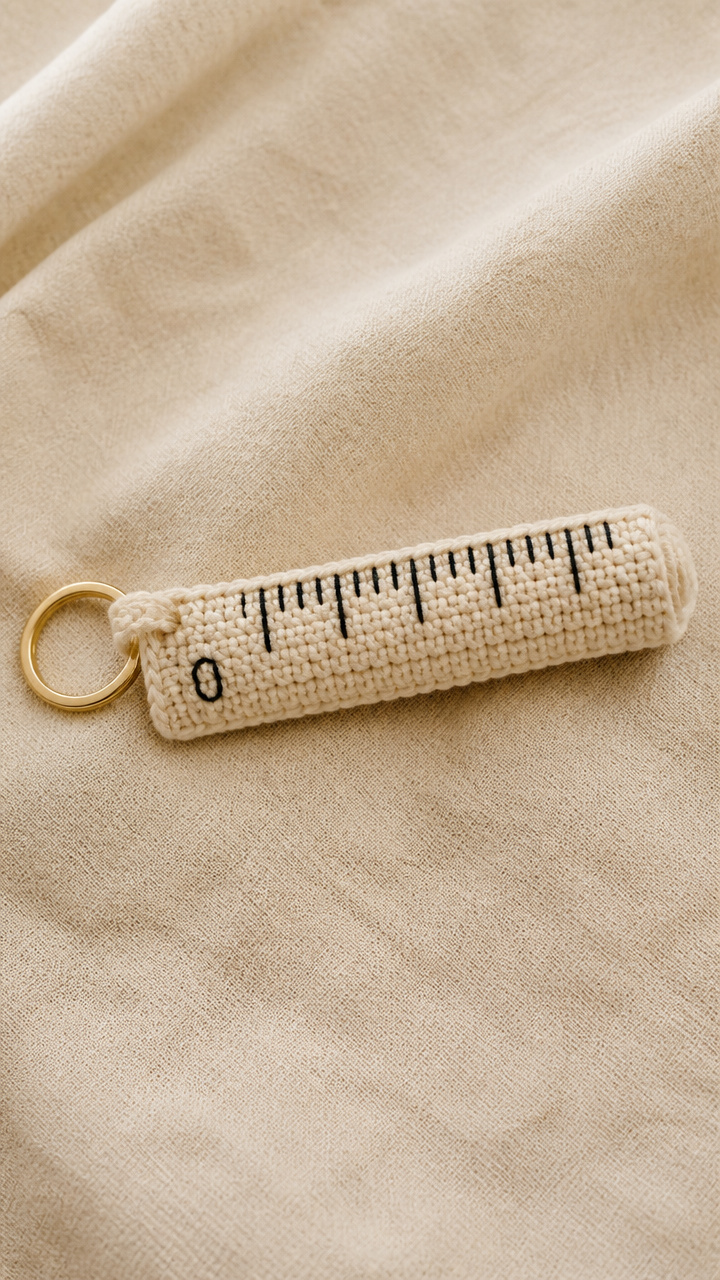
Additional materials: tapestry needle, keychain ring, ruler template (6 inches long)
Stitches used: chain, single crochet, row turning, slip stitch border
A soft ruler charm with bold inch markers and a coiled end for clipping. The thick gauge gives it body. Fun for math teachers or crafty students who measure everything.
How it’s made: Chain 18, work even rows of single crochet until piece measures 6 inches. Add black slip stitch marks at 1-inch intervals along one long edge, then fold in half lengthwise and seam closed. Attach ring at one end.
Key technique: Slip stitch measuring marks are placed by counting 3, 6, 9… chains from the edge, inserting hook, drawing up a loop of black yarn, and completing a slip stitch. Keep them vertical and snug.
⚠️ Watch out for: Uneven row tension causes curling. Check gauge early and adjust hook size if needed. Misplaced marks break the illusion — count carefully.
Finishing: Weave in all ends along the seam. Block flat to maintain straightness. Attach keychain ring through the coiled end before final seaming.
Tips: Add a zero tag at the start with a tiny embroidered '0'.
10. Test Tube Beaker
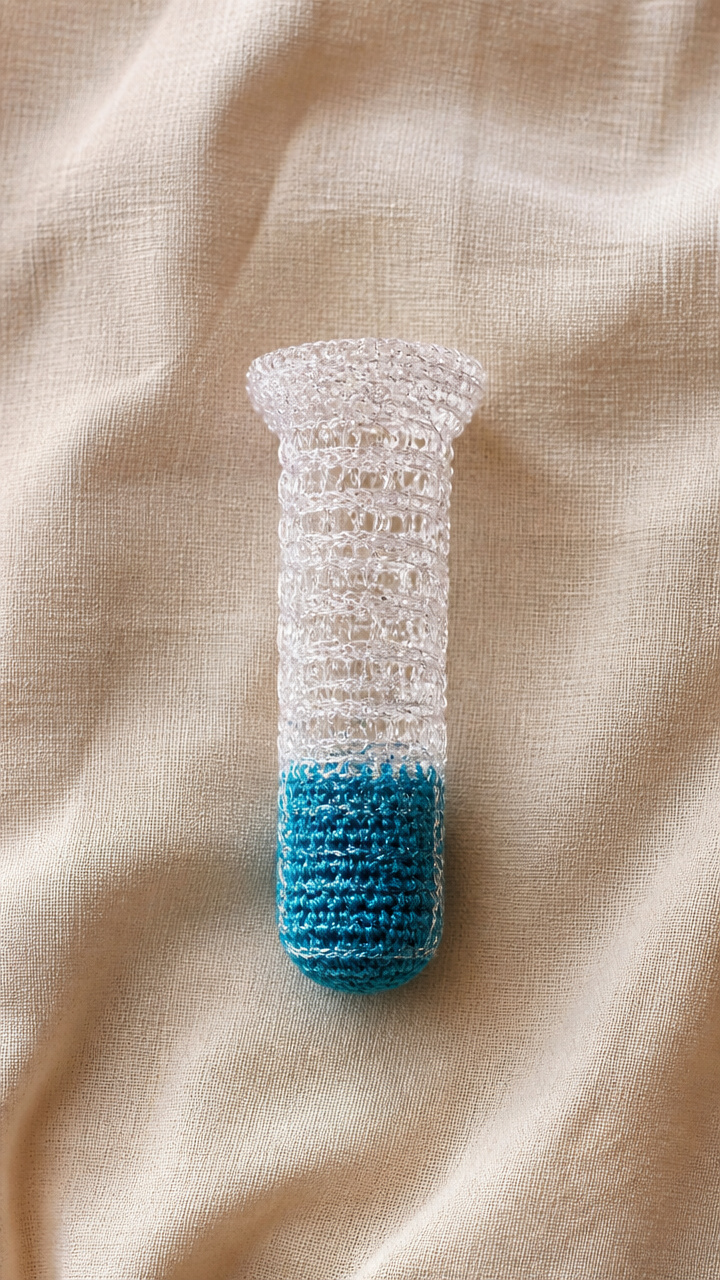
Additional materials: tapestry needle, stitch markers, polyfill stuffing, keychain ring
Stitches used: magic ring, single crochet, increase, front post double crochet, slip stitch join
A miniature beaker with textured sides and a flared lip. Looks like it could hold a tiny experiment. Great for science teachers or STEM students.
How it’s made: Start with magic ring, increase to form flat base, then work even rounds with front post double crochets every 4th stitch to create ribbing. Shape top with decreases, stuff lightly, and attach ring at the open mouth.
Key technique: Front post double crochet wraps around the post of the stitch below from front to back, creating a raised vertical ridge. Space them evenly to mimic lab glassware ribs.
⚠️ Watch out for: Placing fpdc too close together warps the cylinder. Stick to every 4th or 5th stitch. Overstuffing ruins the straight silhouette.
Finishing: Close the bottom with an invisible decrease. Weave in tail through inner circle. Slide keychain ring into the top opening before final rounds.
Tips: Use clear sparkle yarn for the body and colored scraps for 'liquid' near the base.
11. Graduation Cap Square

Additional materials: tapestry needle, keychain ring, small button (optional)
Stitches used: chain, single crochet, row turning, slip stitch
A flat black cap with a dangling tassel in school colors. The tassel moves freely and catches the light. A sweet keepsake for graduates or proud teachers.
How it’s made: Chain 10, work even rows of single crochet until piece is square. Change to colored yarn for one row at the center to represent the tassel cord. Fold in half and seam three sides, leaving top open for tassel.
Key technique: The tassel is made by chaining 15, slip stitching into the center back of the cap, then cutting loops at the end and tying off. No wrapping needed — the chain serves as the hanger and fringe base.
⚠️ Watch out for: Tight tension causes the square to curl. Relax your grip and check after a few rows. Attaching the tassel before seaming the sides limits mobility.
Finishing: Weave in all ends inside the cap. Tuck the tassel chain end into the seam. Attach keychain ring through the top seam junction.
Tips: Sew a tiny button on the front for extra realism.
12. Laptop Pixel Badge
Additional materials: tapestry needle, stitch markers, keychain ring, iron-on adhesive sheet (optional)
Stitches used: single crochet, color change, row turning, whip stitch
A detailed 10×8 stitch laptop with a lit screen and hinge shadow. Crisp cotton holds the pixel edges well. Appeals to tech teachers or digital art students.
How it’s made: Worked flat in rows using single crochet and color changes to form a laptop silhouette with screen glow. After completion, add a whip stitch border, then attach the keychain ring to the top edge.
Key technique: Carrying yarn up the side during color changes prevents cutting too many ends. When switching, drop one color and pick up the other at the edge, twisting once to lock. Keep carried strand loose.
⚠️ Watch out for: Not securing carried yarns causes snagging. Always twist at the edge. Inconsistent row counts lead to trapezoidal shape — count every row.
Finishing: Add a border of single crochet around the edge to stabilize. Weave in all ends on the back. Optional: fuse an adhesive sheet to the back for pin conversion.
Tips: Change screen color to blue for 'on' or gray for 'closed'.
13. Binder Clip Loop
Additional materials: tapestry needle, keychain ring
Stitches used: chain, half double crochet, row turning
A stubby rectangular loop with a soft grip feel. Looks like a mini binder clip from afar. Works well in primary colors or neutral tones.
How it’s made: Chain 8, work 6 rows of half double crochet. Fold in half with right sides together, seam short ends, turn right side out. Weave in ends and attach keychain ring through the loop.
Key technique: Half double crochet gives a dense, squishy fabric that mimics the rubber coating on real binder clips. The short row count creates a compact rectangle perfect for folding.
⚠️ Watch out for: Skipping the seam reinforcement causes splitting. Use two passes of yarn. Not turning right side out fully leaves a crimped edge.
Finishing: Weave in all ends along the seam. Gently stretch the loop open. Slide keychain ring through before final weaving.
Tips: Use self-striping bulky yarn for a fun multi-color effect.
14. Chalk Piece Charm
Additional materials: tapestry needle, keychain ring
Stitches used: chain, single crochet, row turning, slip stitch
A tiny white rectangle with a hand-sewn seam that mimics wrapped chalk. Simple and nostalgic. Hangs quietly on a keyring or zipper.
How it’s made: Chain 4, work 4 rows of single crochet. Fold in half lengthwise and slip stitch the long edge closed. Weave in ends and attach keychain ring to one end.
Key technique: The slip stitch seam is worked through both thicknesses, catching one loop from each side. Insert hook under both front loops, yarn over and pull through both, then yarn over and pull through two on hook.
⚠️ Watch out for: Using dark yarn defeats the purpose — stick to white or pastels. Tight slip stitching puckers the edge; keep it loose and even.
Finishing: Weave in starting tail along the seam. Leave a small tail at the end for a frayed 'used' look. Attach ring to the unfrayed end.
Tips: Dip the tip in red or blue fabric paint for a 'worn' effect.
15. Backpack Zipper Bear
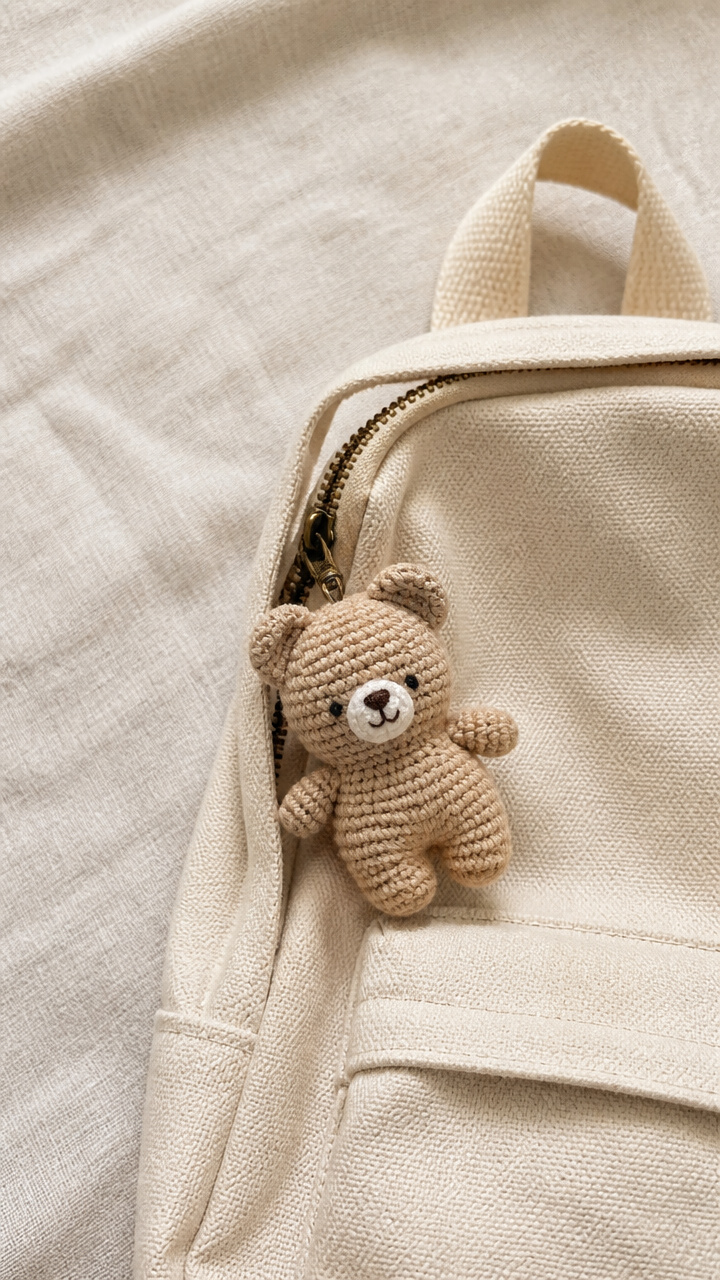
Additional materials: tapestry needle, stitch markers x4, polyfill stuffing, 9mm safety eyes x2, keychain ring
Stitches used: magic ring, single crochet, invisible decrease, embroidery, seaming
A tiny teddy bear with rounded limbs and friendly face. Designed to ride on a backpack zipper. Durable enough for daily wear and soft enough to squeeze.
How it’s made: Head, body, arms, and ears are worked separately in spirals from magic rings. Assemble with mattress stitch, embroider facial features, stuff firmly, then attach keychain ring between shoulders.
Key technique: Attaching safety eyes between rounds 8 and 9 on a 12-round head ensures they sit at the right level. Place them 4 stitches apart and secure backs tightly to prevent loss.
⚠️ Watch out for: Misaligning arms during seaming makes the bear lopsided. Pin before sewing. Using thin yarn weakens joint strength — worsted is ideal.
Finishing: Weave in all ends inside the pieces. Block lightly to set shape. Attach keychain ring by sewing through the upper back with doubled thread.
Tips: Dress the bear in a tiny scarf or hat for seasonal flair.
These little projects bring joy in small packages. Whether you're gifting them to students or treating yourself, each one carries care in every stitch. Pick up your hook and make something that says ‘you’ve got this’ without saying a word.