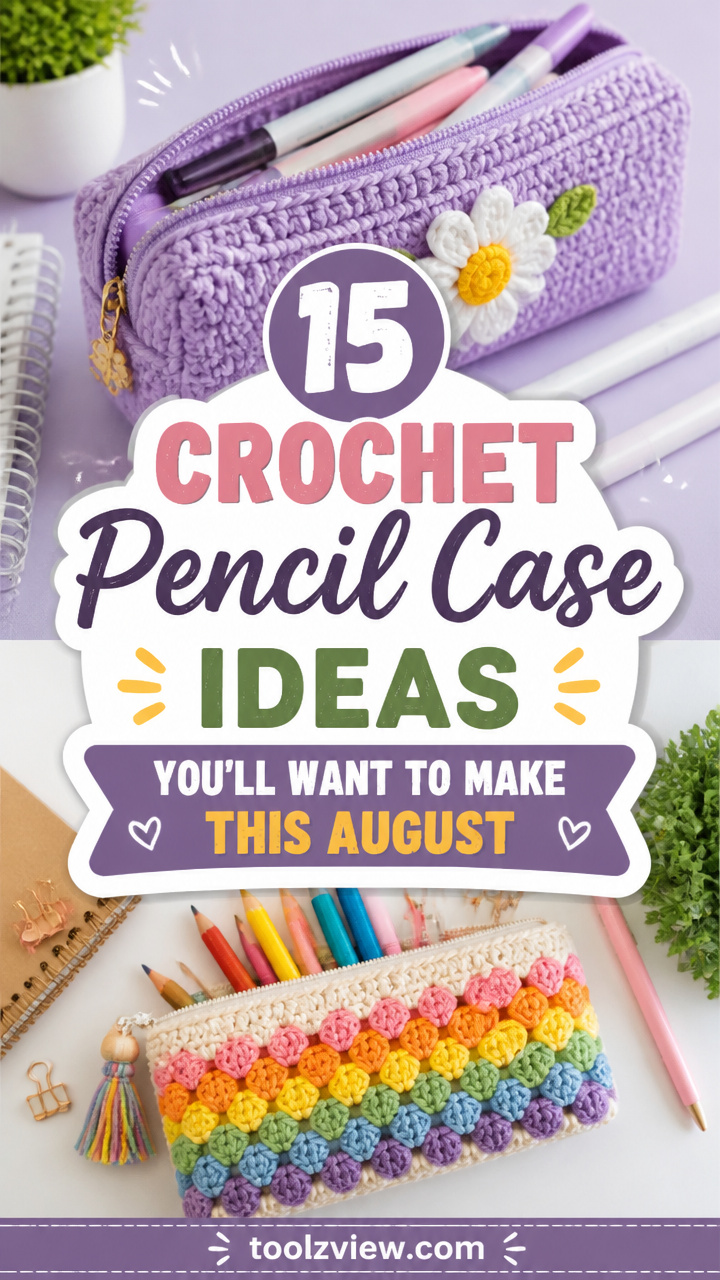
15 Crochet Pencil Case Ideas You’ll Want to Make This August
This page contains affiliate links and I earn a commission if you make a purchase through one of the links, at no cost to you.
Crocheted pencil cases are small enough to finish in a weekend but satisfying enough to show off your stitch skills. They make thoughtful handmade gifts, keep your desk tidy, or add a pop of color to your school bag.
This collection brings together a range of techniques and styles from simple seams to textured stitches and clever closures. Whether you love working in the round, enjoy colorwork, or want to try a new way to shape a case, there’s something here that will spark your next project.
What You’ll Need
Most of these patterns use hooks between 3.5mm and 5.5mm and yarn weights from DK to worsted. Keep stitch markers, a tapestry needle, sharp scissors, and a ruler handy for measuring as you go.
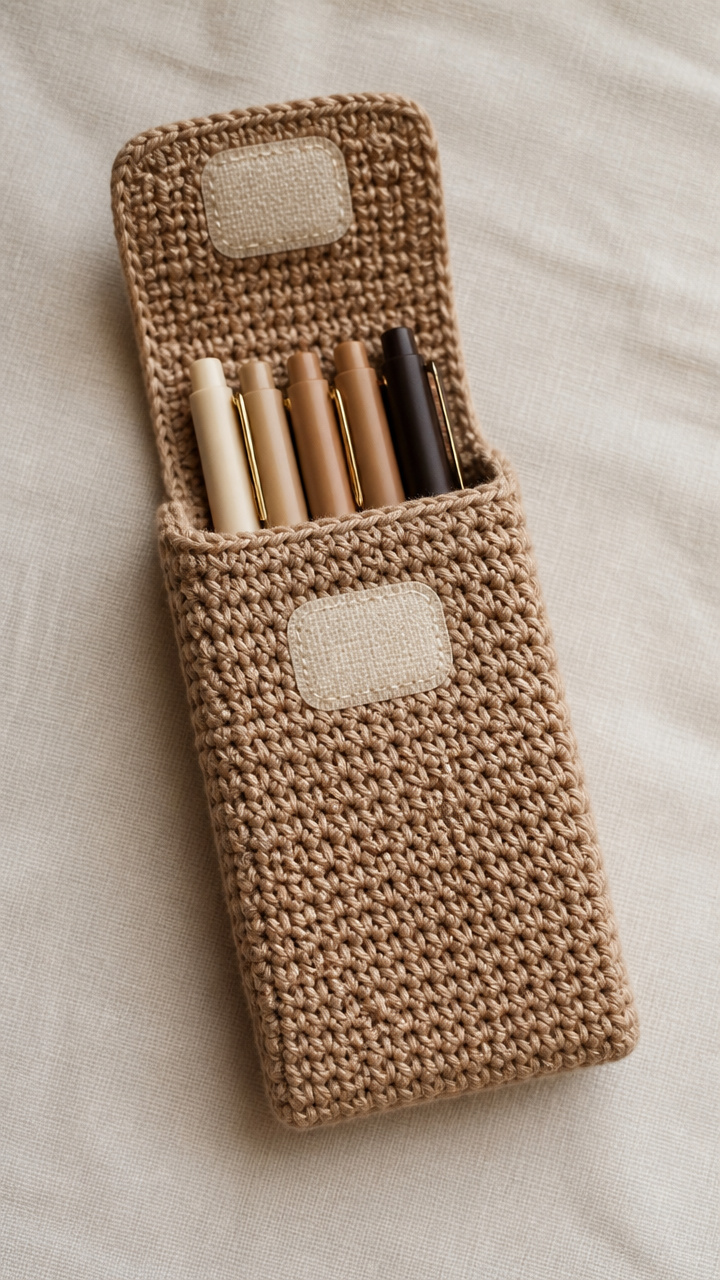
Stitches used: chain, single crochet, slip stitch join
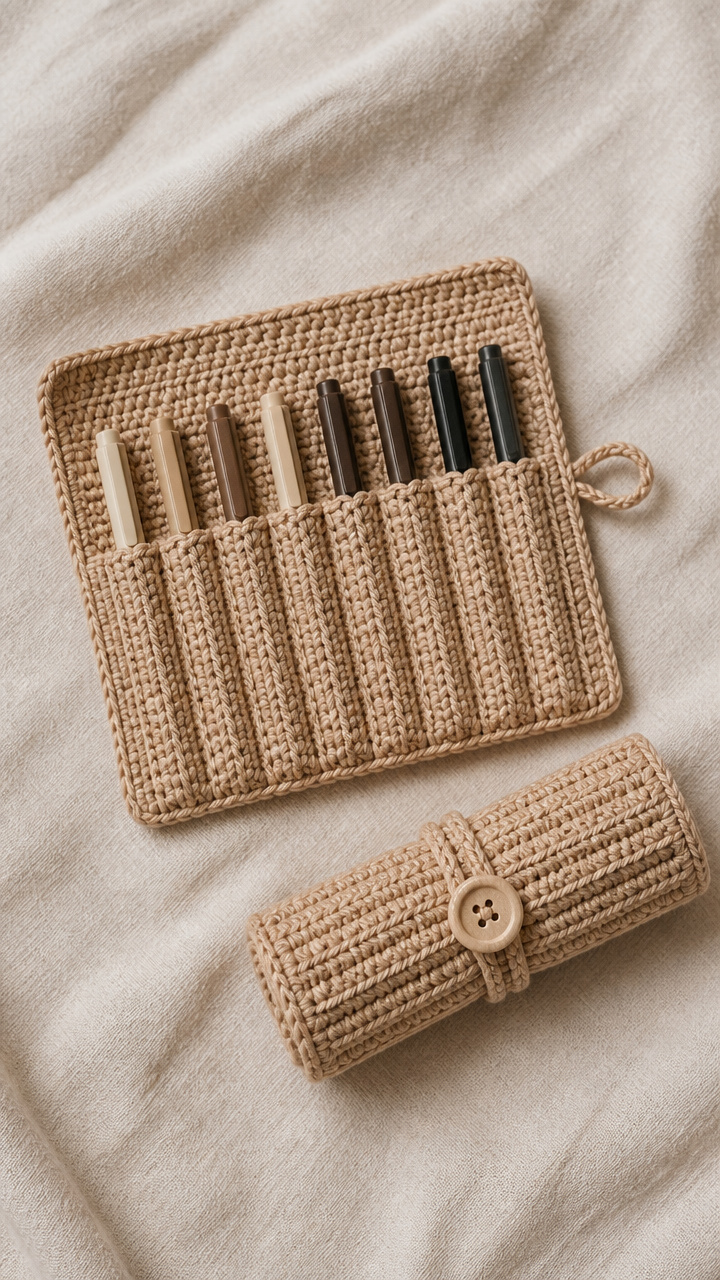
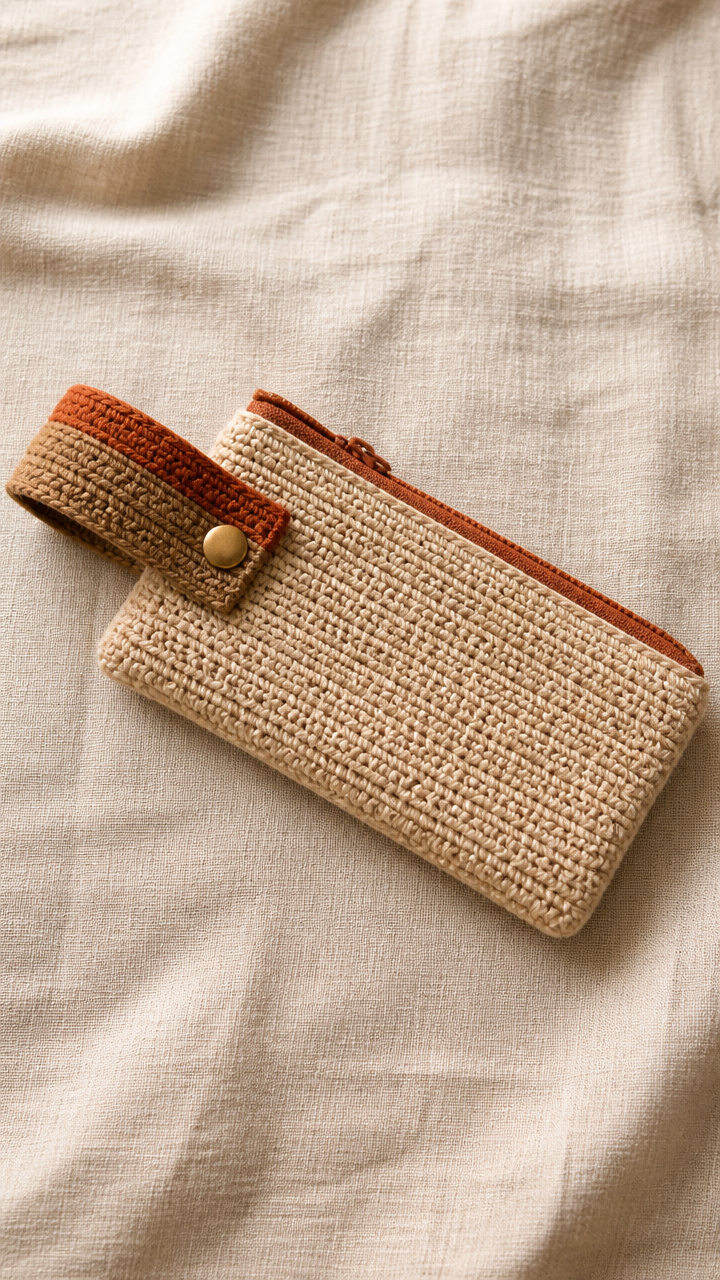
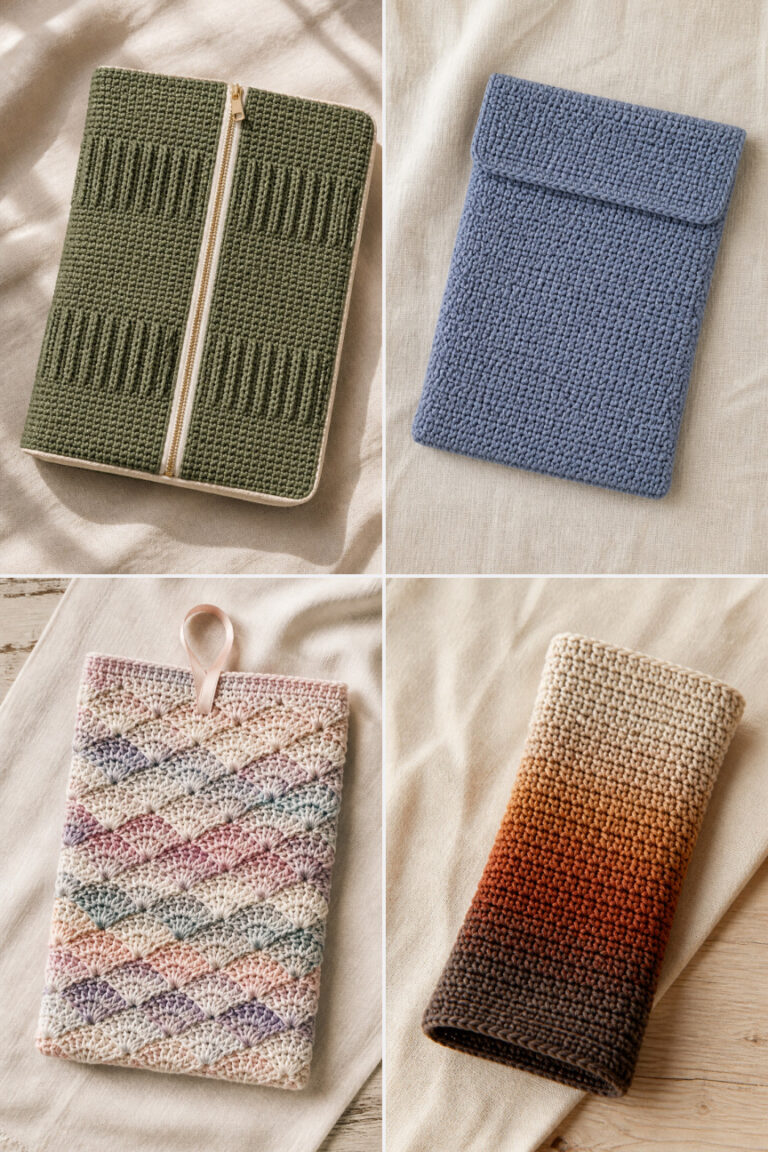
This sleek roll-up case lies flat when open, showing off neatly arranged pens and pencils. When rolled and secured with a button loop, it becomes compact and travel-ready. The dense ribbing resists wear and hides dirt well.
How it’s made: Worked flat in rows starting with a foundation chain, then crocheted back and forth in single crochet with no increases or decreases. The piece is folded and seamed along one long edge and both short ends to form a roll-up tube.
Key technique: The ribbed texture comes from consistently working into the back loop only of each single crochet. This creates vertical ridges that stretch slightly and give the case a snug fit when rolled. Keep tension even so the fabric doesn’t curl.
⚠️ Watch out for: Forgetting to work in the back loop only breaks the ribbed effect. Mark your first stitch each row to stay consistent and check every few rows to ensure the front loops form a clear ridge along the top of each row.
Finishing: Weave in all ends securely before seaming. Use mattress stitch or slip stitch seam along edges to keep the join flat. Lightly block the finished piece to even out the stitches if needed.
Tips: Swap the button for a leather cord toggle or leave it off for a minimalist look.
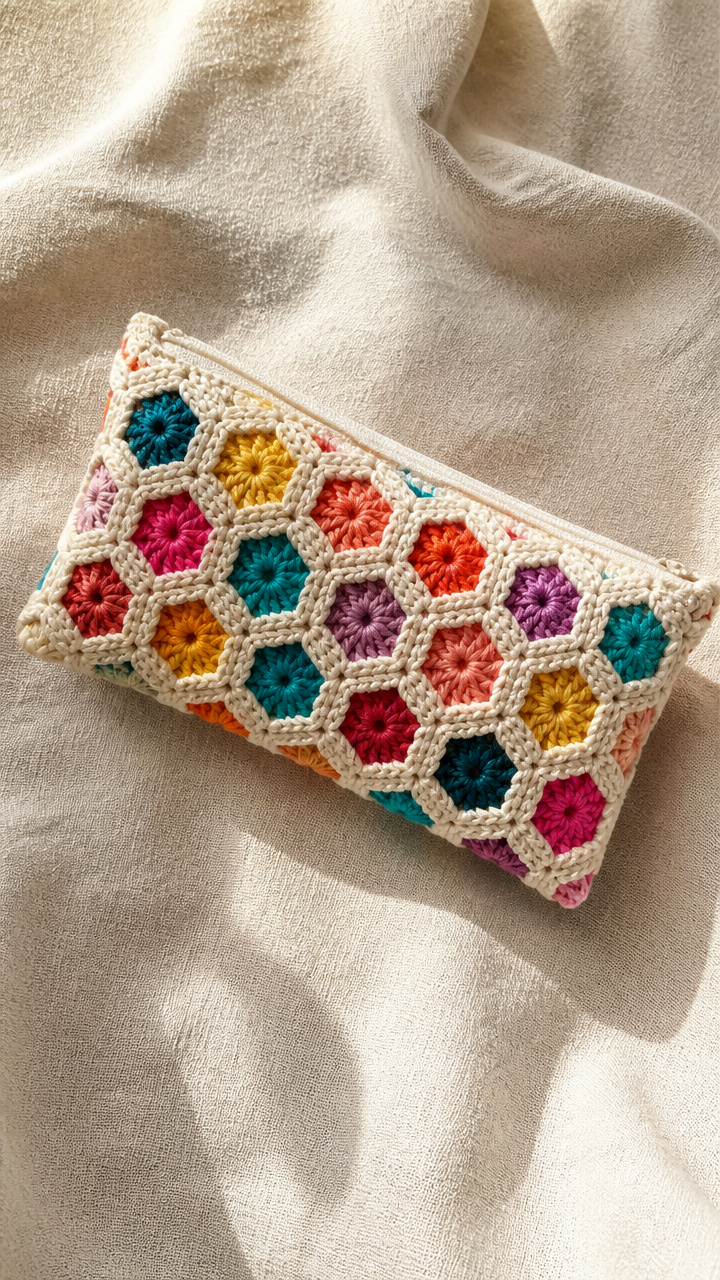
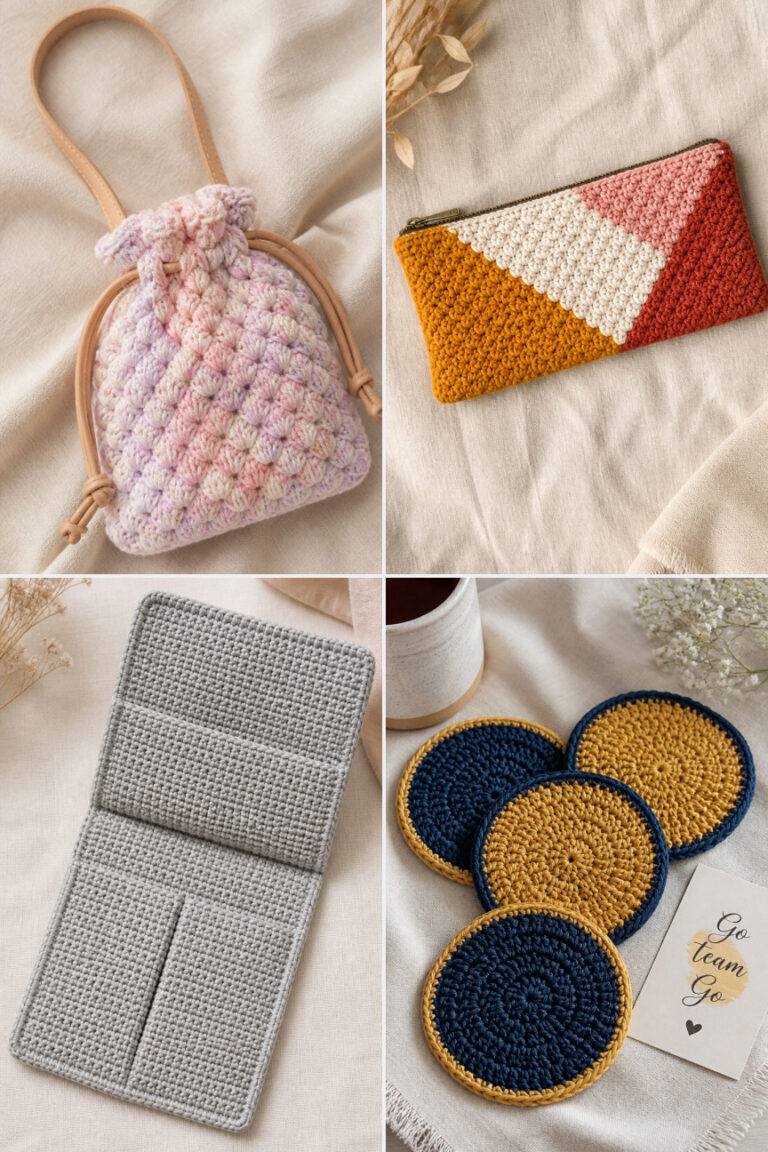
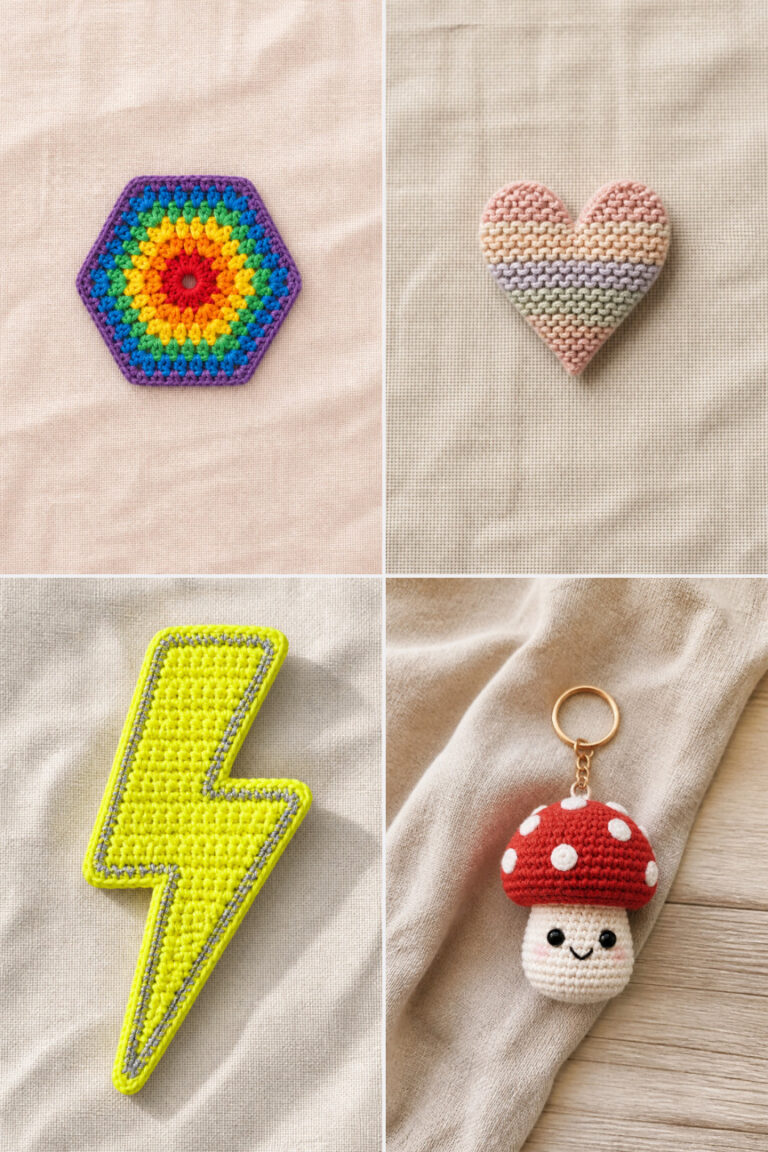
Light and airy with geometric charm, this case shows off colorful yarns through its openwork design. The structure holds its shape thanks to light stuffing along the edges. Great for storing colored pencils or craft tools.
How it’s made: Six identical hexagon motifs are crocheted separately using a mesh pattern, then joined with slip stitches. The pouch is made by sewing two hexagon circles together around the outer edges, leaving one side open for the mouth.
Key technique: Each hexagon uses a repeating cluster of double crochet, chain 2 spaces worked in rounds from a magic ring. The key is maintaining even tension on the ch-2 spaces so they don’t pull tight. Use a stitch marker at the start of each round to track placement.
⚠️ Watch out for: Miscounting clusters per round leads to misshapen hexagons. Count each dc-ch2-dc group carefully and place a marker after every second repeat in later rounds to maintain symmetry.
Finishing: Join hexagons in a circle using slip stitches through both loops. Sew front and back pieces together with a whip stitch, adding a thin line of stuffing inside the seam for body. Weave in ends through the mesh backing.
Tips: Use cotton blend yarn for better drape and durability in the openwork.
Additional materials: cable needle, stitch markers, tapestry needle, magnetic snap
Stitches used: front post double crochet, back post double crochet, chain, single crochet, slip stitch
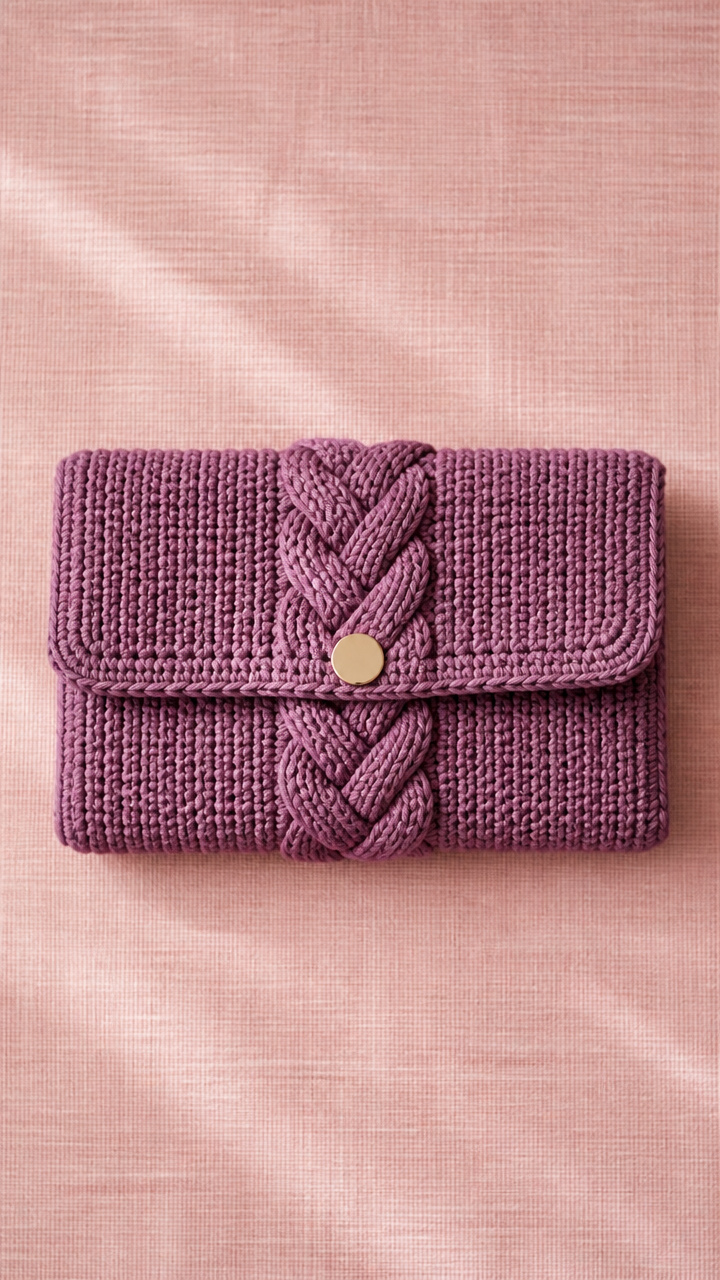
This structured clutch features a bold braided cable down the center that stands out against smooth stockinette-style background stitches. It zips shut with a strong magnetic snap and feels substantial in hand.
How it’s made: Worked flat in two identical panels, each featuring a central cable twist created with front and back post double crochets. Panels are joined with a single crochet border and a magnetic snap is sewn at the top closure.
Key technique: The cable effect is formed by crossing groups of front post double crochets over adjacent columns. Hold unworked stitches on a cable needle in front or back of work as directed, then crochet the posts in order to create the twist. Mark cable columns clearly.
⚠️ Watch out for: Twisting stitches in the wrong direction ruins the cable flow. Always follow the chart or written instructions exactly—crossing front-to-back versus back-to-front changes the twist direction. Practice on a swatch first.
Finishing: Join panels along three sides with a single crochet seam. Add a final round of sc around the entire opening to prep for the snap. Hand-sew the snap halves securely to inner flaps.
Tips: Choose a solid or tonal yarn to let the cables shine.
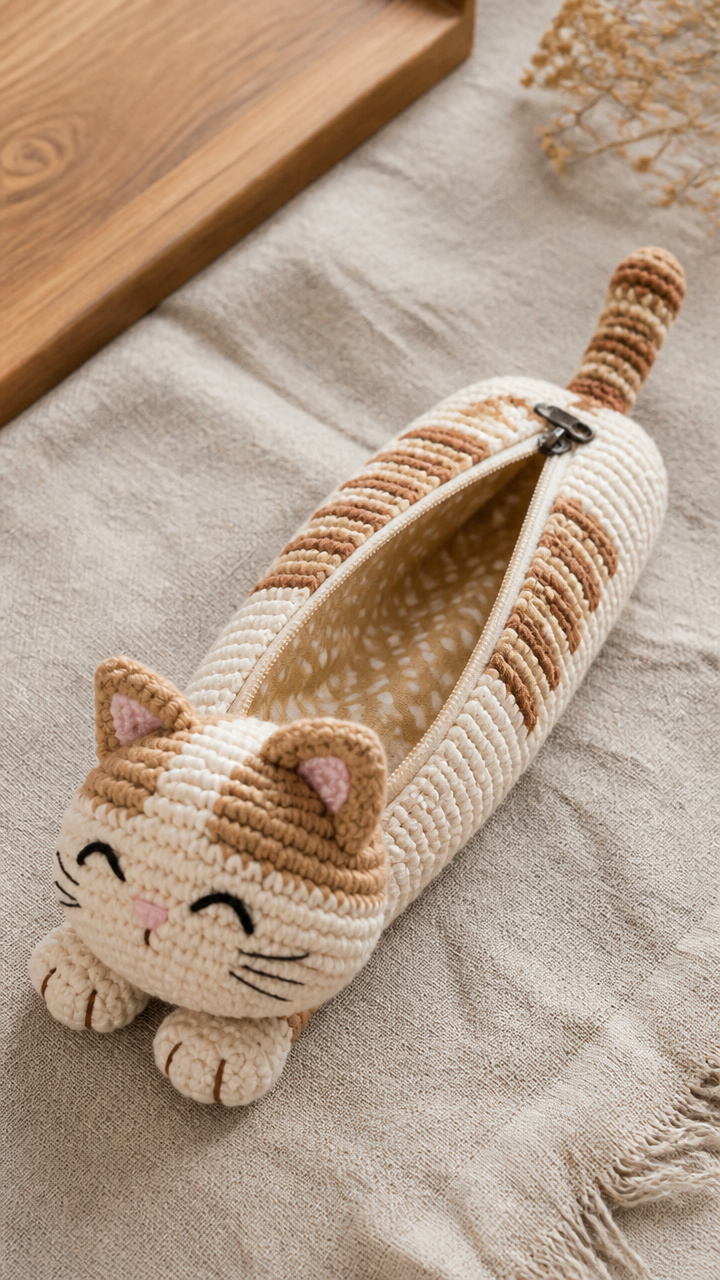
4. Amigurumi Cat Case
Intermediate⏱️ a full weekend🧶 Worsted weight (4)🪝 Hook: 3.5mm (E-4)📏 approx. 150 yards / 137m worsted weight in main color, 30 yards / 27m contrast
This playful cat-shaped case opens along the belly seam to reveal a lined interior pocket. The stiffened felted fabric keeps pens secure while the whimsical face brings joy to any workspace.
How it’s made: Worked in continuous rounds from magic rings for head, body, ears, and tail. Body and head are joined seamlessly. Ears and tail are attached with whip stitch. Mouth and eyes are embroidered.
Key technique: Seamless joining of head and body uses an invisible decrease at the point where the neck meets the torso. Work the last few rounds of the head with careful shaping, then switch to body color and continue without cutting yarn.
⚠️ Watch out for: Overstuffing the head makes it too round and distorts facial features. Stuff lightly and adjust as you go, especially in the snout area where details like eyes and nose need room to sit properly.
Finishing: Embroider eyes and mouth with contrasting thread using a running stitch. Whip-stitch ears and tail in place. Use a fabric liner or iron-on interfacing inside the belly slit to reinforce the opening.
Tips: Felt the finished piece slightly by washing in warm water and agitating gently to tighten the stitches.
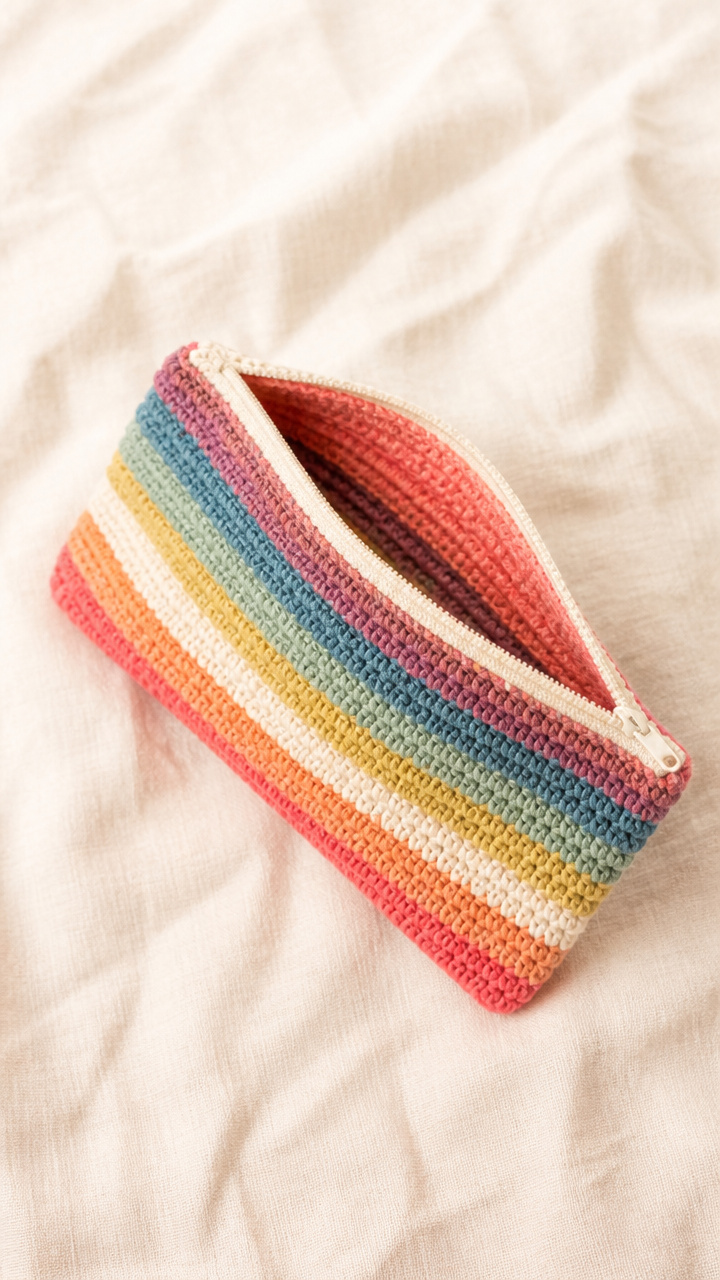
Stitches used: chain, double crochet, slip stitch, single crochet
Bright, retro stripes make this case a cheerful addition to any backpack. The wide opening lets you grab pens easily, and the sturdy construction stands up to daily use.
How it’s made: Worked flat in rows using classic granny stripe pattern—alternating color blocks of three double crochets separated by chain spaces. After completing the panel, fold and seam up the sides and one end, leaving the top open.
Key technique: Color changes happen at the end of each row by pulling the new color through the final yarn over of the last dc trio. Cut old color and weave in ends as you go to minimize finishing work.
⚠️ Watch out for: Twisting the work when turning causes a spiral effect in the stripes. Always turn at the same edge and check that the right side faces out consistently.
Finishing: Seam sides with slip stitch or whip stitch. Fold top edge down 1 inch and slip stitch to create a clean hemmed opening. Weave in all ends on the wrong side.
Tips: Use variegated yarn in one color block to add surprise pops without changing skeins.
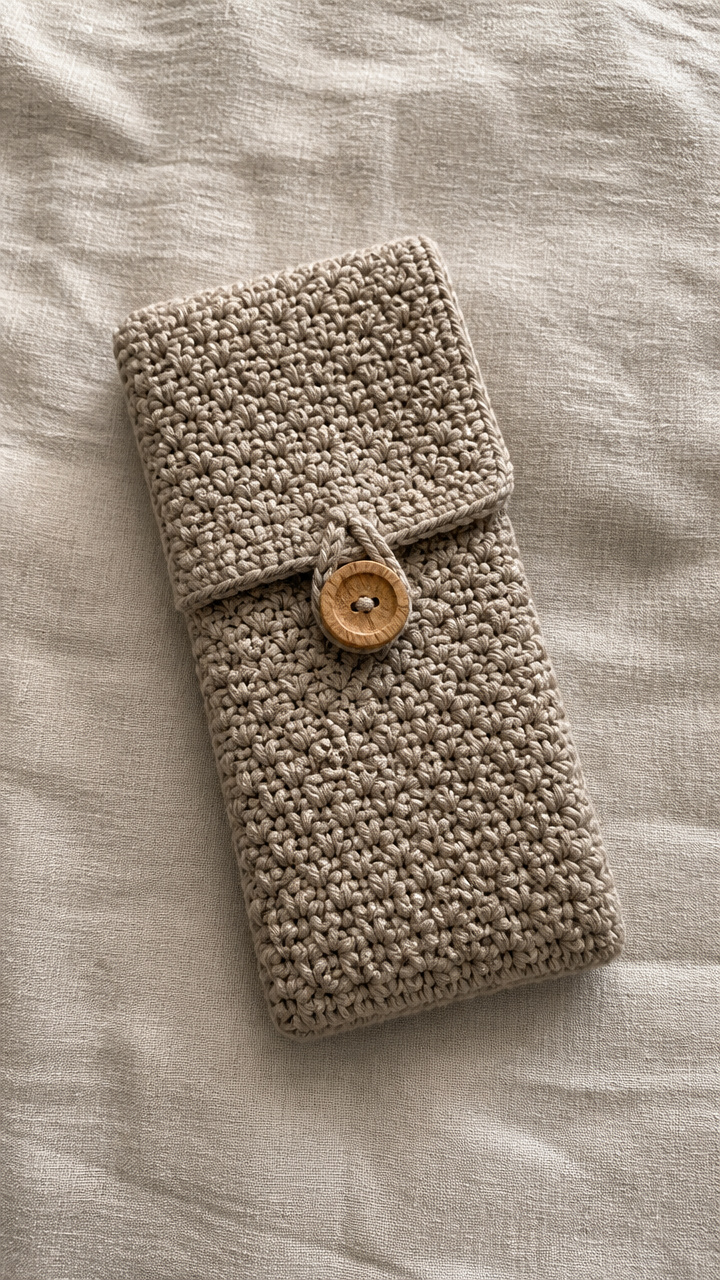
Stitches used: chain, single crochet, half double crochet
Soft and squishy with a tight weave that protects delicate pencil tips, this case folds closed and secures with a wooden button. The reversible texture looks great in monochrome or tonal palettes.
How it’s made: Worked flat in rows using moss stitch (alternating sc and hdc in staggered pattern). Once rectangle is complete, fold in half lengthwise and seam up both ends. A button loop is added to the flap.
Key technique: Moss stitch alternates single crochet and half double crochet in every row, with stitches worked into the previous row’s chain space or stitch to create a woven texture. Maintain the offset by always skipping the first chain and working into the next stitch.
⚠️ Watch out for: Working into the wrong part of the stitch breaks the moss rhythm. Remember: if the stitch above looks like a ‘v’, work into it; if it’s a bump, skip it. Use a marker to track the first stitch.
Finishing: Weave in ends before seaming. Attach button to lower front so the flap wraps over neatly. Block lightly to set the drape.
Tips: Line with lightweight fusible fleece for extra padding.
7. Tunisian Simple Stitch Box
Intermediate⏱️ one afternoon🧶 Worsted weight (4)🪝 Hook: 6.0mm (J-10) Tunisian hook📏 approx. 160 yards / 146m worsted weight
Additional materials: Tunisian crochet hook, tapestry needle, ruler, cardboard insert
Stitches used: Tunisian forward pass, Tunisian return pass, Tunisian simple stitch
This rigid box-style case stands upright and holds pens vertically. The dense Tunisian fabric resists stretching and gives a polished look. Ideal for desk display or gift giving.
How it’s made: Front and back panels are worked in Tunisian simple stitch, then seamed up the sides and bottom. Sides are crocheted in regular single crochet around the upper edge. A cardboard stiffener is inserted into a lining sleeve.
Key technique: Tunisian simple stitch builds fabric by picking up loops across the row on the forward pass, then working them off one by one on the return pass. Keep edge chains loose to prevent curling and maintain even tension on the bar below the hook.
⚠️ Watch out for: Pulling too tightly on the return pass causes the fabric to pucker. Relax your grip and let the loops hang freely until you yarn over and pull through. Use a hook one size larger if needed.
Finishing: Block panels before seaming to ensure they match in size. Seam sides with slip stitch. Create a sleeve on the back panel to slide in a stiffener for structure.
Tips: Add a strip of Velcro to the lid for a secure closure.
Stitches used: chain, single crochet, popcorn stitch, slip stitch
Bumpy texture adds tactile interest to this huggable case that curves gently around pencils. The organic shape fits comfortably in hand and the bold clusters stand out in solid colors.
How it’s made: Worked flat from a foundation chain, increasing slightly on one long edge to create a curved wrap shape. Popcorn stitches are placed in diagonal lines. Edges are finished with single crochet and a button loop.
Key technique: Each popcorn stitch is made by working five incomplete double crochets in the same stitch, then pulling the first loop through the last to close the cluster. Anchor each popcorn with a sc on either side to keep it flat.
⚠️ Watch out for: Not securing the popcorn base causes gaps. Always work a single crochet before and after each popcorn to anchor it. Also, count carefully—missing a skipped stitch between clusters breaks the diagonal alignment.
Finishing: Fold and seam the short ends together. Add a border of single crochet around the opening edge. Sew a button to the underside to match the loop.
Tips: Use a smooth cotton blend to highlight the popcorn definition.
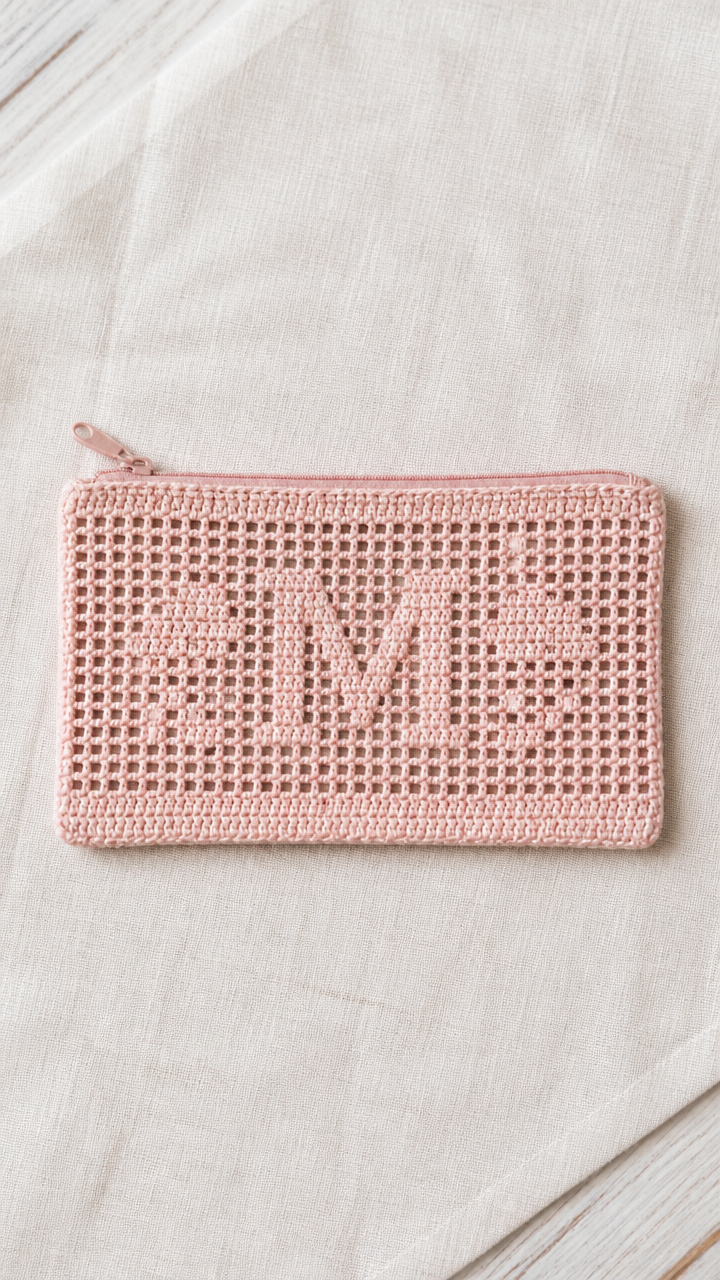
9. Filet Grid Mini Case
Intermediate⏱️ one afternoon🧶 Sport weight (2)🪝 Hook: 3.5mm (E-4)📏 approx. 140 yards / 128m sport weight
Additional materials: stitch marker, tapestry needle, crochet graph paper (optional)
Stitches used: chain, double crochet, skip stitch
Delicate and lacy, this case shows off intricate patterns like stars or initials in negative space. Lightweight and breathable, it’s perfect for carrying fine liners or calligraphy pens.
How it’s made: Worked flat in rows using filet crochet technique—solid blocks of two double crochets alternate with open blocks of chain 2, skip 2. After completing the grid panel, fold and seam sides and one end.
Key technique: Filet crochet relies on a strict grid pattern where solid and open blocks form designs. Each row starts with a ch-4 (counts as dc + ch-2), then repeats either [dc in next dc, ch 2, skip next ch-2 space] for open blocks or [2 dc in same st] for filled blocks.
⚠️ Watch out for: Miscounting blocks throws off the entire design. Use a row counter and mark completed sections with stitch markers. Always check that open and filled blocks align vertically with prior rows.
Finishing: Seam edges with slip stitch. Add a narrow edging of single crochet around the opening to prevent stretching. Block gently to open up the lacework.
Tips: Personalize with a monogram by plotting letters on graph paper first.
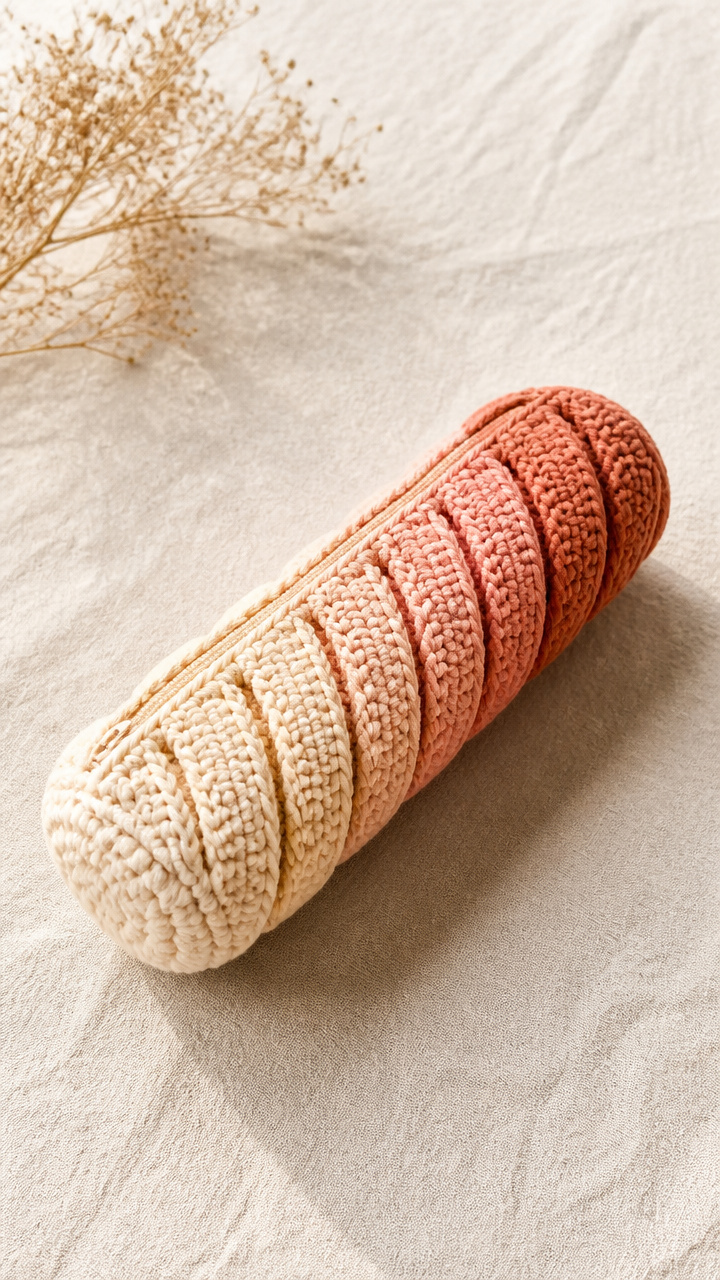
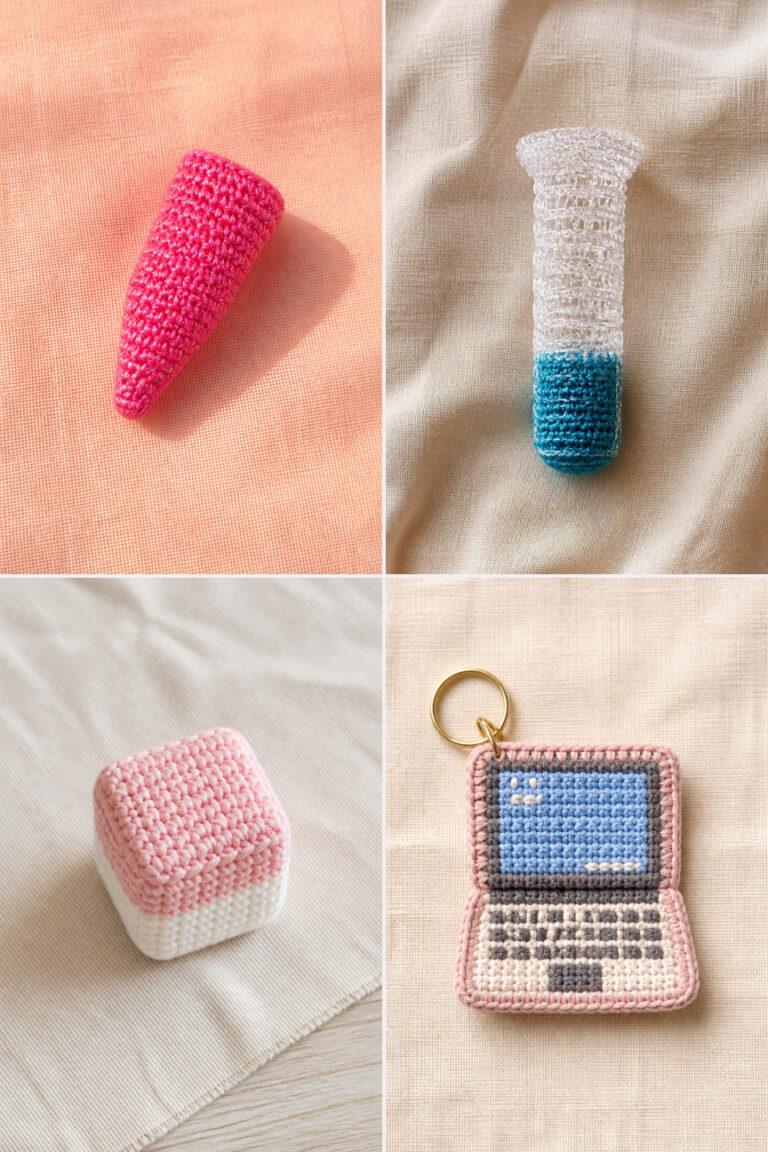
Plump, padded ridges spiral around this cylindrical case like a candy wrapper. The thick fabric cushions pencils and the seamless tube has no weak points. Looks stunning in ombre yarn.
How it’s made: Worked in continuous spiral rounds from a magic ring. Puff stitches are grouped in clusters with chains between, creating a bumpy spiral ridge. Work continues straight up without increases until desired length.
Key technique: Each puff stitch is made by yarning over, inserting hook, pulling up a loop (repeat 5 times in same stitch), then yarn over and pull through all 11 loops on hook. Chain 1 to lock the puff. Rotate slightly each round to maintain the spiral effect.
⚠️ Watch out for: Pulling too tightly on the final puff stitch yarning over collapses the puff. Keep the last pull loose and even. Also, missing the chain between puffs flattens the texture—always ch 1 after closing each puff.
Finishing: Fasten off and weave in end through several puffs on the inside. Add a crocheted drawstring or ribbon through the top edge for closure. Insert a plastic ring at the top if you want it to hold its shape.
Tips: Try alternating puff heights (3-loop vs 5-loop) for varied texture.
Geometric and modern, this diamond-shaped case lies flat when open and tapers to a pointed base. Works well for longer pencils or paintbrushes. Color blocking adds visual punch.
How it’s made: Worked diagonally from corner to corner in C2C technique using double crochet blocks. After reaching peak width, decrease symmetrically. Two identical squares are joined on three sides to form the pouch.
Key technique: Each C2C block consists of ch 3 (counts as first dc), 2 dc in the same chain space. Increase by adding a new block at each end of the row. Decrease by skipping the first and last block of the prior row. Use stitch markers to track current row count.
⚠️ Watch out for: Forgetting to carry non-working yarn up the side causes tangles. Cut and rejoin colors at each row change, or twist them neatly every few rows if doing intarsia. Miscounting increase/decrease points distorts the shape.
Finishing: Join two squares with slip stitch along three edges. Fold top down slightly and work a round of sc to create a clean edge. Weave in all ends on the wrong side.
Tips: Make a larger version for makeup brushes or knitting needles.
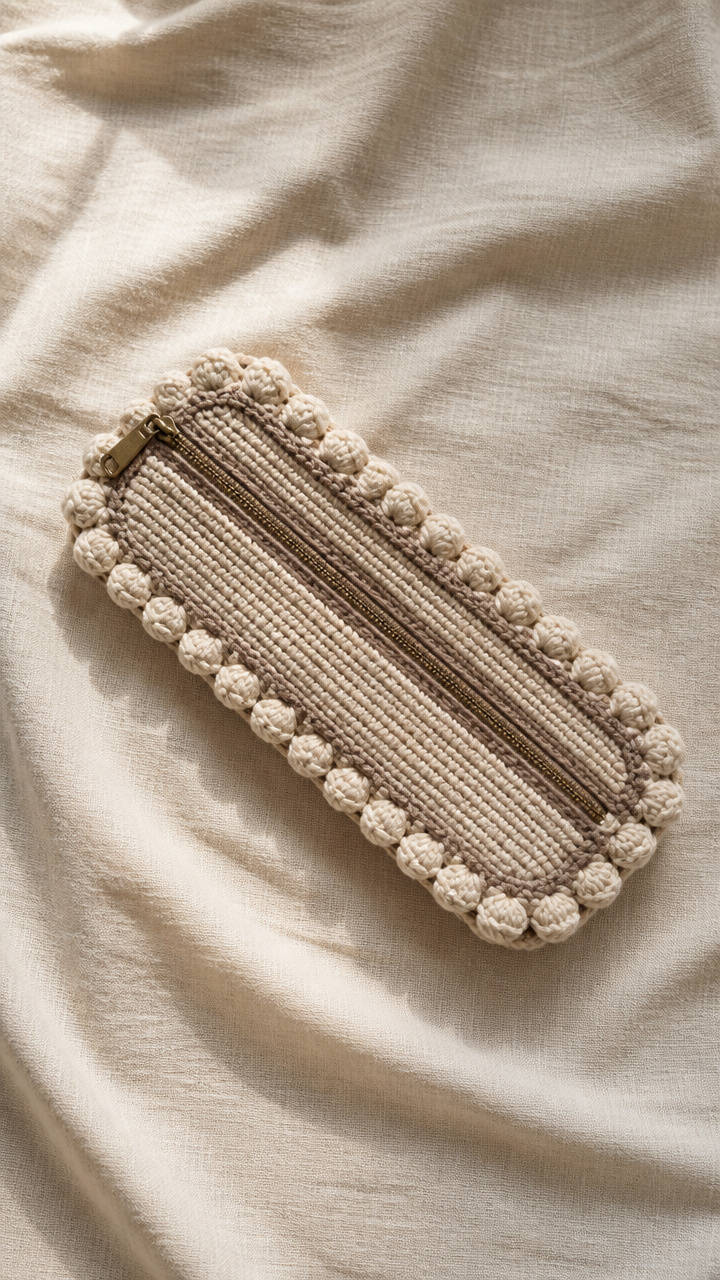
Stitches used: chain, single crochet, bobble stitch, slip stitch
This sleek case features a row of soft bobbles that frame a smooth zipper closure. The contrast between texture and function makes it a standout. Fully lined to protect contents.
How it’s made: Two rectangular panels are crocheted with bobble stitches along the top edge. Panels are seamed on three sides with the zipper sandwiched between the top edges using slip stitches.
Key technique: The bobble stitch is made by working multiple incomplete double crochets in one stitch—yo, insert hook, pull up loop, yo and pull through 2 loops (repeat 4 times total), then yo and pull through all 5 loops. Place bobbles only along the top edge every 3rd stitch.
⚠️ Watch out for: Attaching the zipper too tightly causes puckering. Baste it in place first with thread, checking that the fabric lies flat before crocheting over it. Also, bobbles should face outward—don’t let them curl inward.
Finishing: Hand-stitch a fabric lining inside to cover raw edges and zipper tape. Weave in ends through the lining. Press seams gently with a damp cloth.
Tips: Use a separating zipper to fully open the case for easy access.
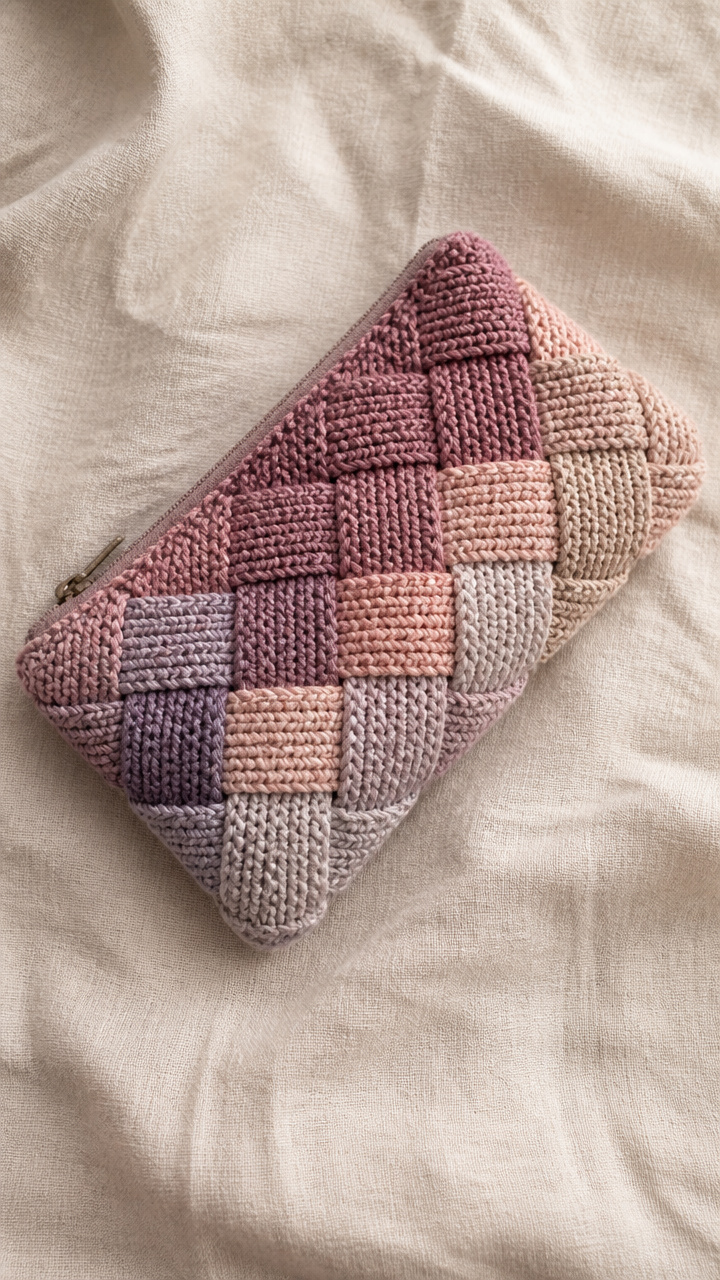
13. Entrelac Rectangle Case
Advanced⏱️ a full weekend🧶 DK weight (3)🪝 Hook: 4.5mm (7)📏 approx. 190 yards / 174m DK weight
Additional materials: stitch markers, tapestry needle, crochet hook for joining
This case mimics woven fabric with interlocking blocks that shift direction. The surface is rich with subtle texture and works beautifully in gradient yarns. Sturdy and flat for slipping into a tote.
How it’s made: Worked in entrelac technique using interconnected trapezoids and rectangles built row by row. Each triangle and square is worked perpendicular to the prior section. Finished with a moss stitch border.
Key technique: Entrelac involves crocheting small shapes that interlock side-by-side. Start with a base triangle, then pick up stitches along its diagonal edge to work a rectangle upward. Continue adding shapes in a zigzag pattern across the piece.
⚠️ Watch out for: Picking up too many or too few stitches along the side edge causes ruffling or gaps. Pick up one stitch for each row end along the slanted edge—usually 3-4 per triangle. Use a smaller hook for joining if needed.
Finishing: After completing all sections, work a round of moss stitch around the entire edge to neaten and stabilize. Weave in ends as you go to avoid a tangled mess at the end.
Tips: Alternate colors every other block for a plaid effect.
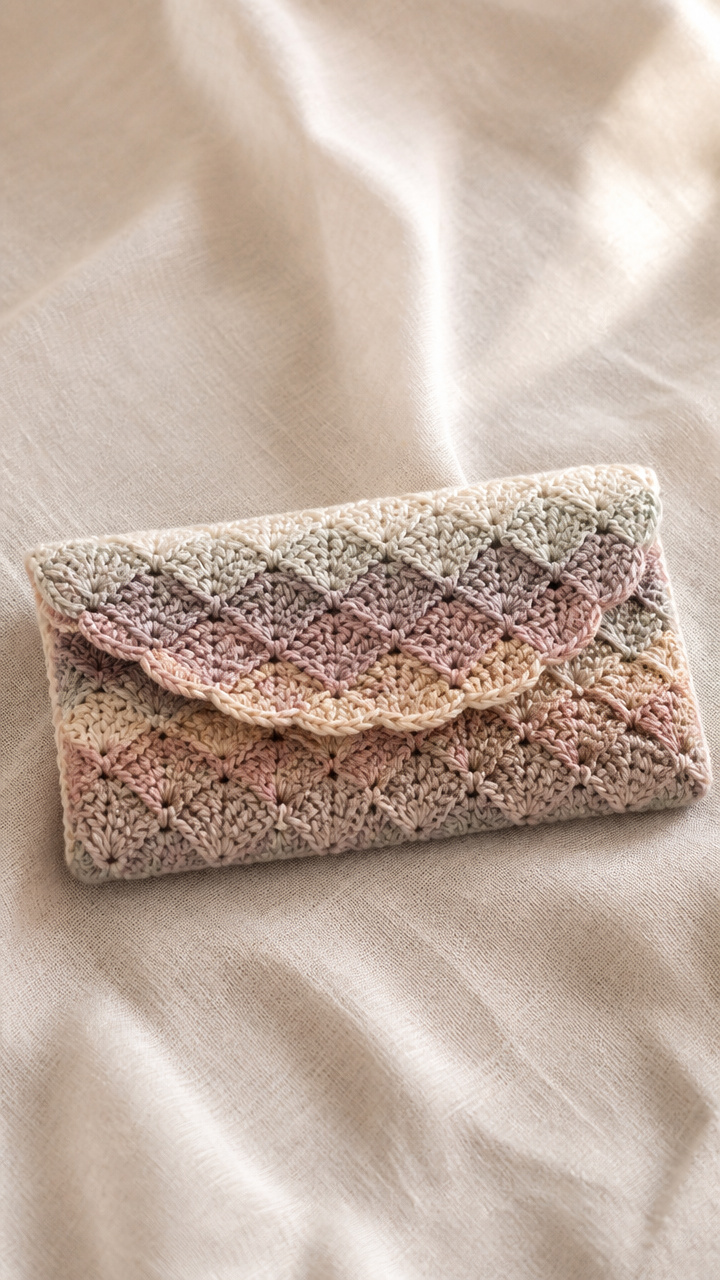
Simple yet elegant, this case features soft scalloped peaks along its length. The dense fabric protects pen tips and the generous flap keeps everything secure. Works up quickly in bulky yarn.
How it’s made: Worked flat in rows of single crochet with shell clusters (5 sc in one stitch) placed at regular intervals. After completing the rectangle, fold and seam sides and one end. Button loop added to flap.
Key technique: Shell clusters are centered on every fifth row and spaced evenly across the width. Work 5 sc in the same stitch, then skip 4 stitches before the next cluster. Fill remaining spaces with single crochet to maintain even row length.
⚠️ Watch out for: Skipping the wrong number of stitches between shells causes uneven spacing. Count carefully: after 5 sc in one stitch, skip exactly 4 stitches, then work one sc in each of the next 4 stitches before the next shell.
Finishing: Seam edges with slip stitch. Fold top edge down 1.5 inches and slip stitch to form a hem. Sew button to front to match loop.
Tips: Use a variegated yarn to make the shells pop without color changes.
Additional materials: tapestry needle, two 6-inch wrist straps (leather or fabric), stitch marker
Stitches used: chain, half double crochet, slip stitch, single crochet
Wear this case on your wrist like a pair of stacked cuffs. Unsnap the top to reveal a hidden compartment for pencils or lipsticks. Functional fashion that turns heads.
How it’s made: Two long Hdc bands are crocheted separately and tapered at both ends. A central pocket panel is stitched between them. Strap loops are crocheted directly onto the ends of each band.
Key technique: The pocket is formed by sewing a rectangular fabric or crocheted piece between the two bracelet bands, leaving the top open. Reinforce the attachment points with whip stitching through multiple layers.
⚠️ Watch out for: Attaching straps too loosely causes sagging. Backstitch multiple times when sewing strap loops to the band ends. Also, ensure both bands are the same length before adding the pocket.
Finishing: Weave in all ends thoroughly. If using fabric lining, serge or zigzag raw edges. Block lightly to even out tension.
Tips: Add a snap or button to the top edge to keep contents secure during movement.
You’ve got everything you need to start making beautiful, useful pencil cases today. Pick one that matches your mood and skill level, grab your hook, and enjoy the rhythm of creating something small but meaningful. These little projects add up to big satisfaction.
This page contains affiliate links and I earn a commission if you make a purchase through one of the links, at no cost to you. Keychains are small enough to finish in a weekend but meaningful enough to carry every day. These patterns blend function and charm, designed with teachers and students in mind —…
This page contains affiliate links and I earn a commission if you make a purchase through one of the links, at no cost to you. Back to school doesn't have to mean off-the-rack supplies. With a hook and some yarn, you can create thoughtful handmade pieces that add personality to notebooks, lockers, and backpacks. These…
This page contains affiliate links and I earn a commission if you make a purchase through one of the links, at no cost to you. Students need practical, durable ways to protect their textbooks and notebooks, and a handmade crochet book sleeve is both functional and personal. These patterns offer a range of styles from…
This page contains affiliate links and I earn a commission if you make a purchase through one of the links, at no cost to you. Backpack charms are more than just cute add-ons, they’re a chance to show off personality and make the everyday a little brighter. These small projects let you play with color,…