20 Easy Crochet Book Sleeve Ideas for Students
Students need practical, durable ways to protect their textbooks and notebooks, and a handmade crochet book sleeve is both functional and personal. These patterns offer a range of styles from simple slip covers to structured cases with pockets, all designed to fit standard school books while showcasing your crochet skills.
Each sleeve uses different stitches, construction methods, and finishing techniques so you can build your repertoire while making something useful. Whether you’re crocheting during study breaks or crafting between classes, these projects are sized for real books and made with real crocheters in mind.
What You’ll Need
Most of these patterns use a 3.5mm to 5.5mm hook and yarn in weights from DK to bulky. You’ll consistently need a tapestry needle, scissors, and stitch markers. Some designs require buttons, zippers, or lining fabric, which are noted in individual materials lists.
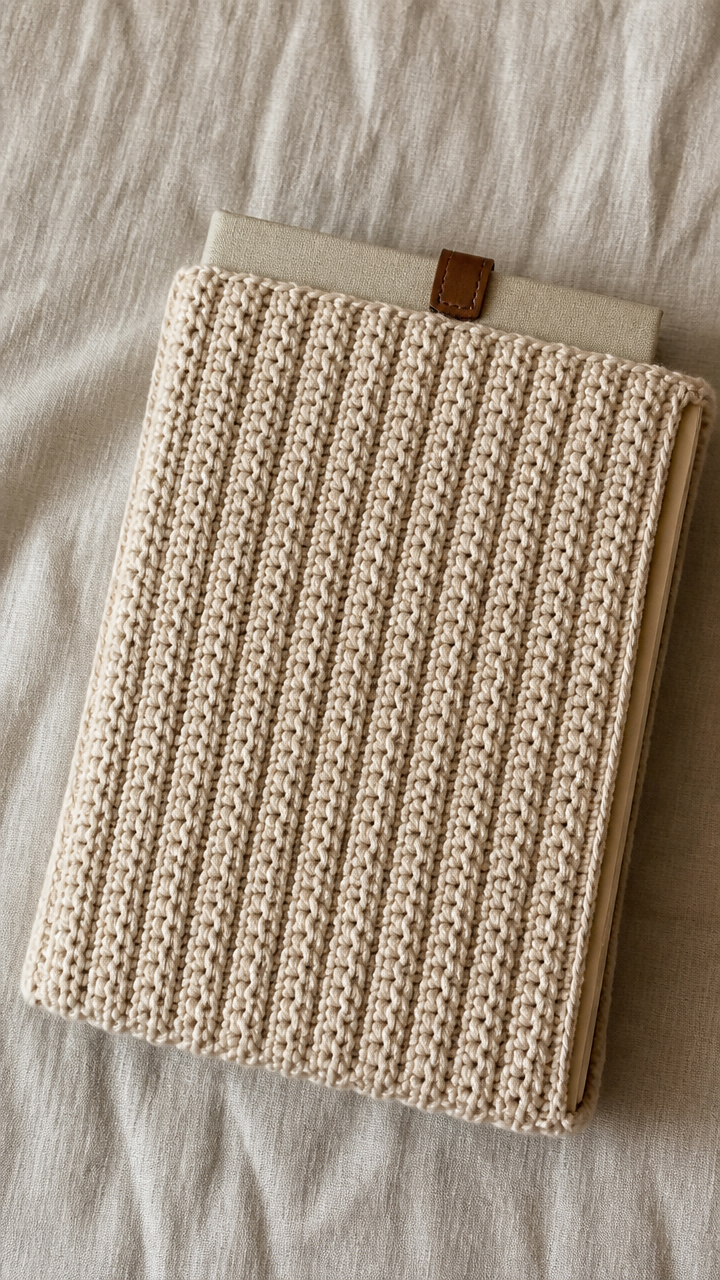
1. Ribbed Slip Cover Sleeve
Additional materials: stitch markers, tapestry needle, measuring tape
Stitches used: chain, single crochet, slip stitch
This sleek sleeve hugs the book with snug vertical ribs that look store-bought but are easy to crochet. It’s ideal for textbooks or notebooks up to 1 inch thick and slips on and off easily.
How it’s made: Chain to fit book width plus 1 inch, then work rows of single crochet in back loops only to create vertical ribbing. Seam up the side and bottom edges with a whip stitch to form a sleeve.
Key technique: Working in the back loop only creates a stretchy ribbed texture that grips the book without slipping. Make sure to keep tension even so the fabric doesn’t curl or gap. Count your foundation chain carefully to match your book’s width.
⚠️ Watch out for: Skipping the back loop on some stitches breaks the rib effect and reduces elasticity. Use stitch markers every 10 stitches to stay on track.
Finishing: Weave in all ends along the seam line. Lightly block to even out tension, then fold the sleeve in half to check fit before final seaming.
Tips: Use a smooth cotton blend for durability and a polished look. Add a leather tab to the top edge for easy pulling from a backpack.
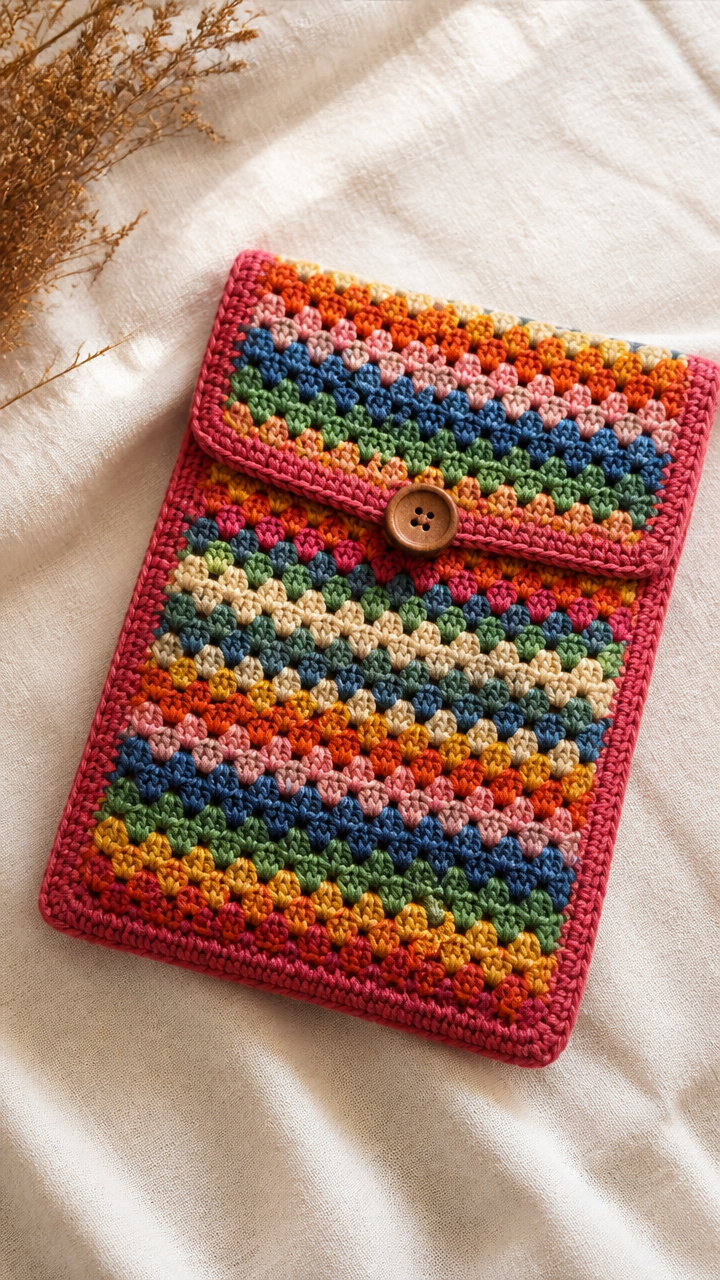
2. Granny Stripe Wrap Sleeve
Additional materials: stitch markers, tapestry needle, button
Stitches used: chain, double crochet, slip stitch
Bright, textured stripes wrap around the book with a fold-over flap secured by a button. The open weave allows the book cover to show through while adding protection.
How it’s made: Crochet vertical granny stripes side by side across the width of the book. Join rows with slip stitches, then fold and seam the sides. Add a button closure at the flap.
Key technique: Vertical granny stripes are made by working a set of three double crochets, chain two, skip two, repeat. Each stripe runs from bottom to top of the sleeve, giving structure and stretch. Keep your ch-2 spaces aligned to maintain straight columns.
⚠️ Watch out for: Miscounting skipped stitches between clusters causes uneven stripes. Mark the first and last cluster of each row to stay aligned.
Finishing: Sew the side and bottom seams with a whip stitch. Attach a button to the front flap and crochet a loop on the back edge for closure.
Tips: Choose three coordinating colors for a school spirit look. Use a solid color for the border to frame the stripes neatly.
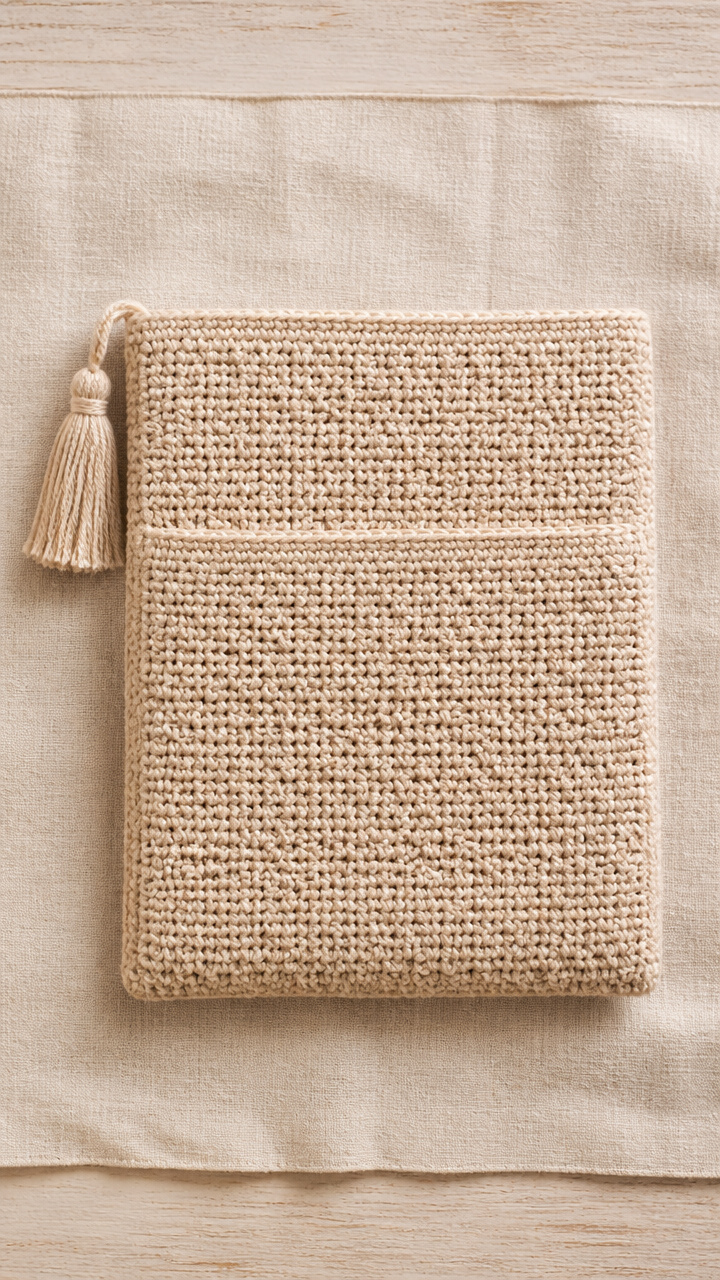
3. Moss Stitch Pocket Sleeve
Additional materials: stitch markers, tapestry needle, fabric liner (optional)
Stitches used: chain, single crochet, chain 1 space
This sleeve has a soft, pebbled texture and includes a front pocket for sticky notes or a pen. It fits snugly around standard notebooks and lies flat when closed.
How it’s made: Start with a foundation chain equal to book height. Work moss stitch in rows across, alternating single crochet and chain 1 in staggered pattern. Seam up the long edge and add a front pocket by crocheting a smaller rectangle and attaching it.
Key technique: Moss stitch alternates single crochet and chain-1 space every row, with stitches worked into the chain space from the previous row. This creates a dense, flexible fabric that resists curling. Use stitch markers at row ends to avoid accidental increases.
⚠️ Watch out for: Working into the wrong part of the chain-1 space causes loose stitches. Always insert hook under both loops of the chain, not into the space beside it.
Finishing: Weave in ends through seam allowances. If using a fabric liner, baste it to the inside before seaming. Fold pocket in place and slip stitch around three edges.
Tips: Line the inside with cotton fabric to prevent yarn snagging on book covers. Add a tassel to the corner for flair.
4. Corner Tassel Sleeve
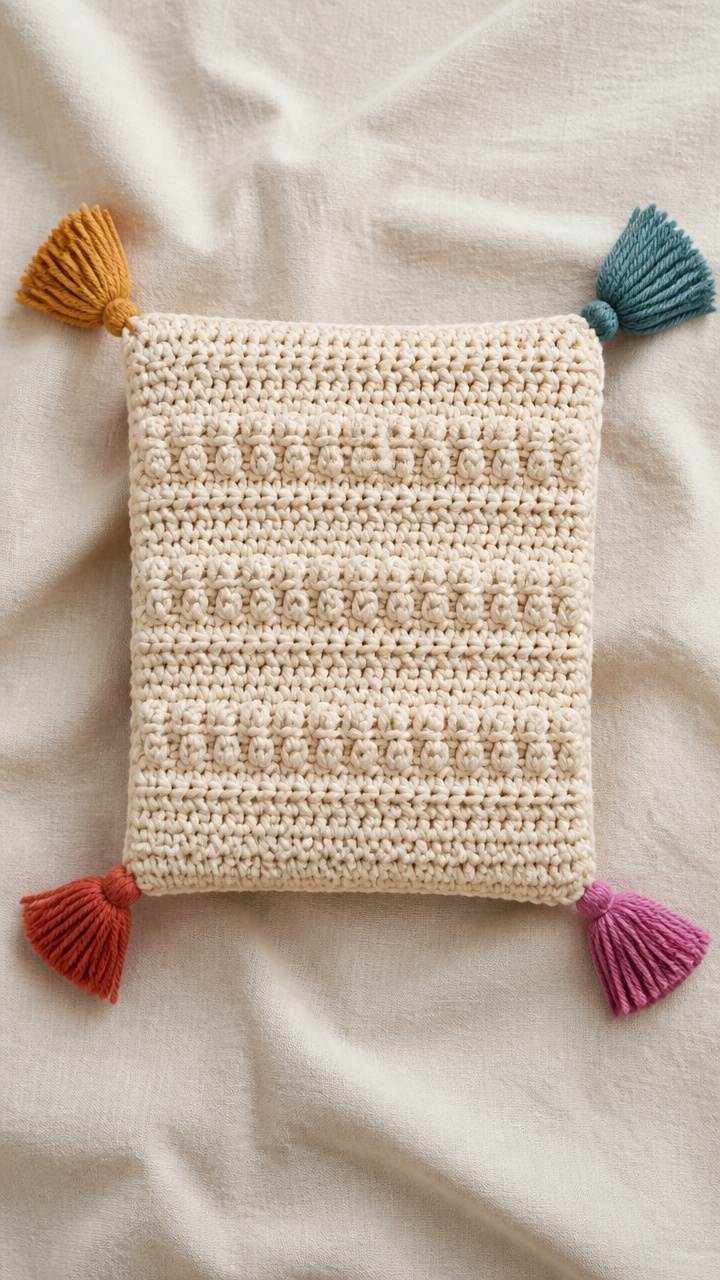
Additional materials: stitch markers, tapestry needle, tassel maker or cardboard
Stitches used: half double crochet, front post double crochet, slip stitch
Thick and cozy with bold texture, this sleeve features playful tassels on each corner. The bulky yarn makes it quick to crochet and great for winter semesters.
How it’s made: Work foundation half double crochet in a rectangle to fit book dimensions. Use front post double crochet in alternating rows to create raised texture. Seam up sides and add tassels to all four corners.
Key technique: Front post double crochet wraps around the post of the stitch below, creating a raised ridge. Work it on every other row to form horizontal ribs. Keep tension firm so the fabric holds shape without stretching out.
⚠️ Watch out for: Twisting the work when turning rows distorts the ribbing. Always turn the same direction and check the right side remains consistent.
Finishing: Weave in ends through textured rows. Make four tassels using a 4-inch cardboard cutout, wrap tops tightly, and knot securely before attaching with tapestry needle.
Tips: Use a wool-blend bulky yarn for warmth and memory. Choose a neutral body color with bright tassels for a pop of color.
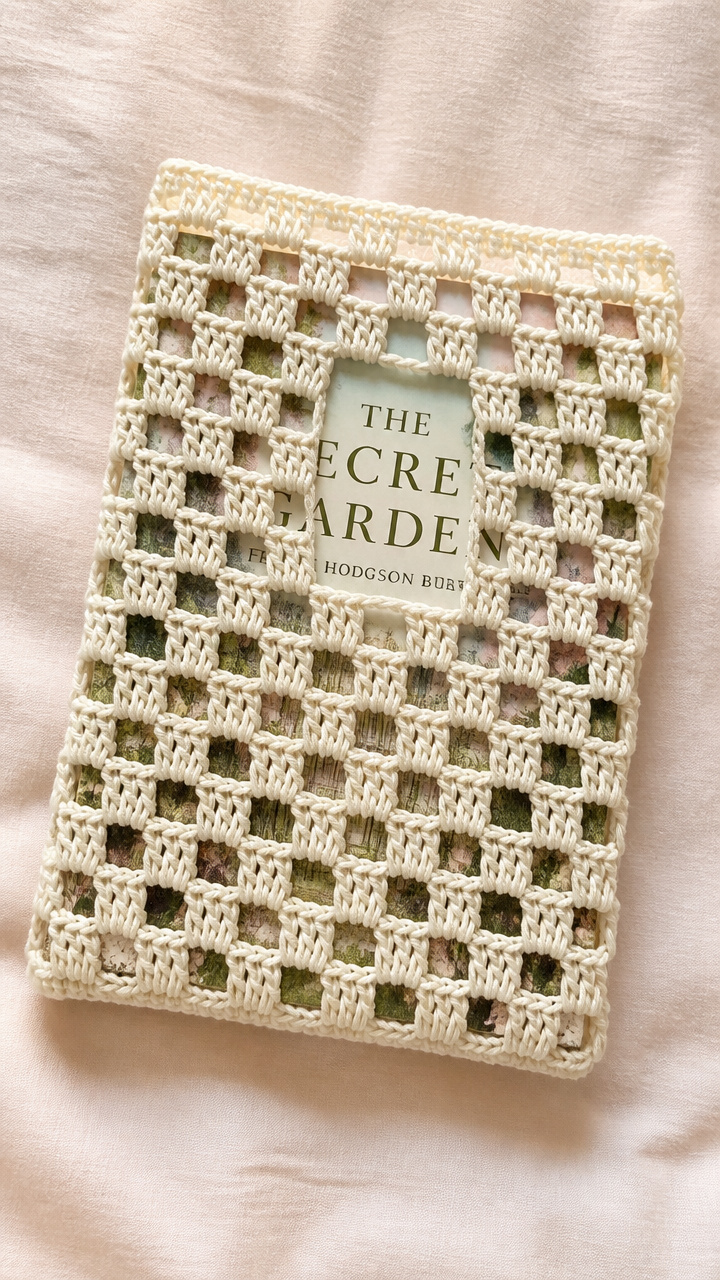
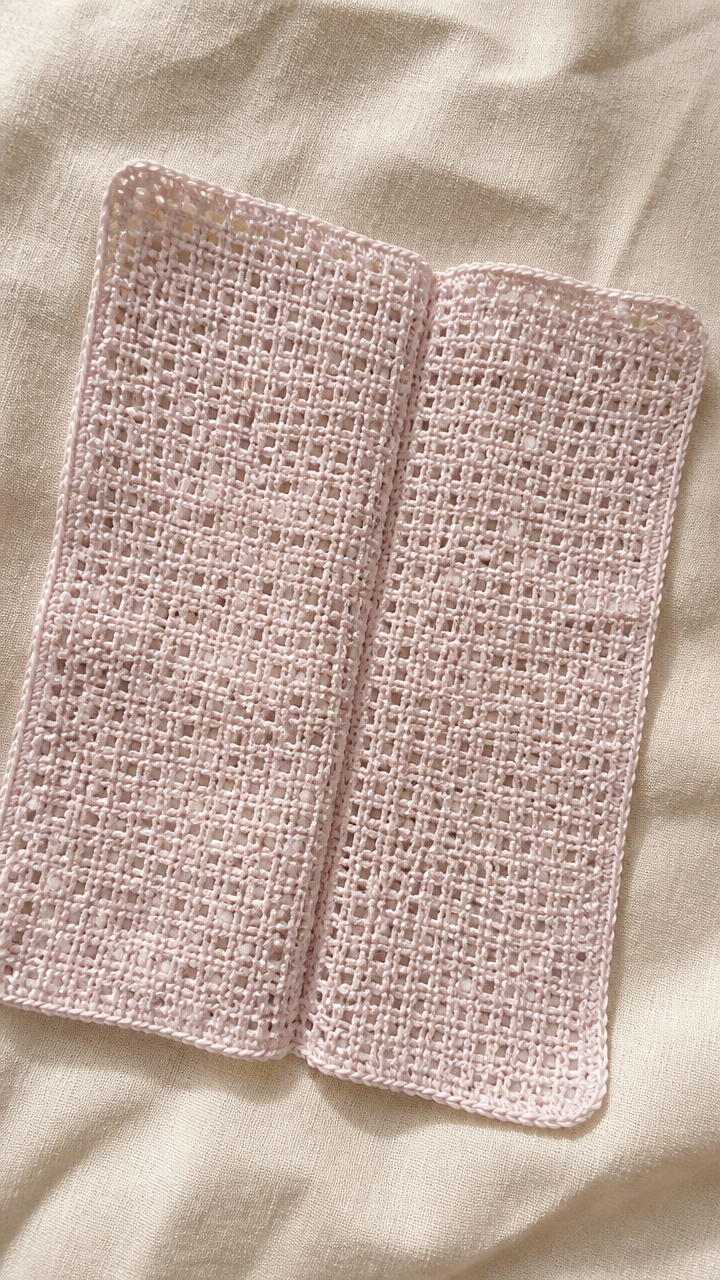
5. Filet Grid Sleeve
Additional materials: stitch markers, tapestry needle, graph paper or chart
Stitches used: chain, double crochet, skip stitch
Lightweight and breathable, this sleeve features an open lattice pattern that shows off the book cover beneath. It’s perfect for spring or summer terms and adds a touch of elegance.
How it’s made: Work in rows using filet crochet technique, alternating solid blocks (dc in each st) and open blocks (ch 2, skip 2). Follow a simple geometric chart to create a grid pattern. Seam sides and bottom after completion.
Key technique: Filet crochet uses double crochet and chain spaces to form a grid. A solid block is 3 dc, an open block is ch 2, skip 2 dc. Count every block carefully and use a chart to track progress. Place a stitch marker at the start of each row.
⚠️ Watch out for: Miscounting skipped stitches breaks the grid alignment. Use a row counter and mark completed blocks with a highlighter on your chart.
Finishing: Weave in ends along the seams. Block gently by pinning to shape and misting with water to open the lace evenly.
Tips: Personalize with initials in the filet pattern. Use a cotton-silk blend for a soft drape and subtle sheen.
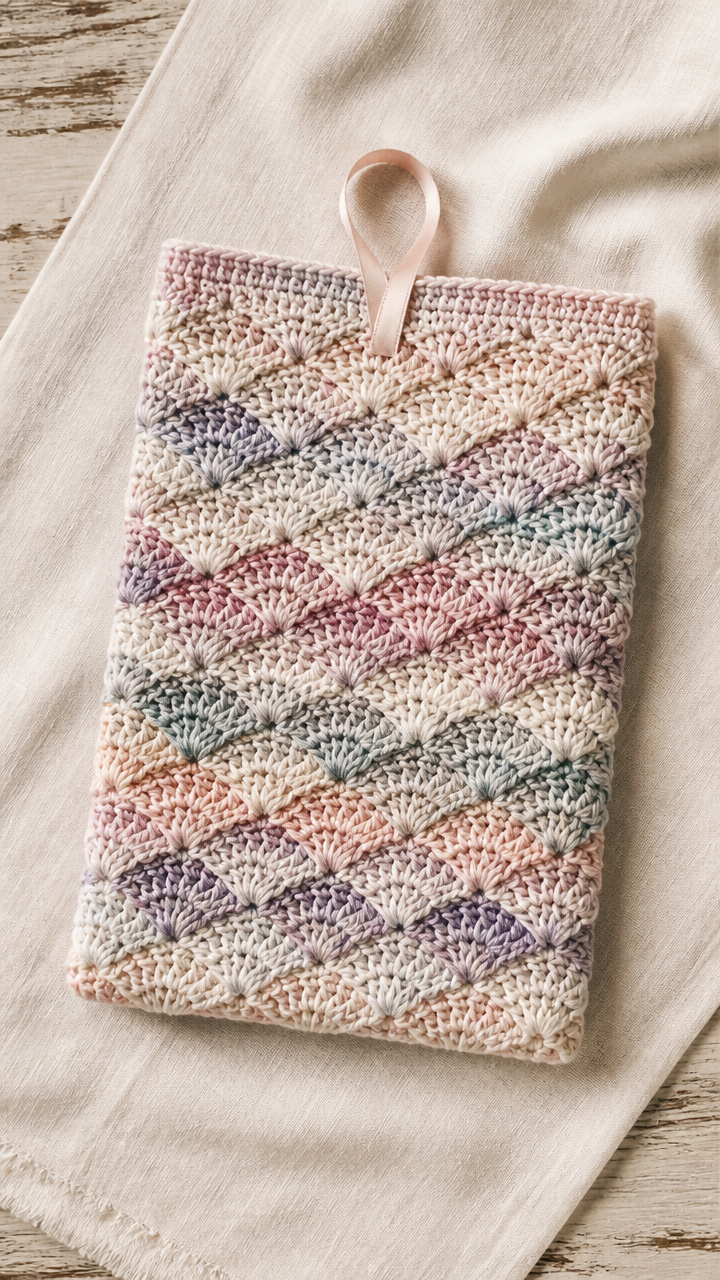
6. Diagonal Shell Sleeve
Additional materials: stitch markers, tapestry needle
Stitches used: chain, double crochet, slip stitch
This sleeve has a bold shell pattern running diagonally across the front. The fabric is flexible and drapes softly, making it easy to slide books in and out.
How it’s made: Start at one corner with a small shell cluster, then increase diagonally by adding a new shell at each end of the row. Work until the piece fits book height and width. Seam along the long edge.
Key technique: Diagonal increases are made by working a shell (5 dc) at the beginning and end of each row. The middle stitches are single crochet. This creates a diamond-shaped piece that becomes rectangular when folded. Count shells to ensure symmetry.
⚠️ Watch out for: Adding extra shells in the center instead of only at ends ruins the shape. Only increase at the first and last stitch of each row.
Finishing: Fold the piece in half and seam the long edge with a whip stitch. Weave in all ends along the seam to hide them.
Tips: Use a variegated yarn to enhance the shell texture. Add a ribbon loop at the top for hanging in lockers.
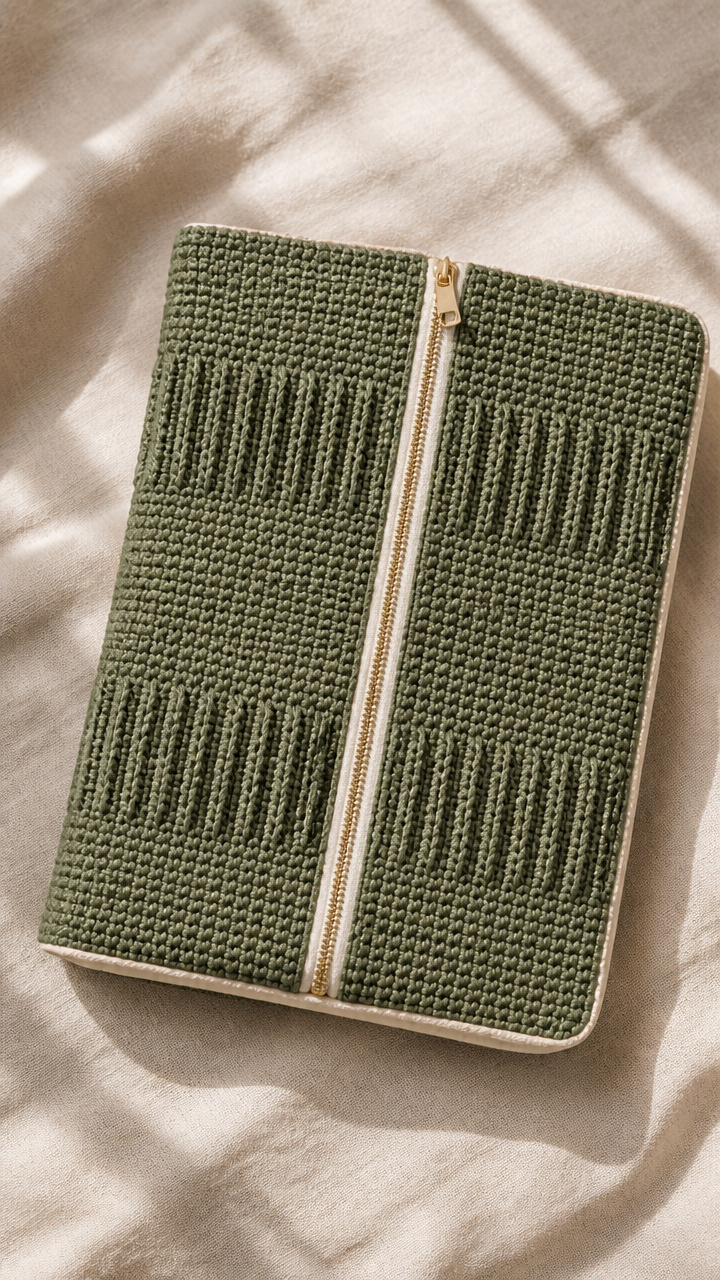
7. Zippered Pouch Sleeve
Additional materials: stitch markers, tapestry needle, 7-inch zipper, fabric lining
Stitches used: single crochet, slip stitch, standing double crochet
This structured sleeve has a full-length zipper for secure closure and a fabric lining to protect book covers. It’s ideal for carrying in crowded backpacks.
How it’s made: Crochet two identical rectangles in single crochet. Pin a zipper between them along the top edge, then sew in place with yarn and tapestry needle. Line with fabric and hand-sew edges.
Key technique: Attaching a zipper involves pinning it face down to the right side of one panel, then crocheting over the teeth with slip stitches. Repeat for the second panel. Use a zipper foot on your sewing machine or hand-stitch securely with small whip stitches.
⚠️ Watch out for: Crocheting too tightly over the zipper makes it hard to open. Use a larger hook or looser tension when working over the teeth.
Finishing: Line each crocheted panel with fabric before attaching the zipper. Fold edges under and hand-sew the lining to hide raw edges.
Tips: Choose a contrasting zipper color for a modern look. Reinforce the zipper ends with extra stitches to prevent splitting.
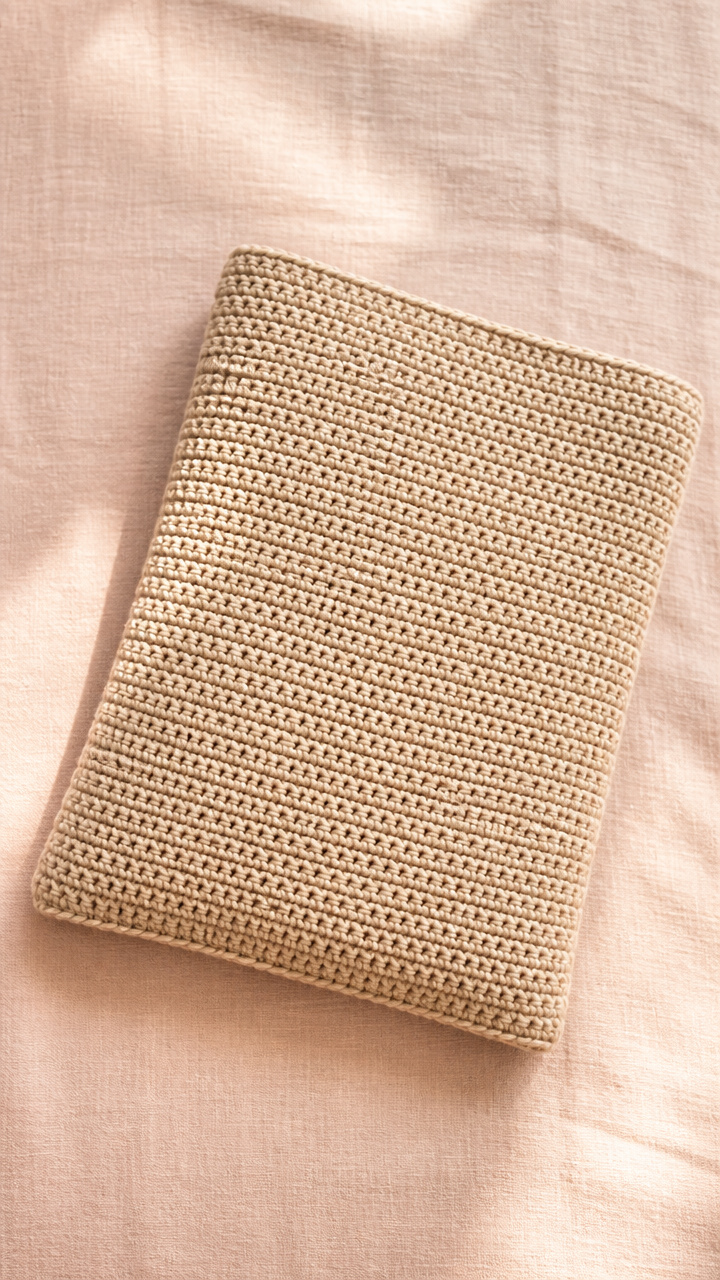
8. Herringbone Half Double Sleeve
Additional materials: stitch markers, tapestry needle
Stitches used: chain, herringbone half double crochet, slip stitch
This sleeve has a sleek, woven appearance with a subtle diagonal grain. It’s thinner than average but sturdy, perfect for slim textbooks or planners.
How it’s made: Chain to book width, then work rows of herringbone half double crochet. Seam up the side and bottom edges. Fold top edge down 1 inch for a clean finish.
Key technique: Herringbone half double crochet is made by yarn over, pull through first loop (not yarn over), then pull through all three loops. This creates a tight, woven texture with a distinct slant. Keep your tension consistent to avoid curling.
⚠️ Watch out for: Pulling too tightly on the final pull-through distorts the fabric. Practice the stitch on a swatch first to find the right rhythm.
Finishing: Fold the top edge down and slip stitch along the inside to secure. Weave in ends through the folded hem for a clean look.
Tips: Use a solid color to highlight the stitch texture. This stitch uses more yarn than regular hdc, so buy extra.
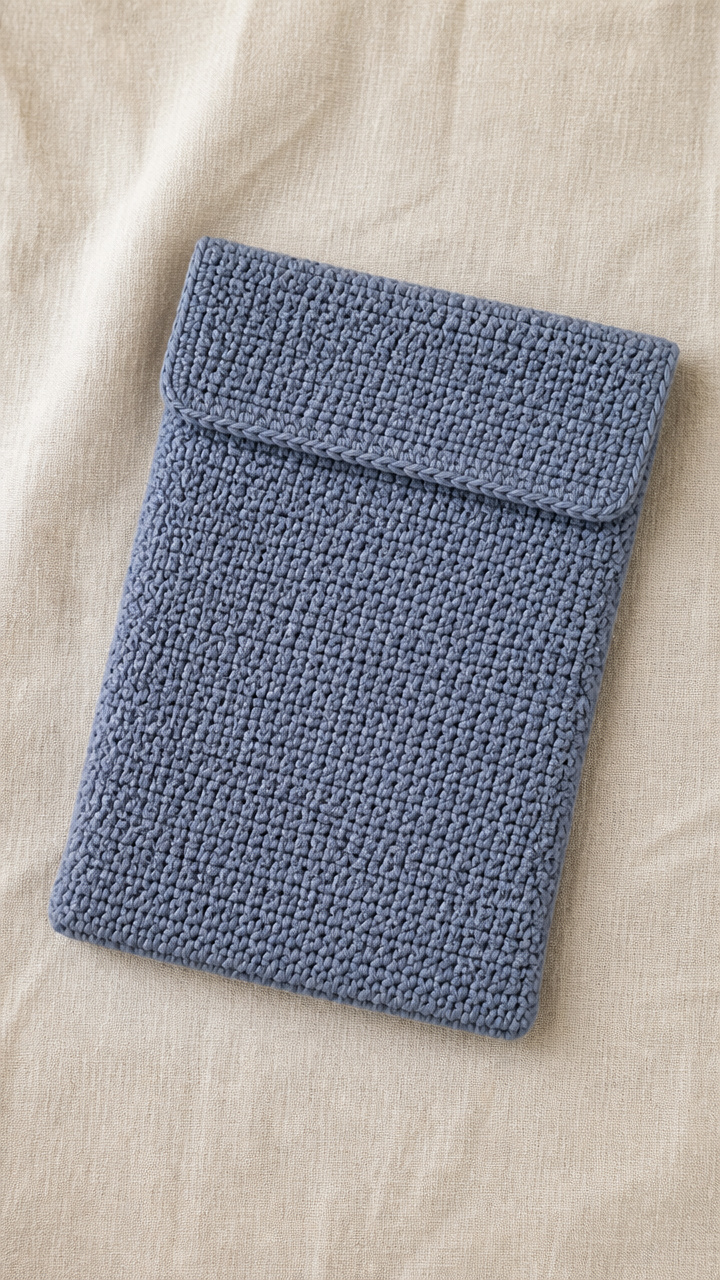
9. Puff Stitch Border Sleeve
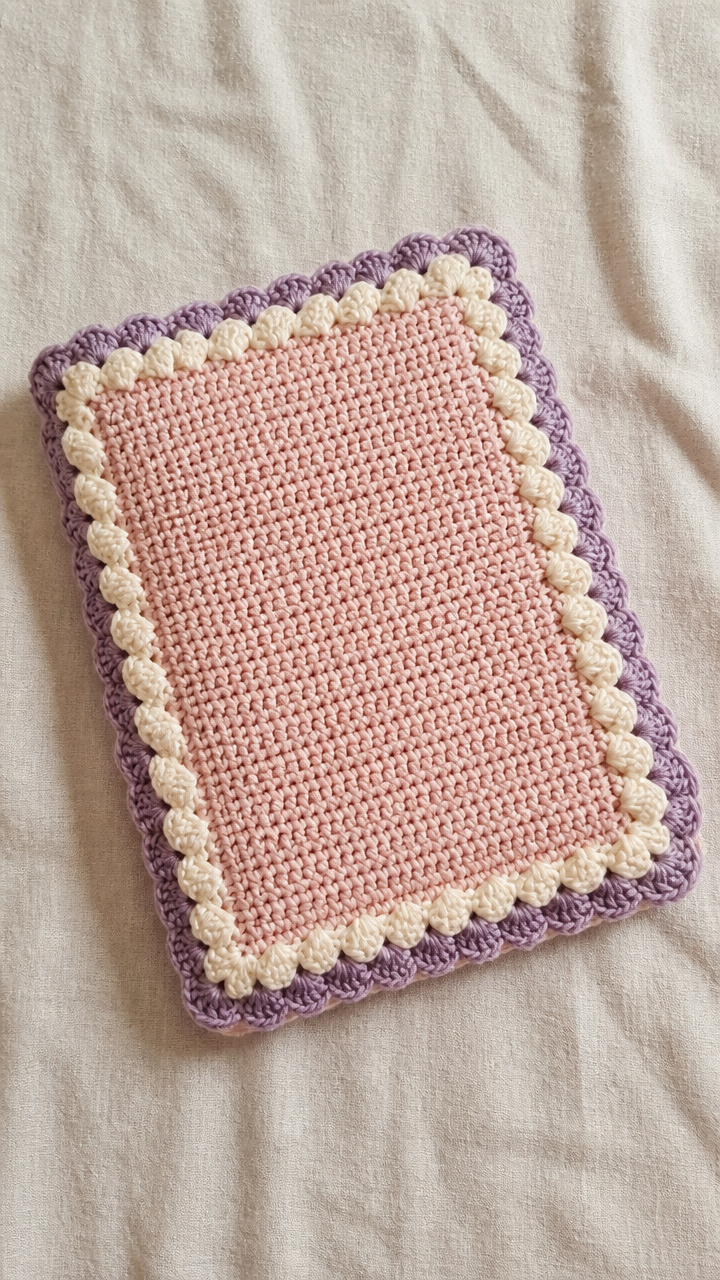
Additional materials: stitch markers, tapestry needle
Stitches used: single crochet, puff stitch, chain
The main body is smooth single crochet, framed by a bouncy border of puff stitches. It’s playful and protective, great for younger students or creative journals.
How it’s made: Crochet a rectangle in single crochet. On the final round, work puff stitches evenly around all edges, placing extra stitches at corners to keep the border flat.
Key technique: Puff stitches are made by pulling up a loop in the same stitch 5 times, yarn over and pull through all 6 loops, then chain 1 to secure. Space them 2 single crochets apart around the edge. Add an extra puff at each corner to prevent pulling.
⚠️ Watch out for: Skipping the chain-1 after each puff causes the border to pucker. Always ch 1 after completing the puff to maintain even spacing.
Finishing: Weave in all ends along the back of the border. Block lightly to let the puffs bloom without flattening them.
Tips: Use a soft acrylic for easy care. Alternate two colors in the border for a festive look.
10. Tunisian Simple Stitch Sleeve
Additional materials: Tunisian hook or 10-inch crochet hook, stitch markers, tapestry needle
Stitches used: Tunisian simple stitch, Tunisian bind off, chain
This sleeve has a smooth, woven look similar to knitting but with crochet ease. The fabric is dense and protective, ideal for heavy textbooks.
How it’s made: Work Tunisian simple stitch in a rectangle to book size. Use a forward pass and return pass for each row. Seam up the sides after binding off.
Key technique: Tunisian simple stitch involves picking up loops across the row, then working them off one by one on the return pass. Keep tension even on the return pass to avoid tight edges. Use stitch markers at each end to prevent dropped loops.
⚠️ Watch out for: Pulling too tight on the return pass makes the fabric curl. Keep the yarn relaxed and let the loops hang freely as you work them off.
Finishing: Use a proper Tunisian bind off to prevent curling. Seam sides with a mattress stitch for an invisible join.
Tips: Use a bamboo Tunisian hook for better grip. Add a leather corner guard for extra durability.
11. Crocodile Scale Flap Sleeve
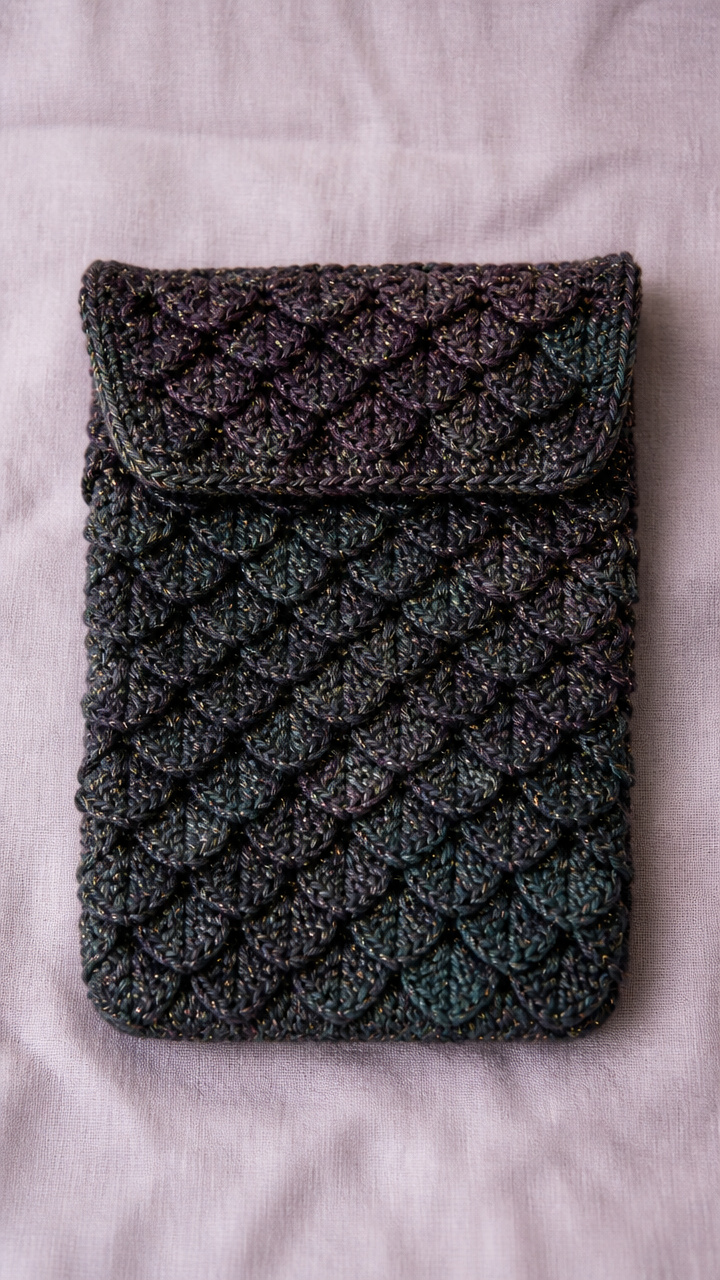
Additional materials: stitch markers, tapestry needle
Stitches used: double crochet, chain, crocodile stitch
This sleeve looks like a dragon’s hide with bold, textured scales that overlap like shingles. The fold-over flap gives extra protection from spills and scuffs.
How it’s made: Work rows of crocodile stitch, which creates overlapping scales. Each scale is made over two posts from the row below. Work until the piece fits book height, then seam sides and add a fold-over flap.
Key technique: Crocodile stitch involves working 5 double crochets around the post of a double crochet from two rows below, then turning and working 5 more on the other side. Keep the base rows firmly crocheted so the scales stand upright. Use stitch markers to track scale placement.
⚠️ Watch out for: Losing track of which post to work around collapses the scales. Mark every other dc in the base row with a stitch marker to guide placement.
Finishing: Seam sides with a whip stitch through back loops only to hide the seam. Fold the top 2 inches down for the flap and slip stitch in place.
Tips: Use a dark color with metallic yarn for a fantasy vibe. This stitch uses yarn quickly—buy an extra skein.
12. Beaded Mesh Sleeve
Additional materials: stitch markers, tapestry needle, size 8 seed beads, beading needle (optional)
Stitches used: chain, double crochet, beaded double crochet
Delicate and shimmering, this sleeve features beads nestled in a loose mesh. It’s lightweight and perfect for carrying a journal to creative writing class.
How it’s made: Work rows of double crochet with a chain-1 space between each. String beads onto the yarn ahead of time and work each dc around a bead. Seam sides after completion.
Key technique: Slide a bead down the yarn just before making a double crochet. Work the dc as usual, trapping the bead in the base of the stitch. Space beads every 2-3 stitches to avoid stiffness. Use a beading needle to thread yarn through small beads if needed.
⚠️ Watch out for: Forgetting to string beads early leads to constant cutting and rethreading. Pre-string at least 50 beads before starting.
Finishing: Weave in ends through mesh openings. Do not block heavily—mist lightly to avoid stressing the bead threads.
Tips: Use crystal beads for sparkle or matte ones for subtlety. Choose a strong nylon thread if beads are heavy.
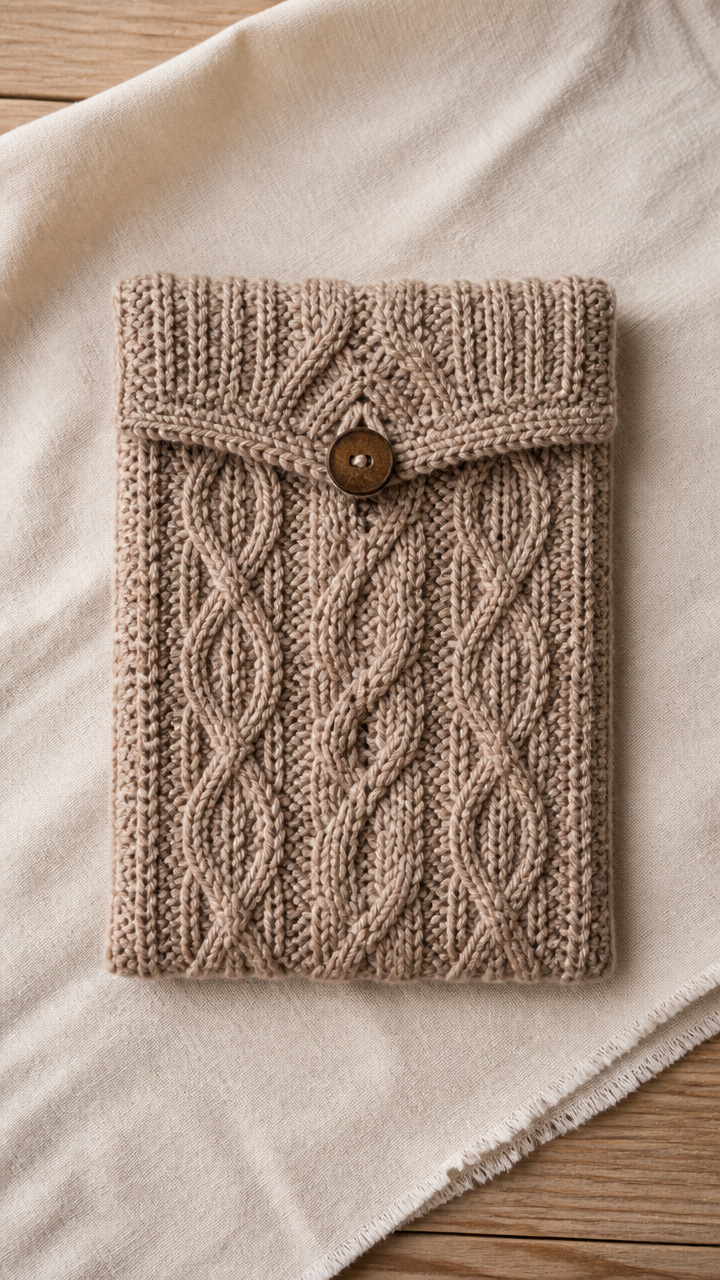
13. Cable Knit Illusion Sleeve
Additional materials: stitch markers, tapestry needle, cable needle
Stitches used: front post double crochet, back post double crochet, double crochet
This sleeve looks like it was knitted with thick cables, but it’s all crochet. The texture adds warmth and grip, making it ideal for winter textbooks.
How it’s made: Work in rows using front and back post double crochet to create twisted cable effects. Follow a repeating 12-stitch cable pattern. Seam up the side after completion.
Key technique: Cable twists are made by working 3 front post dc, then using a cable needle to hold 3 stitches in front or back while working the next 3. This mimics knitting cables. Keep tension loose on the cross to avoid puckering.
⚠️ Watch out for: Twisting the cable in the wrong direction breaks the pattern. Always move stitches to the front for a right-cross, back for a left-cross.
Finishing: Weave in ends along the seam. Block firmly to define the cables and even out the fabric.
Tips: Use a wool-blend yarn for better stitch definition. Add a leather zipper pull for a polished touch.
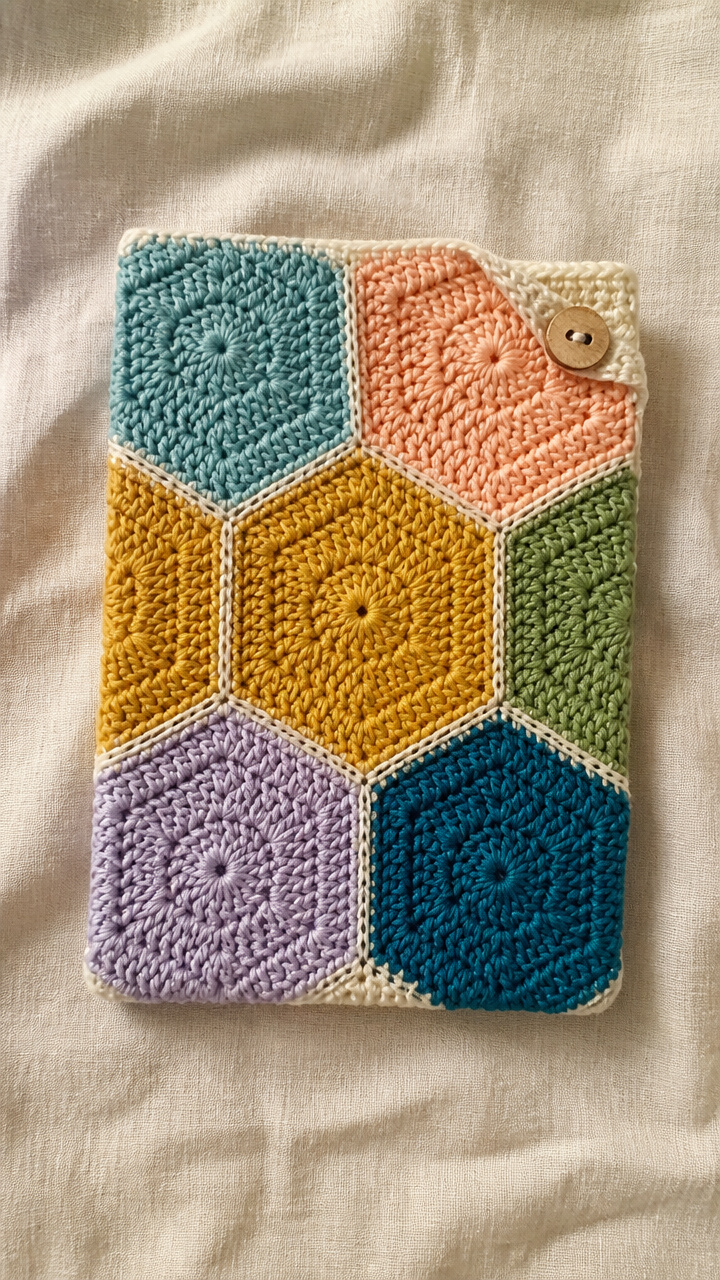
14. Hexagon Patch Sleeve
Additional materials: stitch markers, tapestry needle, sewing needle
Stitches used: magic ring, double crochet, slip stitch, join as you go
Six colorful hexagons form a modern, patchwork-style sleeve. The joined design lies flat and offers great stitch definition for showing off variegated yarns.
How it’s made: Crochet hexagons using the magic ring and increase rounds. Join hexagons as you go in a 2×3 grid. Crochet a border around the assembled piece to finish the sleeve.
Key technique: Join as you go connects hexagons by slip stitching into the next hexagon’s chain-1 spaces during the final round. This creates a seamless join. Align hexagons carefully and pull joins snug but not tight.
⚠️ Watch out for: Pulling join-as-you-go seams too tight causes puckering. Use a larger hook for joining if needed to keep the fabric flat.
Finishing: Crochet a round of single crochet around the entire piece to neaten edges. Weave in ends through the back of joins.
Tips: Use leftover scrap yarns for each hexagon. Add a button to one corner for closure.
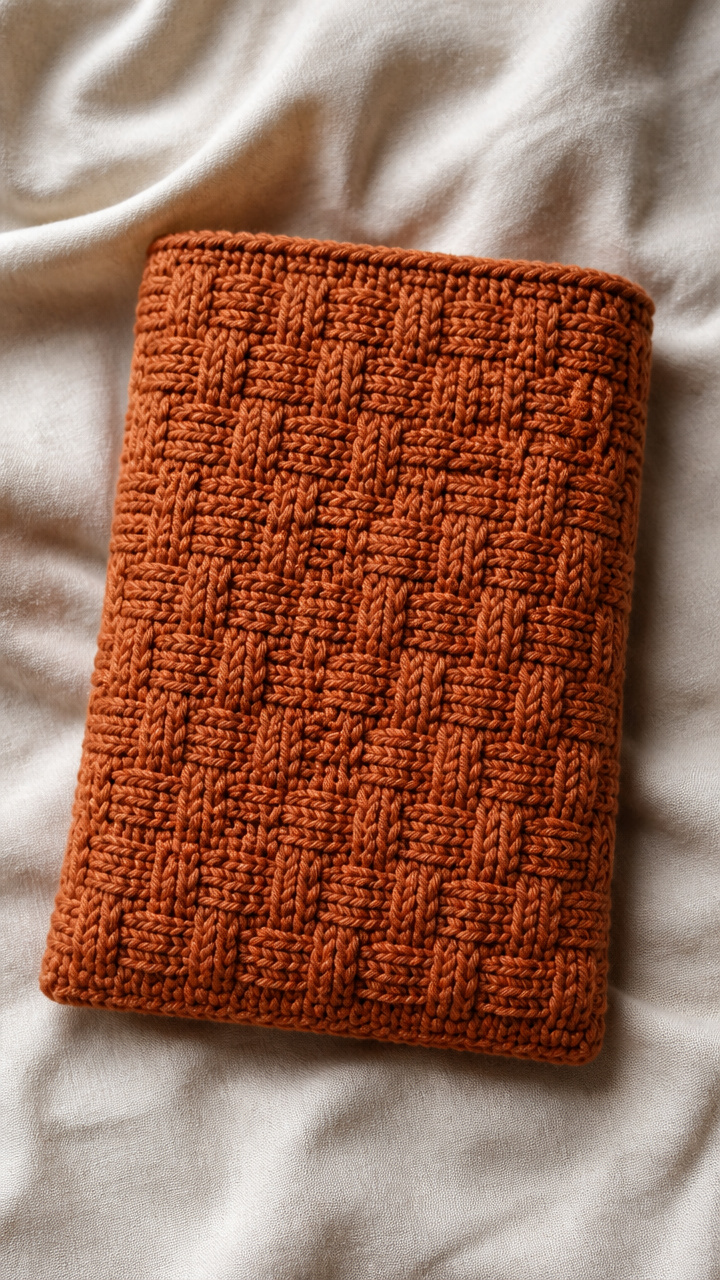
15. Basketweave Stitch Sleeve
Additional materials: stitch markers, tapestry needle
Stitches used: front post double crochet, back post double crochet, double crochet
This sleeve looks like woven fabric with deep texture and shadow lines. It’s thick and protective, perfect for heavy art supplies or binders.
How it’s made: Work in rows, alternating 4 front post dc and 4 back post dc every other row to create a woven block effect. Continue until the rectangle fits the book. Seam up the side.
Key technique: Basketweave alternates blocks of front and back post dc every two rows. The posts cross over each other to form a 3D weave. Keep tension consistent so the fabric lies flat and doesn’t curl.
⚠️ Watch out for: Working regular dc instead of post stitches ruins the effect. Always use FPdc and BPdc as specified—don’t substitute.
Finishing: Weave in ends through the back of post stitches. Block lightly to set the weave without flattening the texture.
Tips: Use a solid color to highlight the pattern. This stitch uses more yarn than stockinette, so plan accordingly.
16. Lace Edge Flip Sleeve
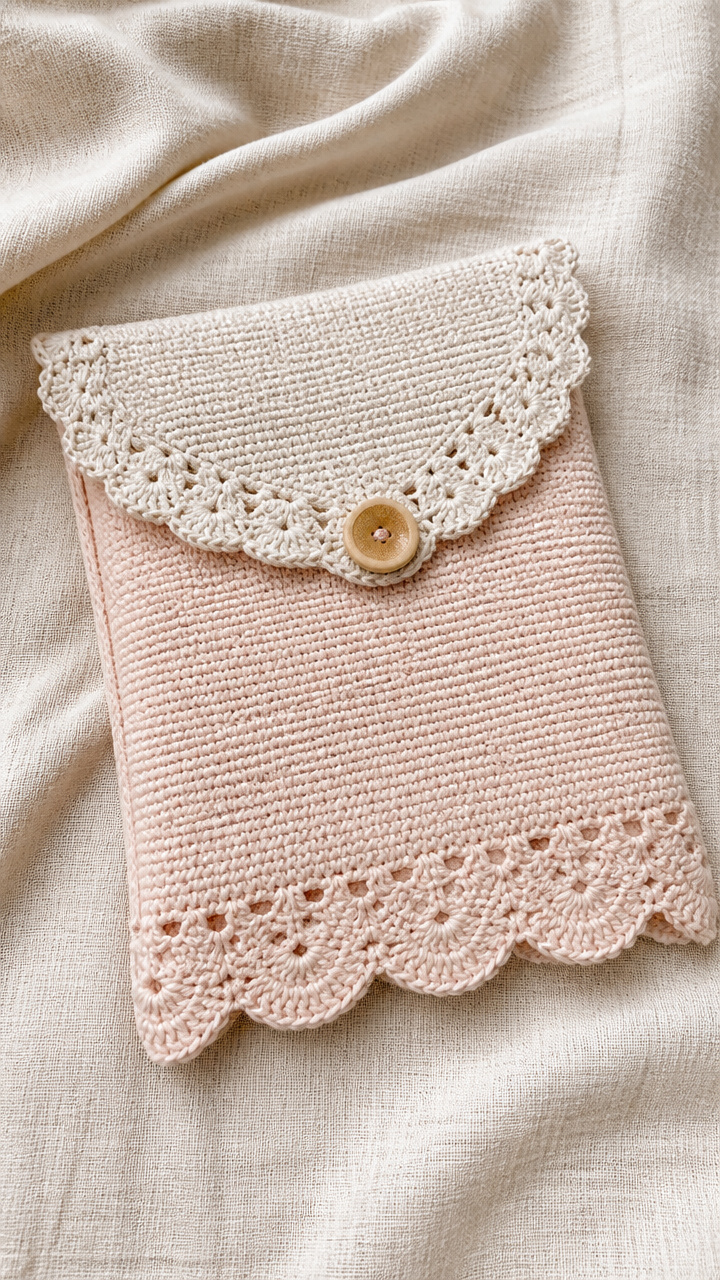
Additional materials: stitch markers, tapestry needle
Stitches used: single crochet, double crochet, shell stitch, chain space
Delicate shells edge a simple sleeve with a fold-over top. The contrast between solid body and lacy trim makes it perfect for literature or art classes.
How it’s made: Crochet a rectangle in single crochet. On the final round, work a shell stitch border (5 dc in one st) every 4 stitches, with chain spaces between. Fold top edge for a flip flap.
Key technique: The lace border uses shell stitches spaced evenly around the edge. Work a shell, ch 2, skip 2 sc, repeat. At corners, work (shell, ch 2, shell) in the same stitch to turn smoothly.
⚠️ Watch out for: Skipping the ch-2 between shells causes crowding. Always ch 2 after each shell to maintain open spacing.
Finishing: Fold the top 1.5 inches down and slip stitch in place. Block the border to open the shells fully.
Tips: Use a soft merino blend for drape. Add a small button to keep the flap closed.
17. Popcorn Cluster Sleeve
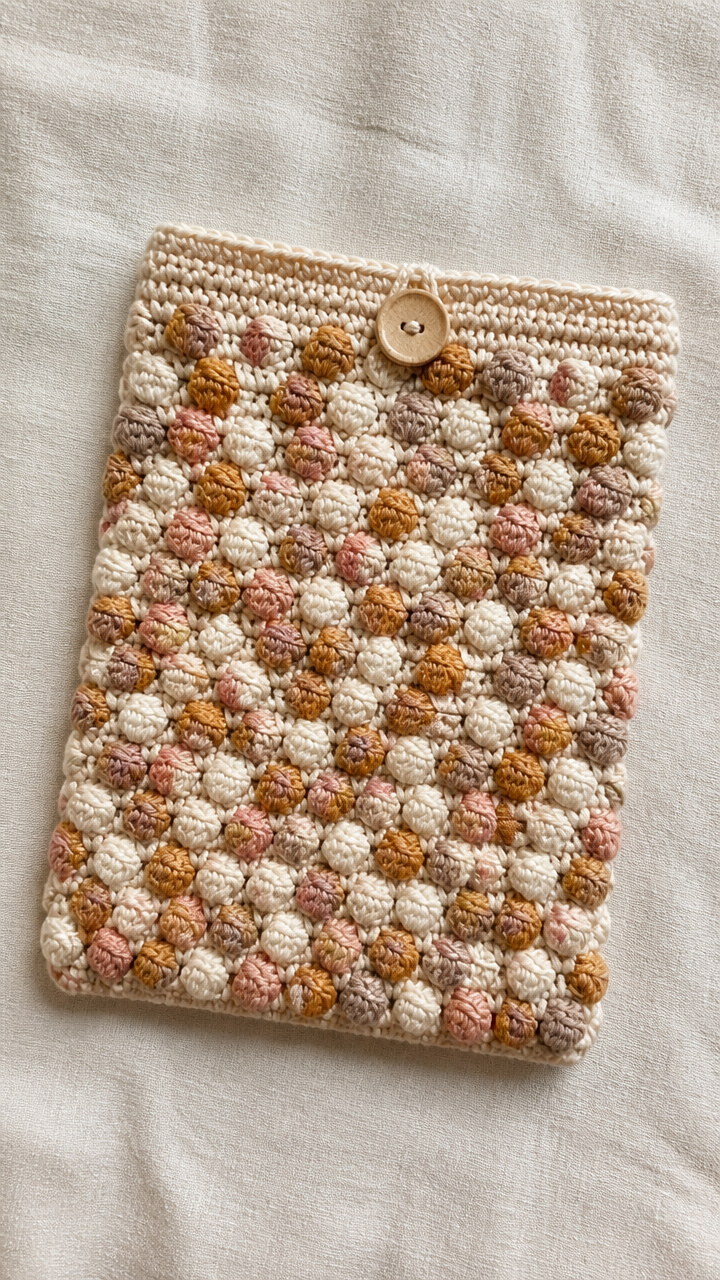
Additional materials: stitch markers, tapestry needle
Stitches used: single crochet, popcorn stitch, chain
Bumpy popcorns dot the surface in a grid pattern, giving this sleeve a fun, tactile feel. It’s great for younger students or as a gift.
How it’s made: Work rows of single crochet with a popcorn stitch every 4th stitch. Popcorns are made by working 5 dc in one sc, removing hook, inserting from front and closing the stitch. Alternate rows with and without popcorns.
Key technique: Popcorn stitches are clusters of 5 dc pulled through one stitch. After making the 5 dc, remove the hook, insert it into the first dc, and pull the loop through to close. This creates a raised bump. Space them evenly to avoid distortion.
⚠️ Watch out for: Forgetting to close the popcorn leaves a hole. Always complete the final step of pulling the loop through the first dc.
Finishing: Weave in ends through the back of sc rows. Block lightly to even out the texture without flattening the popcorns.
Tips: Use a soft, bulky yarn for extra squish. Alternate colors every other row for a confetti effect.
18. Spiral Crochet Tube Sleeve
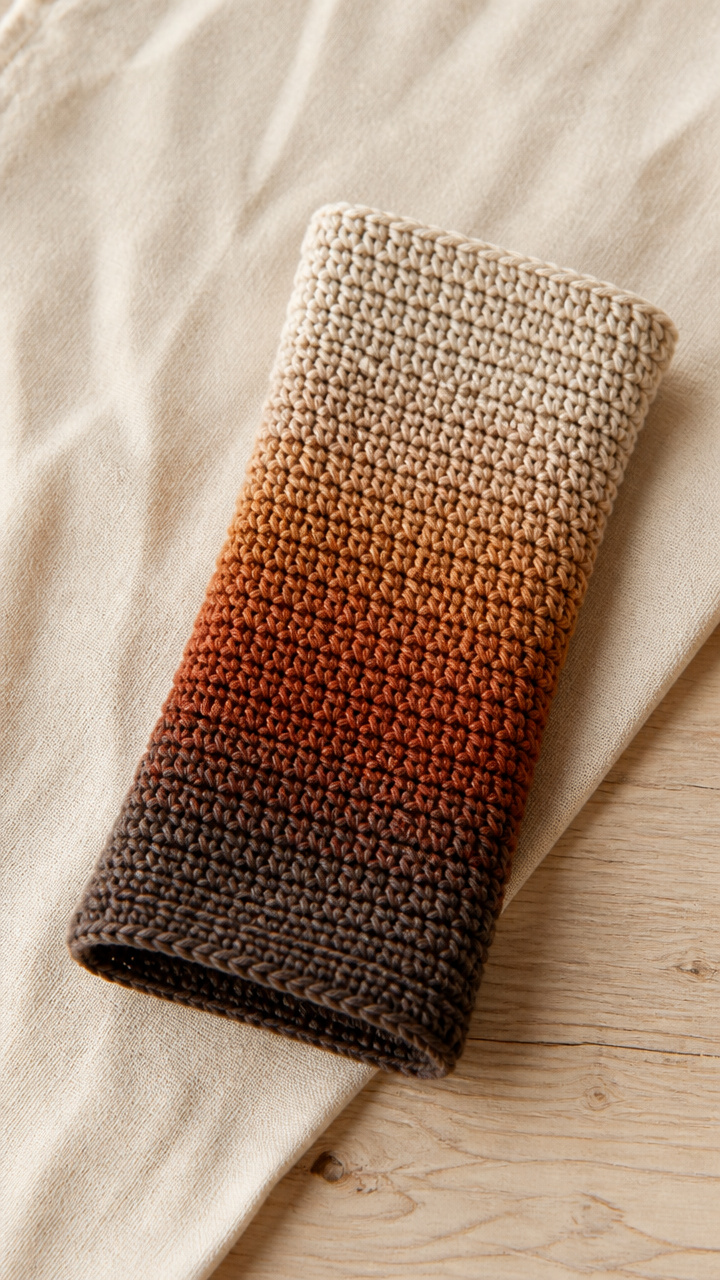
Additional materials: stitch markers, tapestry needle
Stitches used: magic ring, double crochet, slip stitch join
This sleeve looks like a seamless tube with a spiral pattern radiating from the center. It stretches slightly to fit and slides on easily.
How it’s made: Start in a magic ring and work in continuous spiral rounds of double crochet, increasing evenly to form a flat circle. Continue straight up without increases to form a tube that fits book height.
Key technique: Spiral crochet means you don’t join or chain at the end of each round. Use a stitch marker to track the first stitch of each round. Increase by 6 dc per round in the flat part, then stop increasing once the circle matches book width.
⚠️ Watch out for: Losing track of the spiral start causes jagged lines. Move the stitch marker up each round and check alignment every few rounds.
Finishing: Slip stitch to finish the top edge, then weave in the end through several rounds. Do not block—let the spiral relax naturally.
Tips: Use a gradient yarn to enhance the spiral effect. Add a drawstring to the top for closure.
19. Tapestry Crochet Initial Sleeve
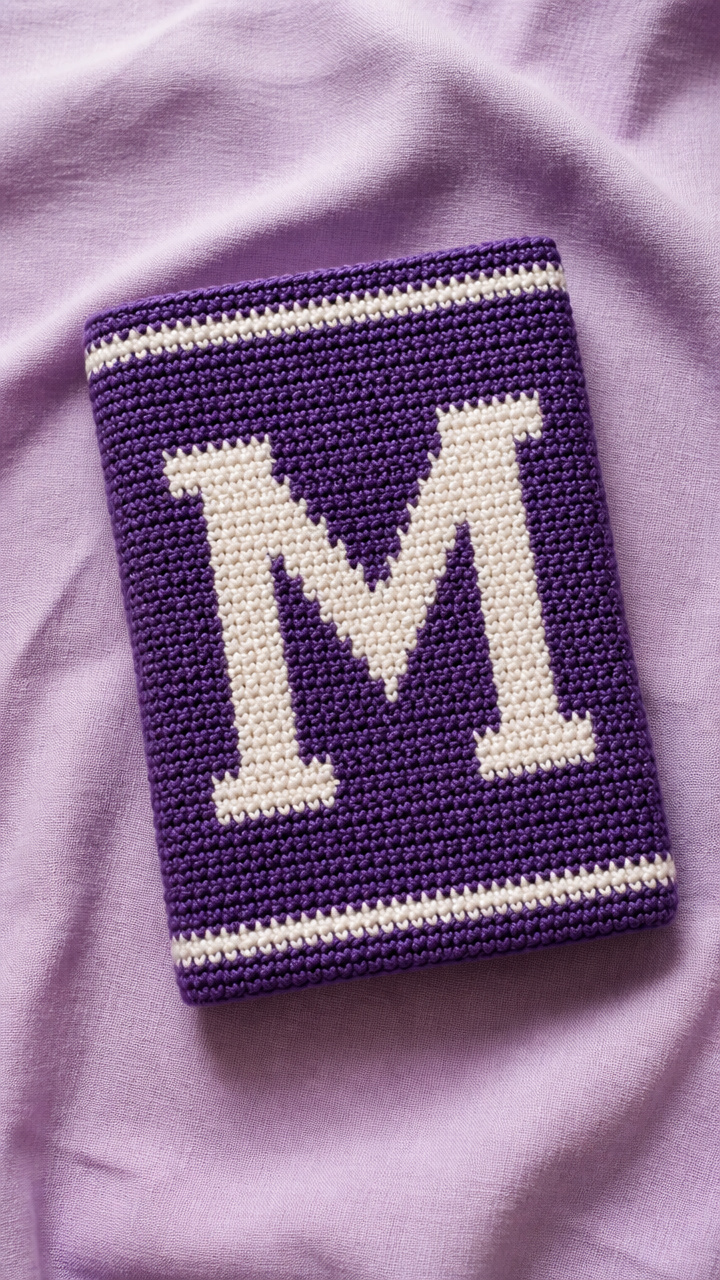
Additional materials: stitch markers, tapestry needle, color chart
Stitches used: single crochet, tapestry crochet, carry yarn
A bold initial stands out on a solid background, personalized with your first letter. The dense fabric protects books while showing off your name.
How it’s made: Work in rows using single crochet and two colors. Follow a chart to create a large initial in the center. Seam up the sides after completion.
Key technique: Tapestry crochet carries unused yarn behind the work. Hold both colors in your hand and switch as needed. Twist yarns every 2-3 stitches to prevent long floats. Keep tension even to avoid puckering.
⚠️ Watch out for: Carrying yarn too loosely creates snag hazards. Keep the carried strand snug against the back of the work without pulling tight.
Finishing: Weave in ends through the back of sc rows. Block gently to align the lettering.
Tips: Choose high-contrast colors for clarity. Use a school color for the background.
20. Double Layer Thermal Sleeve

Additional materials: stitch markers, tapestry needle
Stitches used: half double crochet, front loop only, back loop only
Thick and warm, this sleeve feels like a cozy blanket for your book. It’s excellent for outdoor reading or protecting delicate covers.
How it’s made: Chain to book width, then work rows of half double crochet, working in front loop only on right side rows and back loop only on wrong side rows. This creates a double-layered, lofty fabric. Seam up the side.
Key technique: By alternating front and back loop only hdc, you create two connected layers with air trapped between. This adds insulation and cushioning. Keep row tension consistent to maintain even thickness.
⚠️ Watch out for: Working in both loops breaks the double layer. Always check which loop you’re using based on the row side.
Finishing: Weave in ends between the layers. Fold top edge down 1 inch and slip stitch to create a clean hem.
Tips: Use a soft chenille yarn for extra warmth. This fabric is stretchy—measure flat before seaming.
You’ve got everything you need to make book sleeves that are as practical as they are pretty. Pick a pattern that matches your skill and yarn stash, and enjoy making something that gets used every day. Happy crocheting, and may your books stay safe and stylish.