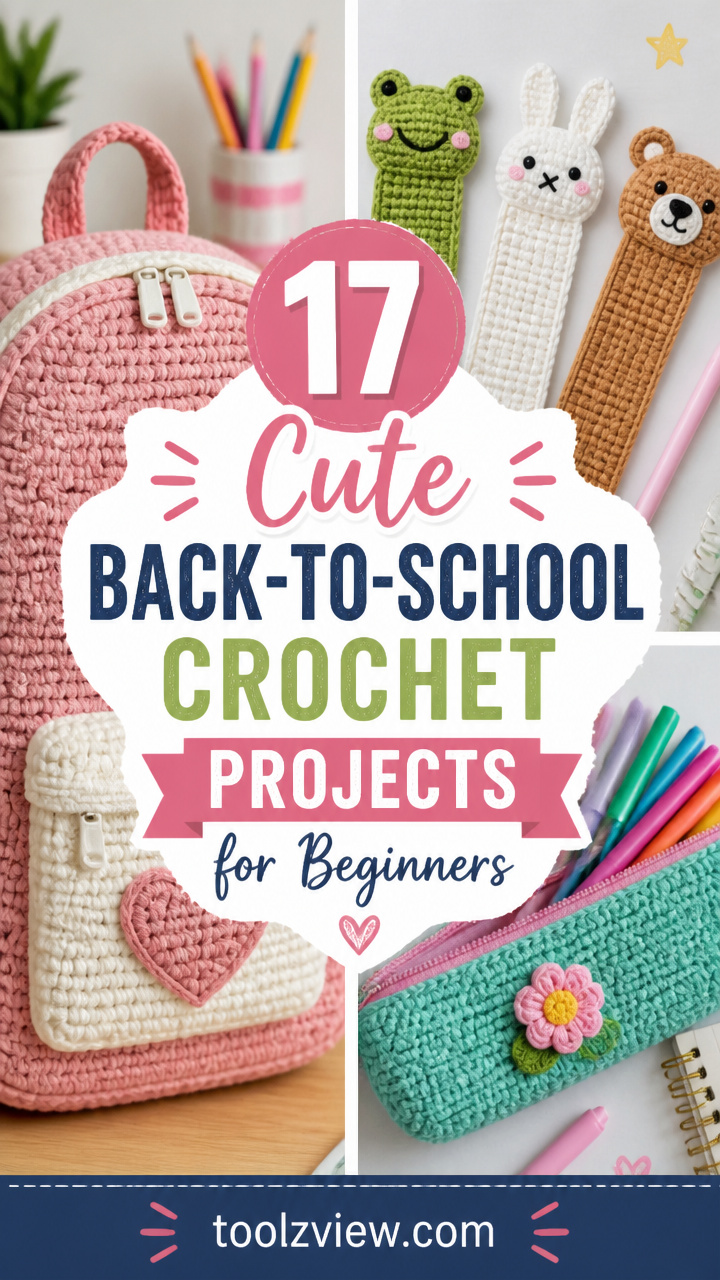
17 Cute Back-to-School Crochet Projects for Beginners
This page contains affiliate links and I earn a commission if you make a purchase through one of the links, at no cost to you.
Back to school doesn't have to mean off-the-rack supplies. With a hook and some yarn, you can create thoughtful handmade pieces that add personality to notebooks, lockers, and backpacks. These projects blend practicality with charm, using simple stitches and clever construction so you can make gifts or treats for yourself that actually get used every day.
From tiny pencil toppers to roomy totes, each design builds confidence with clear techniques. You'll work with familiar stitches in new ways, practice shaping, and even try small embellishments, all while making items that feel joyful to use.
What You’ll Need
Most of these patterns use hooks between 3.5mm and 5.5mm and yarn in weights from DK to bulky. Keep stitch markers, a tapestry needle, and a pair of sharp scissors on hand. Many small projects use scrap yarn, so this is a great chance to use up your leftovers.
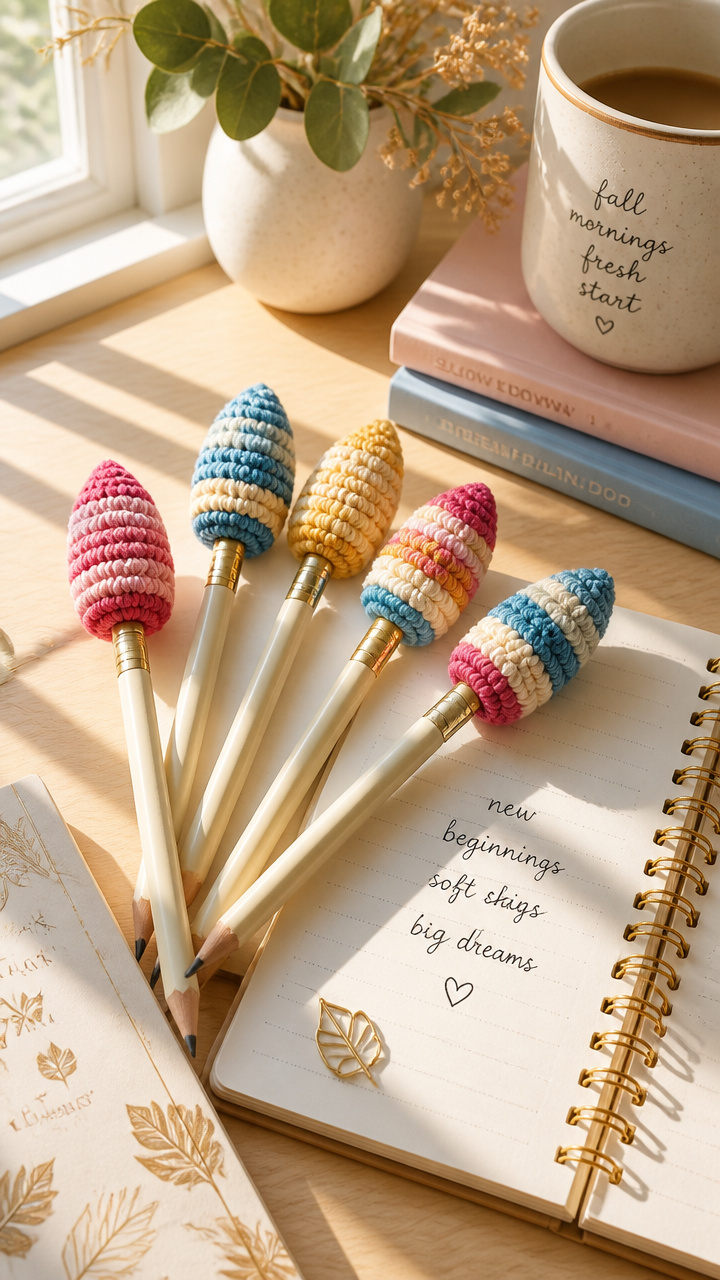
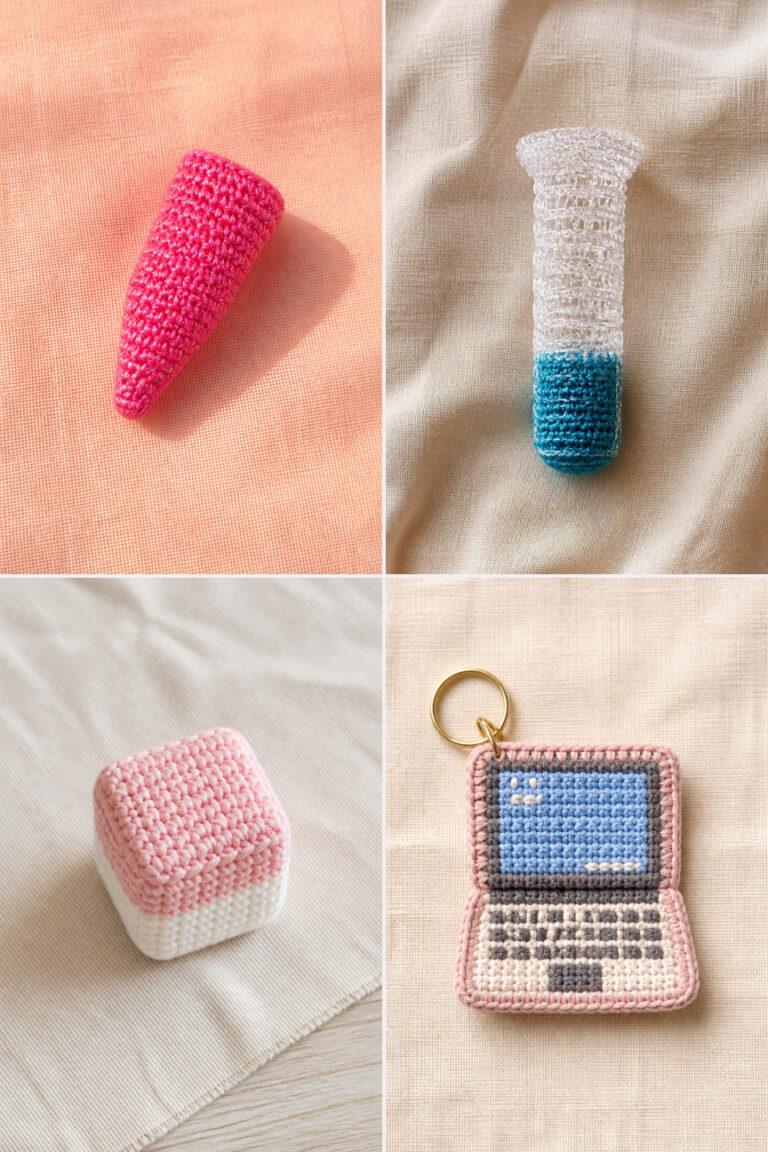
1. Striped Pencil Toppers
Beginner⏱️ 1-2 hours🧶 DK weight (3)🪝 Hook: 3.5mm (E-4)📏 approx. 50 yards / 46m total in two colors
Stitches used: magic ring, single crochet, slip stitch, yarn over
These little caps slip snugly over pencil erasers and add a pop of color to any pencil cup. The stripes are worked in the round so there’s no seaming, and they stay put during writing. Kids love collecting different color combos.
How it’s made: Worked in continuous rounds from a magic ring, increasing to form a snug cap that fits over the top of a standard pencil or pen. Each topper is made in two color bands joined as you go.
Key technique: Joining a new color at the end of a round: finish the last yarn over of the final stitch with the new color, pull through all loops, then continue in the new color. This creates a clean, seamless join without cutting yarn.
⚠️ Watch out for: Starting too loose in the magic ring can make the base too big. Pull the tail tight after the first round to close the center completely.
Finishing: Weave in ends with the tapestry needle, making sure tails are secured inside the topper. No blocking needed — just slide onto pencils right away.
Tips: Try using variegated yarn for one stripe to add subtle color shifts without changing colors.
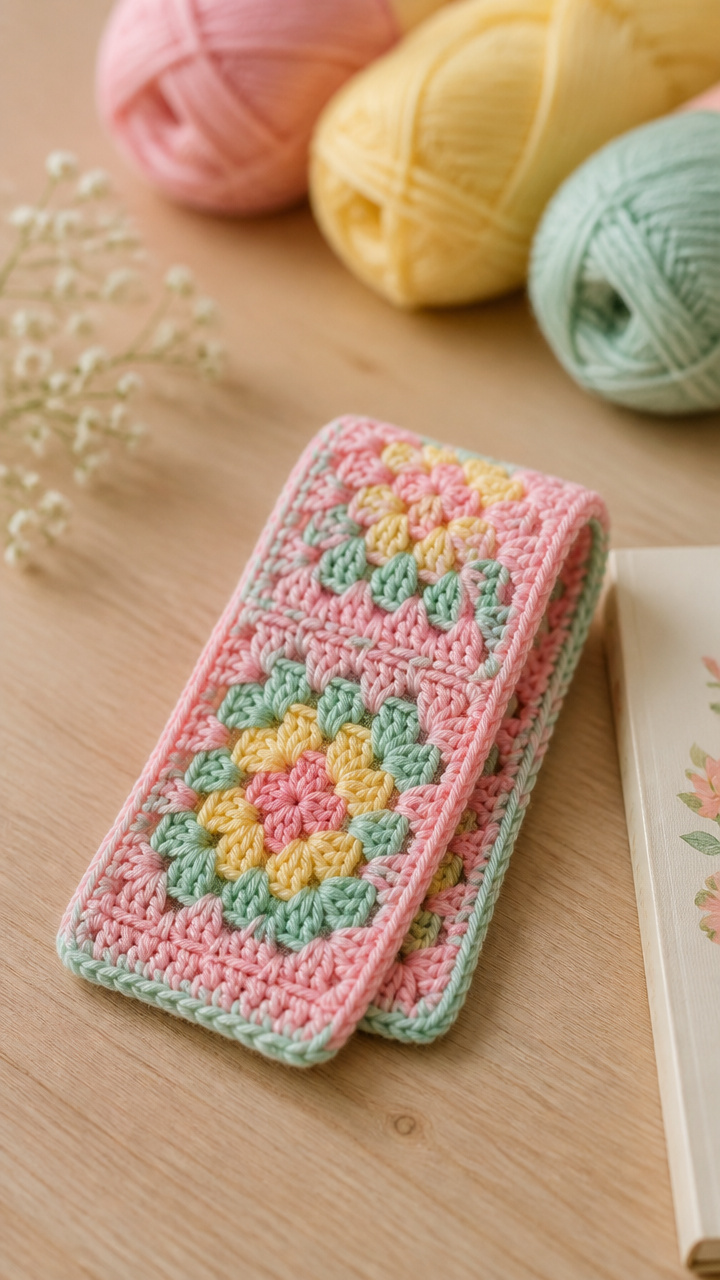
2. Mini Granny Square Bookmark
Beginner⏱️ 1-2 hours🧶 Worsted weight (4)🪝 Hook: 5.0mm (H-8)📏 approx. 80 yards / 73m in two colors
This narrow bookmark lies flat and won’t fall out, with a wide tassel-free top that won’t snag. The bright colors peek out from pages and make finding your spot easy. Great for gifting with a new book.
How it’s made: Worked flat in rows, starting with a foundation chain and building a long rectangle using a modified granny stripe pattern. The top edge has a decorative picot trim.
Key technique: Picot trim: after completing the final row, work a chain 3, slip stitch into the first chain to form a picot, then skip no stitches and repeat across. This creates a dainty scalloped edge.
⚠️ Watch out for: Skipping too many stitches between double crochet groups can widen the piece. Always skip exactly two chains between clusters to keep consistent width.
Finishing: Weave in all ends securely on the back side. Light steam blocking helps the edges lie flat but is not required.
Tips: Swap in a third color for the picot trim to make it stand out even more.
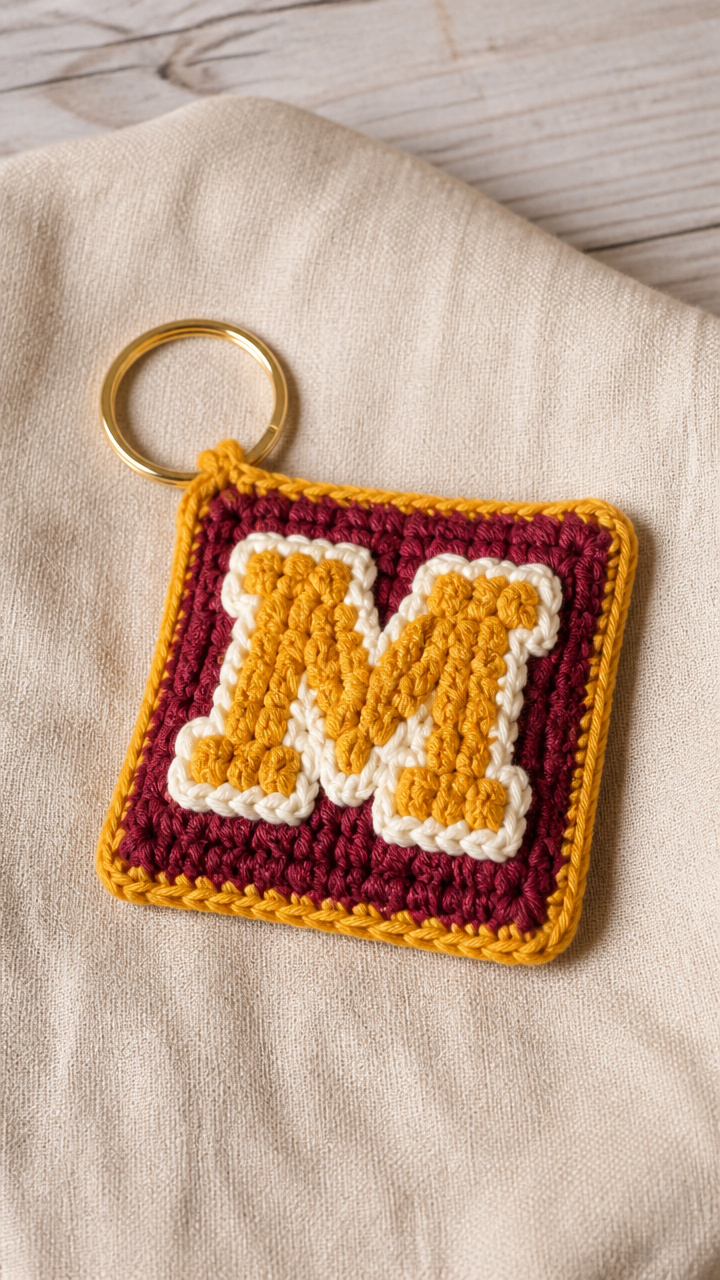
Stitches used: magic ring, single crochet, popcorn stitch, slip stitch
This tiny textured square jiggles on a backpack zipper or keys with a fun handmade touch. The popcorn stitches give it grip and dimension without adding bulk. Choose school colors for team spirit.
How it’s made: Worked in the round from a magic ring, increasing evenly to form a small puffy square. After shaping, the piece is stuffed lightly and seamed closed with a whip stitch.
Key technique: Popcorn stitch: work 5 double crochets into one stitch, remove hook from loop, insert hook into first double crochet of the group, catch the loop, and pull through all loops. This creates a raised bump.
⚠️ Watch out for: Not tightening the popcorn stitch enough can leave a loose center. Make sure to pull the final loop snug after completing each popcorn.
Finishing: Close the opening with a whip stitch through both layers, stuff lightly before fully closing, then attach the keyring through the top seam.
Tips: Use a smaller hook for tighter stitches if you want a firmer finish.
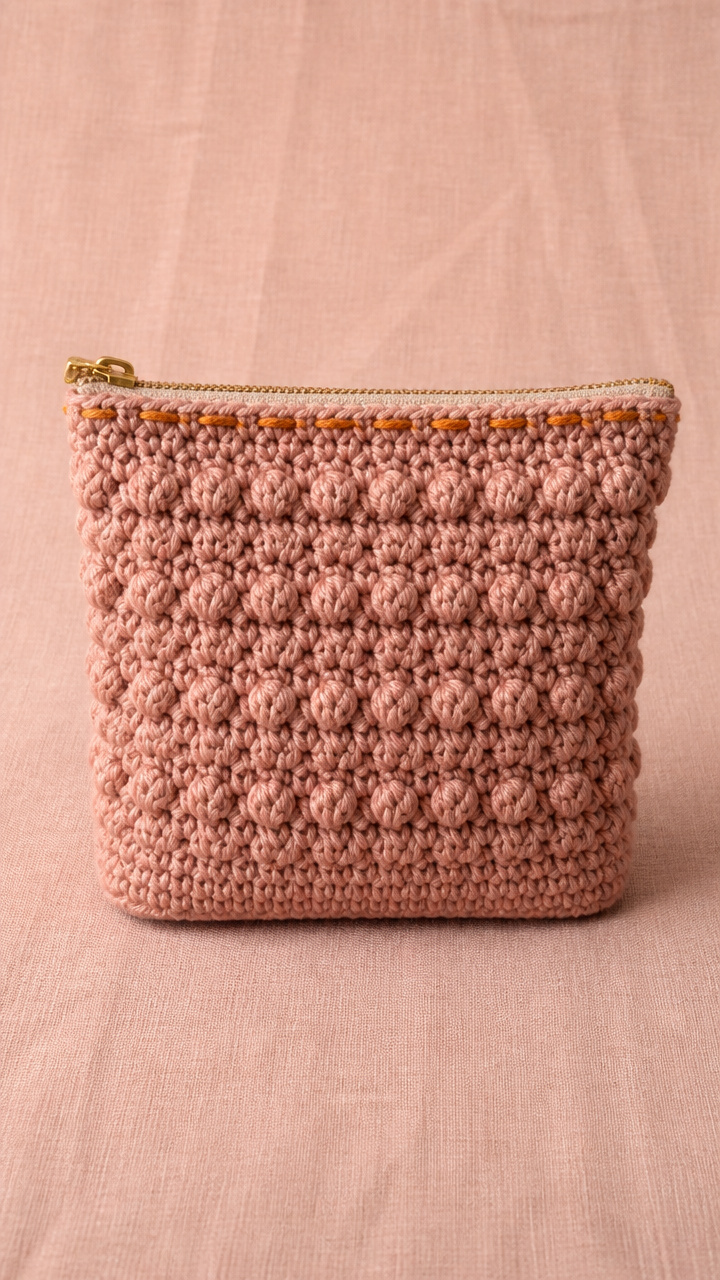
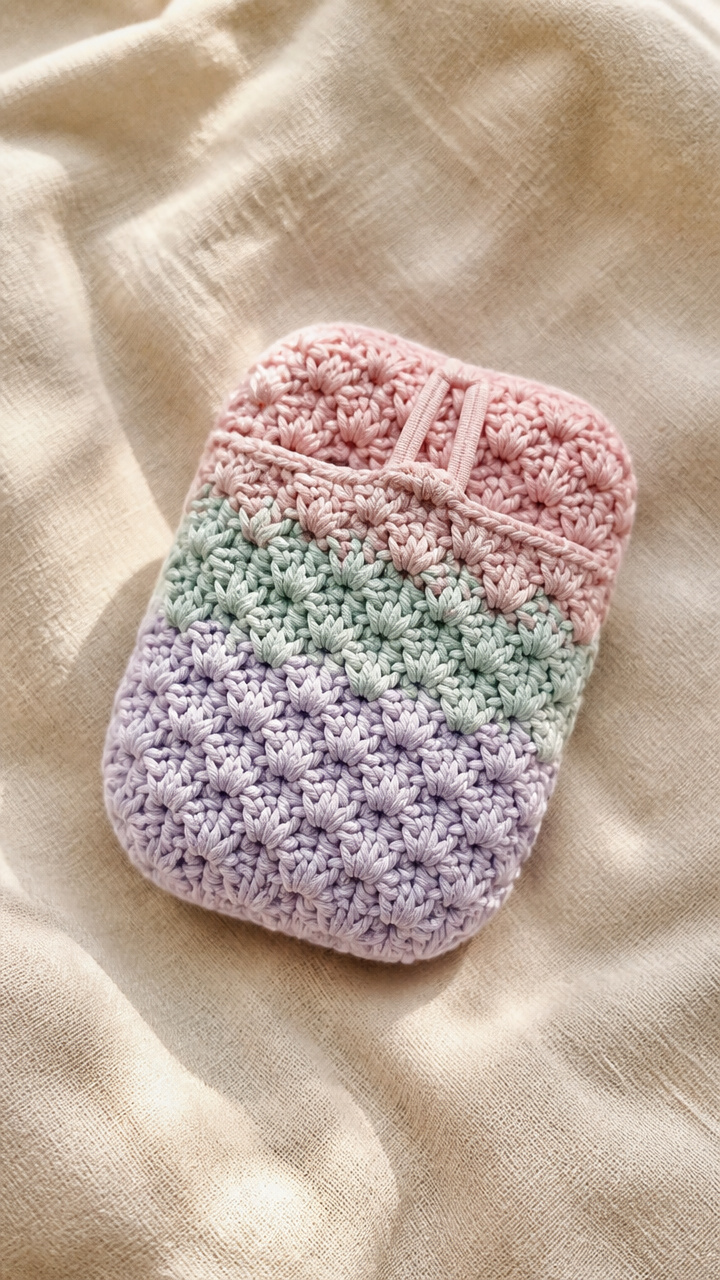
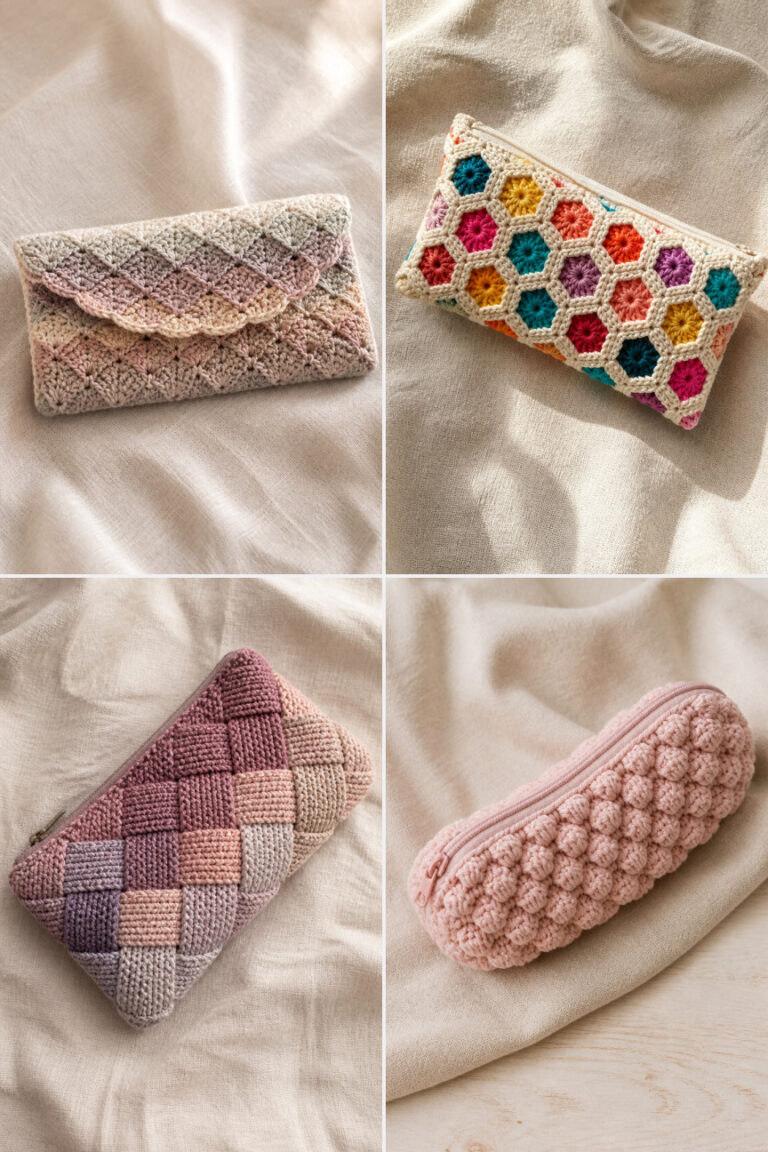
Stitches used: chain, single crochet, bobble stitch, slip stitch join
This small pouch has a soft, squishy texture from rows of bobbles and holds pens or makeup. The zipper closure keeps contents secure and the flat base lets it stand upright. Perfect for tossing in a backpack.
How it’s made: Worked flat in rows, starting with a foundation chain. Bobbles are worked on every right side row in a staggered pattern. After completing both panels, they are seamed together with the zipper sandwiched between.
Key technique: Bobble stitch: yarn over, insert hook into stitch, pull up a loop, yarn over, pull through two loops — repeat four more times in the same stitch, then yarn over and pull through all six loops on hook. This creates a dense, rounded bump.
⚠️ Watch out for: Miscounting bobbles per row leads to uneven texture. Use stitch markers every five stitches to keep track of bobble placement.
Finishing: Sew the zipper to each front and back panel using a yarn needle and matching thread, then fold and seam the sides. Weave in all ends on the inside.
Tips: Try using a contrasting color for the zipper seam to add a pop of surprise.
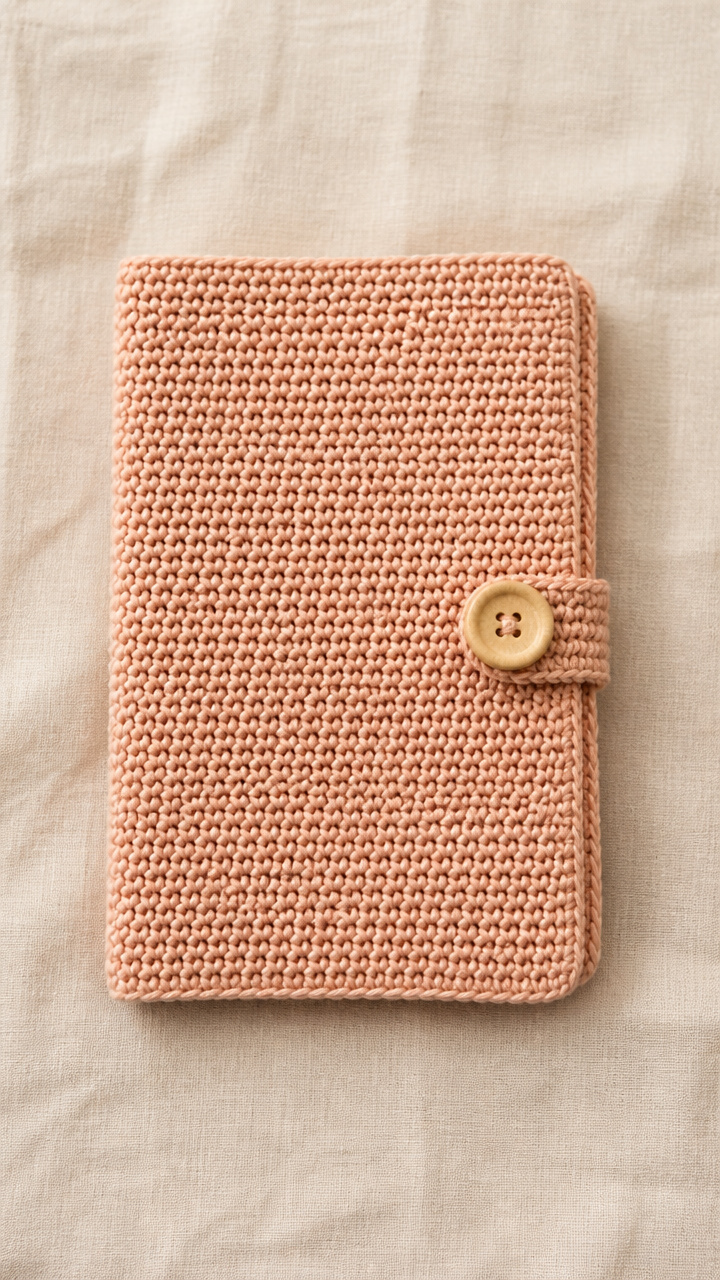
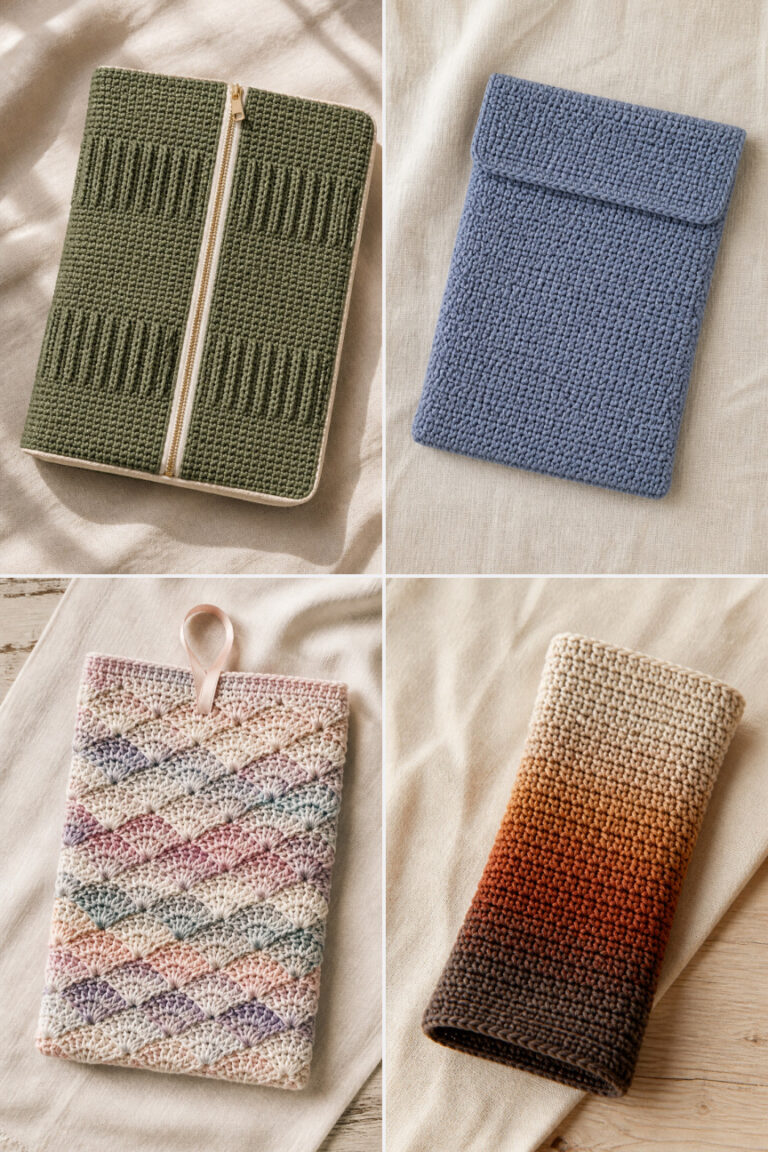
Stitches used: chain, single crochet, slip stitch, invisible join
This snug cover hugs a notebook and protects it from scuffs. The dense single crochet fabric resists snags and adds structure. Add a button and loop to keep it closed during transit.
How it’s made: Worked flat in rows to match the height and width of a standard spiral notebook. After completing the panel, fold and seam the sides and bottom, leaving the top open with a button closure.
Key technique: Invisible join for single crochet: at the end of a row, slip stitch into the first stitch of the row, then chain 1 and turn. This creates a seamless edge that looks like stockinette.
⚠️ Watch out for: Not measuring the notebook before starting leads to a too-tight or too-loose fit. Always measure your specific notebook and add 1/2 inch for seam allowance.
Finishing: Sew the sides and bottom with a whip stitch, then attach a button and crochet loop to the front flap. Light blocking helps the cover lay flat.
Tips: Use cotton yarn for extra durability and a crisp finish.
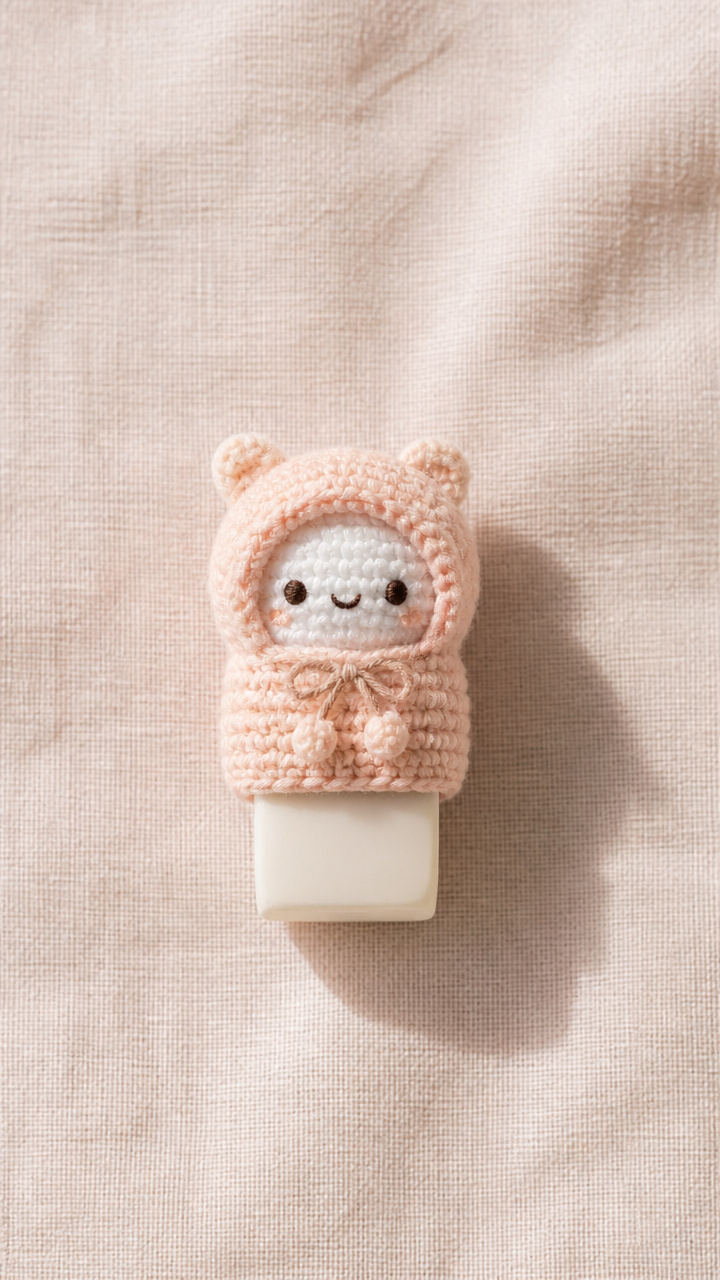
6. Hooded Amigurumi Eraser
Intermediate⏱️ 2-3 evenings🧶 Sport weight (2)🪝 Hook: 3.0mm (C-2)📏 approx. 100 yards / 91m total in two colors
Additional materials: tapestry needle, polyfill stuffing, stitch markers, small eraser
Stitches used: magic ring, single crochet, invisible decrease, slip stitch
This tiny character slips over a standard eraser and wears a cozy hood. The body is soft and squeezable, and the hood adds whimsy. Kids love using it to erase mistakes in style.
How it’s made: Worked in continuous rounds from a magic ring. The body is shaped with increases and decreases, then seamed at the top to hold a small eraser. The hood is crocheted separately and sewn on.
Key technique: Invisible decrease: insert hook into front loops only of the next two stitches, yarn over and pull through both, yarn over and pull through both loops on hook. This creates a smooth decrease without a bump.
⚠️ Watch out for: Overstuffing the body makes it hard to fit over the eraser. Stuff lightly so the eraser slides in and out easily.
Finishing: Weave in all ends inside the piece. Sew the hood to the top edge with matching yarn, making sure it doesn’t cover the eraser tip.
Tips: Try making a matching pencil topper to go with it.
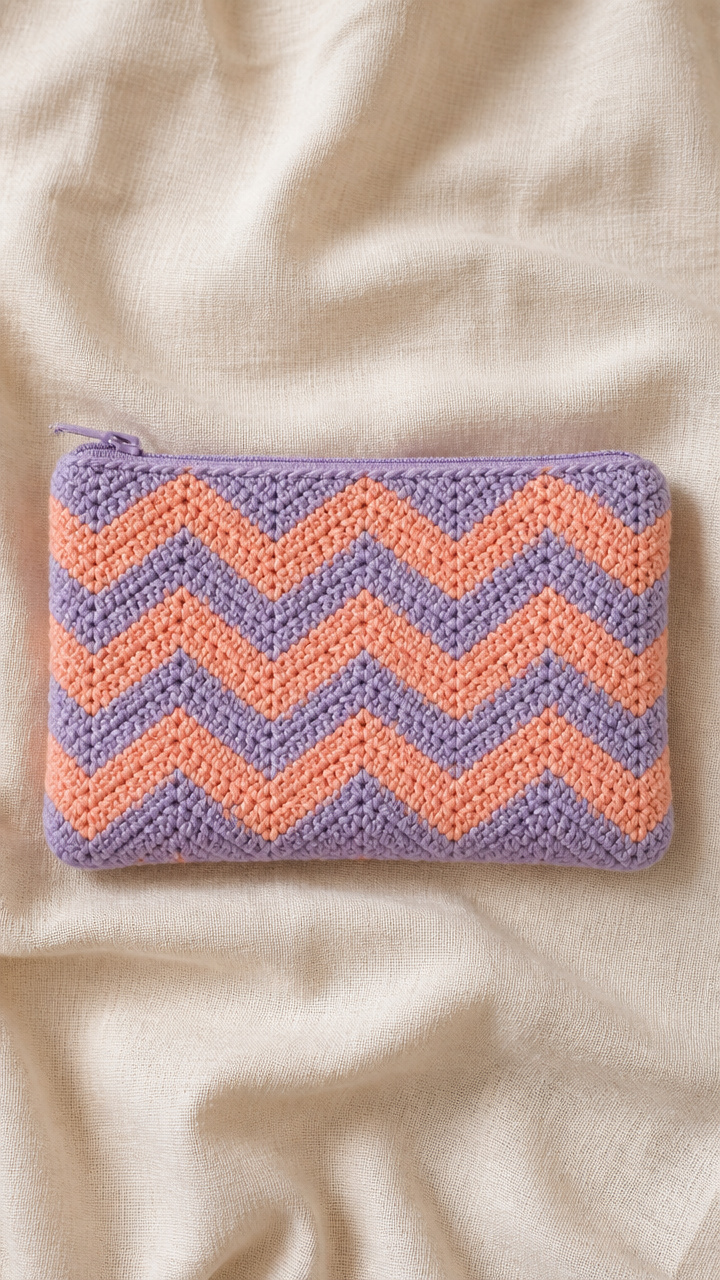
7. Chevron Pencil Case
Intermediate⏱️ 2-3 evenings🧶 DK weight (3)🪝 Hook: 4.0mm (G-6)📏 approx. 180 yards / 165m in two colors
This long case holds a full set of colored pencils and zips shut securely. The chevron pattern adds movement and texture, and the two-color design gives it a modern look.
How it’s made: Worked flat in rows using a chevron pattern with color changes every two rows. After completing the panel, fold and seam the sides, then attach the zipper along the top edge.
Key technique: Chevron shaping: work two increases followed by two decreases in each repeat across the row. This creates a zigzag effect. Keep tension even to prevent ruffling.
⚠️ Watch out for: Tight tension on color changes can cause puckering. Make sure to yarn over with the new color smoothly and carry the old color up the side.
Finishing: Attach the zipper with a yarn needle and matching thread, sewing close to the teeth. Weave in all ends on the inside to prevent snagging.
Tips: Use a smooth zipper to avoid catching yarn.
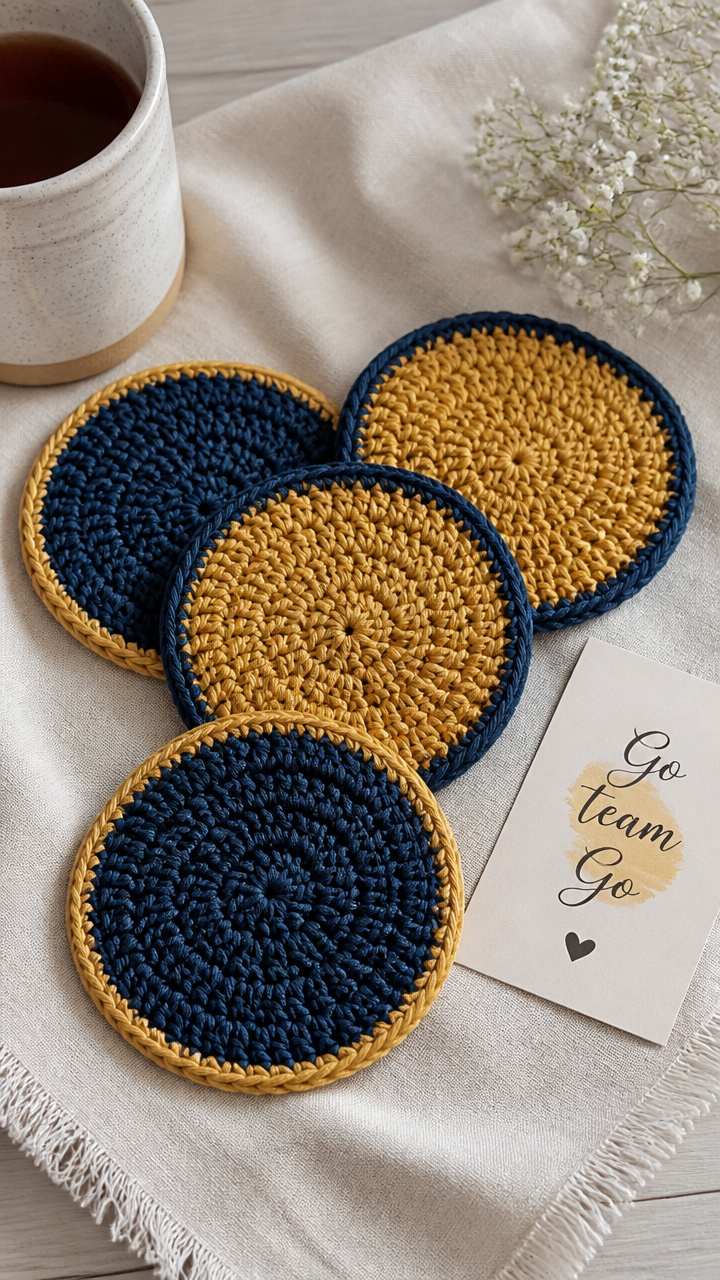
8. Moss Stitch Coaster Set
Beginner⏱️ 1-2 hours🧶 Worsted weight (4)🪝 Hook: 4.5mm (7)📏 approx. 100 yards / 91m total in two colors
Stitches used: chain, single crochet, moss stitch, slip stitch
These absorbent coasters protect desks from water rings and add a handmade touch to any study space. The texture grips cups and won’t slide around. Make a set in school colors.
How it’s made: Worked in the round from a magic ring, increasing in a staggered pattern to form a flat circle. Each coaster is worked in two colors with a simple band at the edge.
Key technique: Moss stitch: alternate single crochet and chain 1 in each row, placing the single crochet into the chain space of the previous row. This creates a tight, bumpy texture that lies flat.
⚠️ Watch out for: Placing the single crochet into the stitch instead of the chain space breaks the pattern. Always work into the chain space from the row below.
Finishing: Weave in ends on the back. No blocking needed — they’re ready to use right away.
Tips: Try using cotton yarn for better absorbency.
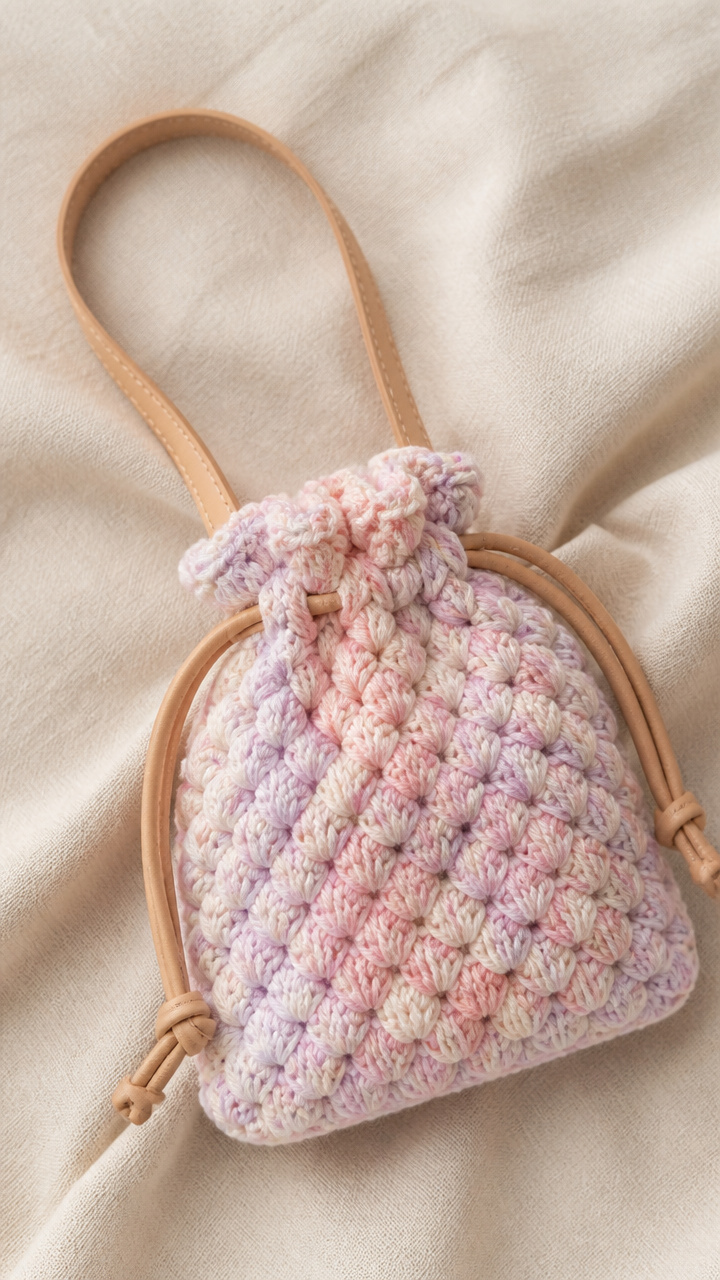
9. Puff Stitch Mini Bag
Intermediate⏱️ a full weekend🧶 Bulky weight (5)🪝 Hook: 6.0mm (J-10)📏 approx. 300 yards / 274m
Stitches used: chain, puff stitch, single crochet, slip stitch
This small bag has a plush texture and holds pens, chargers, or small notebooks. The bulky yarn works up fast, and the leather drawstrings give it a polished look.
How it’s made: Worked flat in rows to form a rectangle, then seamed up the sides and bottom. The top edge is finished with a single crochet border, and leather cords are threaded through for drawstrings.
Key technique: Puff stitch: yarn over, insert hook into stitch, pull up a loop, repeat five times in the same stitch, yarn over and pull through all 11 loops on hook, then chain 1 to lock. This creates a thick, fluffy stitch.
⚠️ Watch out for: Not chaining 1 after each puff stitch causes the row to lean. Always chain 1 to maintain height and alignment.
Finishing: Seam the sides with a whip stitch, then single crochet evenly around the top. Thread leather cords through opposite sides for a drawstring closure.
Tips: Use a smooth leather cord to prevent fraying.
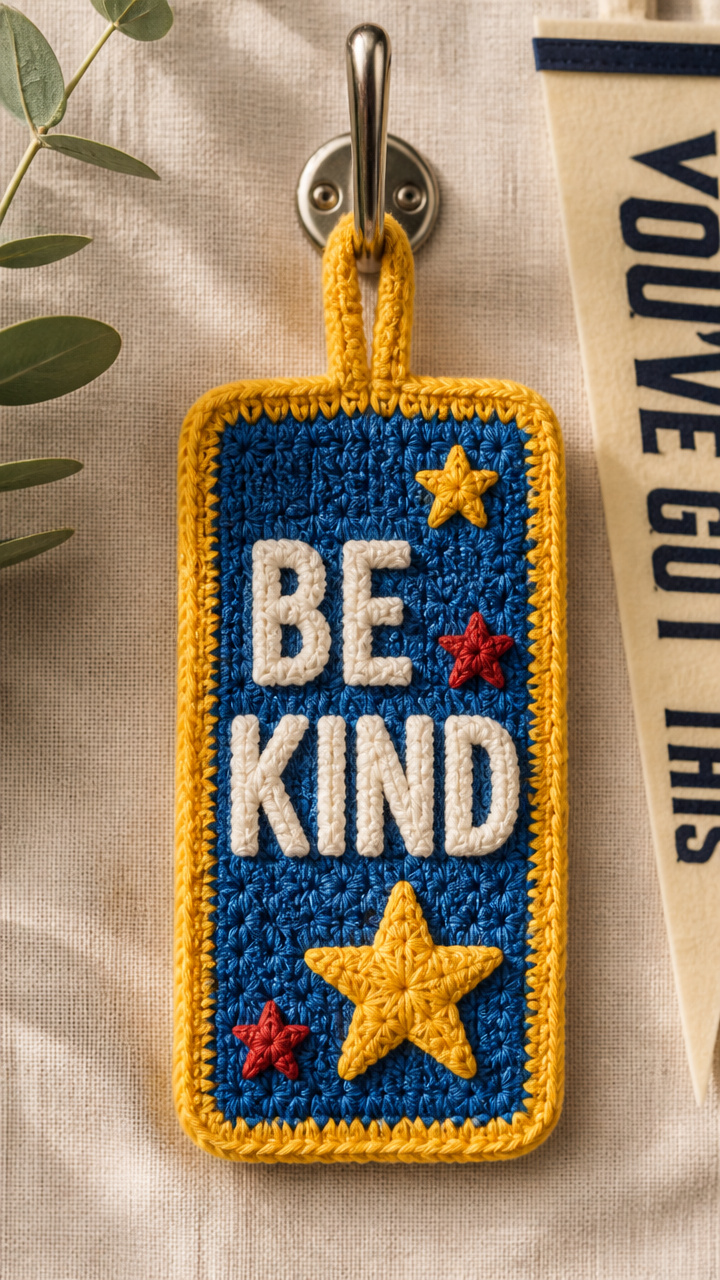
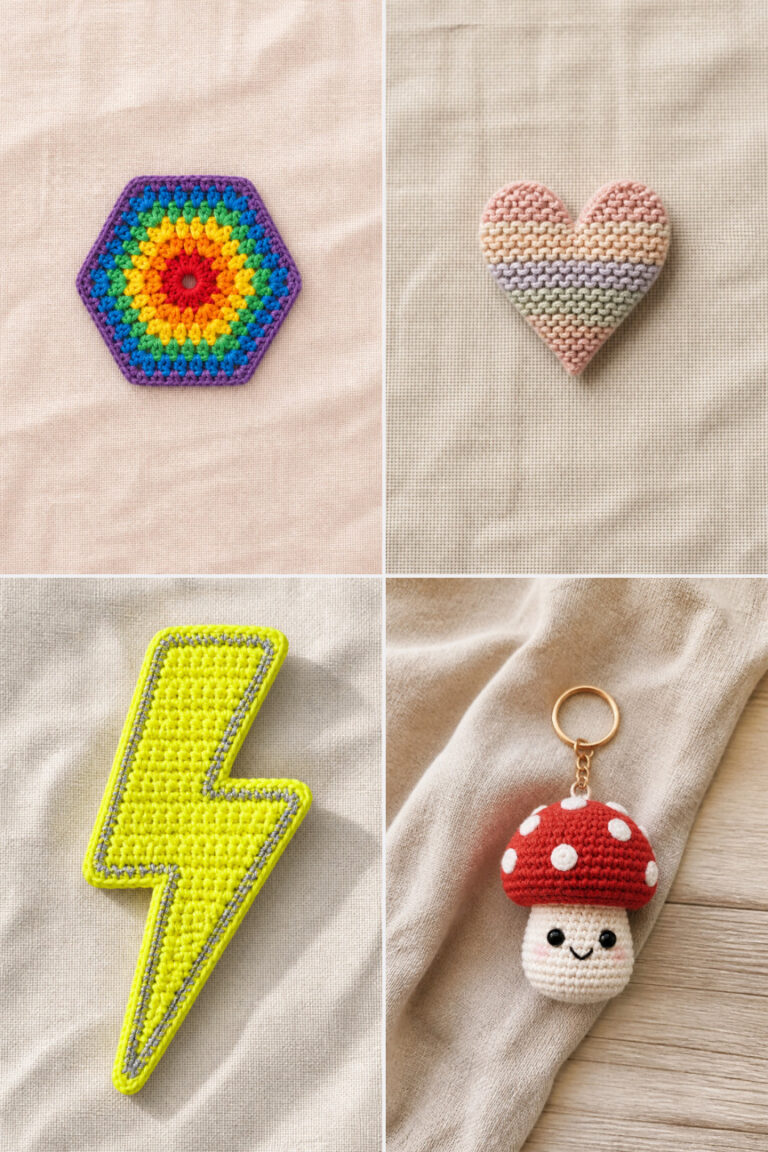
Stitches used: chain, star stitch, slip stitch, single crochet
This tag hangs from a locker hook and shows off school spirit with texture and color. The star stitch gives it a raised, dimensional look that stands out.
How it’s made: Worked flat in rows using star stitch over an even number of chains. After completing the rectangle, fold and seam the top to form a loop for hanging.
Key technique: Star stitch: skip one chain, *single crochet in next chain, yarn over and pull up a loop in the skipped chain, yarn over and pull through two loops — repeat from * four more times, then yarn over and pull through all loops on hook. This creates a star-shaped cluster.
⚠️ Watch out for: Miscounting chains breaks the star pattern. Always chain an even number and place stitch markers every 10 stitches to track progress.
Finishing: Fold the top edge down and seam the sides to form a hanging loop. Weave in ends securely on the back.
Tips: Add initials with duplicate stitch for a personal touch.
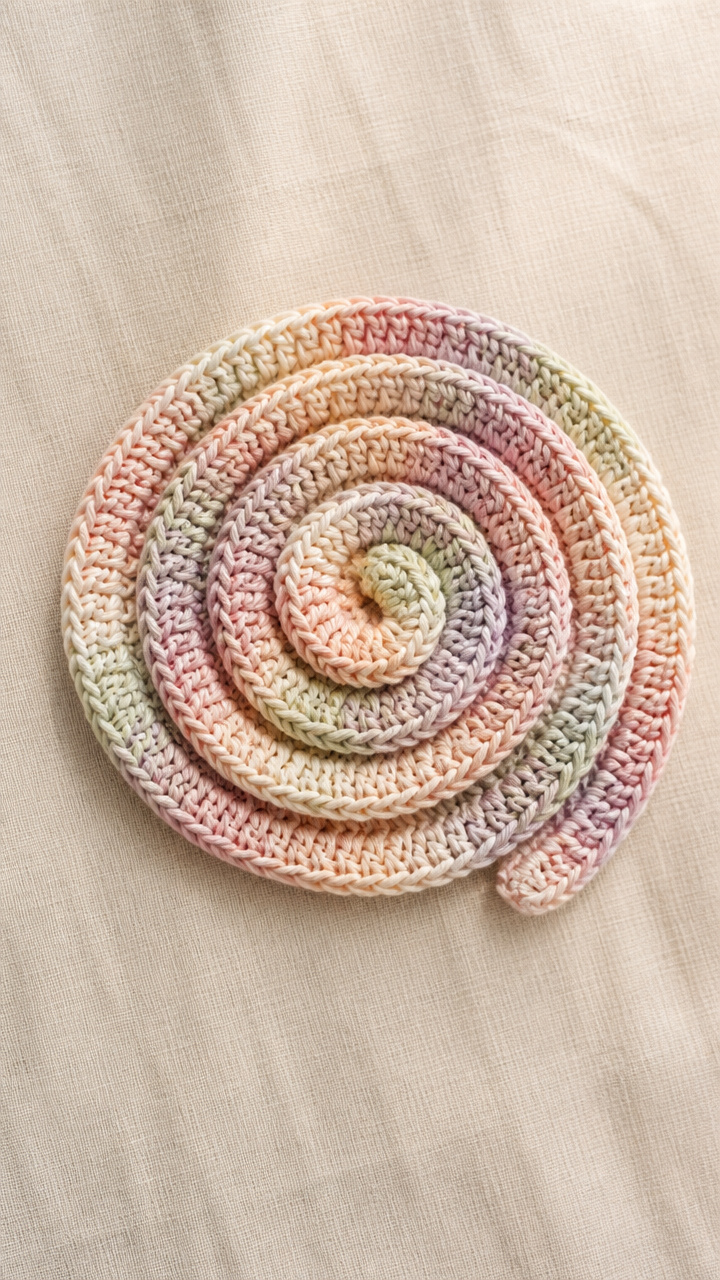
This snug wrap protects pens from rolling and adds grip. The spiral design looks like a tiny coiled mat and stretches to fit most pen sizes.
How it’s made: Worked in continuous spiral rounds from a magic ring with no joining. The piece grows in a flat spiral and is shaped to fit snugly around a pen barrel.
Key technique: Spiral rounds: do not join at the end of each round. Instead, continue working into the next round without a slip stitch. Use a stitch marker to mark the first stitch of each round.
⚠️ Watch out for: Losing track of the round start distorts the spiral. Move the stitch marker up each round to keep your place.
Finishing: Weave in the tail through the last few stitches to secure. No seaming needed — it’s ready to slide on.
Tips: Try using variegated yarn to enhance the spiral effect.
This cozy case keeps earbuds tangle-free and fits in a pocket. The cluster stitches add cushioning, and the elastic closure keeps it snug.
How it’s made: Worked flat in rows to form a rectangle, then seamed into a tube. The ends are gathered with an elastic cord to keep headphones secure.
Key technique: Cluster stitch: work 3 double crochets in one stitch but do not complete the last step of each, then yarn over and pull through all loops on hook. This creates a thick, textured column.
⚠️ Watch out for: Not pulling the final loop tightly on clusters leaves gaps. Make sure to snug the yarn after completing each cluster.
Finishing: Sew the long edges together with a whip stitch, then thread elastic through the top edge and tie the ends securely.
Tips: Use a soft acrylic blend for extra cushioning.
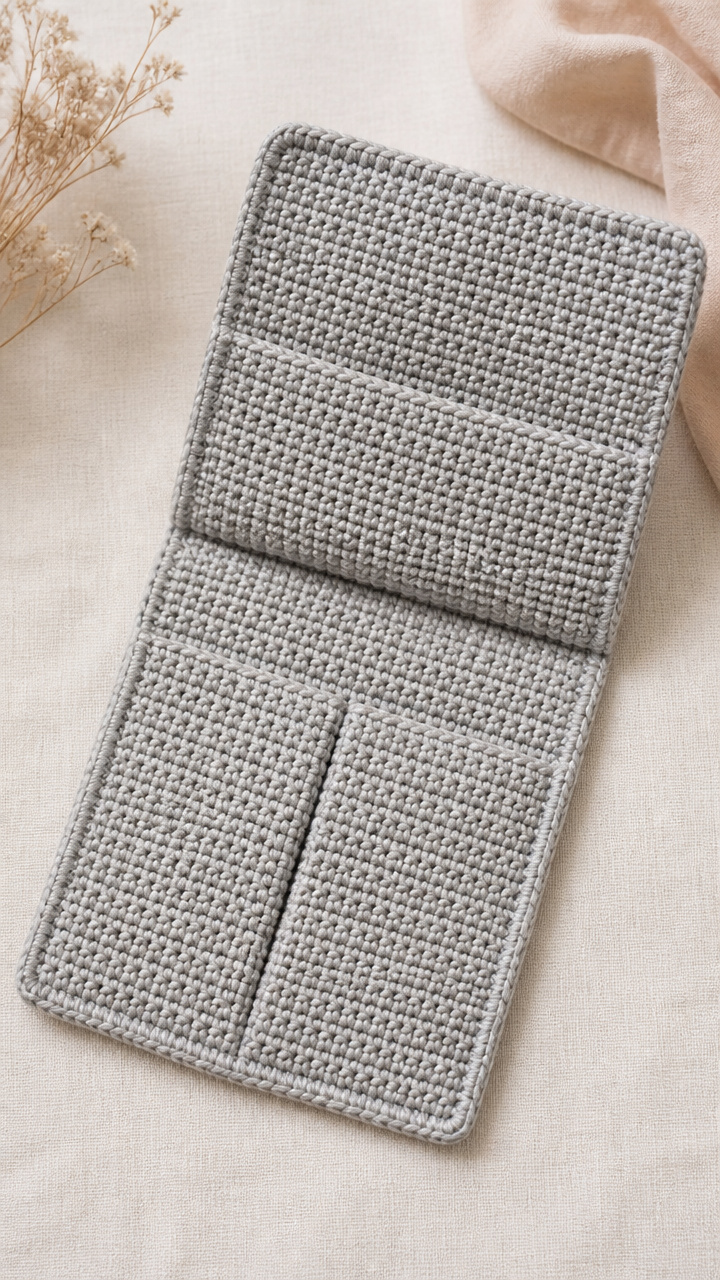
13. Tunisian Simple Stitch Case
Intermediate⏱️ one afternoon🧶 Worsted weight (4)🪝 Hook: 5.0mm (H-8) Tunisian hook📏 approx. 150 yards / 137m
Additional materials: Tunisian crochet hook, tapestry needle, button
Stitches used: Tunisian simple stitch, Tunisian bind off, chain, single crochet
This structured case holds pens or tech accessories with a smooth, woven-like fabric. The Tunisian stitch gives it durability and a professional look.
How it’s made: Worked in Tunisian simple stitch back and forth to form a rectangle. After completing the panel, fold and seam the sides, then add a button closure to the flap.
Key technique: Tunisian simple stitch: on the forward pass, insert hook into vertical bar of each stitch, yarn over and pull loop onto hook. On return pass, yarn over and pull through one loop at a time until one remains.
⚠️ Watch out for: Dropping loops on the return pass creates dropped stitches. Keep tension even and count loops after each return pass.
Finishing: Bind off with a standard Tunisian bind off, then seam the sides and add a button to the front flap.
Tips: Use a longer Tunisian hook to hold more stitches comfortably.
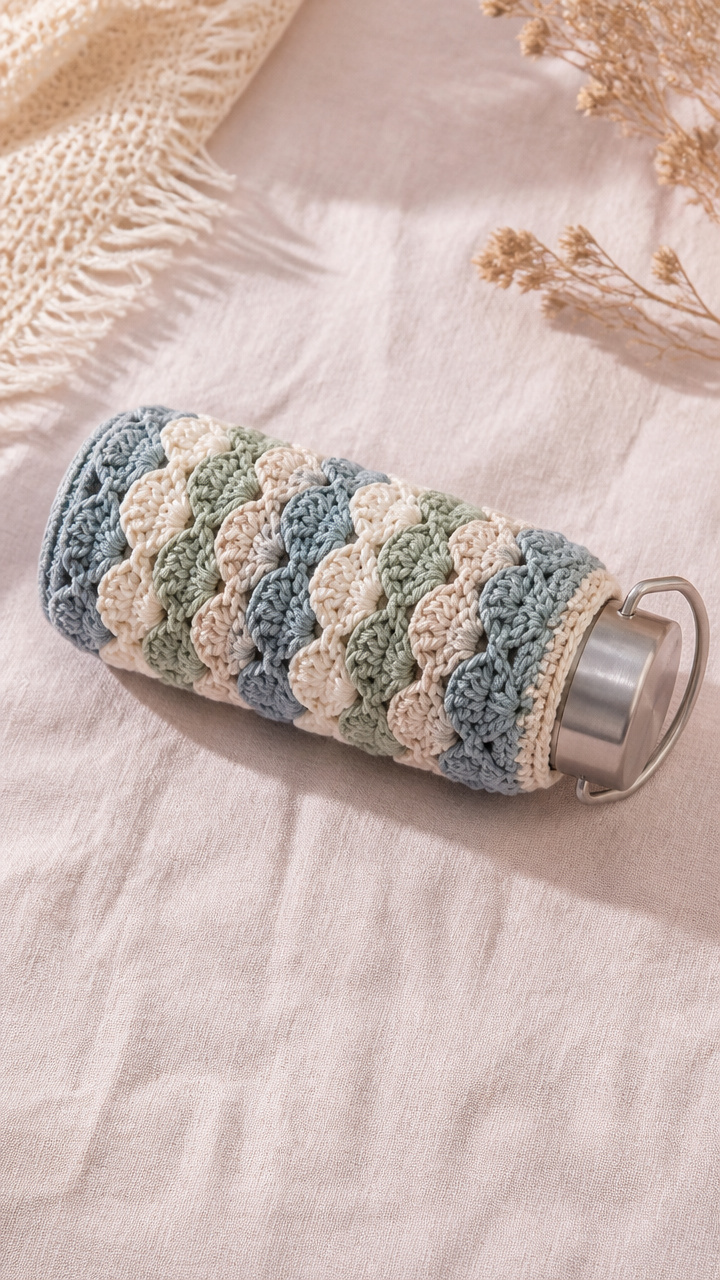
This cozy slips over a standard water bottle and adds grip and insulation. The shell pattern gives it a beachy, relaxed vibe perfect for school days.
How it’s made: Worked in the round from a foundation chain joined into a ring. Shells are worked in each round, increasing to fit the bottle base, then worked straight up. A button closure is added at the top.
Key technique: Shell stitch: work 5 double crochets into one stitch, then skip two stitches before the next stitch. This creates a fan shape that flares slightly.
⚠️ Watch out for: Skipping too few or too many stitches between shells distorts the fit. Always skip exactly two stitches after each shell.
Finishing: Sew a button to the front edge and crochet a loop on the back to close. Weave in all ends on the inside.
Tips: Use cotton for better moisture resistance.
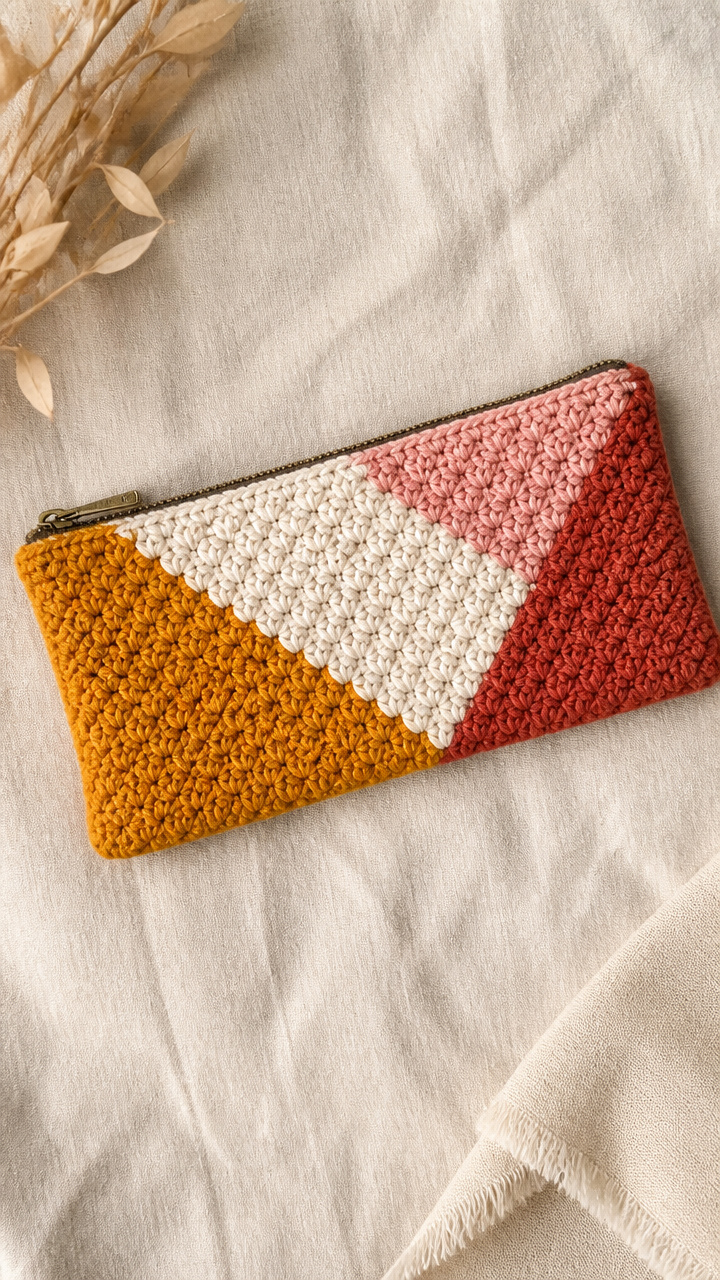
15. Corner-to-Corner Pencil Pouch
Intermediate⏱️ a full weekend🧶 Worsted weight (4)🪝 Hook: 5.0mm (H-8)📏 approx. 220 yards / 201m in three colors
This geometric pouch stands out with color blocking and a modern shape. The c2c pattern allows for creative designs, and the zipper keeps contents safe.
How it’s made: Worked in corner-to-corner technique using blocks of color to form a parallelogram. After completing the piece, fold and seam the sides, then attach the zipper.
Key technique: Corner-to-corner increase: start with a chain 6, double crochet in fourth chain from hook and last chain, turn. Each new row adds one block by working two double crochets in the corner chain space.
⚠️ Watch out for: Twisting the work when turning causes diagonal misalignment. Always keep the right side facing you and the corner at the bottom right.
Finishing: Fold the piece so the corners meet, then seam the sides and attach the zipper along the top edge.
Tips: Try spelling initials in color blocks across the diagonal.
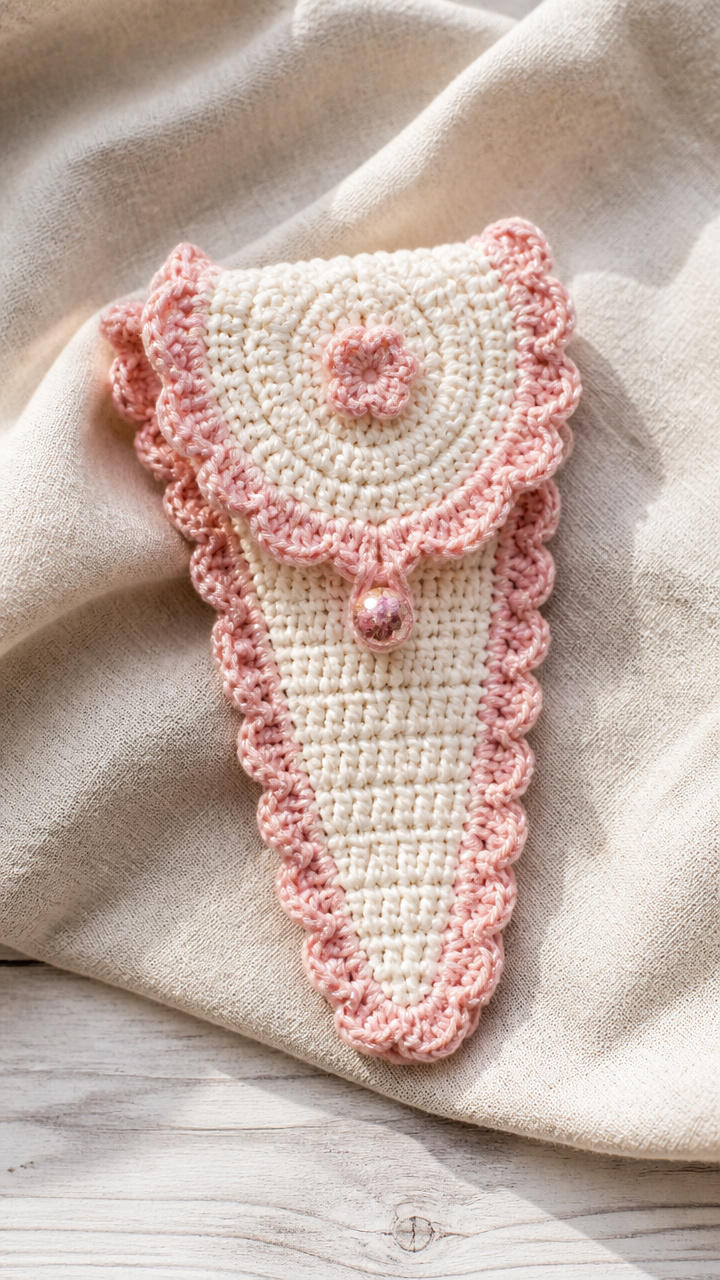
Stitches used: chain, single crochet, double crochet, ruffle edge
This snug case protects scissors and adds a girly touch to a pencil case. The ruffle peeks out when open and makes it easy to grab.
How it’s made: Worked flat in rows to form a rectangle, then seamed along the long edge to create a tube. The ruffle is added to one short end by crocheting into the edge and working double crochets in every stitch.
Key technique: Ruffle edge: work 3 double crochets into each stitch along the edge. This creates a gathered, flouncy trim that adds whimsy.
⚠️ Watch out for: Working too few double crochets per stitch results in a flat edge. Make sure to work exactly three into each stitch for full ruffles.
Finishing: Sew the sides with a whip stitch, then add a snap button to the flap. Weave in all ends on the inside.
Tips: Use a sparkly yarn for the ruffle to make it extra fun.
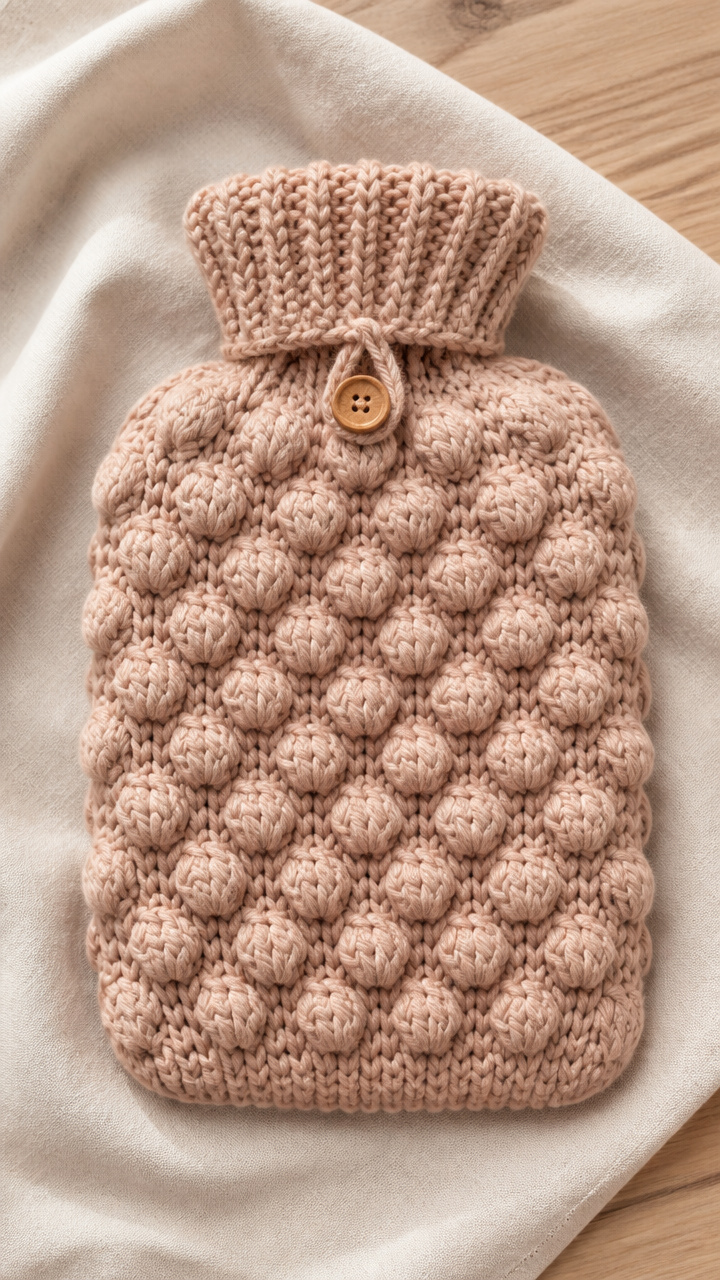
Stitches used: chain, single crochet, bobble stitch, button loop
This cozy cover makes a hot water bottle safer and more comfortable to hold. The bobbles add cushioning and a fun texture that feels good to touch.
How it’s made: Worked flat in rows to match the width and height of a standard hot water bottle. After completing the panel, fold and seam the sides, leaving the top open with a button closure.
Key technique: Bobble stitch placement: work one bobble, then skip two single crochets before the next. This keeps the texture even and prevents overcrowding.
⚠️ Watch out for: Skipping too many stitches between bobbles creates gaps. Stick to skipping exactly two single crochets for consistent spacing.
Finishing: Sew the sides with a whip stitch, then crochet a small loop for the button. Weave in all ends securely.
Tips: Use wool-blend yarn for better heat retention.
You’ve got everything you need to start making pieces that are useful, cheerful, and uniquely yours. Don’t be afraid to mix colors or try a new stitch — these projects are designed to be forgiving and fun. Pick one that makes you smile and grab your hook, your next favorite school accessory is just a few stitches away.
This page contains affiliate links and I earn a commission if you make a purchase through one of the links, at no cost to you. Students need practical, durable ways to protect their textbooks and notebooks, and a handmade crochet book sleeve is both functional and personal. These patterns offer a range of styles from…
This page contains affiliate links and I earn a commission if you make a purchase through one of the links, at no cost to you. Keychains are small enough to finish in a weekend but meaningful enough to carry every day. These patterns blend function and charm, designed with teachers and students in mind —…
This page contains affiliate links and I earn a commission if you make a purchase through one of the links, at no cost to you. Crocheted pencil cases are small enough to finish in a weekend but satisfying enough to show off your stitch skills. They make thoughtful handmade gifts, keep your desk tidy, or…
This page contains affiliate links and I earn a commission if you make a purchase through one of the links, at no cost to you. Backpack charms are more than just cute add-ons, they’re a chance to show off personality and make the everyday a little brighter. These small projects let you play with color,…