15 Christmas Crafts You Can Make With Paper Plates
You probably have a stack of plain paper plates sitting in your kitchen cabinet right now. With just a little creativity, those everyday supplies can easily transform into joyful, handmade Christmas decorations that fill your home with warmth and cheer.
These crafts are perfect for cozy afternoon activities with the kids or peaceful moments when you want to slow down and create something real.
Each project on this list is designed to be clear, doable, and packed with charm, making it simple to bring holiday magic to life using basic materials you already have at home.
1. Paper Plate Reindeer Ornaments
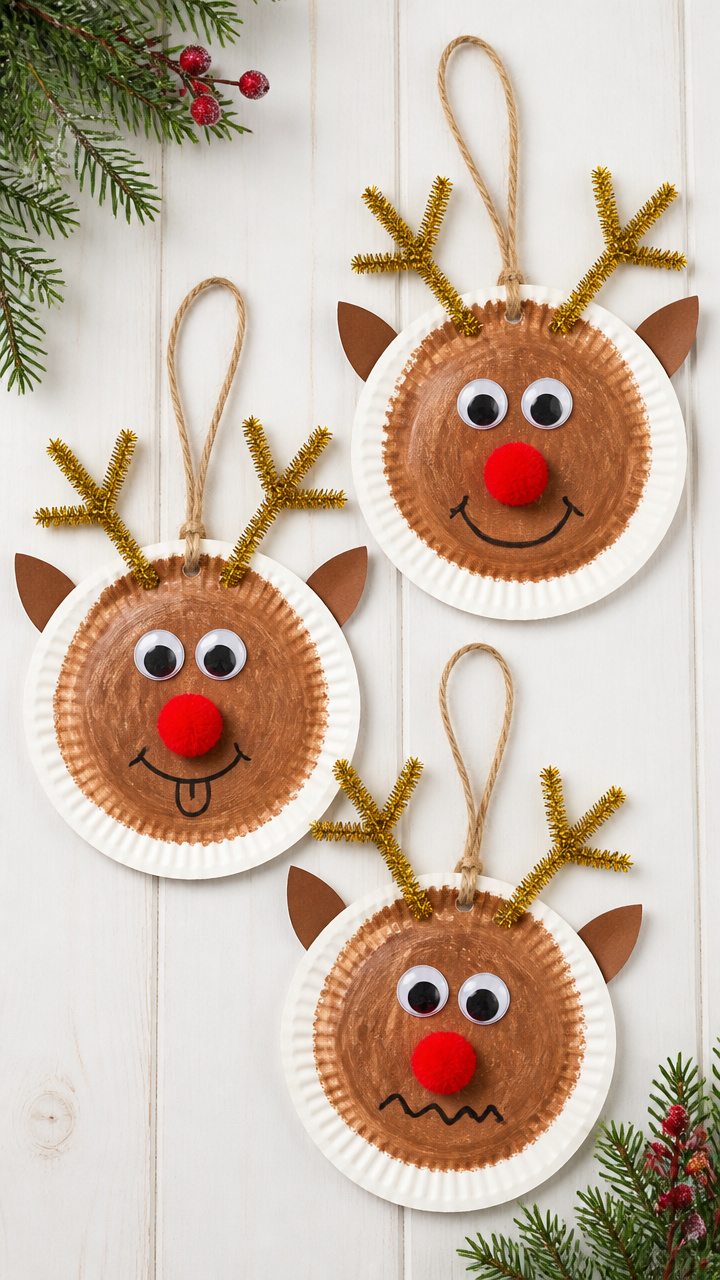
Fuzzy reindeer faces peek out from red noses and curly pipe cleaner antlers, turning plain plates into sweet ornaments that hang proudly on the tree. Kids love giving each reindeer its own goofy expression.
Materials Needed
- 12 white paper plates
- Brown acrylic paint
- Black and red pom poms, 1 inch diameter, 24 total
- Googly eyes, 1 inch, 24 pieces
- Black fine-tip marker
- Gold pipe cleaners, 6 inches long, 24 pieces
- Red yarn, 8 inch lengths, 12 pieces
- Hole punch
- Glue gun and glue sticks
- Paintbrush, 1 inch flat
How to Make It
- Paint the entire front of each paper plate brown and let dry completely, about 20 minutes.
- Glue two googly eyes near the top edge and a red pom pom centered below for the nose.
- Use the black marker to draw two small nostrils on the red pom pom.
- Bend each pipe cleaner into a V shape and twist the ends together to form antlers, then glue to the back top of the plate.
- Tie a piece of red yarn into a loop and glue to the back for hanging.


2. Santa Face Wreath
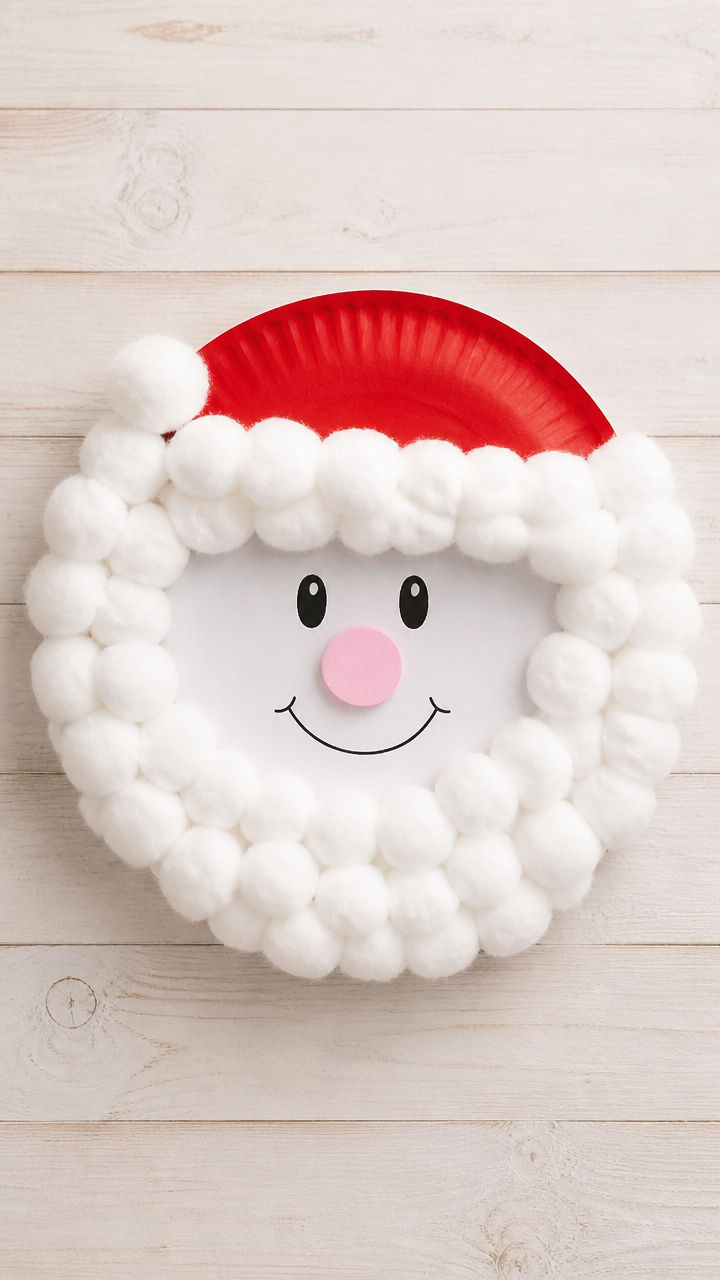
A fluffy white beard fans out from Santa’s jolly face, forming a full wreath that looks cheerful on any door. The layered construction gives it depth without needing advanced tools.
Materials Needed
- 1 large white paper plate
- 1 small white paper plate
- Cotton balls, 300 count
- Red acrylic paint
- Pink craft foam sheet, 9×12 inches
- Black marker
- Scissors
- Glue gun and glue sticks
- Ribbon, 1/2 inch wide, 12 inch length
How to Make It
- Cut the center out of the large plate, leaving a 2 inch wide ring.
- Glue cotton balls side by side all around the ring until fully covered, letting them overlap slightly.
- Paint the small plate red and let dry for 20 minutes.
- Cut two circles from pink foam for rosy cheeks and glue to the red plate.
- Draw eyes and a smile on the red plate with the black marker, then glue it to the center of the cotton-covered ring.
- Glue a ribbon loop to the back for hanging.



3. Paper Plate Snowman Wall Art
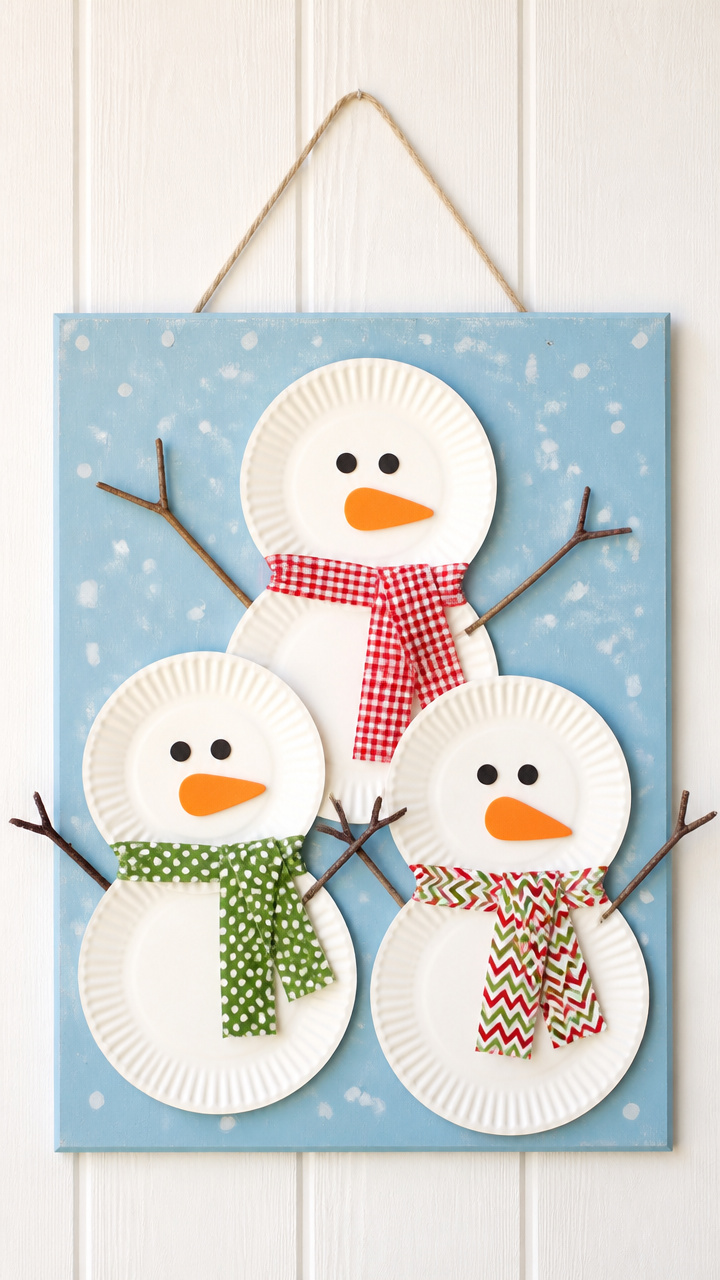
Three stacked snowmen with twig arms and patterned scarves stand against a snowy sky, framed in a circular plate border. This craft doubles as festive wall decor for hallways or playrooms.
Materials Needed
- 1 white paper plate
- Blue acrylic paint
- White paint pen
- Black construction paper, 9×12 inch sheet
- Orange craft foam, 1 sheet
- Small twigs, 6 pieces, 3 inches long
- Fabric scraps for scarves, 3 pieces, 1×6 inches
- Glue gun and glue sticks
- Scissors
- Pencil
How to Make It
- Paint the front of the plate blue and let dry completely, about 25 minutes.
- Use the white paint pen to draw falling snowflakes across the surface.
- Cut three decreasing-size circles from black paper for snowman bodies and layer them vertically on the plate.
- Cut small orange triangles from foam for noses and glue under each top circle.
- Glue twigs to the sides of the middle circle for arms and tie fabric scraps around the neck area.
- Hang with adhesive wall strips or string taped to the back.


4. Christmas Tree Suncatchers
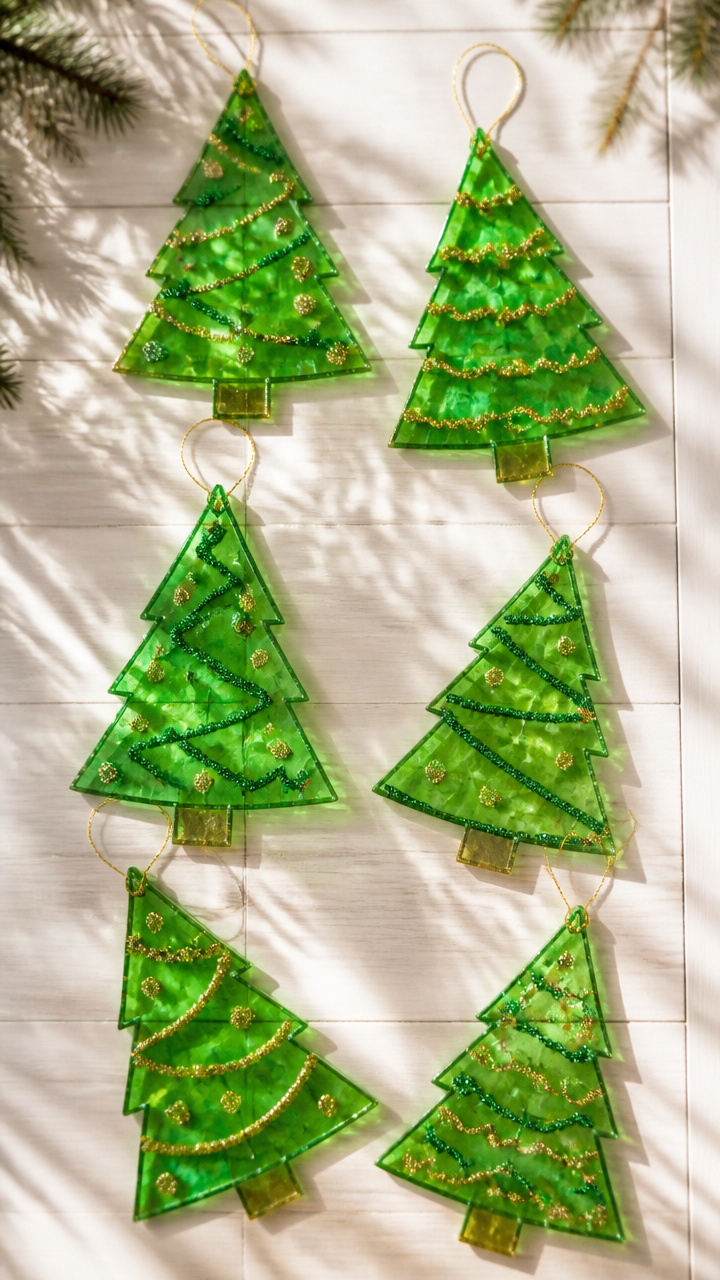
Shiny green trees sparkle in the window, made with tissue paper and glitter glue that catch the winter light beautifully. These suncatchers add color without clutter.
Materials Needed
- 6 white paper plates
- Green tissue paper, 12 sheets, 12×12 inches
- Clear school glue
- Glitter glue, green and gold
- Scissors
- Pencil
- Ribbon, 6 inch lengths, 6 pieces
- Plastic tray or table cover
How to Make It
- Cut each plate into a triangle shape by trimming off the round edges to form a pointed tree.
- Cut tissue paper into 1 inch squares and set aside.
- Brush a thin layer of clear glue over the front of the triangle.
- Press tissue paper squares onto the glued surface, covering completely with slight overlaps.
- Outline branches with green glitter glue and add gold dots for ornaments, letting dry 2 hours flat.
- Punch a hole at the top and thread ribbon through for hanging in a sunny window.


5. Bell Garland Rings
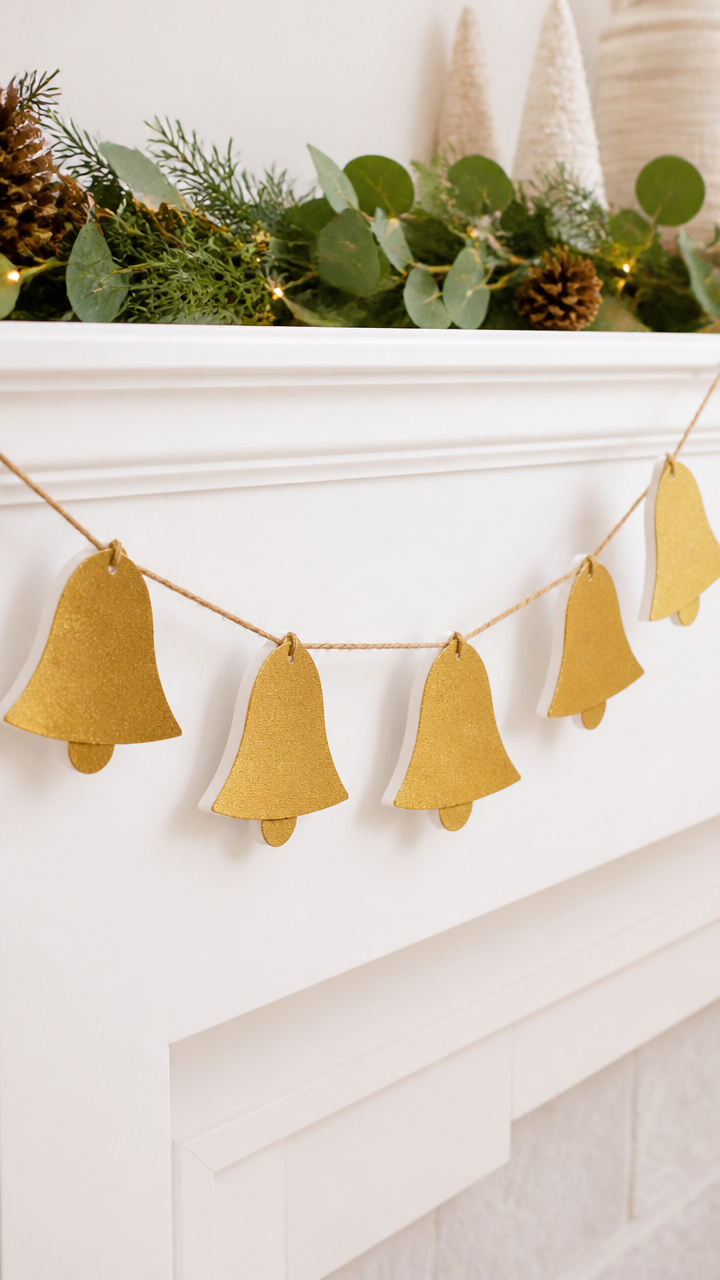
Golden bells dangle from a rustic string, their curved shapes cut cleanly from plates and layered for dimension. Hang this garland across a mantel or doorway for instant cheer.
Materials Needed
- 10 white paper plates
- Gold acrylic paint
- Black acrylic paint
- Paintbrush, 1 inch flat
- Scissors
- Hole punch
- Jute twine, 6 feet
- Glue stick
- Ruler
How to Make It
- Paint both sides of each plate gold and let dry for 30 minutes.
- Cut each plate in half to create 20 bell shapes.
- Use the black paint to add a small clapper line inside each bell, curving downward from center.
- Punch two holes at the curved top end of each half-circle, spaced 1 inch apart.
- Thread the jute twine through the holes of each pair, spacing them 3 inches apart along the length.
- Knot the ends of the twine to prevent slipping.


6. Angel Dinner Plate Halo
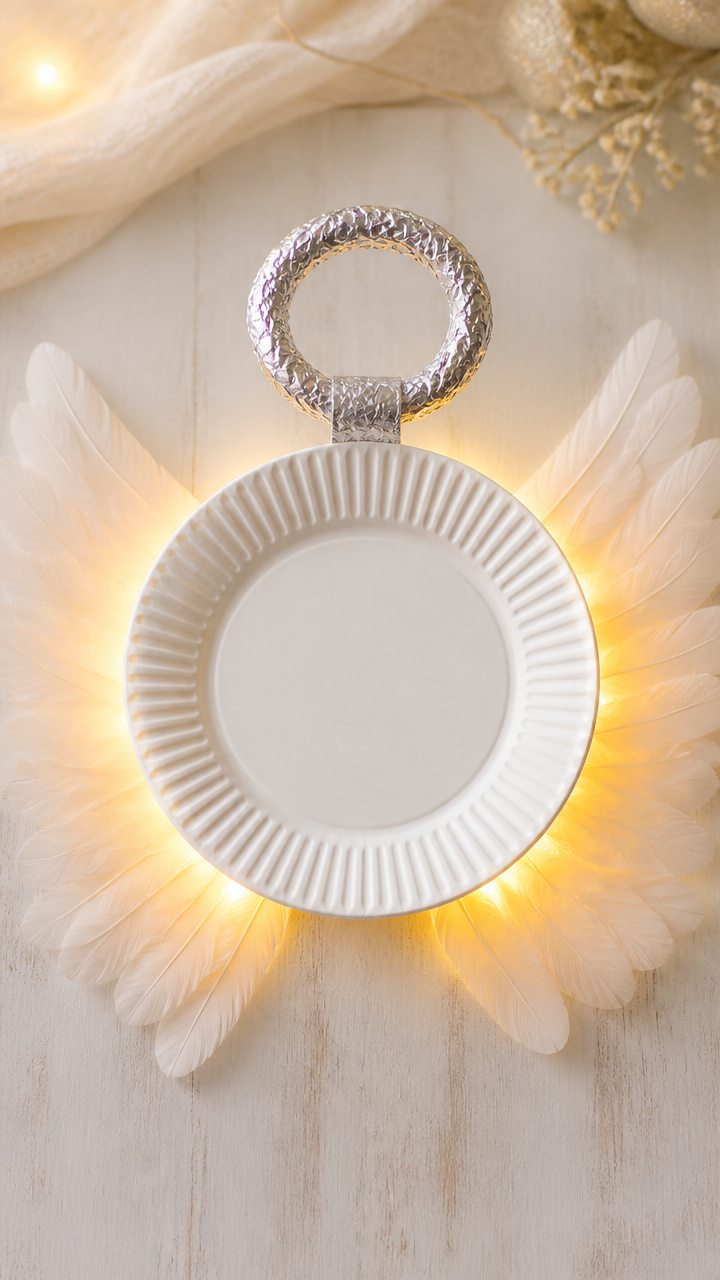
Soft wings spread behind a glowing halo, crafted from a single plate and shimmering foil. This angel brings quiet beauty to tabletops or windowsills.
Materials Needed
- 1 white paper plate
- Silver wrapping paper, 8×8 inch square
- Yellow acrylic paint
- Feather trim, 12 inch length
- Glue gun and glue sticks
- Scissors
- Pencil
- Ruler
How to Make It
- Cut the plate straight across the center to make two semicircles.
- Paint the flat edge of one semicircle yellow and let dry 20 minutes for the halo.
- Cut a 6 inch circle from silver wrapping paper and glue it behind the painted edge to create a reflective glow.
- Cut two feather-trimmed wing shapes from cardboard and attach to the back of the other semicircle with hot glue.
- Place the halo piece upright behind the angel body so it appears to float above the wings.


7. Snowflake Window Fans
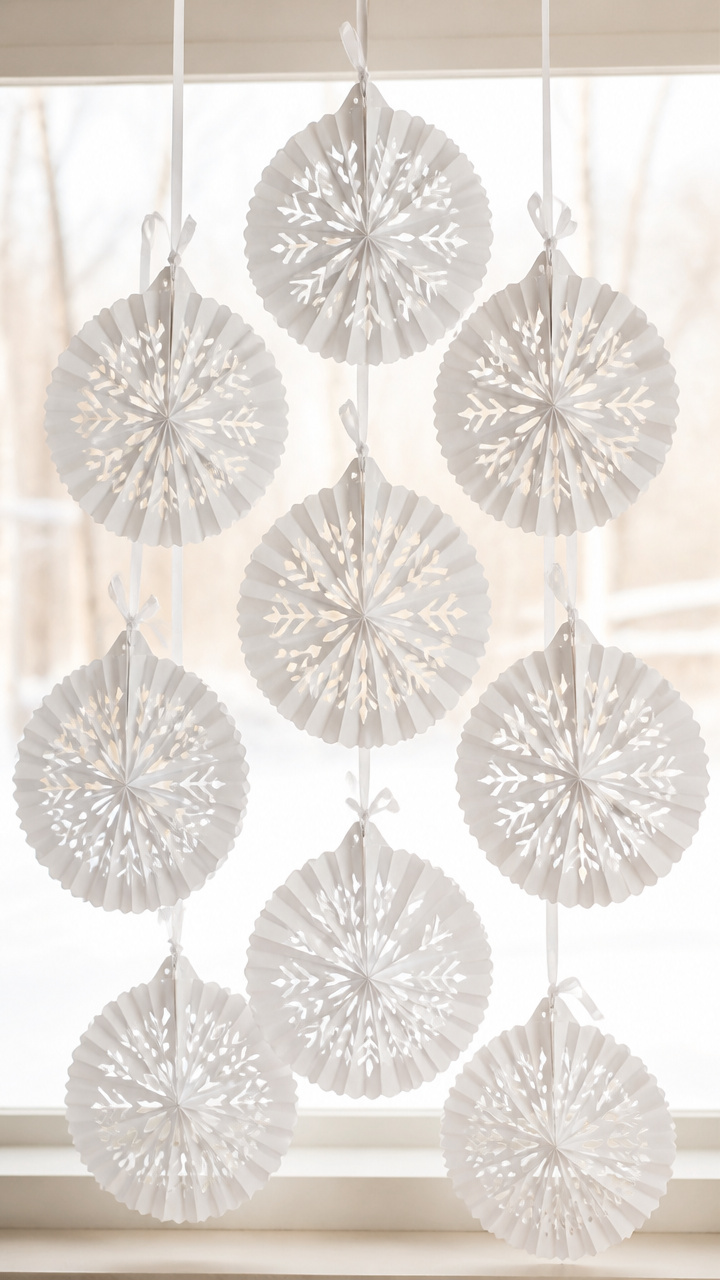
Delicate paper snowflakes bloom from the center of fan-folded plates, creating symmetrical designs that look intricate but are easy to cut. Each one dances gently in the breeze.
Materials Needed
- 8 white paper plates
- White glue
- Ribbon, 1/4 inch wide, 6 inch lengths, 8 pieces
- Scissors
- Pencil
- Craft knife (optional, for adults)
- Cardboard circle, 4 inch diameter, 8 pieces
How to Make It
- Fold each plate into quarters and use scissors to cut away the outer rim, leaving a square center.
- Unfold to reveal a starburst shape, then refold into eighths.
- Cut small triangle shapes along the folded edges to create open patterns, then unfold carefully.
- Flatten the snowflake and glue it to a cardboard circle for stability.
- Tie a ribbon loop to the back center for hanging.


8. Santa’s Sleigh Launcher
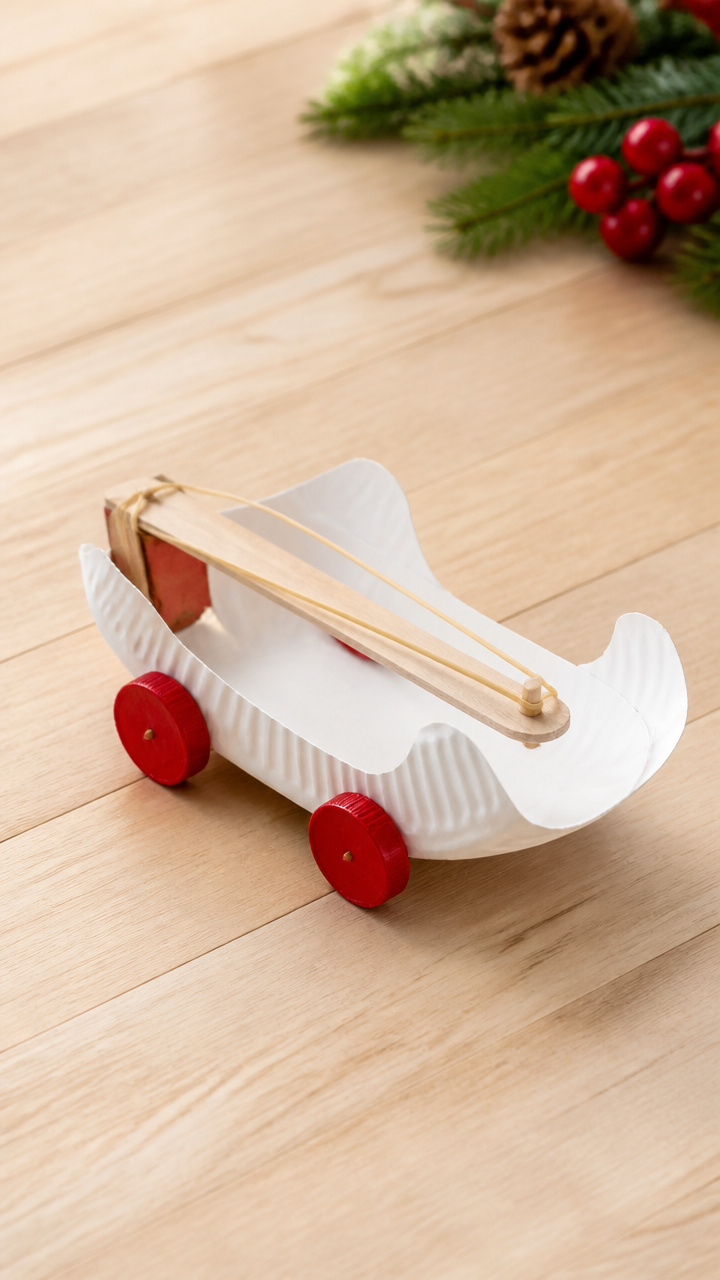
A sleigh made from a plate glides across the floor when you pull back the rubber band launcher. This playful toy keeps kids busy during long holiday afternoons.
Materials Needed
- 1 white paper plate
- 2 plastic bottle caps, 1 inch diameter
- Rubber band, 6 inch
- Popsicle stick, 4.5 inch
- Red acrylic paint
- Glue gun and glue sticks
- Scissors
- Ruler
How to Make It
- Paint the plate red and let dry 25 minutes.
- Cut a 1 inch slit 2 inches from the edge on both sides of the plate.
- Slide the popsicle stick through the slits to form a front runner, bending slightly outward.
- Glue bottle caps to the bottom near the back edge for wheels.
- Loop the rubber band around the back center and hook fingers under it to pull back and release forward.


9. Mitten String Lights
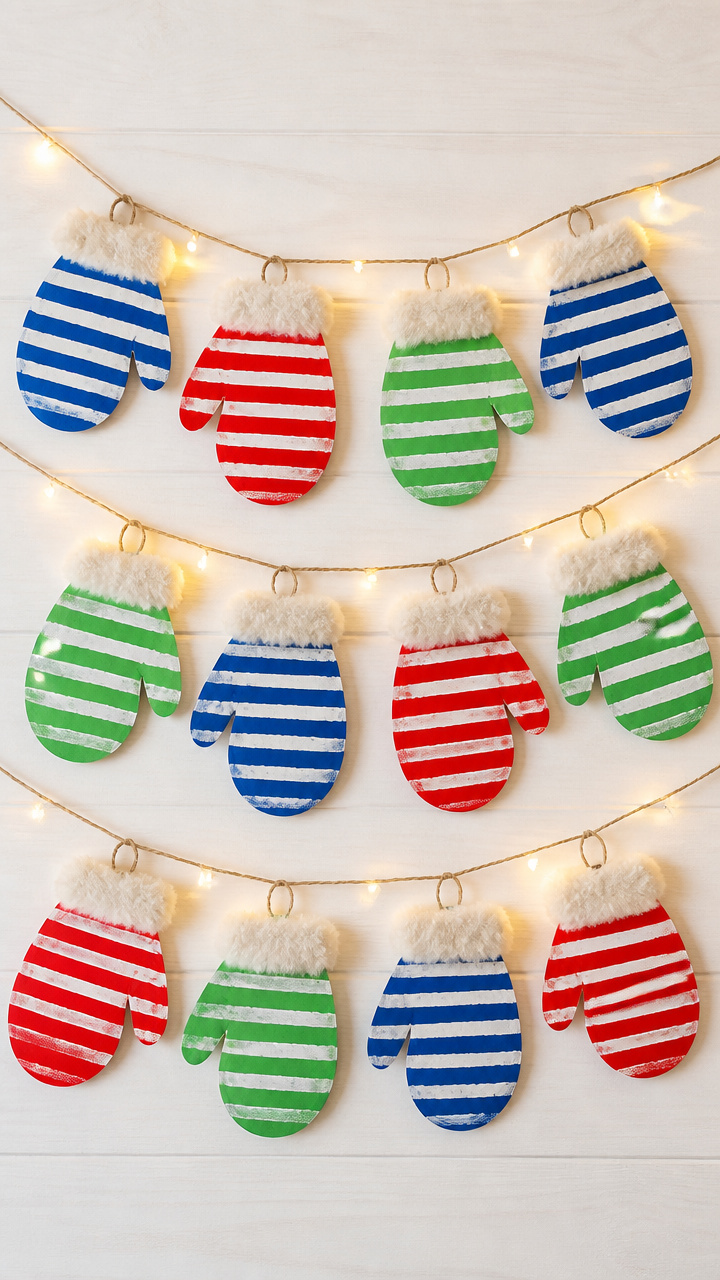
Cozy mittens dangle from twine, their cuffs trimmed with faux fur and stripes painted in classic colors. Clip them to an existing string light for extra charm.
Materials Needed
- 12 white paper plates
- Blue, red, and green acrylic paint
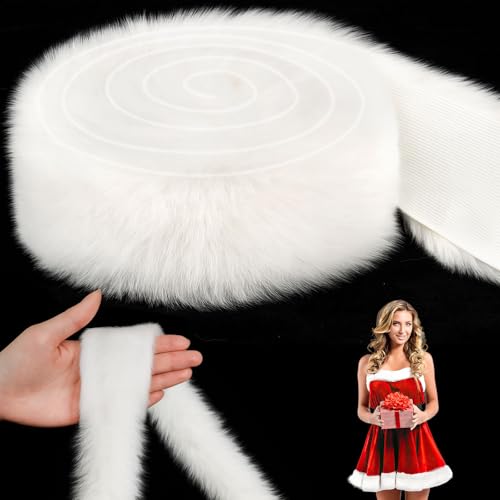
- Faux fur trim, 1/2 inch wide, 6 feet
- Twine, 8 feet
- Scissors
- Glue gun and glue sticks
- Clothespins, 12
How to Make It
- Cut mitten shapes from plates using a printed template, 6 inches tall, 12 total.
- Paint alternating cuffs with colored stripes and let dry 20 minutes.
- Glue faux fur along the top edge of each mitten for the cuff lining.
- Cut 12 twine pieces, 6 inches long, and tie one to the top of each mitten.
- Clip clothespins to an existing string light and attach each mitten by its twine loop.

10. Starburst Nativity Crown
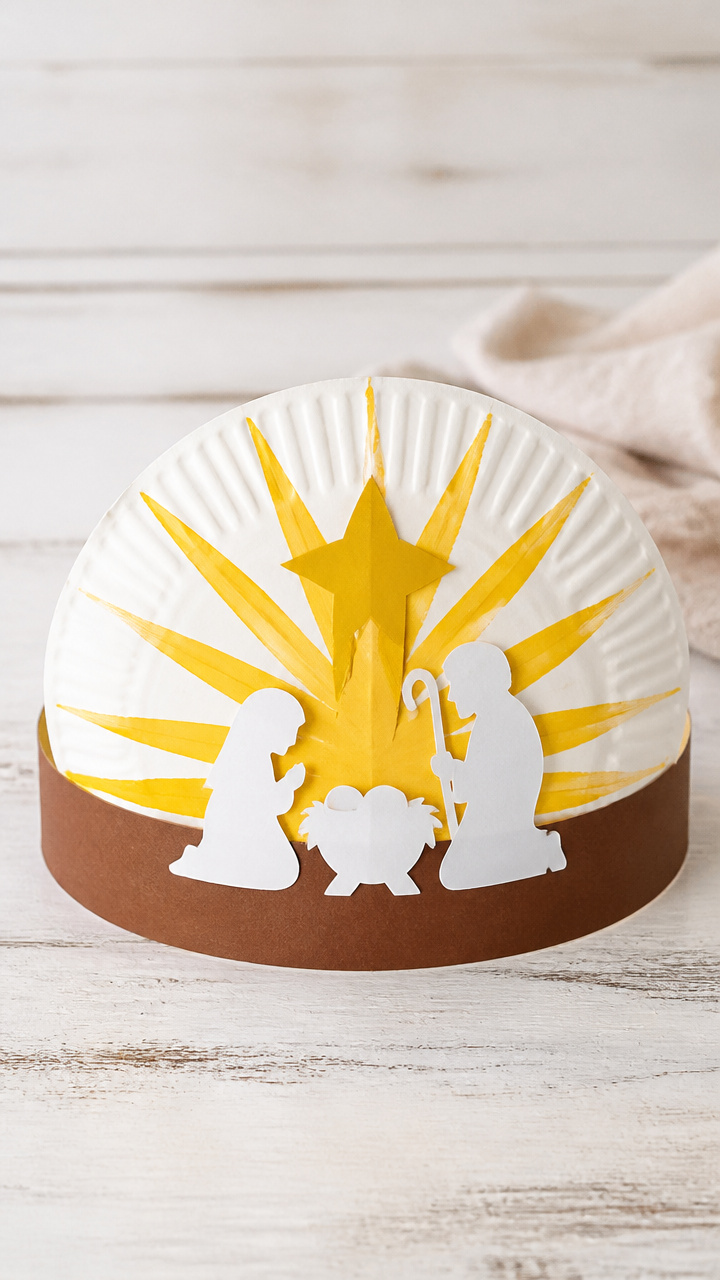
A radiant crown holds tiny figures of Mary, Joseph, and the baby Jesus, framed by golden rays. Use it for storytelling or display on a shelf.
Materials Needed
- 1 white paper plate
- Yellow acrylic paint
- Brown construction paper, 9×12 inch
- White craft foam, 1 sheet
- Scissors
- Glue stick
- Pencil
- Ruler
- Double-sided tape
How to Make It
- Cut the outer rim off the plate, keeping the center circle and the ring separate.
- Paint the ring yellow and let dry 25 minutes for the starburst base.
- Cut small figures from brown paper and white foam: Mary in a robe, Joseph with a staff, baby in swaddling.
- Glue the figures standing in a row on the center circle.
- Attach the center circle to the back of the starburst ring with double-sided tape so rays extend outward.
- Place on a shelf or wear gently for nativity scenes.


11. Peekaboo Elf House
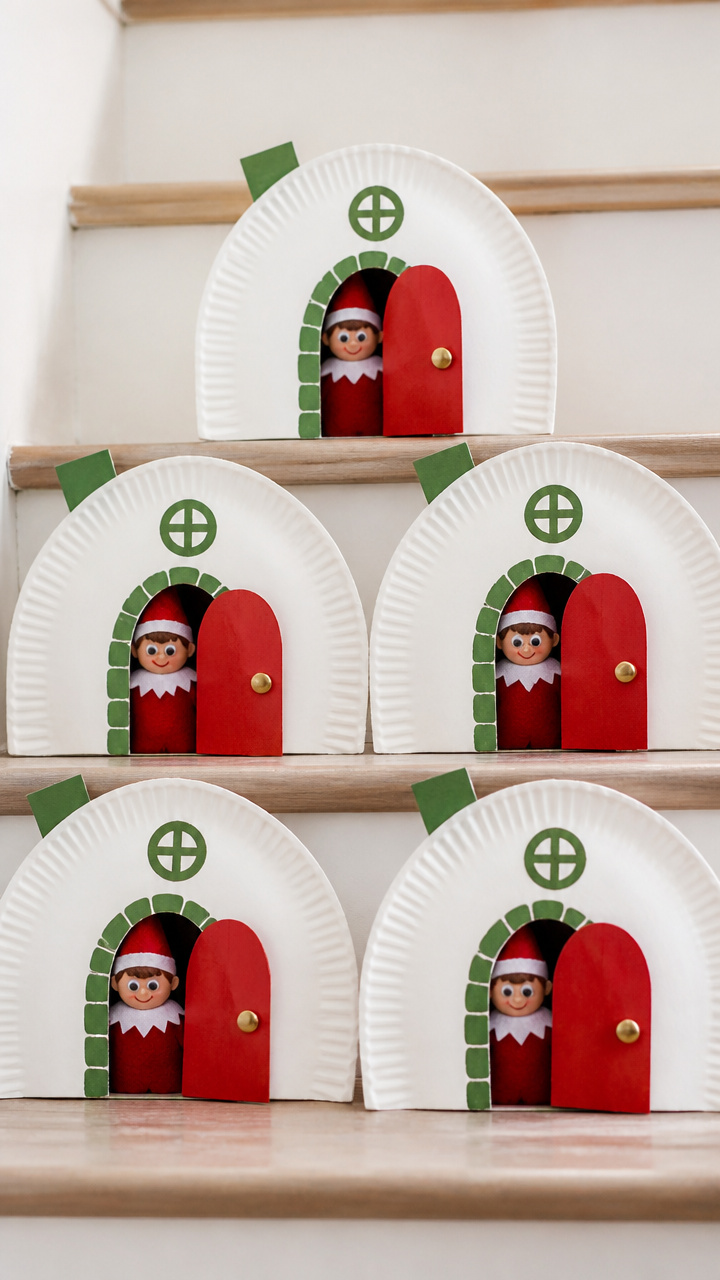
A mini house with a door that opens reveals a tiny elf inside, ready to deliver holiday news. Set several on a staircase for a hidden holiday surprise.
Materials Needed
- 5 white paper plates
- Green acrylic paint
- Red craft foam, 1 sheet
- Wiggly eyes, 1/2 inch, 5 pieces
- Mini craft door, 2×3 inches, 5 pieces
- Brass fasteners, 5
- Glue gun and glue sticks
- Scissors
How to Make It
- Cut each plate in half and paint the flat side green, letting dry 25 minutes.
- Glue two halves together at the curved edges to form a tent-shaped house.
- Cut a vertical slit on the front to insert the mini door and attach with a brass fastener so it swings open.
- Glue a wiggly eye and a red foam hat to a small figure or cutout inside.
- Set on steps or shelves with doors closed, then let kids discover who's inside.


12. Gingerbread Man Mobile
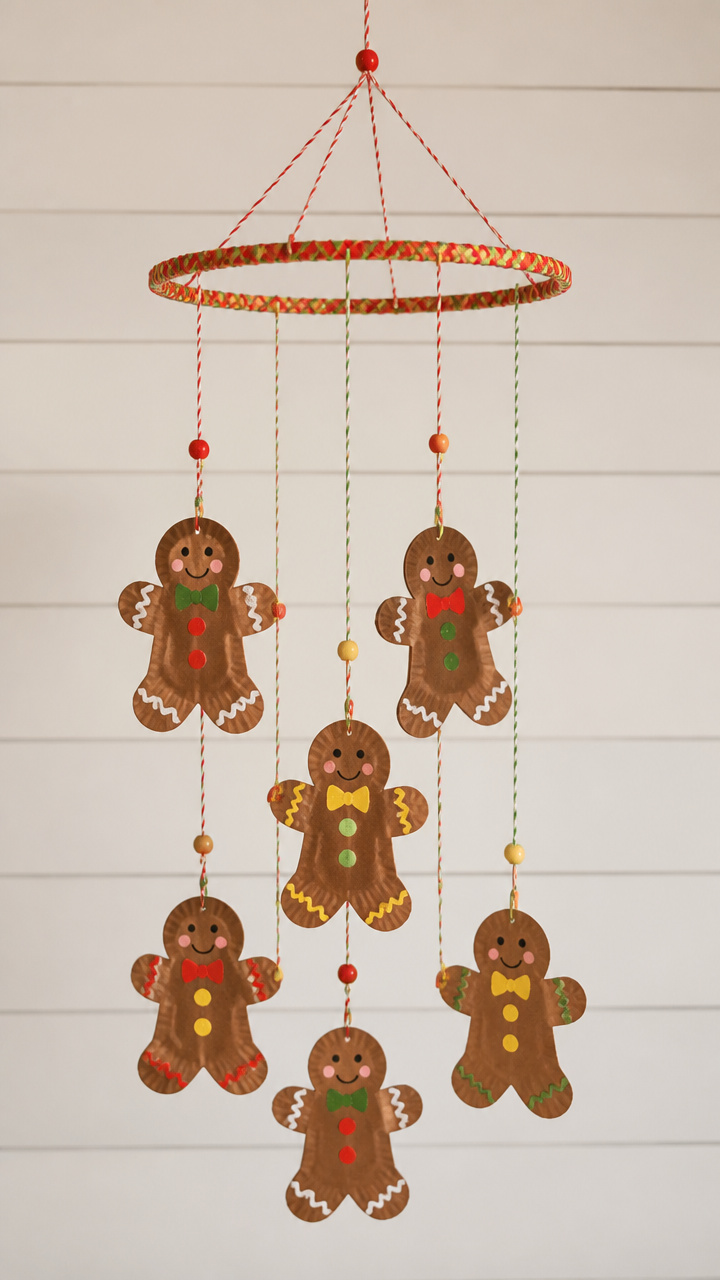
Browned gingerbread men dangle at different levels, their candy buttons and smiles made with bright paint. This mobile spins gently above a crib or reading nook.
Materials Needed
- 6 white paper plates
- Brown acrylic paint
- Red, yellow, and green paint pens
- Embroidery floss, 3 colors, 12 inch lengths, 18 pieces
- Embroidery hoop, 8 inch
- Glue gun and glue sticks
- Scissors
- Hole punch
How to Make It
- Cut gingerbread man shapes from plates using a template, 5 inches tall.
- Paint all shapes brown and let dry 30 minutes.
- Use paint pens to add eyes, mouth, and colored buttons down the front.
- Punch a hole at the top of each figure and tie three floss strands to it, connecting to different points on the hoop.
- Space six figures evenly around the hoop and adjust floss lengths so they hang at staggered heights.
- Tie three long floss strands to the top of the hoop for hanging.


13. Holiday Countdown Clock
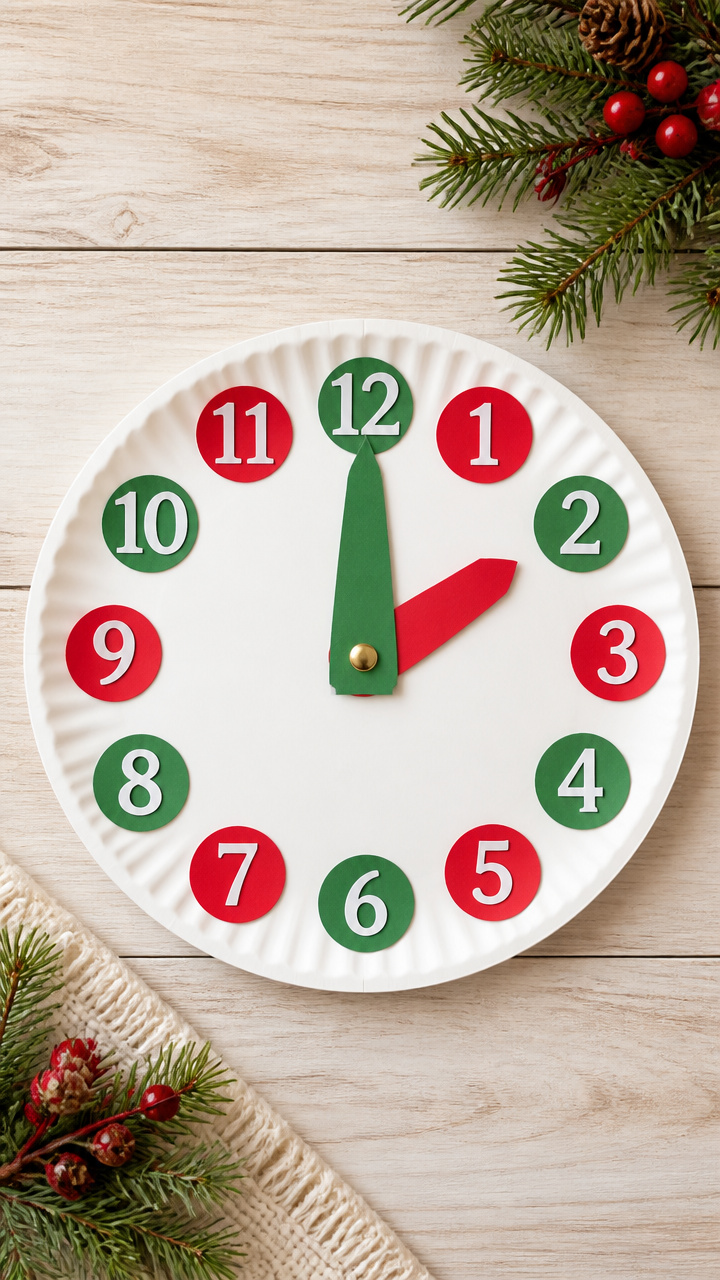
A working clock counts down the days until Christmas, with numbers you turn daily. It builds excitement and fits neatly on a dresser or fridge.
Materials Needed
- 1 white paper plate
- Brass fastener, 1 inch
- Cardstock, red and green, 8.5×11 inch sheets
- Markers
- Scissors
- Ruler
- Pencil
- Glue stick
How to Make It
- Write numbers 1 through 25 evenly spaced around the edge of the plate.
- Cut an arrow shape from green cardstock, 4 inches long, and color the tip red.
- Push the brass fastener through the center of the arrow and plate to attach securely.
- Cut small red stars from cardstock and glue one over each number as the day passes.
- Turn the arrow each morning to point to the current day.


14. Reindeer Antler Headband
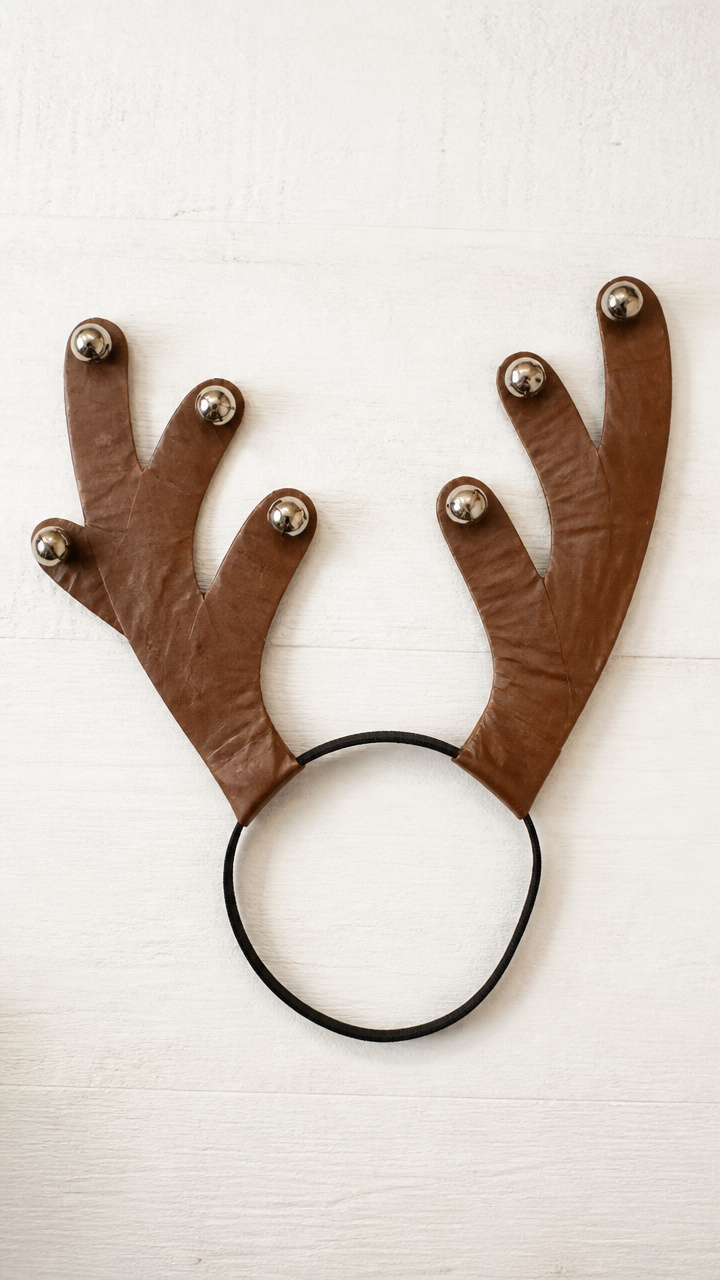
Curved antlers rise from a headband base, wrapped in brown tape and topped with mini jingle bells. Perfect for holiday photos or parties.
Materials Needed
- 1 white paper plate
- Brown masking tape
- 2 jingle bells, 1 inch
- Elastic band, 14 inch length
- Hot glue gun and glue sticks
- Scissors
- Pencil
How to Make It
- Cut two antler shapes from the plate using a branching design, about 8 inches tall.
- Wrap each antler tightly with brown masking tape to cover the surface completely.
- Glue a jingle bell to the tip of each main branch.
- Cut two small notches at the bottom of each antler for elastic attachment.
- Thread the elastic through both notches and tie knots to secure, forming a headband.


15. Ornament Storage Wheel
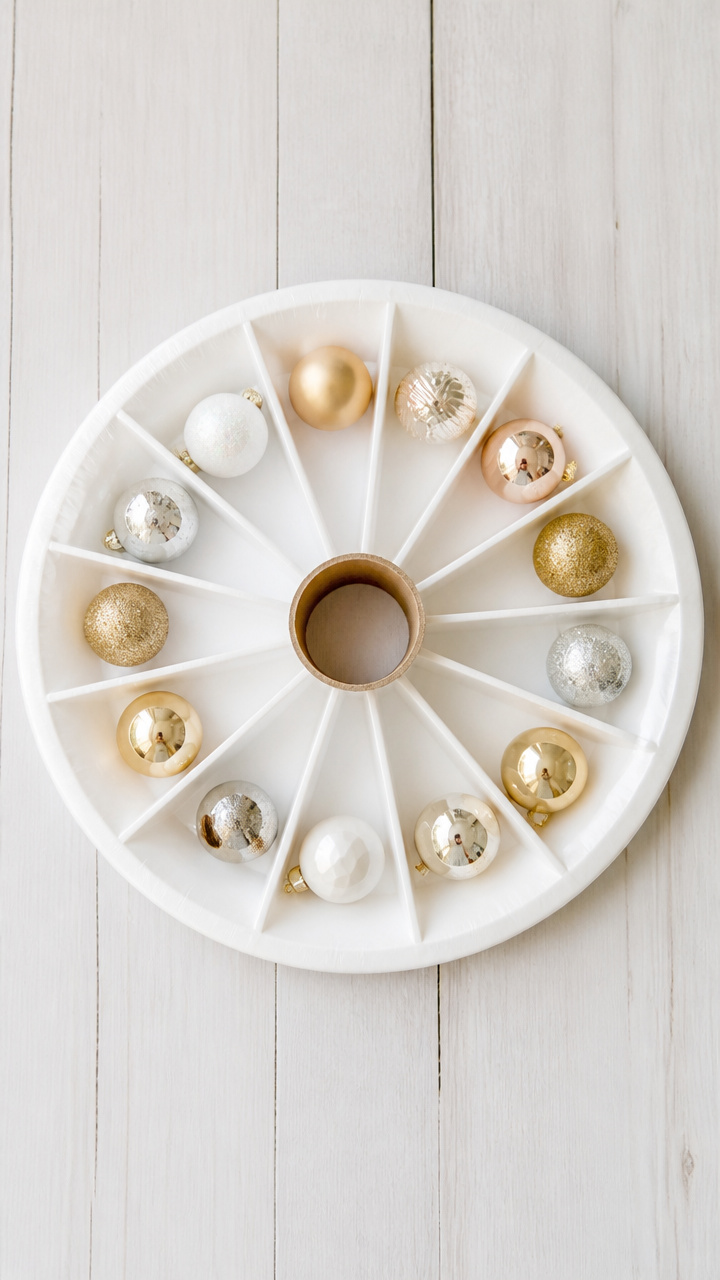
A rotating wheel stores lightweight ornaments behind numbered slots, keeping them tangle-free and visible. Store it in a closet or under the bed.
Materials Needed
- 1 white paper plate
- Cardboard tube, toilet paper size, 1
- Clear contact paper, 12×12 inch sheet
- Scissors
- Glue stick
- Ruler
- Pencil
- Number stickers 1-12
How to Make It
- Cut 12 evenly spaced vertical slits around the edge of the plate, 1 inch deep.
- Cover both sides of the plate with contact paper, smoothing out bubbles.
- Glue the cardboard tube to the center of the plate as a spindle.
- Label each slot with a number sticker corresponding to ornament type.
- Slide flat ornaments like photo disks or felt shapes into the slots and spin to access.


![[TreeKeeper Telescoping Christmas Ornament Storage Box with Dividers] - Adjustable Organizer Holds 120 Ornaments up to 4 Inches Tall by Nearly Any Width and Length | 5 Removable Trays with Separators](https://m.media-amazon.com/images/I/41auN5+PNzL._SL500_.jpg)
You’ve got everything you need to start right now, even if it’s just a stack of plates and some glue. Pick one idea that makes you smile and give it a try today.