15 Christmas Crafts You Can Make With Popsicle Sticks
You do not need a cart full of expensive supplies to fill your home with holiday magic. With just a handful of humble popsicle sticks, a little glue, and some imagination, you can create charming keepsakes that add genuine warmth to your seasonal decor.
There is something truly special about the joy of making and sharing handmade pieces with loved ones. Each of these doable projects is designed to capture that cozy Christmas spirit, transforming the simplest everyday materials into festive treasures you will cherish for years to come.
1. Mini Christmas Tree Ornament
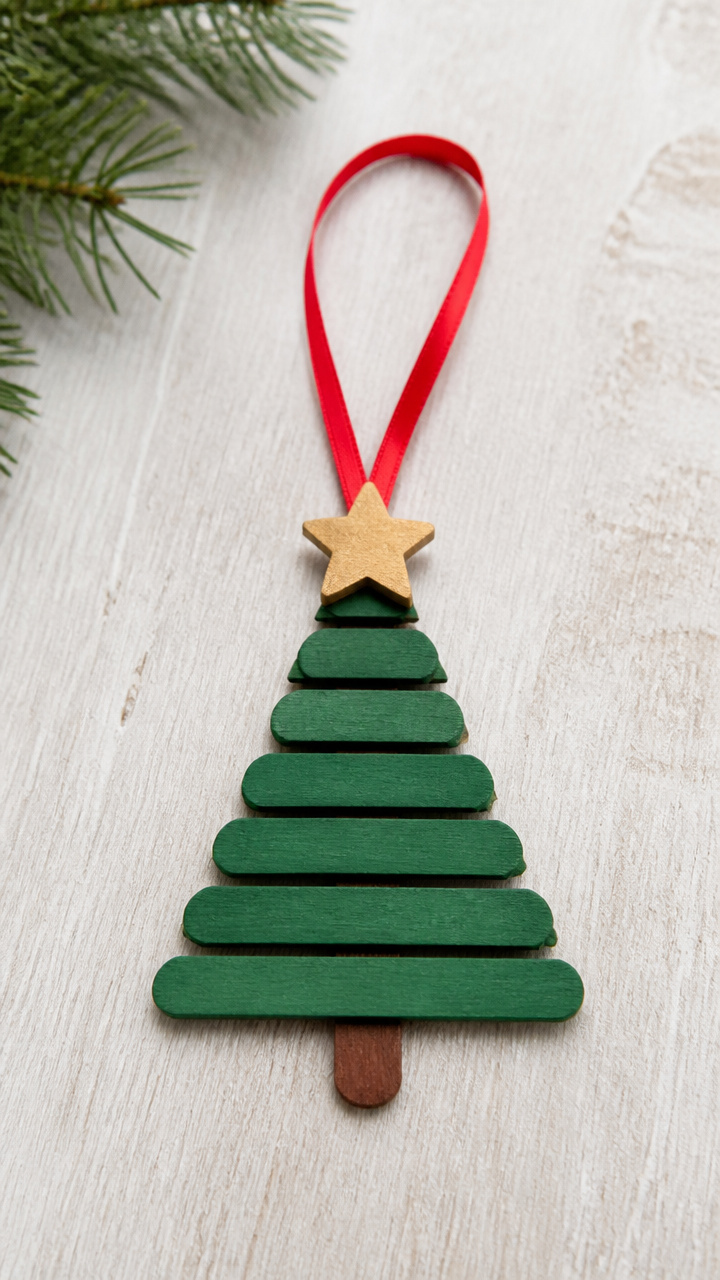
Tiny green triangles stacked on a stick base create a sweet ornament that holds real charm. This little tree fits perfectly on any branch or window hook.
Materials Needed
- 60 natural popsicle sticks
- green acrylic paint
- small star-shaped gold sticker
- white school glue
- red ribbon, 12 inches
- paintbrush
- scissors
How to Make It
- Paint 50 popsicle sticks green and let them dry flat for 20 minutes.
- Cut 10 painted sticks in half diagonally to form small triangles for tree layers.
- Glue the full sticks vertically side by side onto one unpainted stick laid horizontally to form the trunk base.
- Stack the cut triangle sticks from largest at the bottom to smallest at the top, gluing each layer slightly above the last.
- Attach the gold star to the top tip and tie red ribbon to the top for hanging.


2. Santa’s Sleigh Wall Hanging
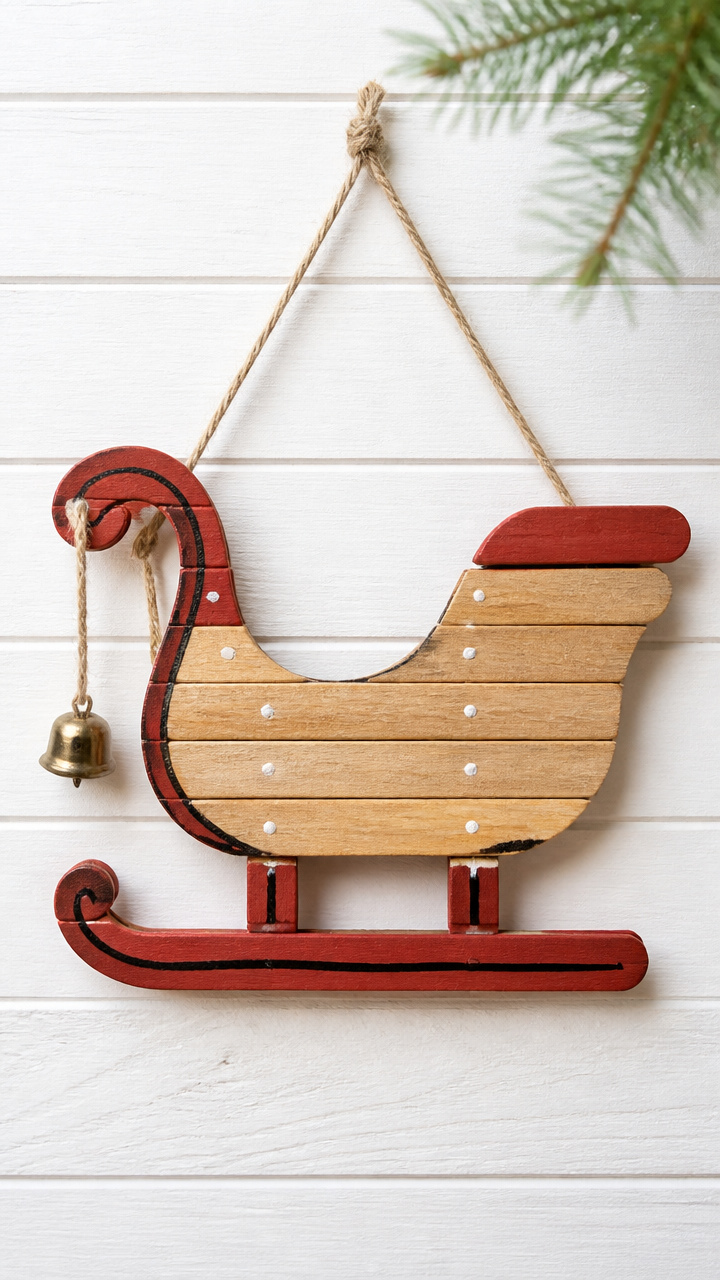
A rustic sleigh silhouette with runners and a curved front captures Santa’s journey in woodland style. Hang it on a wall or door for instant cheer.
Materials Needed
- 8 natural popsicle sticks
- red acrylic paint
- black fine-tip marker
- white school glue
- small jingle bell
- twine, 8 inches
- scissors
- paintbrush
How to Make It
- Paint two sticks red for the runners and set aside to dry for 15 minutes.
- Bend the front ends of the red sticks slightly upward using pliers for the sleigh curve.
- Lay two sticks parallel and glue the bent red runners across both ends to form the base frame.
- Glue three sticks vertically across the frame for the sleigh body, spacing them evenly.
- Glue the eighth stick diagonally at the back as a seat back, then attach twine across the front for hanging and tie the jingle bell to the front curve.



3. Snowy Pinecone Reindeer
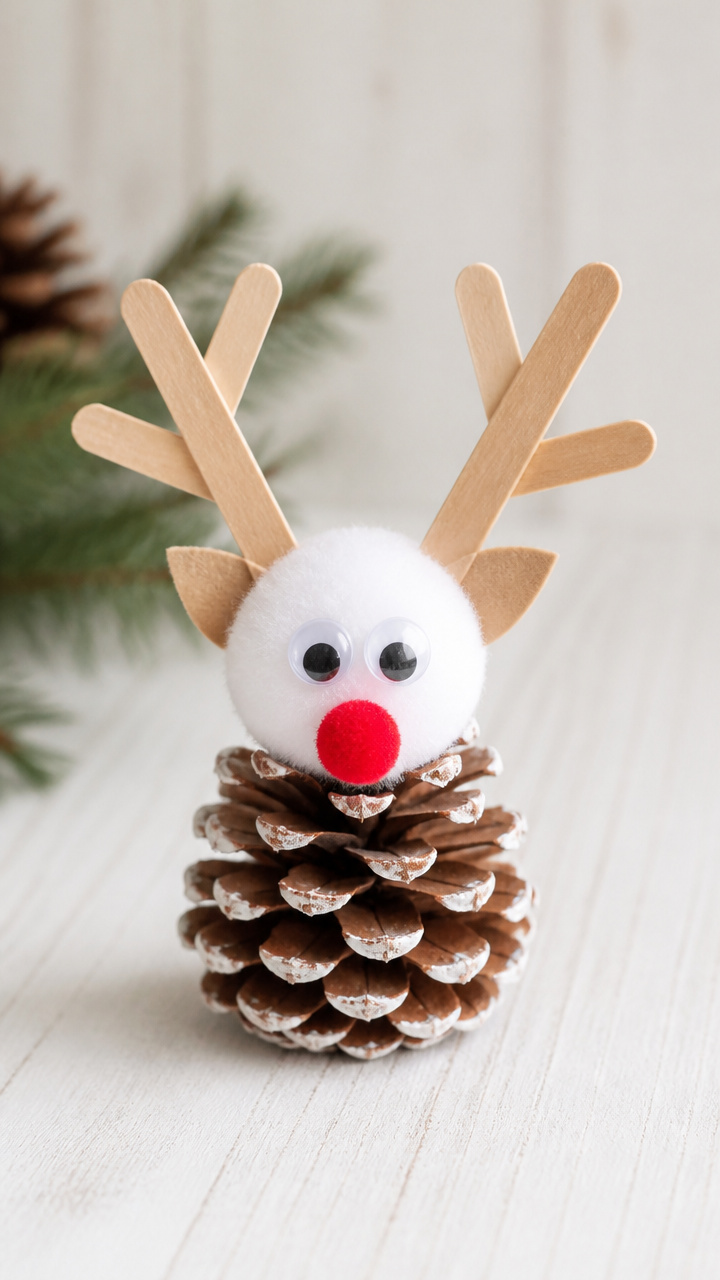
A pinecone body paired with popsicle stick antlers gives this reindeer woodland character. Its snowy cotton head makes it perfect for table decor.
Materials Needed
- 1 large pinecone
- 2 natural popsicle sticks
- white craft glue
- cotton balls
- googly eyes, 2, size 10mm
- small red pom-pom, 8mm
- brown pipe cleaner, 12 inches
- scissors
- hot glue gun with glue sticks
How to Make It
- Break one popsicle stick in half and shape each piece into a forked antler using pliers.
- Hot glue the antlers to the top of the pinecone, pressing firmly for 10 seconds.
- Wrap cotton balls around the top of the pinecone for the face and secure with dots of hot glue.
- Glue on googly eyes and the red pom-pom for the nose.
- Twist the pipe cleaner into antler bases and wrap around the head for added detail.


4. Christmas Light String Banner
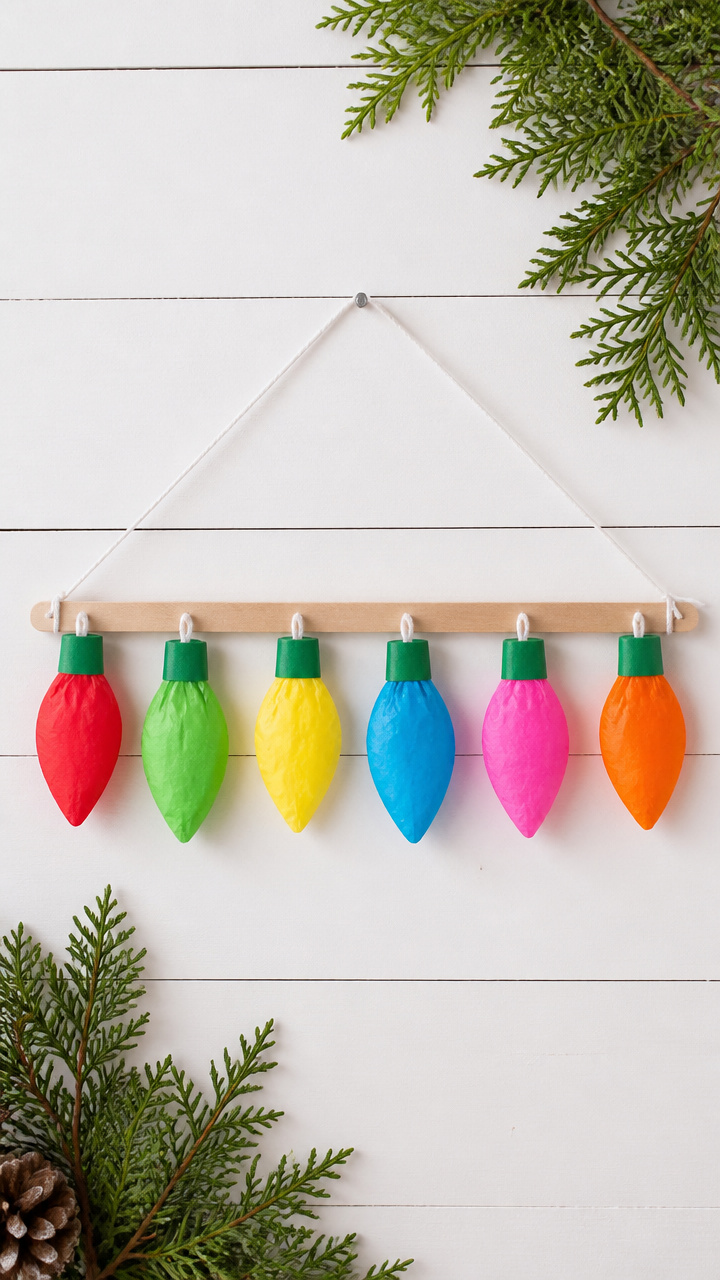
Bright bulb shapes dangle from a popsicle stick rod like festive lights. This colorful banner adds sparkle above mantels or windows.
Materials Needed
- 1 natural popsicle stick
- 6 colored tissue paper squares, 3×3 inches (red, green, yellow, blue, pink, orange)
- white school glue
- clear tape
- string, 24 inches
- scissors
- pencil
How to Make It
- Roll each tissue paper square into a loose tube and secure the edge with a dab of glue.
- Pinch the middle of each tube to form a bulb shape and let dry for 10 minutes.
- Poke two small holes at each end of the popsicle stick using a pencil tip.
- Thread the 24-inch string through the holes and tie knots underneath to secure.
- Tape the top of each bulb to the string, spacing them 2 inches apart.


![Popsicle Stick Cottage Model Kit – 350+ Pre-Cut Wooden Pieces – Rustic DIY House Craft for Kids and Adults – Complete Kit [Everything Included] by POPSI KITS](https://m.media-amazon.com/images/I/41ipWx9Y9CL._SL500_.jpg)
5. Reindeer Name Place Cards
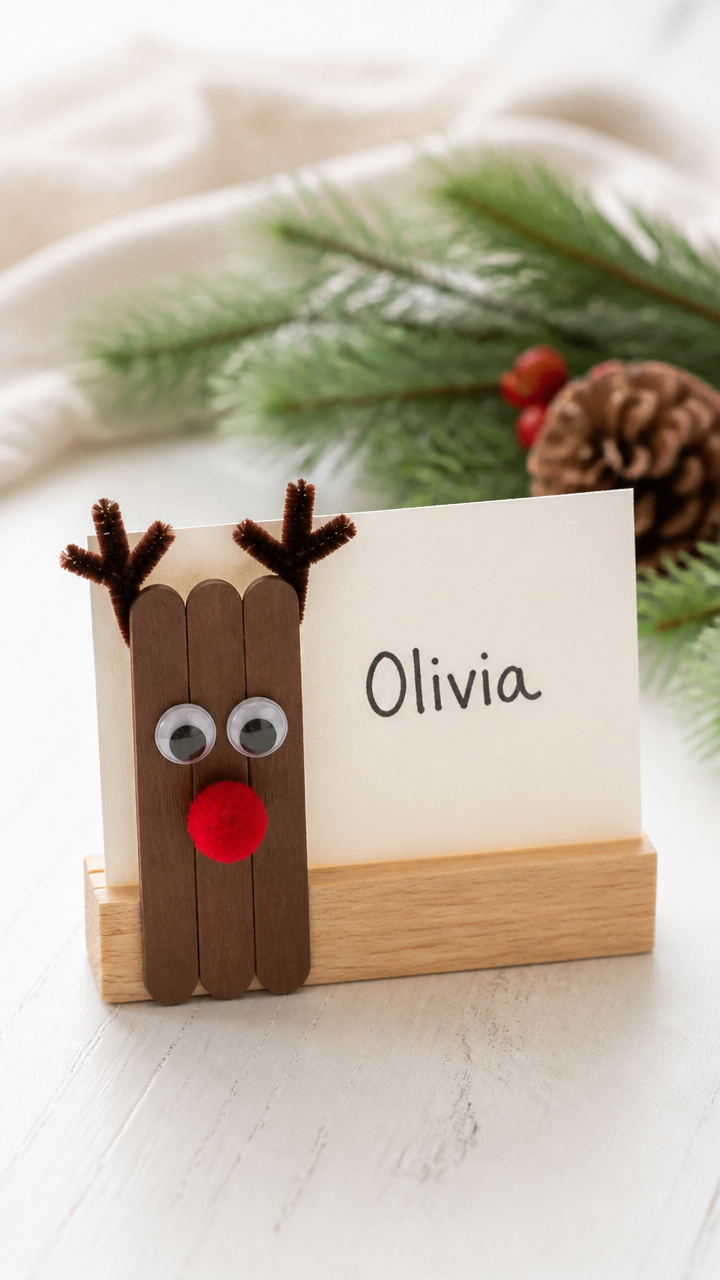
Personalized reindeer faces with name tags make holiday place settings memorable. Guests will smile when they find their spot.
Materials Needed
- 10 natural popsicle sticks
- brown acrylic paint
- red pom-pom, 6mm
- googly eyes, 10mm, 2 per card
- white school glue
- calligraphy pen
- scissors
- paintbrush
- brown pipe cleaner, 6 inches
How to Make It
- Paint five sticks brown and let dry for 15 minutes.
- Cut each painted stick in half crosswise to make 10 short reindeer heads.
- Glue two googly eyes near the top edge and the red pom-pom below for the nose.
- Cut the pipe cleaner into 1-inch pieces and twist into antlers, then glue to the back top of each head.
- Write each guest's name on the front with the calligraphy pen using neat block letters.

6. Frosted Window Star
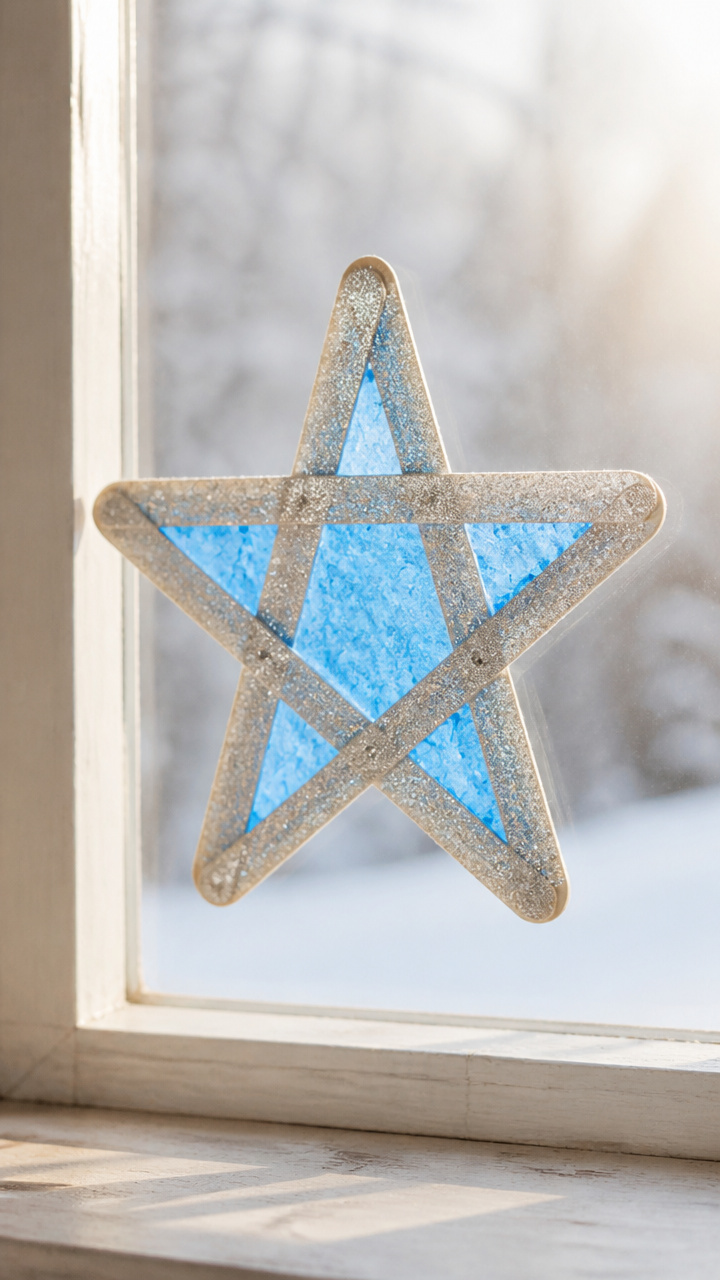
A five-pointed star outlined in glittering 'frost' catches the winter light beautifully. Stick it to any glass surface for icy magic.
Materials Needed
- 10 natural popsicle sticks
- white school glue
- fine silver glitter
- blue cellophane sheet, 6×6 inches
- scissors
- tape
- protractor or star stencil
How to Make It
- Arrange five sticks into a star shape, overlapping tips at 72-degree angles using the protractor as a guide.
- Glue each joint and let dry for 30 minutes, flipping once halfway.
- Apply a thin line of glue along each stick edge and sprinkle silver glitter over it.
- Shake off excess glitter after 2 minutes and let dry another 20 minutes.
- Cut the cellophane into a smaller star and tape it to the center for a frosted window effect.


7. Merry Christmas Sign
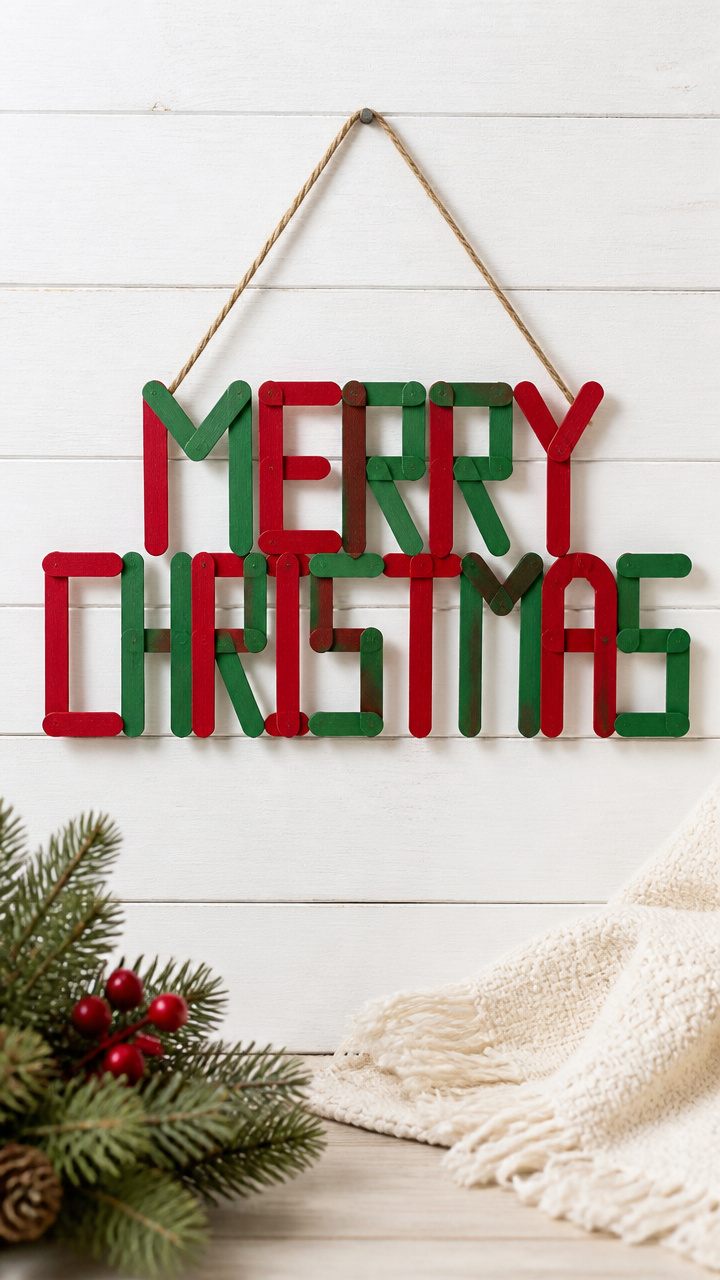
Bold block letters spell out holiday cheer with clean lines and bright colors. This sign stands on its own or hangs with pride.
Materials Needed
- 20 natural popsicle sticks
- red acrylic paint
- green acrylic paint
- white school glue
- black fine-tip marker
- paintbrush
- ruler
- scissors
How to Make It
- Paint ten sticks red and ten sticks green, alternating colors, and let dry for 20 minutes.
- Arrange sticks side by side in a rectangle, gluing each end to its neighbor with white glue.
- Once dry, write 'MERRY' on the top row and 'XMAS' on the bottom row in bold black letters using the marker.
- Let the ink dry for 5 minutes, then apply a thin coat of glue over the words to seal them.
- Stand upright or attach twine to the back corners for hanging.


8. Popsicle Stocking Silhouette
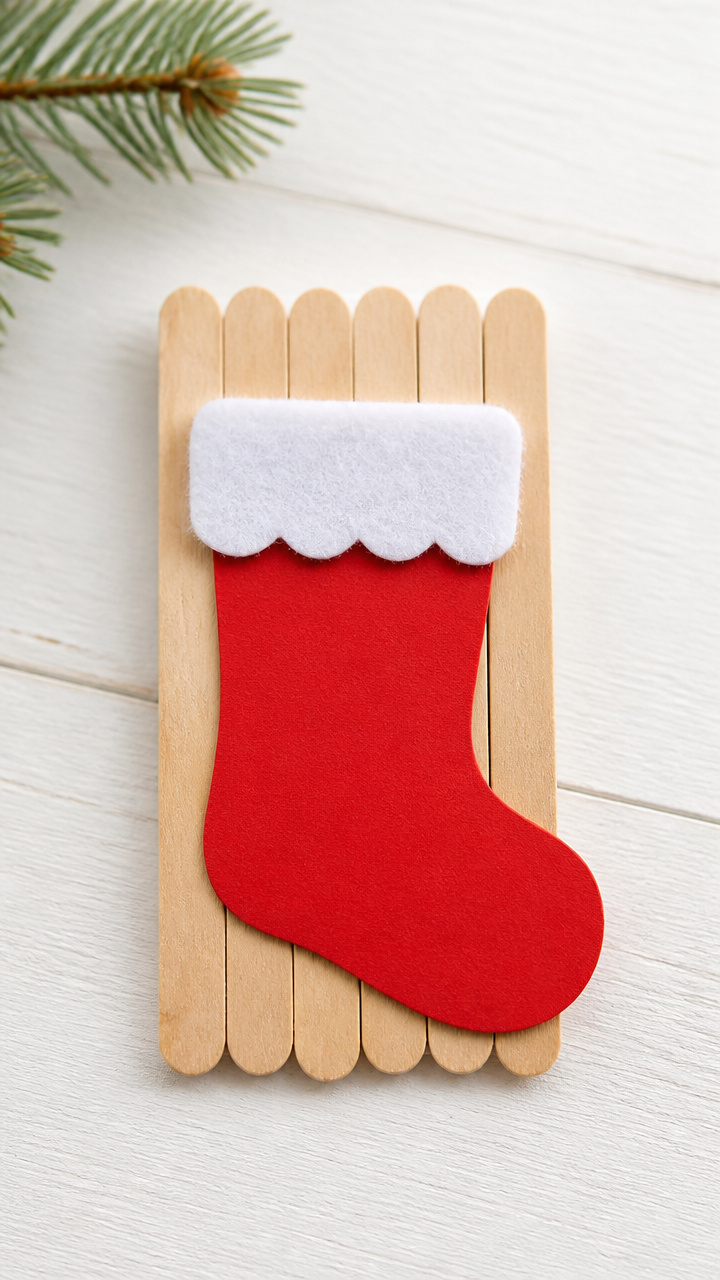
A classic stocking outline with a fluffy cuff brings cozy charm to your decor. Hang a row of these for instant festivity.
Materials Needed
- 1 natural popsicle stick
- red construction paper, 5×7 inches
- white felt sheet, 3×3 inches
- white school glue
- scissors
- hole punch
- ribbon, 6 inches
How to Make It
- Cut a stocking shape from the red paper using scissors, about 4 inches tall with a rounded toe and curved top.
- Cut a 1-inch high strip from the white felt for the cuff and glue it across the top edge of the stocking.
- Glue the popsicle stick vertically down the back center for support.
- Punch a hole at the top left corner and thread the ribbon through for hanging.
- Let dry completely for 30 minutes before displaying.
9. Snowman Face Ornament
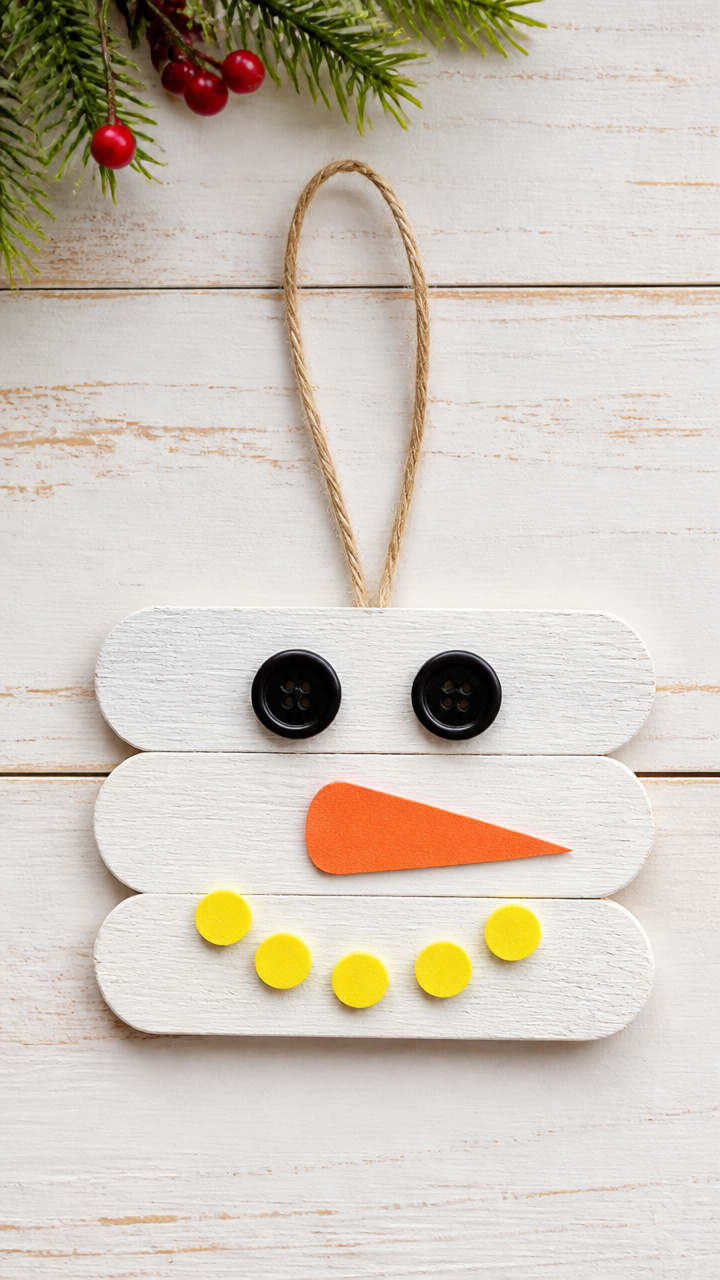
Three stacked circles form a cheerful snowman face you can hang anywhere. Its carrot nose and coal eyes bring instant smiles.
Materials Needed
- 3 natural popsicle sticks
- white acrylic paint
- orange construction paper
- black button, 6mm, 2 pieces
- yellow craft foam
- white school glue
- paintbrush
- scissors
- ribbon, 8 inches
How to Make It
- Paint all three sticks white and lay flat to dry for 20 minutes.
- Cut one stick in half and glue the halves vertically to the back of one full stick to form arms.
- Cut a small triangle from orange paper for the nose and a tiny circle from yellow foam for the mouth.
- Glue the buttons on for eyes, add the nose in the center, and the mouth below.
- Tie ribbon to the top for hanging and let glue cure for 30 minutes.


10. Candy Cane Decor Frame
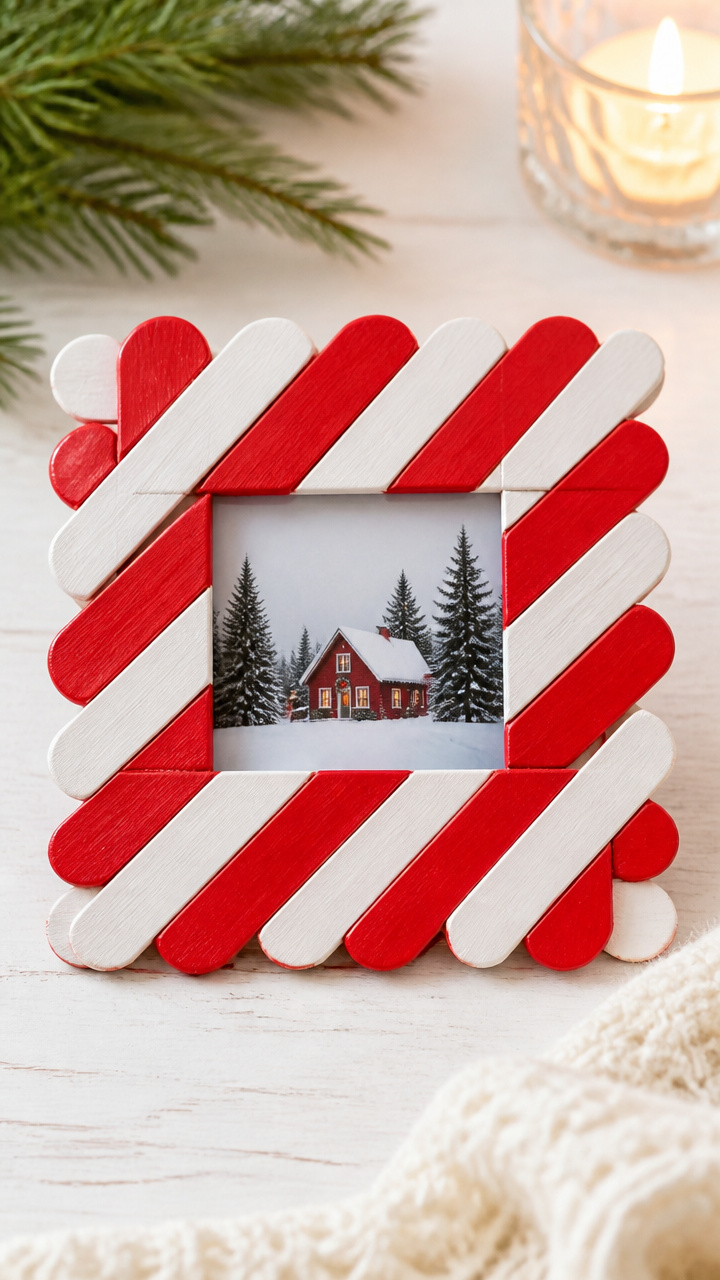
Red and white striped sticks form a mini frame that mimics a candy cane twist. Slip in a photo or drawing for a sweet gift.
Materials Needed
- 8 natural popsicle sticks
- red acrylic paint
- white acrylic paint
- white school glue
- small printed photo, 2×2 inches
- paintbrush
- scissors
- clear tape
How to Make It
- Paint four sticks red and four white, letting them dry for 15 minutes each.
- Draw diagonal white stripes on the red sticks using white paint and let dry 10 minutes.
- Arrange two red striped sticks vertically and two white sticks horizontally to form a square frame, gluing corners together.
- Tape the photo to the back of the frame and reinforce edges with extra glue.
- Let dry for 30 minutes before displaying on a shelf.


11. Christmas Wreath Wall Art
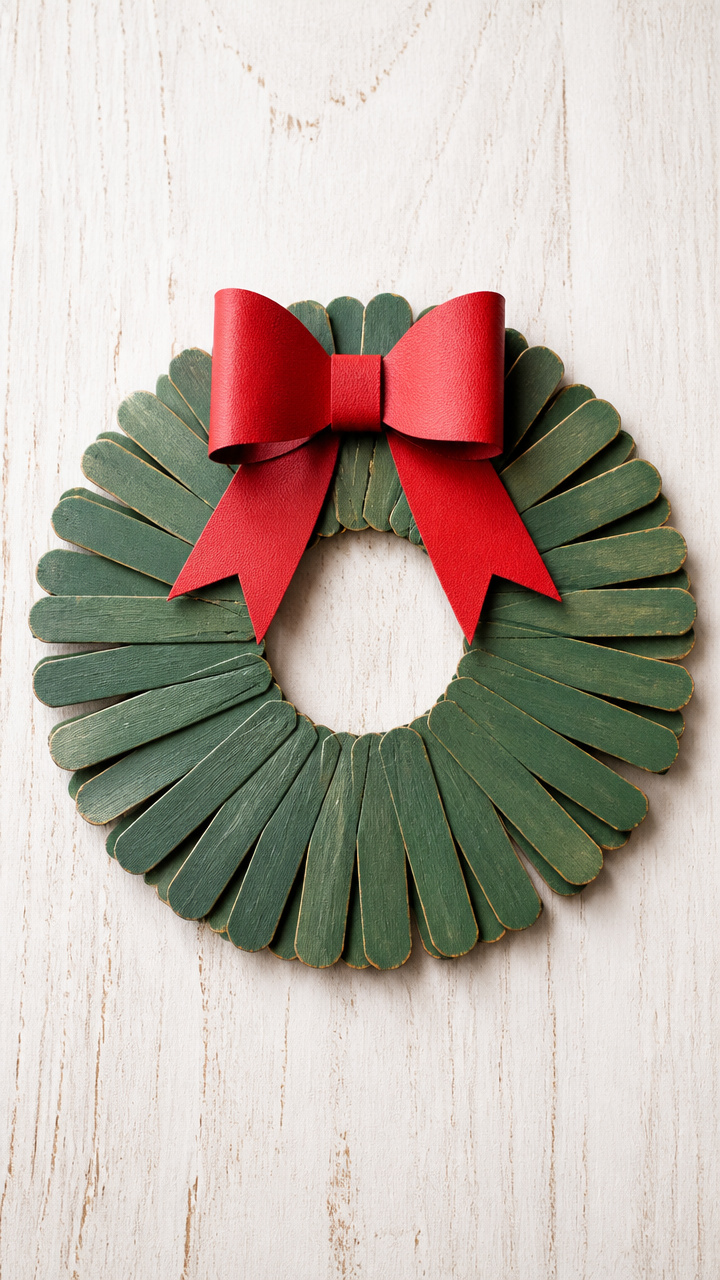
A circular base wrapped with green sticks forms a lush wreath with a bold red bow. This piece looks great grouped with others.
Materials Needed
- 18 natural popsicle sticks
- green acrylic paint
- red craft paper
- white school glue
- cardboard circle, 4 inches diameter
- paintbrush
- scissors
- hole punch
How to Make It
- Paint 16 sticks green and let dry for 20 minutes.
- Glue the painted sticks around the edge of the cardboard circle, standing them upright and side by side.
- Cut a small bow shape from red paper and glue it to the bottom of the wreath.
- Punch a hole at the top of the cardboard and thread a loop of glue-dipped string through for hanging.
- Let the entire piece dry for 40 minutes before display.


12. North Pole Marker Sign
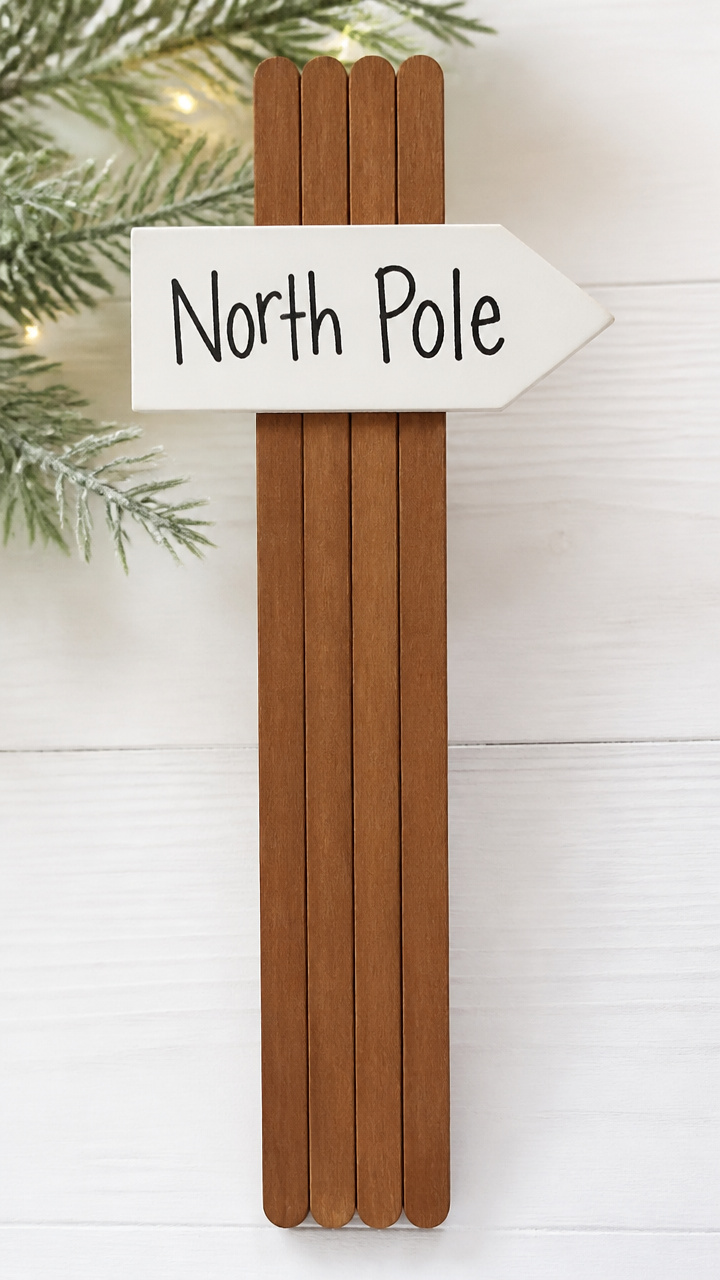
A tall signpost with directional arrows points the way to holiday magic. Kids love seeing this near the tree.
Materials Needed
- 5 natural popsicle sticks
- brown acrylic paint
- white cardstock, 3×5 inches
- black marker
- white school glue
- paintbrush
- scissors
- ruler
How to Make It
- Paint four sticks brown and let dry for 15 minutes.
- Glue three sticks vertically end to end to form a long post and let dry 30 minutes.
- Cut the cardstock into a rectangle and write 'North Pole 1 Mile' with the black marker.
- Glue the sign to the top of the post using the fifth stick as a horizontal brace behind it.
- Let dry completely before placing on a shelf.
13. Gingerbread House Model
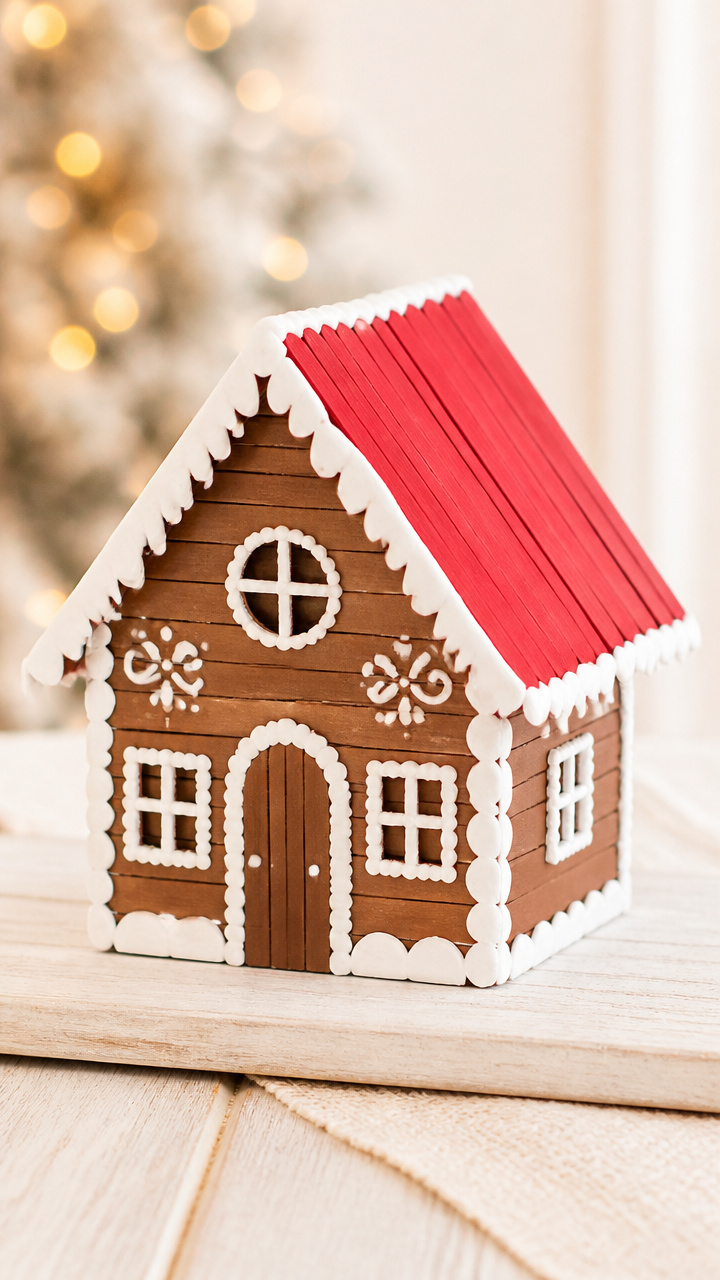
A miniature house with slanted roof and door details looks good enough to eat. Display it on a side table or mantle.
Materials Needed
- 12 natural popsicle sticks
- brown acrylic paint
- red craft paper
- white school glue
- white puffy paint
- paintbrush
- scissors
- ruler
How to Make It
- Paint all sticks brown and let dry for 20 minutes.
- Glue four sticks into a square for the base and four more upright at each corner for walls.
- Cut two sticks to 2.5 inches and glue them at an angle on top to form a peaked roof.
- Cut a small rectangle from red paper for the door and glue it to the front wall.
- Squeeze white puffy paint along the roof edges and door frame, then let dry overnight.


14. Santa’s Ladder Accessory
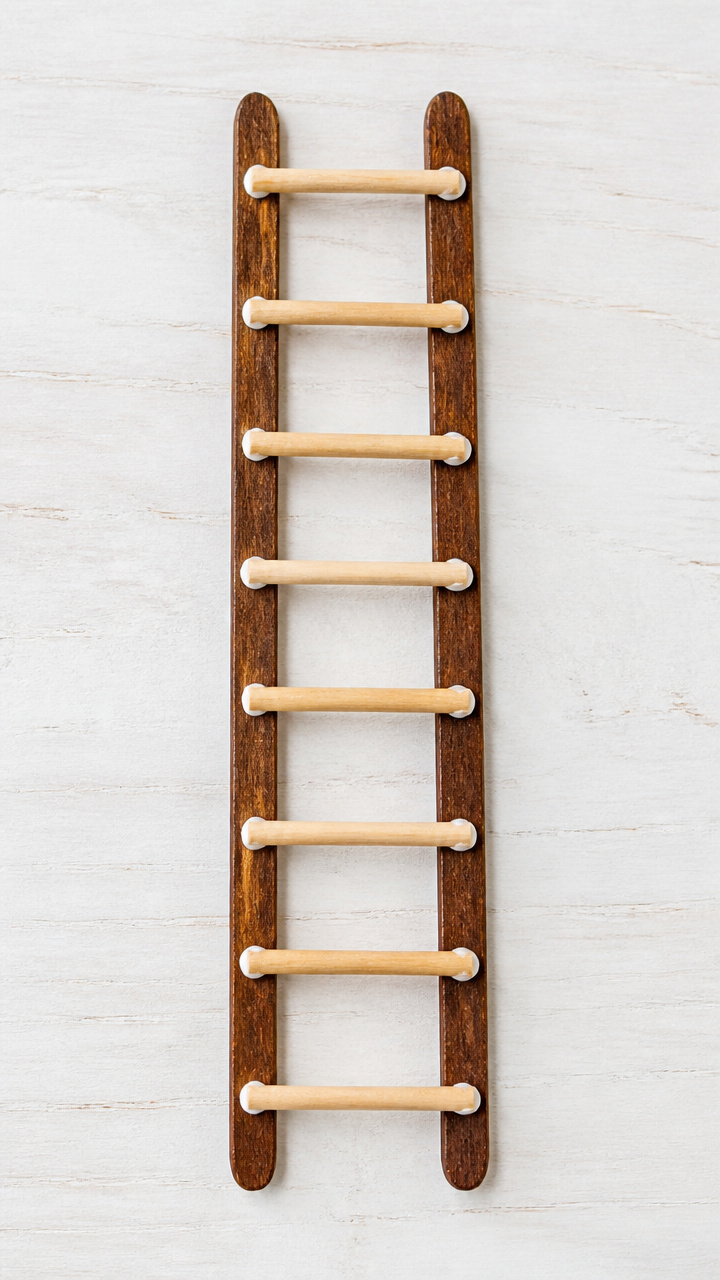
A tiny ladder built with rungs and side rails invites playful storytelling beside toys or trees. It feels like Santa just climbed up.
Materials Needed
- 7 natural popsicle sticks
- brown acrylic paint
- white school glue
- paintbrush
- ruler
How to Make It
- Paint all sticks brown and let dry for 15 minutes.
- Lay two full sticks parallel, 2 inches apart, on a flat surface.
- Cut five sticks in half to make 10 rungs and glue one every half inch between the long sticks.
- Press each rung down firmly and wipe away excess glue with a fingertip.
- Let the ladder dry undisturbed for 40 minutes before placing near decor.
15. Holiday Countdown Calendar
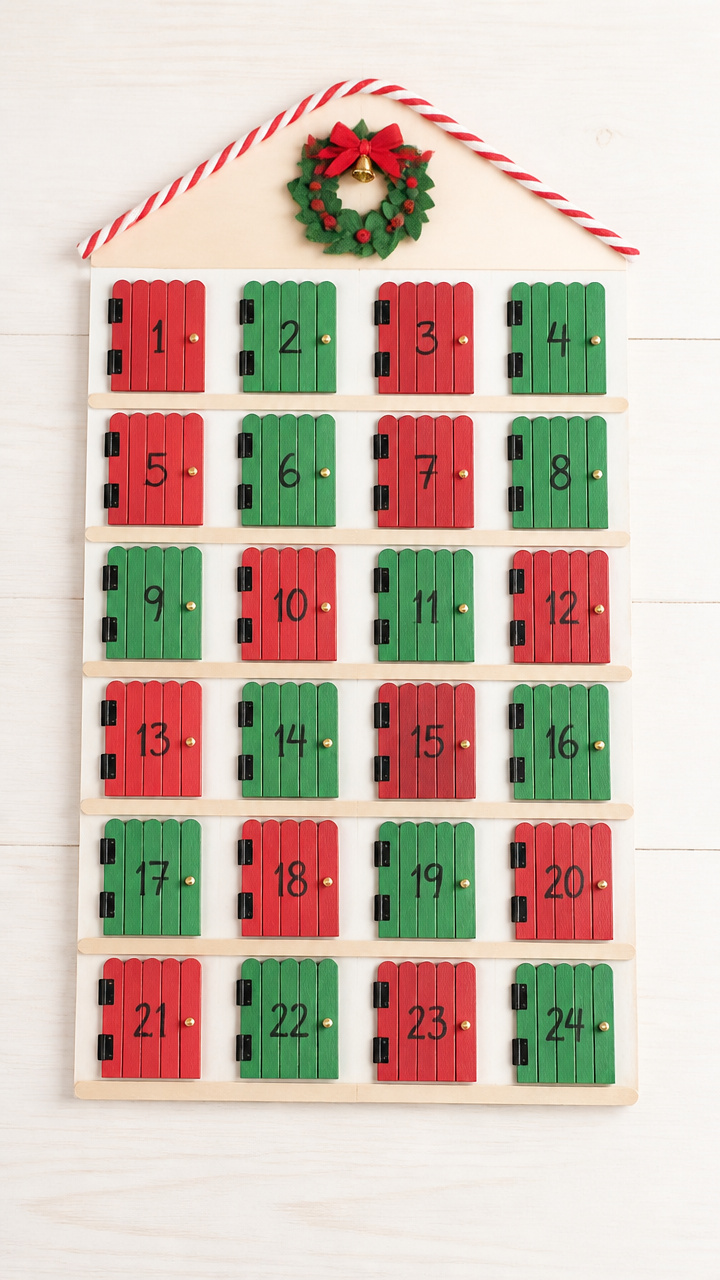
Small numbered doors open to reveal hidden messages or candies. Each day builds excitement with hands-on fun.
Materials Needed
- 24 natural popsicle sticks
- green and red acrylic paint
- white cardstock, A4 size
- white school glue
- markers
- scissors
- ruler
- paper clips, 24
How to Make It
- Paint 12 sticks red and 12 green, alternating, and let dry for 20 minutes.
- Cut the cardstock into 24 small rectangles, each 1×1.5 inches, and write numbers 1 to 24 on them.
- Glue a painted stick vertically to the back of each card to form a door hinge.
- Attach each door to the main cardstock sheet with a paper clip at the top so it can flip open.
- Write a note or draw a symbol behind each door, then let everything dry for 30 minutes.


You’ve got everything you need to start creating right now. Grab your glue, gather the sticks, and let your hands make something joyful this season.