15 Fun Letter G Crafts for Preschoolers Using Simple Supplies
Little hands love to create, and learning the letter G becomes a joyful adventure when it’s wrapped in glue, glitter, and giggles. These crafts use supplies you likely already have at home and turn everyday moments into playful lessons.
Each one builds fine motor skills while keeping the focus on fun. You’ll find painting, cutting, stamping, and even squishing—because preschoolers learn best when they’re moving and making.
1. Glittery Glue G Art
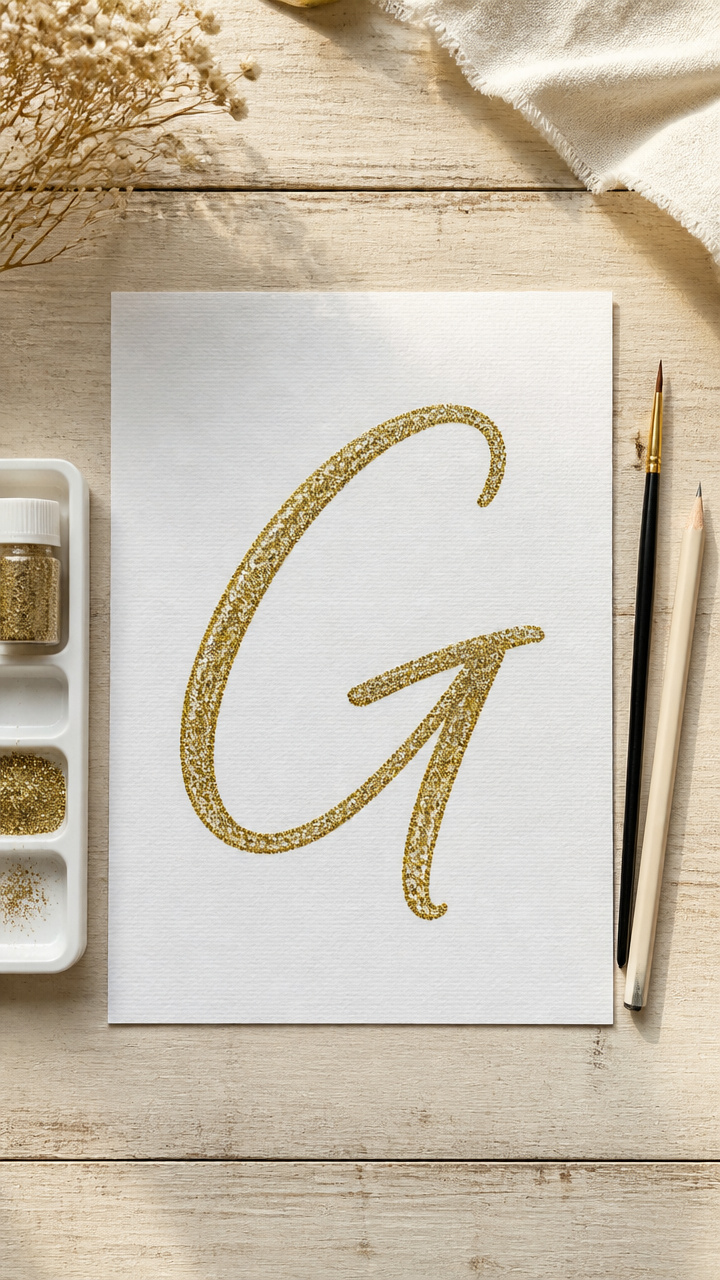
Shimmery swirls of glue and glitter form a bold letter G that catches every bit of light. This sensory-rich craft sticks to paper and sticks in memory.
Materials Needed
- A4 white cardstock
- White school glue
- Fine gold glitter
- Small plastic tray
- Pencil
- Paintbrush
How to Make It
- Draw a large uppercase G on the cardstock with pencil, making the line thick and smooth.
- Use a paintbrush to trace over the pencil line with white school glue, filling the width evenly.
- Pour gold glitter into the tray and gently press the glued paper face down into it.
- Lift the paper and tap off excess glitter over the tray, then let dry flat for 30 minutes.
2. Garden G Bug Hunt
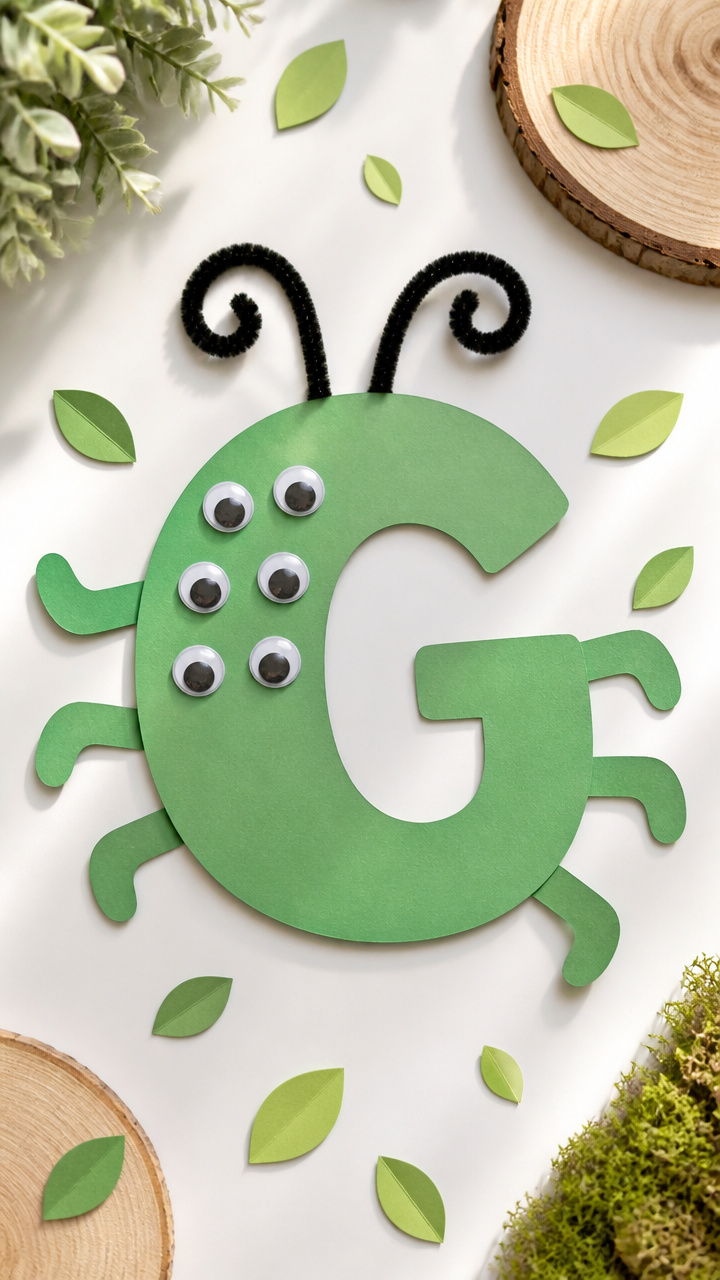
Tiny googly eyes and pipe cleaners become garden bugs crawling around a green G. This craft encourages storytelling and tiny finger movements.
Materials Needed
- Green construction paper
- Googly eyes (6mm)
- Black pipe cleaners
- White glue
- Scissors
- Pencil
How to Make It
- Cut the green paper in half and draw a large G on one piece with pencil.
- Snip pipe cleaners into 1 inch pieces for bug legs and antennae.
- Glue two eyes and four leg pieces onto each side of the top curve of the G to make two bugs.
- Let dry for 20 minutes before flipping or moving.
3. Giraffe Paper Plate Craft
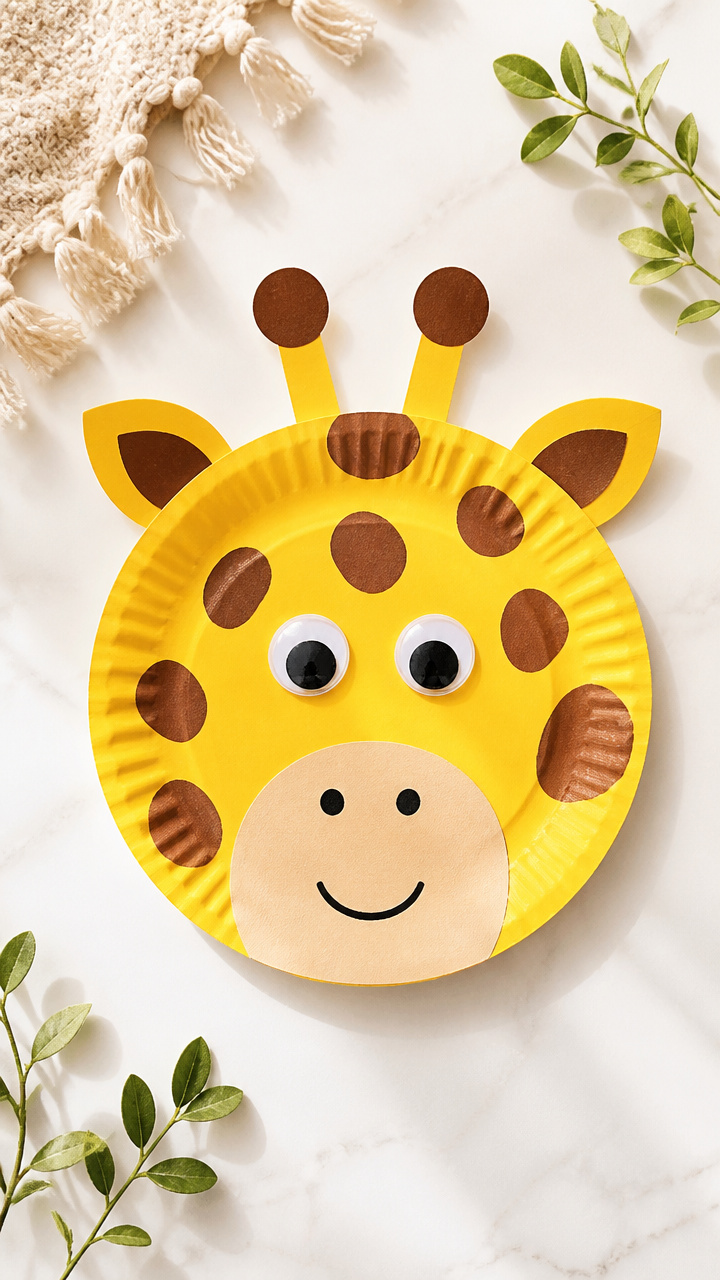
A sunny yellow giraffe with a spotted pattern peers out from behind its big G-shaped neck. Kids love matching colors to shapes here.
Materials Needed
- Paper plate
- Yellow acrylic paint
- Paintbrush
- Brown marker
- Googly eyes (12mm)
- Glue
- Scissors
How to Make It
- Paint the entire paper plate yellow and let dry for 20 minutes.
- Cut the edge of the plate to form a neck shaped like a backward C, connecting to the round body as a G.
- Draw brown spots all over the giraffe’s body with the marker.
- Glue on two googly eyes near the top of the neck and let dry completely.
4. Grass Texture Rubbing
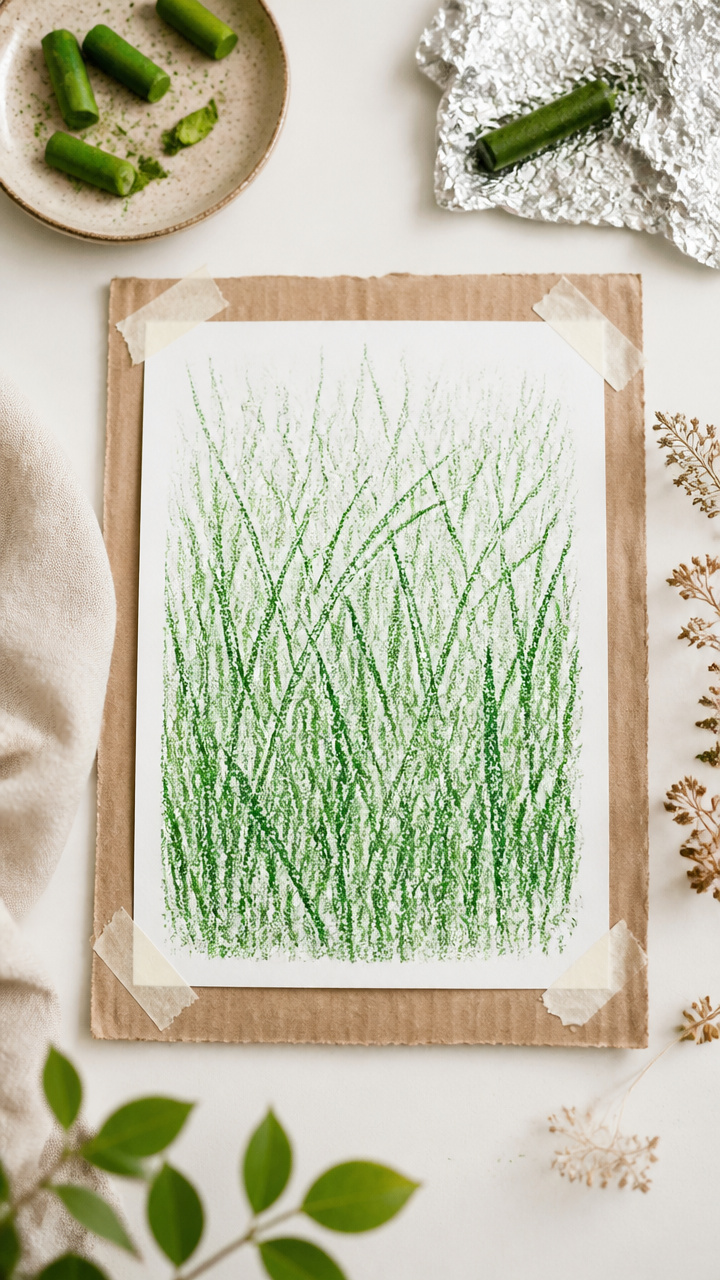
Crumpled paper and crayons reveal a bumpy green G that feels just like real grass. This tactile art teaches texture through touch.
Materials Needed
- Green crayon (peeled)
- White drawing paper
- Aluminum foil
- Tape
- Cardboard scrap
How to Make It
- Crumple the foil tightly, then flatten slightly and tape it to the cardboard.
- Place the drawing paper over the foil and trace a large G shape with the green crayon using firm pressure.
- Color inside the rubbed G outline to make it stand out clearly.
- Feel the bumpy surface with your fingertips and talk about how it reminds you of grass.
5. Glow Stick G Letters
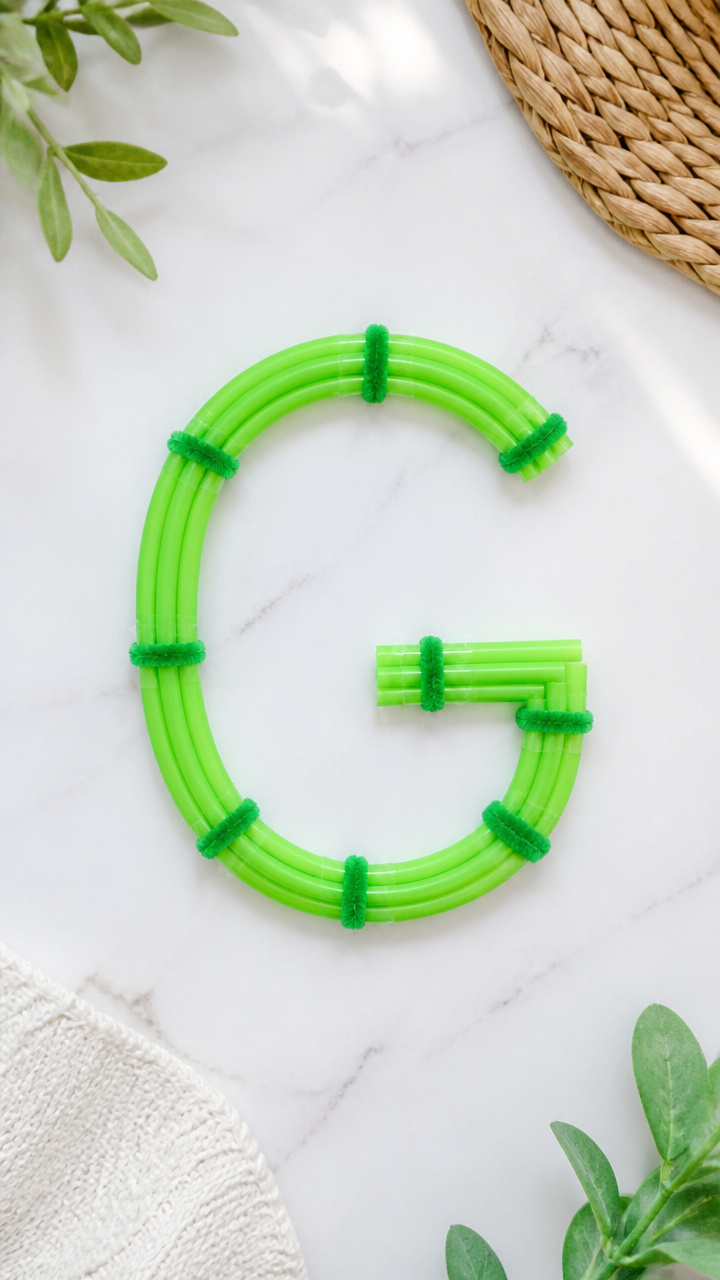
Plastic straws bent into glowing G shapes light up any room. Bendable and bright, these are perfect for dark corners or pretend play.
Materials Needed
- Green plastic straws (6 per child)
- Pipe cleaner (green)
- Scissors
- Tape
How to Make It
- Bend one straw into a large G shape, using fingers to form the curve and straight stem.
- Cut small slits at the ends of the G where pieces meet and insert the next straw to extend thickness.
- Thread a green pipe cleaner through the center of all straws to reinforce the shape.
- Twist the ends of the pipe cleaner together at the bottom to secure and trim excess with scissors.
6. Gummy Bear Counting Frame
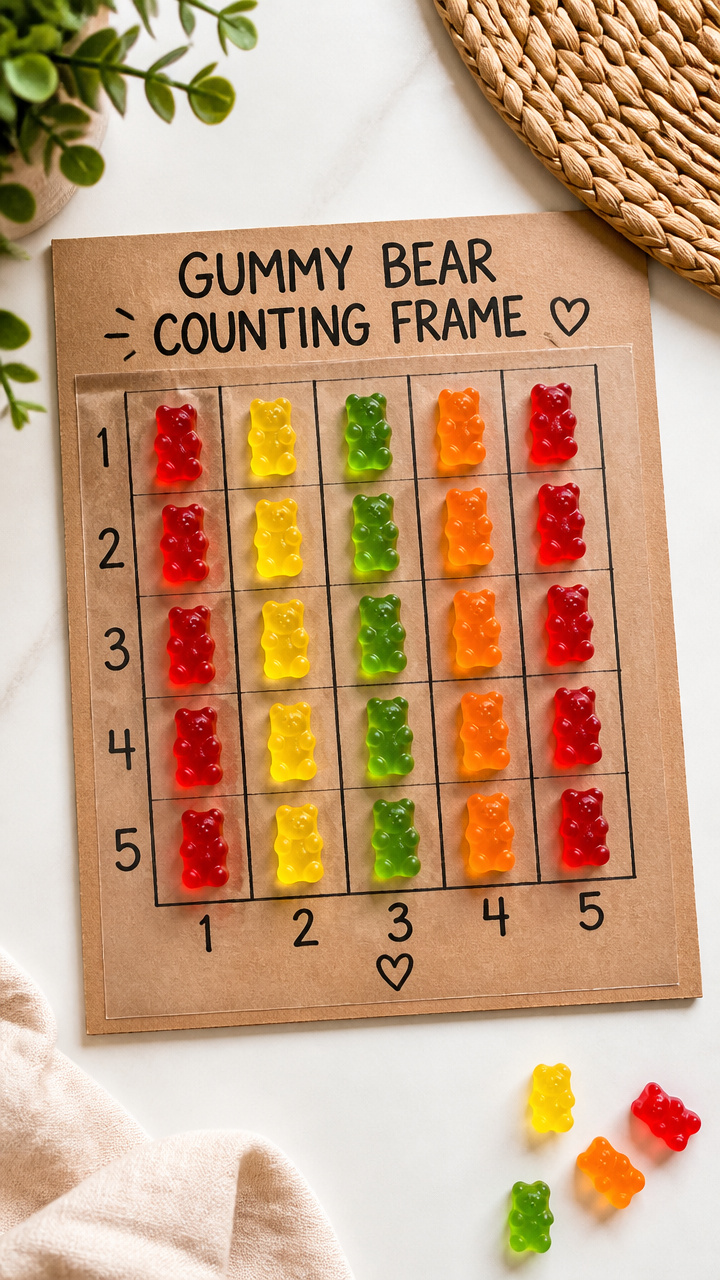
Clear contact paper holds colorful gummy bears in a G outline while building early counting skills. Sticky fun with zero mess.
Materials Needed
- Clear contact paper (12×18 inch sheet)
- Red, yellow, green, orange gummy bears
- Scissors
- Black marker
- Cardboard base
How to Make It
- Draw a large G on the cardboard with black marker and cut it out carefully.
- Peel the backing off the contact paper and place the sticky side up on the table.
- Arrange gummy bears along the outline of the G, pressing each gently into the adhesive.
- Cover with another layer of contact paper sticky side down to seal and trim edges.
7. Garage Playdough Press
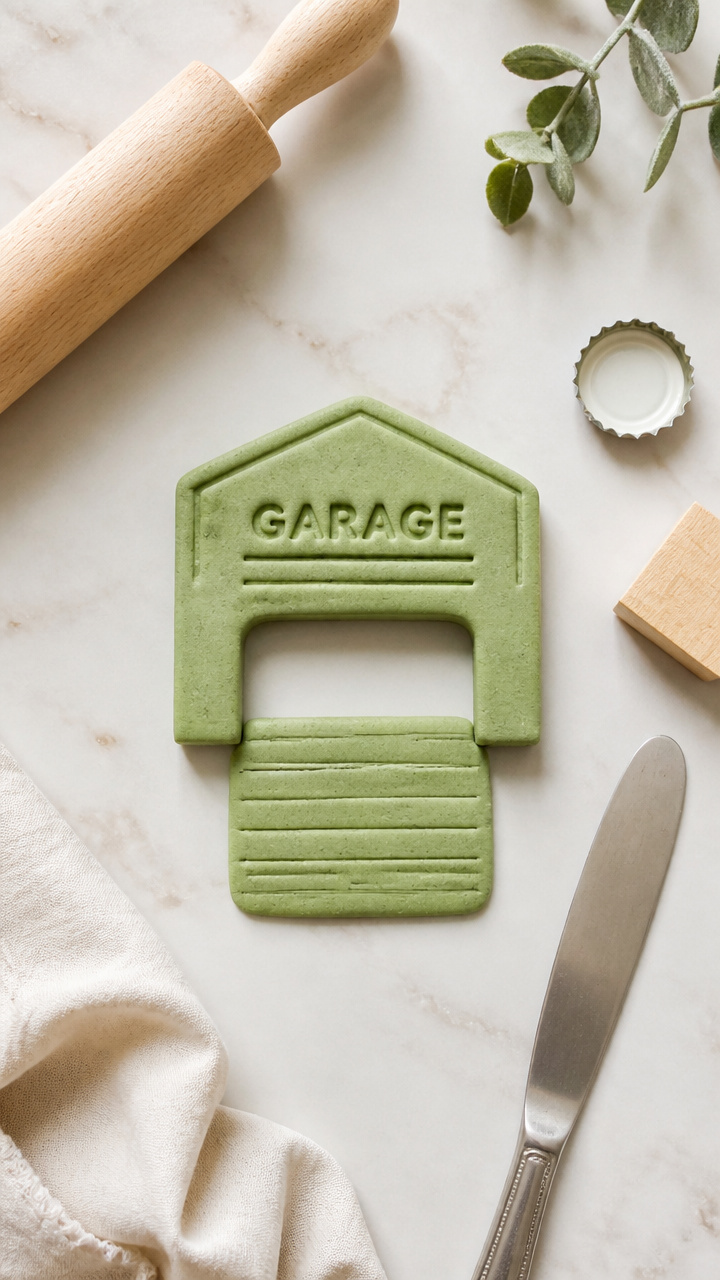
Homemade playdough gets rolled and pressed into a garage-shaped G using bottle caps and blocks. Squishy learning never looked so cool.
Materials Needed
- Homemade salt dough (1 cup flour, 1/2 cup salt, 1/2 cup water, green food coloring)
- Rolling pin
- Plastic bottle cap (2 inch diameter)
- Wooden block (1×1 inch)
- Knife (butter knife, blunt)
How to Make It
- Mix flour, salt, water, and 3 drops green food coloring in a bowl until smooth.
- Roll the dough to 1/2 inch thickness on a clean surface using the rolling pin.
- Press the bottle cap into the dough to form the curved part of the G.
- Use the wooden block to stamp the straight line and carve details with the butter knife.
8. Globe Cotton Ball Map
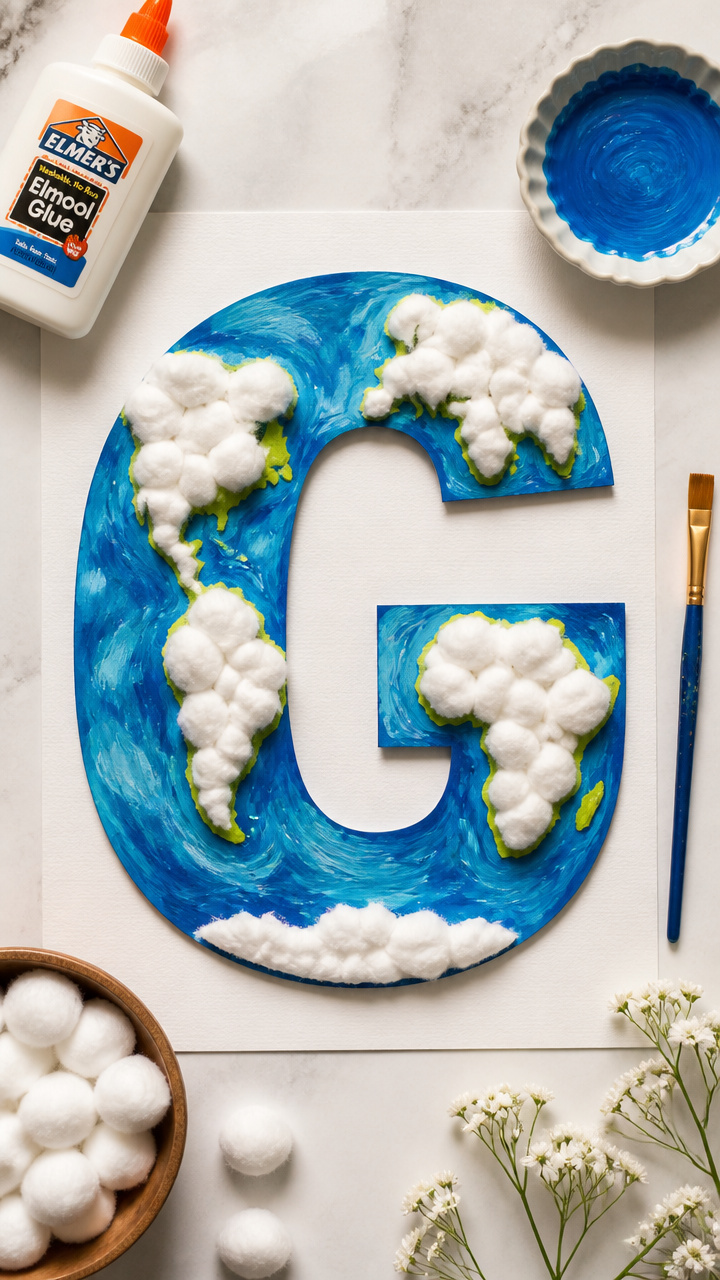
Soft cotton balls form continents on a blue-painted G shaped like a globe. Geography meets letter recognition in this squishy world craft.
Materials Needed
- Blue acrylic paint
- A4 white cardstock
- Cotton balls
- White glue
- Paintbrush
- Pencil
How to Make It
- Paint the entire cardstock blue and let dry flat for 25 minutes.
- Draw a large rounded G on the paper with pencil, making the curve wide like a globe.
- Dab glue inside the G shape and pinch cotton balls to fit like landmasses.
- Press each cotton ball gently into the glue and let dry overnight.
9. Garden Spoon Stamps
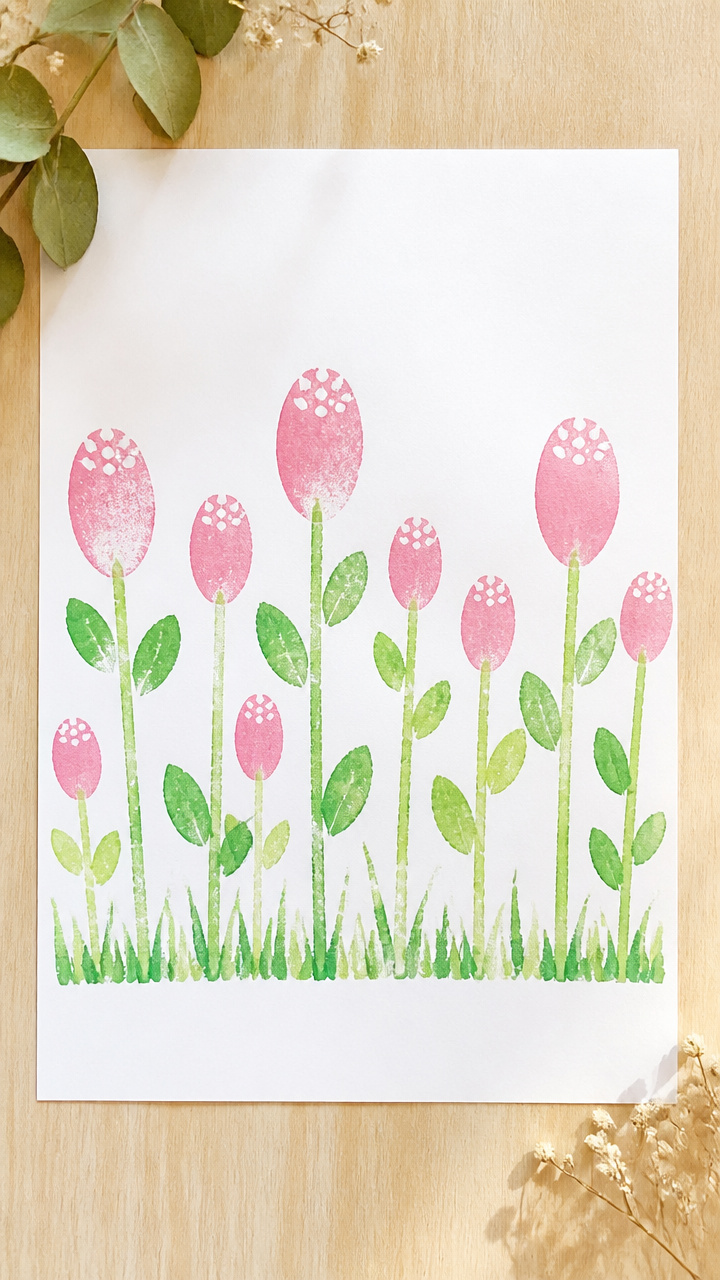
Wooden spoons dipped in paint become garden tools that stamp flower pots along a growing G. Messy, rhythmic, and full of discovery.
Materials Needed
- Wooden spoon
- Green acrylic paint
- Pink acrylic paint
- A4 white drawing paper
- Paint tray
- Pencil
How to Make It
- Draw a large G on the paper with pencil, leaving space between lines for stamps.
- Pour green and pink paint into separate sections of the tray.
- Dip the spoon bowl into green paint and stamp stems along the G line.
- Dip the handle end into pink paint and add flower heads at the top of each stem.
10. Giant G Mosaic
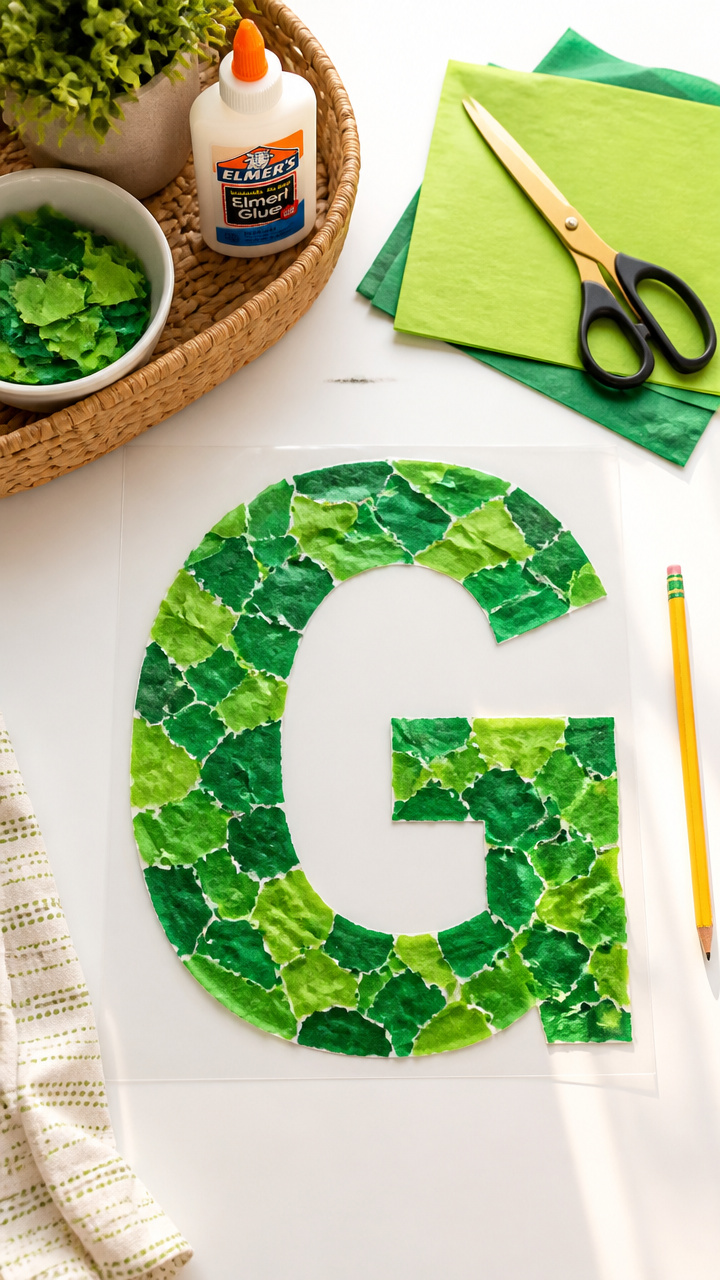
Colorful tissue paper squares stick to a giant G to form a stained glass effect. Layering tiny pieces builds patience and color sense.
Materials Needed
- Green tissue paper
- Scissors
- White glue
- A4 clear contact paper
- Pencil
- Tray
How to Make It
- Draw a large G on the contact paper with pencil and place sticky side up on the tray.
- Cut tissue paper into 1 inch squares in assorted shades of green.
- Dab glue on the sticky area and press tissue squares close together to fill the G.
- Let dry completely before peeling off the backing and hanging in a window.
11. Grapevine Leaf Collage
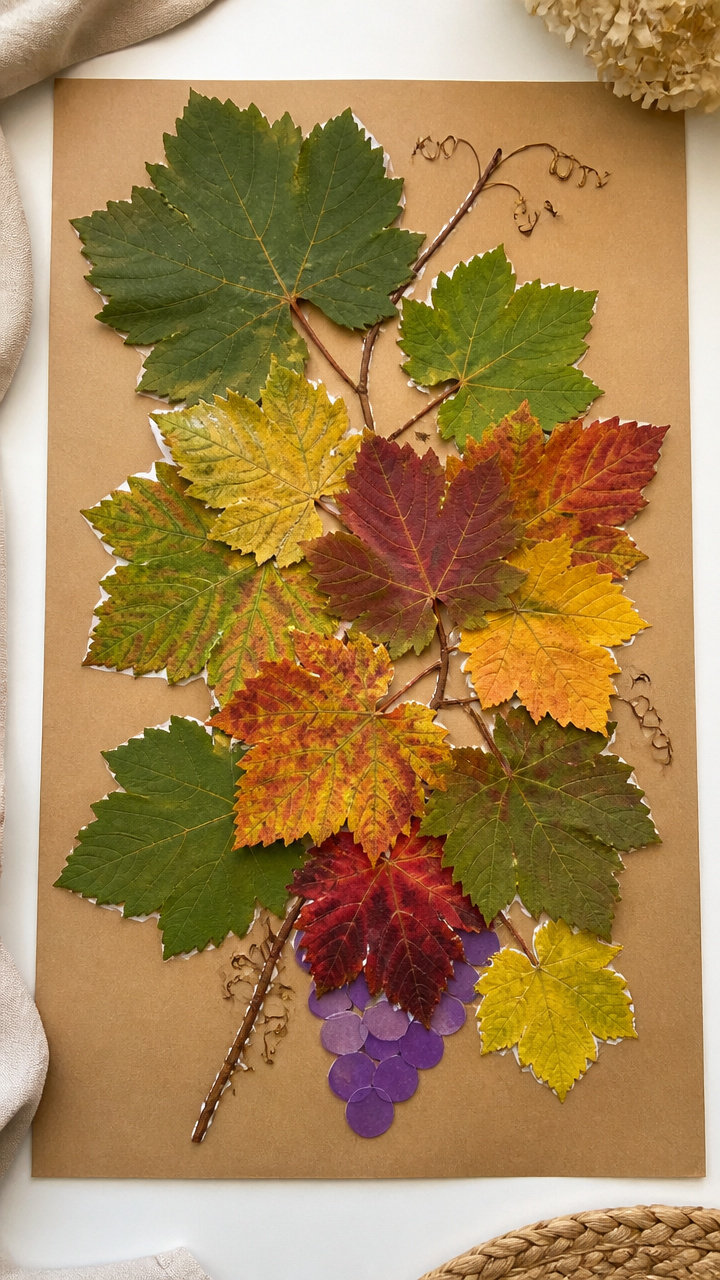
Real dried leaves arranged in a swirling G shape bring the outdoors in. Nature’s texture makes every craft one of a kind.
Materials Needed
- 5 dried grapevine leaves
- Brown construction paper
- White glue
- Paintbrush
- Scissors
How to Make It
- Arrange the leaves on the brown paper to form a flowing G shape, overlapping slightly.
- Use the paintbrush to apply a thin layer of glue to the back of each leaf.
- Press each glued leaf firmly onto the paper in place.
- Let dry for 1 hour before displaying on a shelf or wall.
12. Giggle Face Popsicle Mask
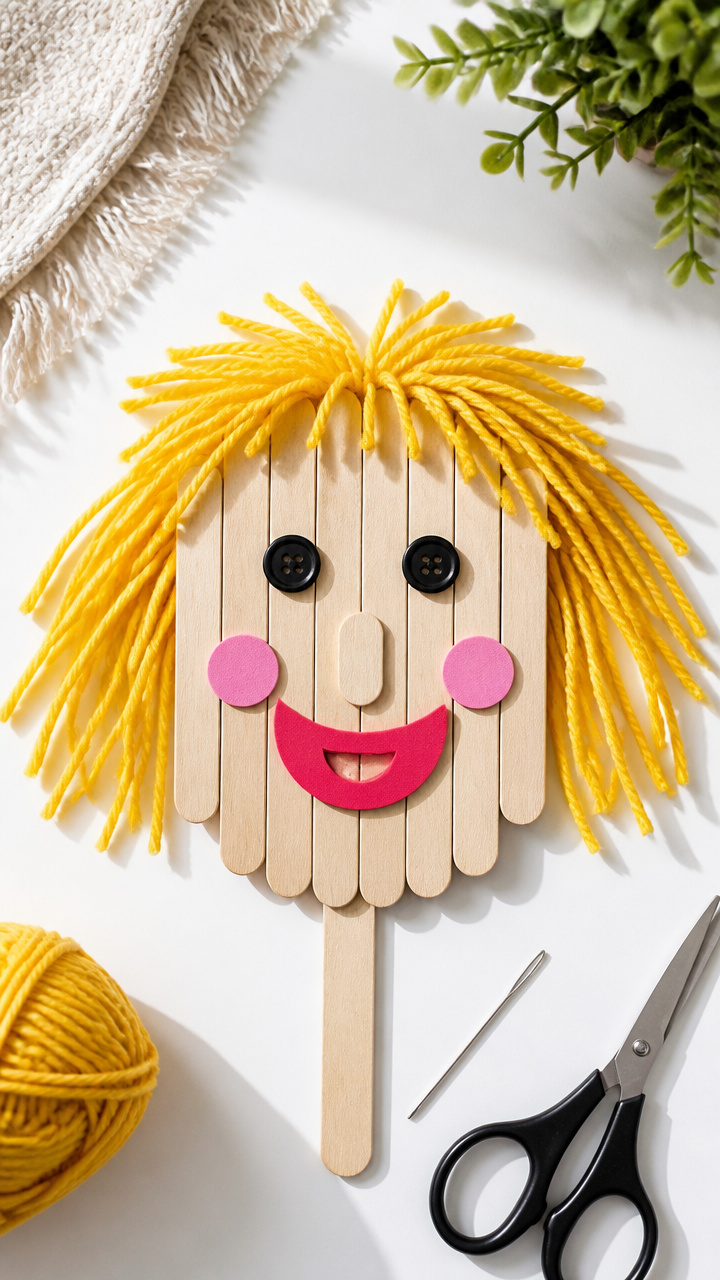
A smiling G-shaped mask made from popsicle sticks dances with yarn hair and button eyes. Perfect for storytelling or parade play.
Materials Needed
- 10 flat popsicle sticks
- White glue
- Yarn (yellow)
- Two black buttons (10mm)
- Needle (blunt)
- Scissors
How to Make It
- Glue five popsicle sticks end to end in a gentle curve to form the G shape, letting dry 30 minutes.
- Glue the remaining five sticks vertically across the open part of the G to form a face grid.
- Thread the needle with yellow yarn and knot at the top to make hair strands along the top edge.
- Sew a button at each end of the horizontal row for eyes and let dry overnight.
13. Glue Dot Geometric G
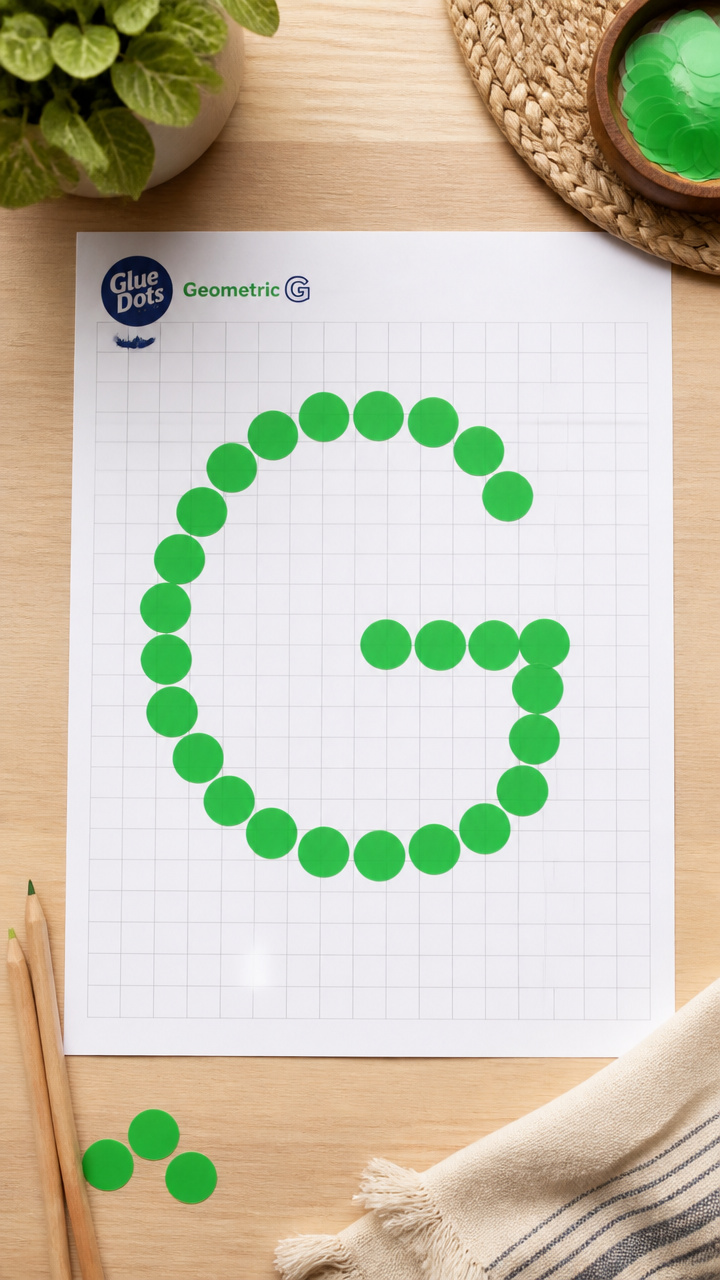
Colorful dot stickers snap into a grid to build a modern G. Clean, bright, and perfect for little sticker lovers.
Materials Needed
- Green dot stickers (1 inch, 20 count)
- Light gray grid paper (A4)
- Pencil
How to Make It
- Lightly sketch a block-style G on the grid paper using pencil lines that follow the squares.
- Peel one green dot sticker at a time and place it on each square along the pencil path.
- Fill the entire G shape by covering every marked square with a sticker.
- Double check that all dots are pressed down firmly and display proudly.
14. Gourd Painting Adventure
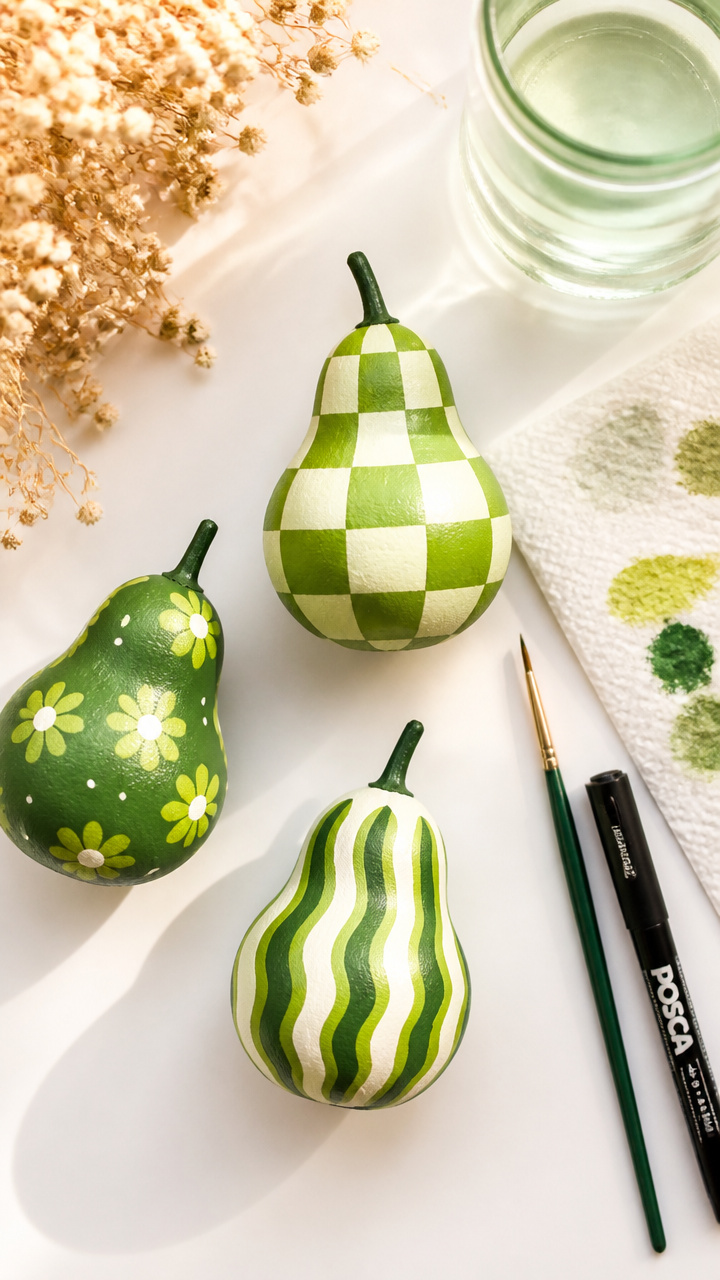
Mini faux gourds become wobbly canvases for painted G letters. Rolling shapes add challenge and laughter to brush control.
Materials Needed
- 3 mini foam gourds
- Green acrylic paint
- Thin paintbrush
- Black marker
- Cup of water
- Paper towel
How to Make It
- Wet the brush and dip in green paint, wiping excess on the paper towel.
- Paint a large G on the side of one gourd, using slow steady strokes.
- Rinse the brush and repeat for the other two gourds.
- Once dry, go over each G with the black marker to make it bold and clear.
15. Guitar String Art
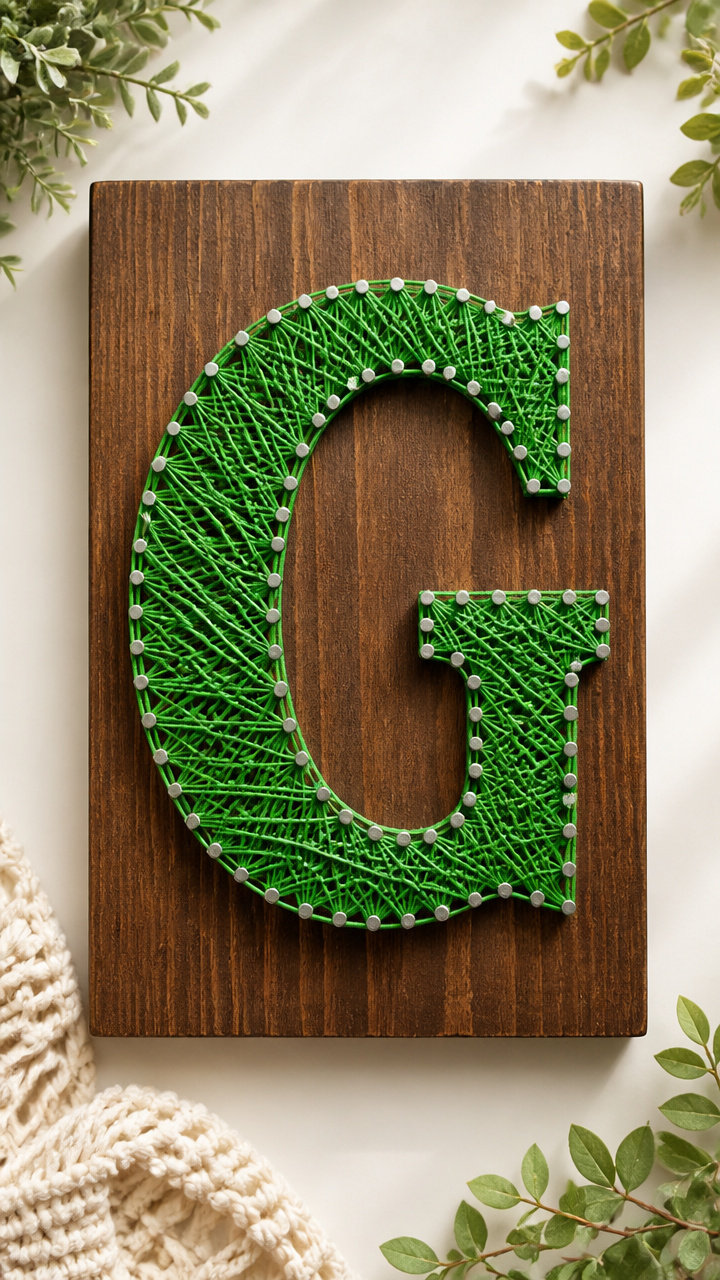
Nails and string wrap around a wooden board to form a musical G. This sturdy craft doubles as wall decor and rhythm play.
Materials Needed
- Small wood board (6×8 inch)
- 10 small nails (1 inch)
- Hammer
- Green embroidery floss
- Pencil
- Safety goggles
How to Make It
- Draw a large G on the board with pencil, spacing it evenly.
- Put on safety goggles and tap a nail into each sharp turn and curve point of the G, about 1 inch apart.
- Tie the floss end to the bottom nail and wrap it tightly around each nail in order.
- Continue wrapping until the G is filled with crisscrossing green thread and tie off at the last nail.
You’ve got everything you need right in your craft drawer to make learning the letter G a hands-on delight. Pick one, gather your little maker, and let the creating begin.