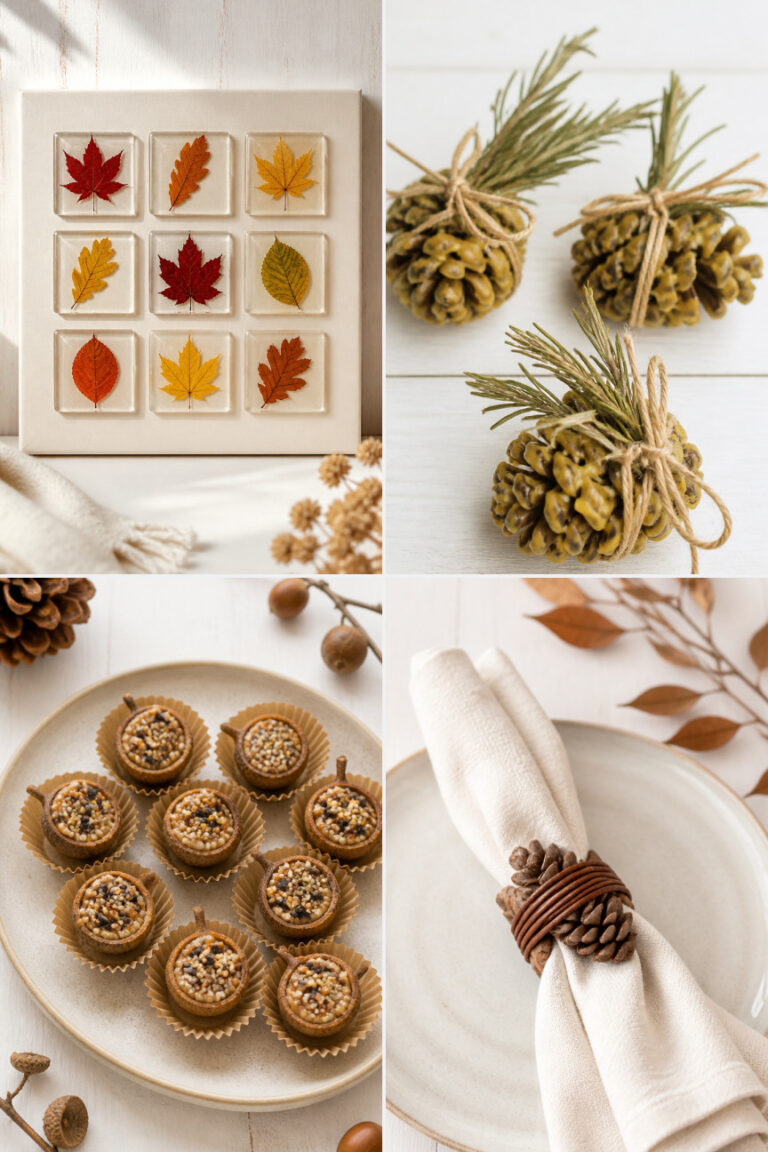
15 Thanksgiving Paper Crafts for Kids and Adults
Thanksgiving is a time for warmth, connection, and creativity. Filling your table and home with handmade touches brings a special charm no store-bought decor can match.
These paper crafts blend simple materials with thoughtful details. Whether you're crafting with little hands or creating something elegant for the centerpiece, each project feels meaningful and joyful to make.
1. Folded Leaf Place Cards
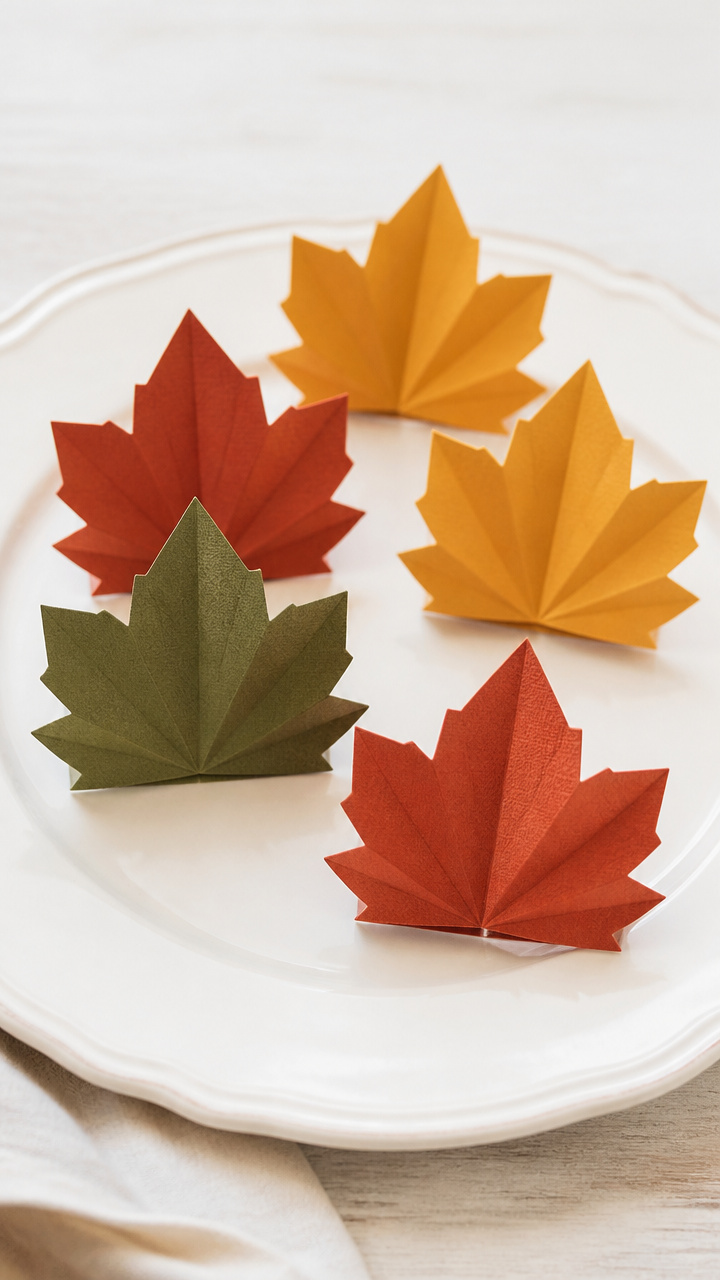
Crisp folded leaves in autumn colors hold guest names with quiet elegance. These double as both place cards and keepsakes.
Materials Needed
- 6 sheets of 6×6 inch textured craft paper in rust, mustard, and olive
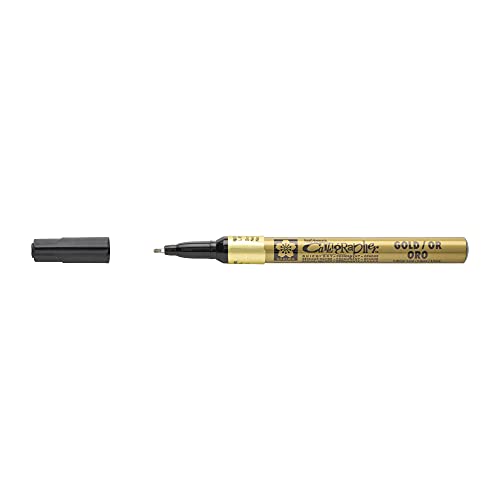
- Gold fine-tip calligraphy pen
- Ruler
- Bone folder
- Scissors
How to Make It
- Cut each 6×6 sheet into four 3×3 inch squares, yielding 24 total.
- Fold one square diagonally corner to corner to form a triangle, creasing sharply with the bone folder.
- Position the triangle with the long edge facing you, then fold the left and right corners up to meet at the top point, forming a leaf shape.
- Write a guest’s name in cursive along the center ridge using the gold pen, letting it dry for 90 seconds.


2. Hand-Printed Turkey Napkin Rings
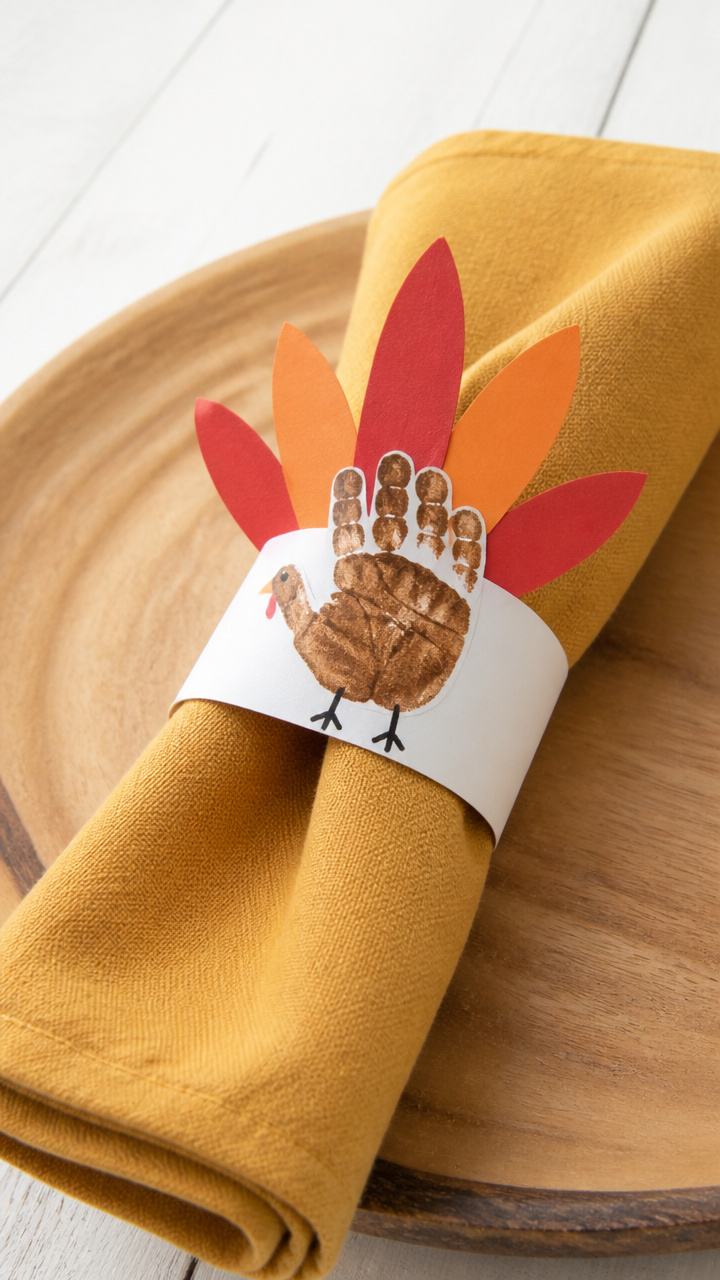
Kids’ handprints become playful turkeys when turned sideways and dressed with simple details. These add whimsy to cloth napkins.
Materials Needed
- Brown washable stamp pad
- White cardstock, 8.5×11 inches, 8 sheets
- Black fine-tip marker
- Red and orange construction paper, 1 sheet each
- Glue stick
- Scissors
- 1-inch wide green ribbon, 2 yards
How to Make It
- Press a child’s palm and fingers firmly onto the stamp pad, covering fully but not dripping.
- Stamp the handprint horizontally on the cardstock so fingers point right, leaving space on the left for the body.
- Cut out a small oval from brown cardstock for the turkey body and glue it to the heel of the handprint.
- Draw eyes and a beak with the black marker, then cut feather shapes from red and orange paper and glue them behind the body.
- Cut ribbon into eight 9-inch lengths and glue each around a napkin, attaching the turkey cutout to the front with glue.


3. Tissue Paper Harvest Window Display
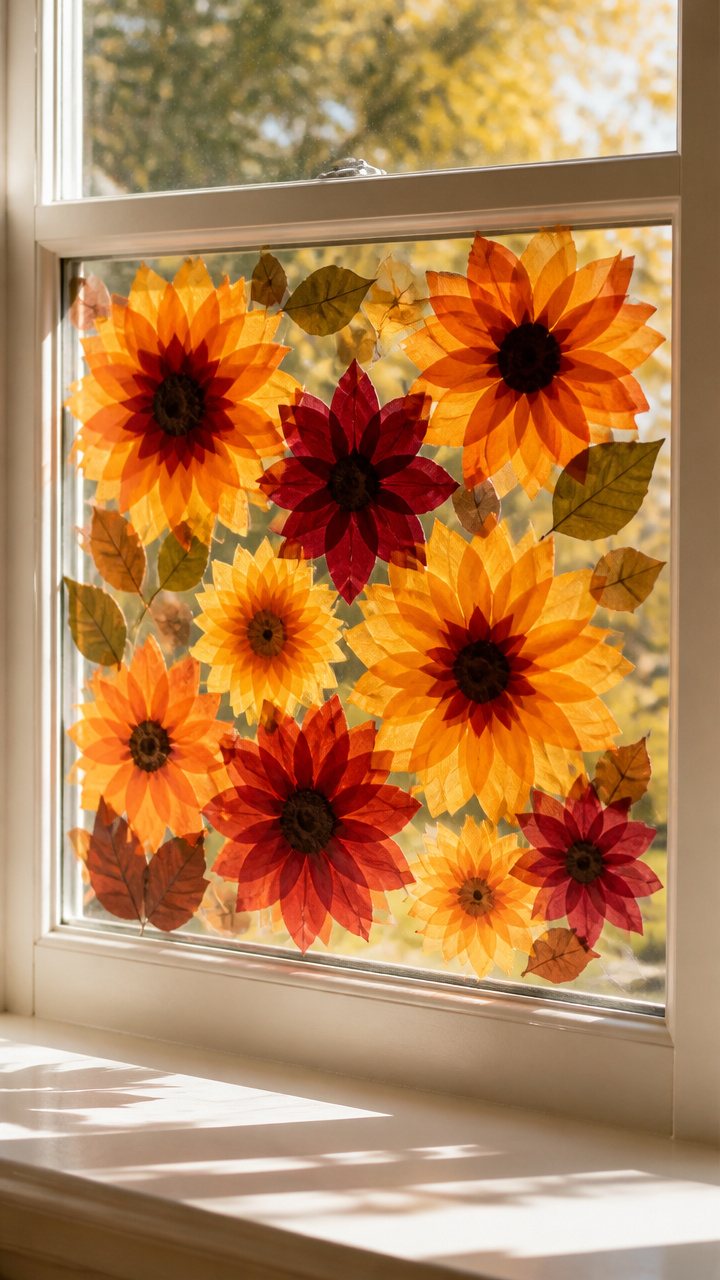
Layered tissue flowers in harvest hues glow when backlit by sunlight. This temporary mural brightens any window.
Materials Needed
- Orange, yellow, and deep red tissue paper, 20 sheets each
- Clear contact paper, 18×24 inches
- Pencil
- Scissors
- Ruler
How to Make It
- Cut tissue paper into 6×6 inch squares, stacking three colors together to make multilayered blooms.
- Fold each stack accordion-style three times, making 1.5 inch pleats, then staple once at the center.
- Fan open the layers gently and bend outward to form a full flower, repeating until you have 15 blooms.
- Peel the backing off the contact paper and press each flower sticky-side down, clustering them like a vine near the top corner of the sheet.
- Hang the display on a window using tape on all four corners, ensuring smooth contact with the glass.


4. Paper Weaving Table Runner
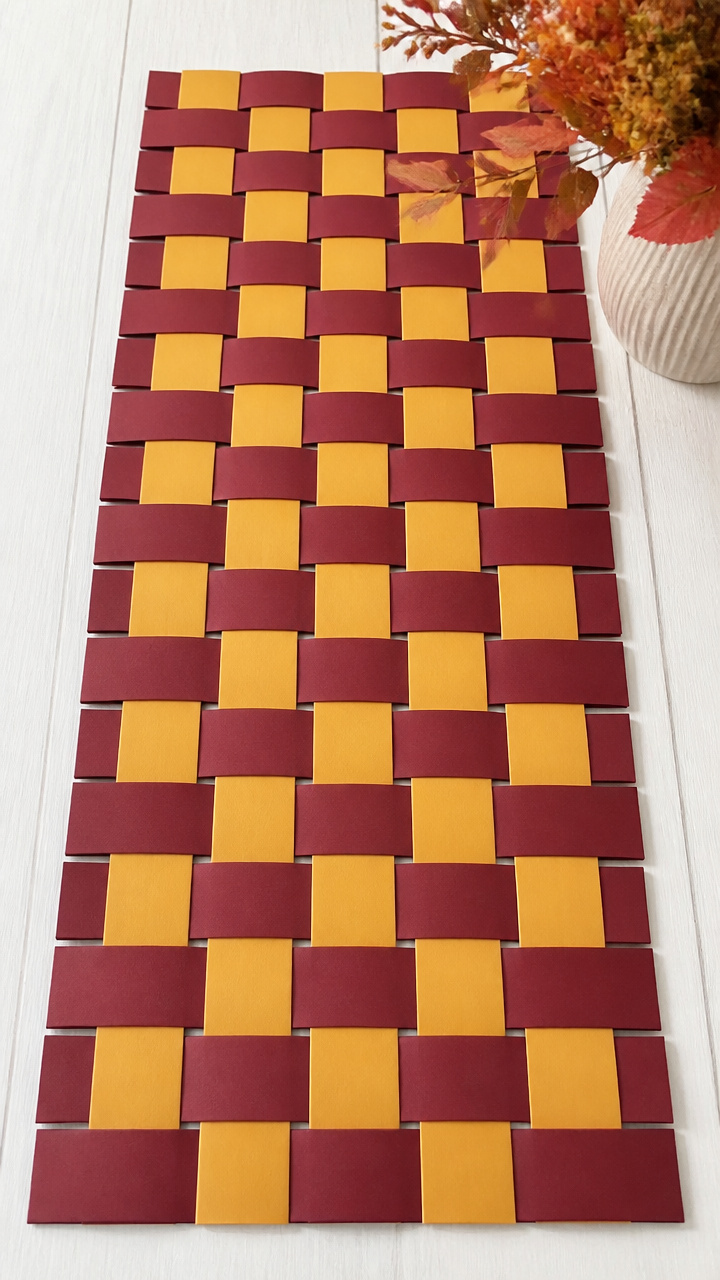
Bright interlaced strips create a sturdy runner that wipes clean and stores flat. It's bold, modern, and totally reusable.
Materials Needed
- 12 sheets of 12×12 inch construction paper: 6 in cranberry, 6 in goldenrod
- Glue stick
- Ruler
- X-Acto knife
- Cutting mat
- Pencil
How to Make It
- Lay one goldenrod sheet flat and use the ruler to draw parallel lines every 1 inch from top to bottom, stopping 1 inch from either end.
- Use the X-Acto knife on the cutting mat to slice along each line, creating 11 vertical fringe strips per sheet.
- Cut 11 cranberry sheets into 1-inch horizontal strips, each 12 inches long.
- Weave one strip over and under the vertical slits, starting from the left and alternating pattern with each new row.
- Glue the ends of each horizontal strip to the back of the base sheet, pressing flat, then repeat until all rows are filled.

5. Pop-Up Cornucopia Card
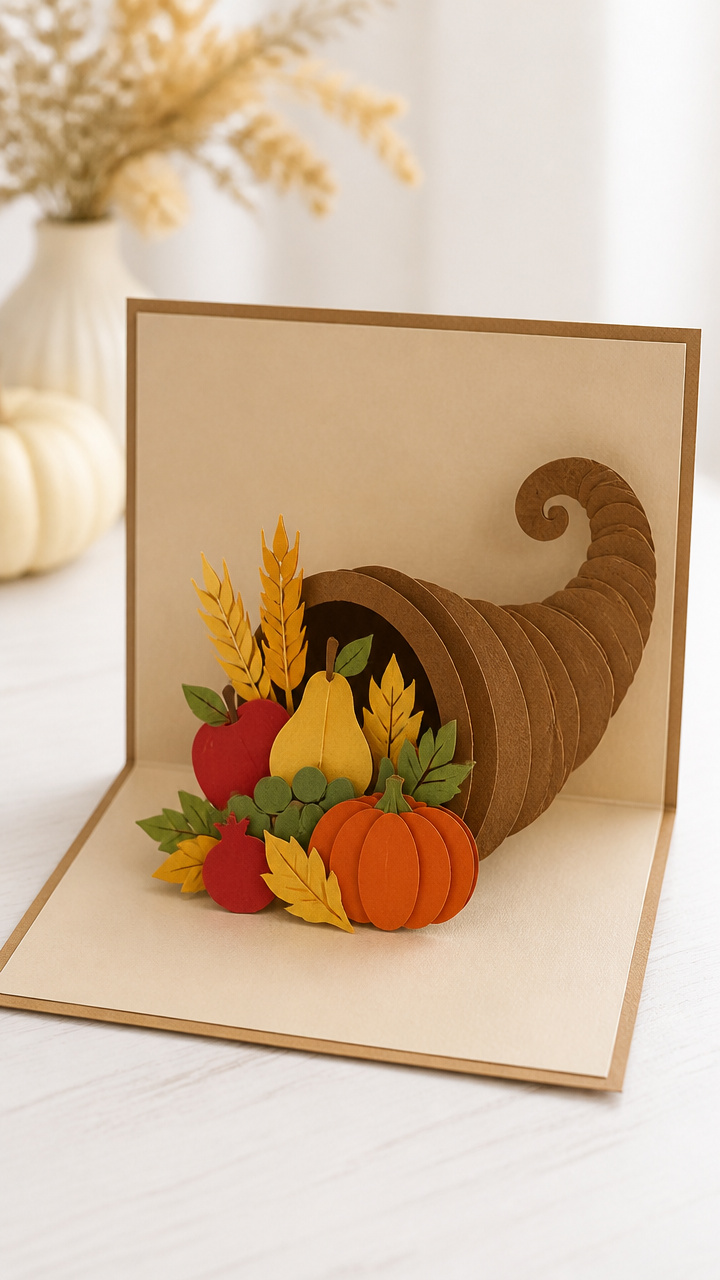
When opened, a bountiful horn spills paper fruit and wheat. This greeting doubles as a tiny centerpiece.
Materials Needed
- 8.5×11 inch tan cardstock, 2 sheets
- Assorted colored paper: green, red, yellow, brown, 1 sheet each
- Glue stick
- Scissors
- Pencil
- Ruler
How to Make It
- Fold one tan sheet in half vertically to make a 5.5×8.5 inch card.
- On the second tan sheet, draw a cornucopia shape 4 inches tall and cut it out.
- Cut a 1.5-inch slit across the center fold of the card, then insert the cornucopia tab through from the inside and glue flat.
- Cut small apples, grapes, and wheat stalks from the colored paper and arrange them spilling from the horn, gluing only the base points.
- Write a message on the front flap, letting glue dry completely before closing.


6. Punched-Paper Gratitude Banner
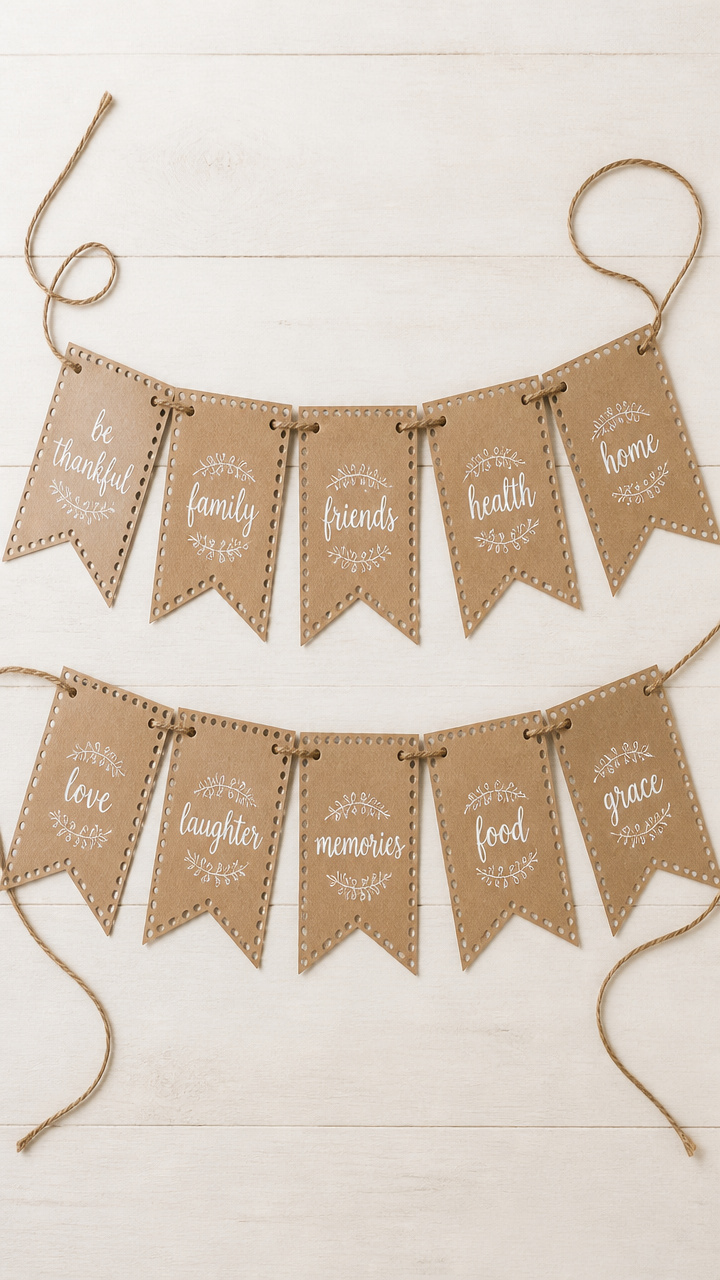
Each flag holds a single handwritten reason for gratitude. The dotted edges give it a delicate, stitched look.
Materials Needed
- 10 sheets of 6×9 inch kraft paper
- Hole punch
- Twine, 5 feet
- Brown ink pad
- White gel pen
- Ruler
- Scissors
How to Make It
- Cut each kraft sheet into two 6×4.5 inch flags, resulting in 20 total.
- Use the hole punch to make two close holes at the top left and right corners of each flag.
- Press the ink pad lightly along the outer edges of each flag to age the look.
- Write one gratitude phrase per flag with the white gel pen, such as 'for morning coffee' or 'for my sister’s laugh'.
- Thread twine through the holes and knot between flags to keep spacing even, leaving 3 inches at each end for hanging.

7. Rolled Paper Pumpkins Centerpiece
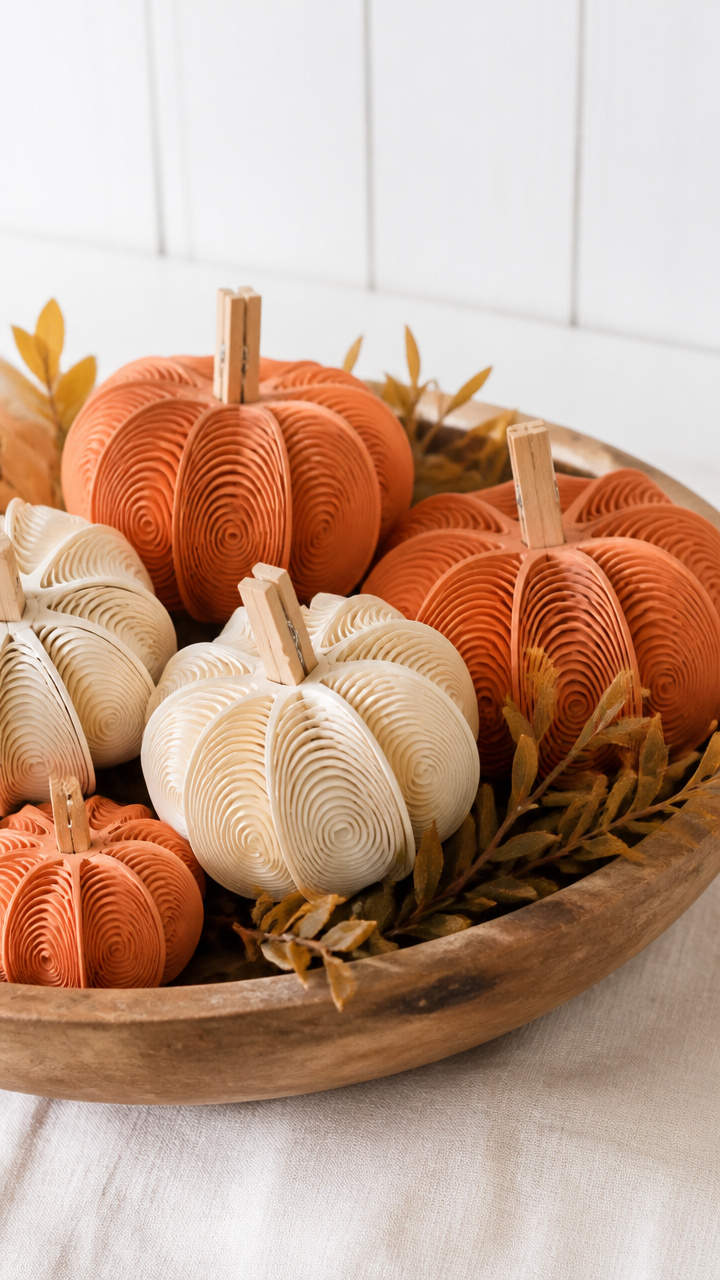
Tightly rolled paper coils form plump mini pumpkins that nest in a bowl. No carving, no mess, just color.
Materials Needed
- Orange, terracotta, and cream cardstock, 8 sheets each
- Glue stick
- Pencil
- Ruler
- Scissors
- Small wooden clothespins, 12
- Green pipe cleaner, 1 roll
How to Make It
- Cut each sheet into twelve 1×8 inch strips, giving 288 strips total.
- Roll one strip tightly from one end, gluing the last inch to secure, then gently squeeze sides to flatten into a disc.
- Add a dot of glue to the edge of a new strip and continue rolling around the first coil, building outward until 3 inches wide.
- Pinch the top and bottom slightly to create a pumpkin shape, then clip a clothespin over the top while drying for 2 minutes.
- Cut pipe cleaners into 1.5 inch stems and press one into the top of each pumpkin.


8. Ladder-Fold Turkey Decoration
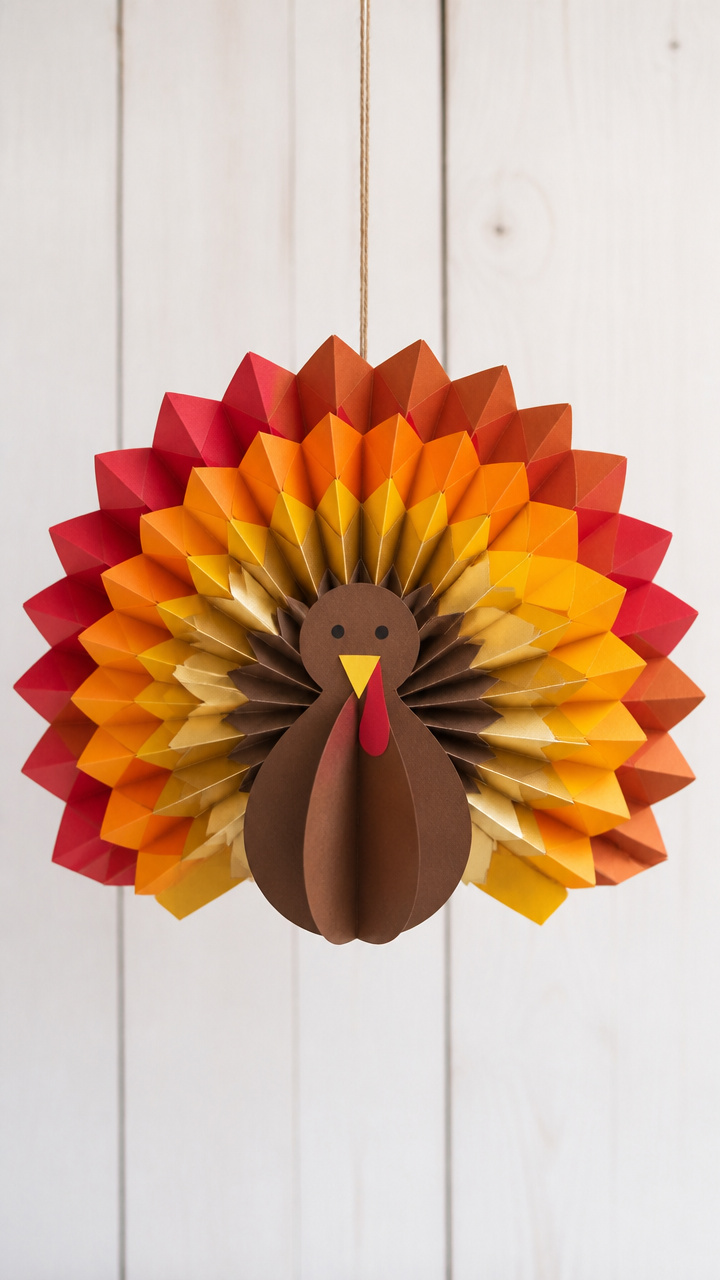
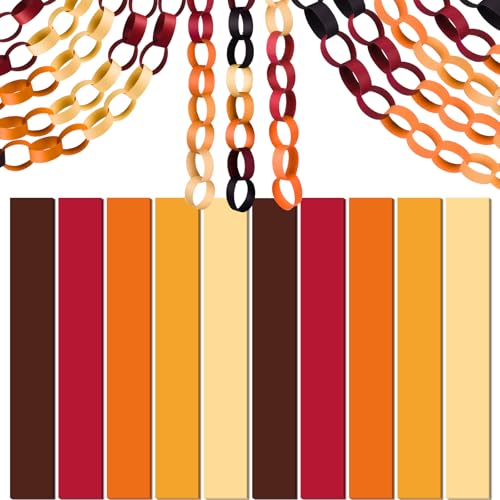
A zigzag paper chain fans into a turkey tail when stretched. Hang it across a mantel or doorway for instant festivity.
Materials Needed
- 6 sheets each of red, orange, yellow, brown, and gold finger-weight paper
- Glue stick
- Scissors
- Pencil
- Ruler
How to Make It
- Cut each sheet into six 2×6 inch rectangles, totaling 180 pieces.
- Fold one rectangle accordion-style with 0.5 inch pleats, then repeat with all pieces.
- Glue the short ends of two differently colored rectangles together at right angles to form an L-shape.
- Continue adding pieces in a chain, rotating colors in harvest order, until the strip reaches 6 feet.
- Stretch gently to reveal the zigzag pattern and hang with tape at both ends.

9. Pressed Paper Flower Garland
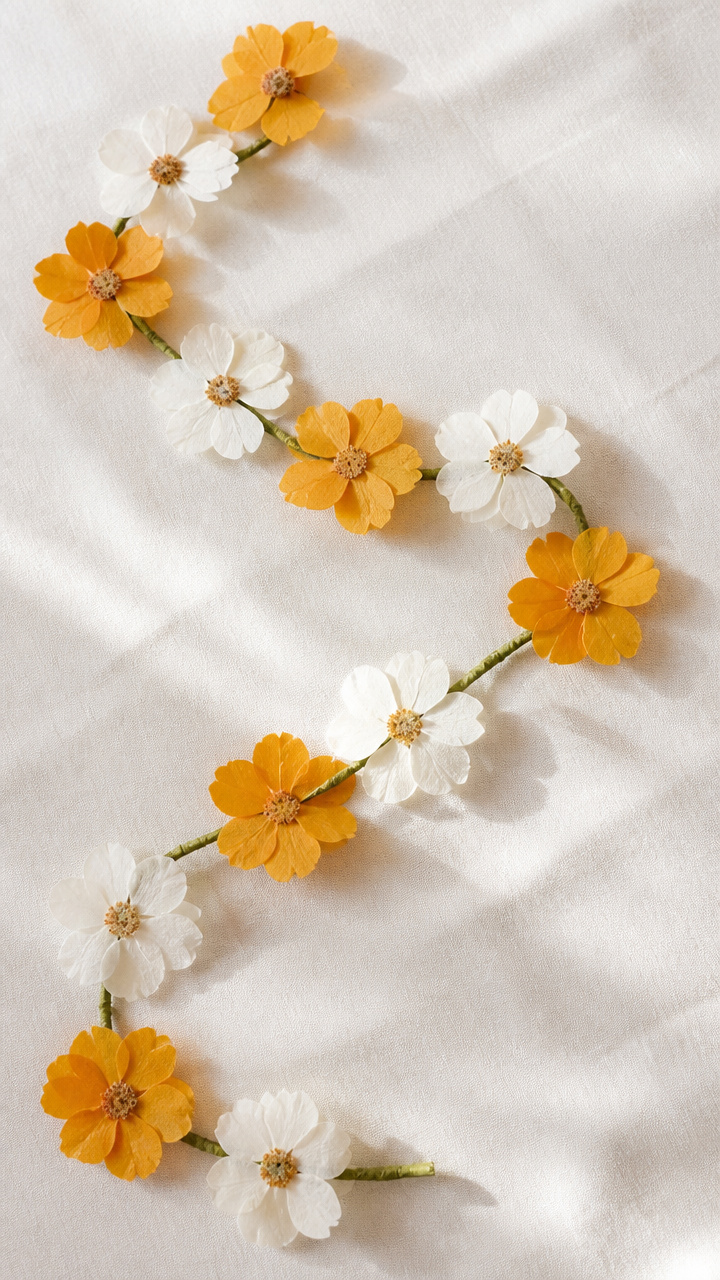
Flat paper blossoms mimic real chrysanthemums and daisies found in fall bouquets. They flutter softly in a breeze.
Materials Needed
- White and marigold printer paper, 5 sheets each
- Circle punch, 2 inch diameter
- Green drinking straws, 15
- Glue dot roller
- Scissors
How to Make It
- Use the circle punch to make 60 circles from the white and marigold paper combined.
- Stack five circles, offsetting each slightly, then pinch the center and staple once.
- Fan each petal outward gently to form a flower, repeating until 12 are made.
- Apply a glue dot to the back center of each flower and press onto a straw segment cut to 1.5 inches.
- Slide straws onto a 7-foot string, spacing flowers 5 inches apart, and tie knots at each end to secure.
10. Stenciled Paper Bag Luminary
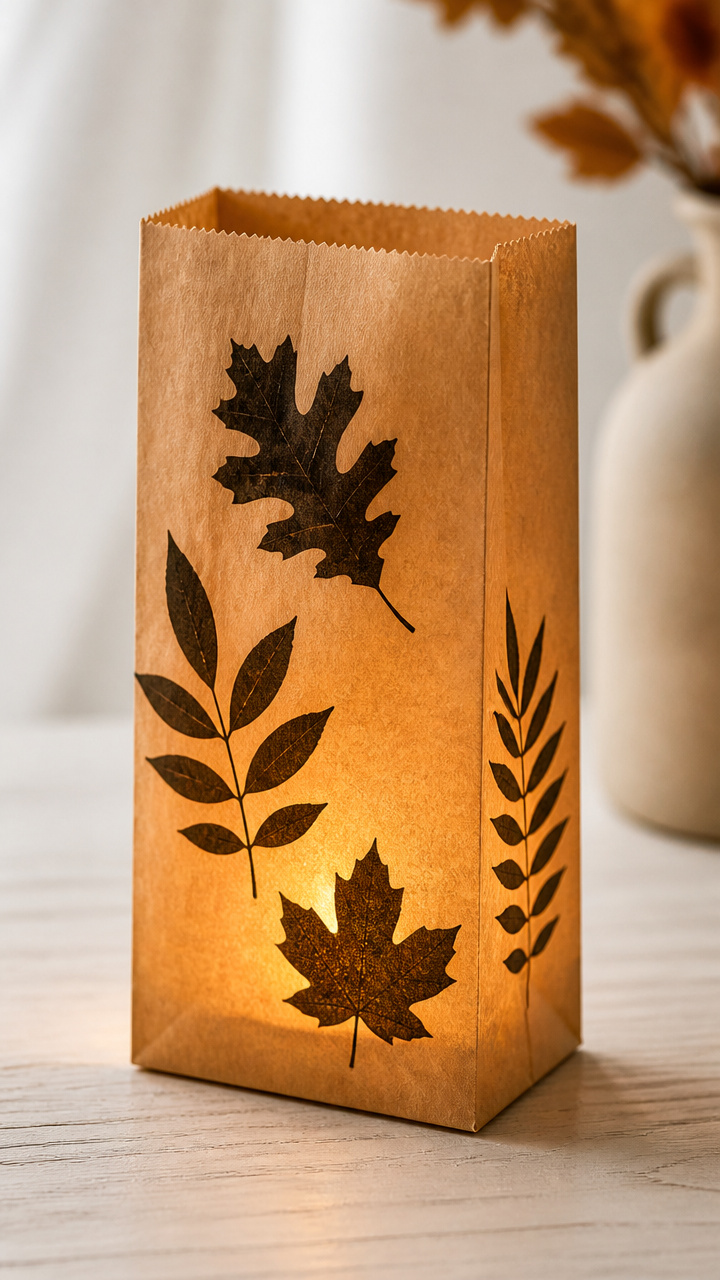
Plain lunch bags turn into glowing lanterns with leaf stencils. Set them on steps or tables after dark.
Materials Needed
- 10 standard brown paper lunch bags
- Leaf stencil, 3×3 inch, pre-cut from cardboard
- Black acrylic paint
- Sponge brush, 1 inch
- Tea light LED candles, 10
- Pencil
How to Make It
- Place the stencil on the front of a bag and hold firmly with one hand.
- Dab the sponge brush into paint, tap off excess, and press over the stencil opening, filling the leaf shape.
- Lift the stencil straight up and let the paint dry for 4 minutes before moving.
- Repeat on all 10 bags, placing the leaf at different heights and angles.
- Place one LED tea light inside each bag and fold the top edge down twice to secure.


11. Cut-Out Thankful Tree
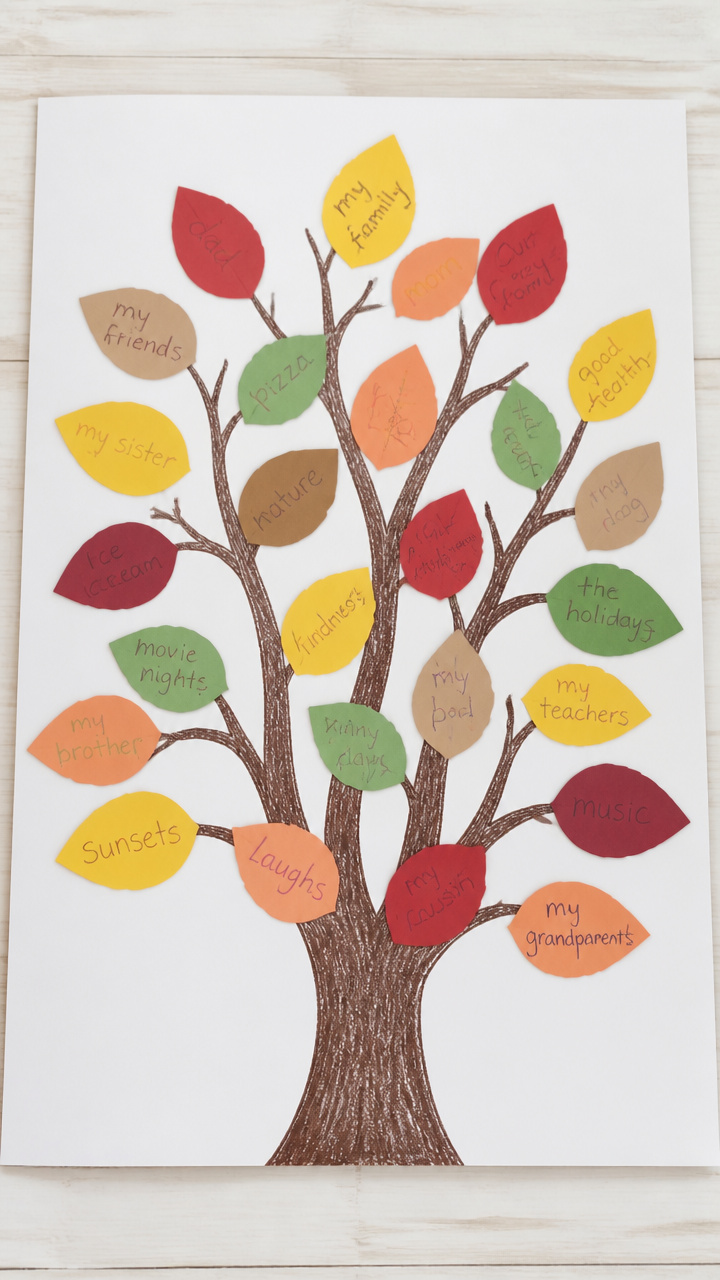
A bare branch on poster board collects colorful paper leaves filled with notes. Guests add their own throughout dinner.
Materials Needed
- Large white poster board, 24×36 inches
- Brown marker
- Assorted colored paper, 10 sheets
- Scissors
- Glue stick
- Pencil
How to Make It
- Draw a large tree trunk and branches in freehand with the brown marker, spreading to fill the upper two-thirds of the board.
- Cut 50 leaf shapes, 2 inches long, from the colored paper, mixing shades.
- Write one thing you’re thankful for on each leaf in pencil, leaving room for guests to add theirs later.
- Glue the first 20 leaves near the trunk, then set the board upright with extra leaves and glue nearby for guests to contribute.


12. Accordion Harvest Box
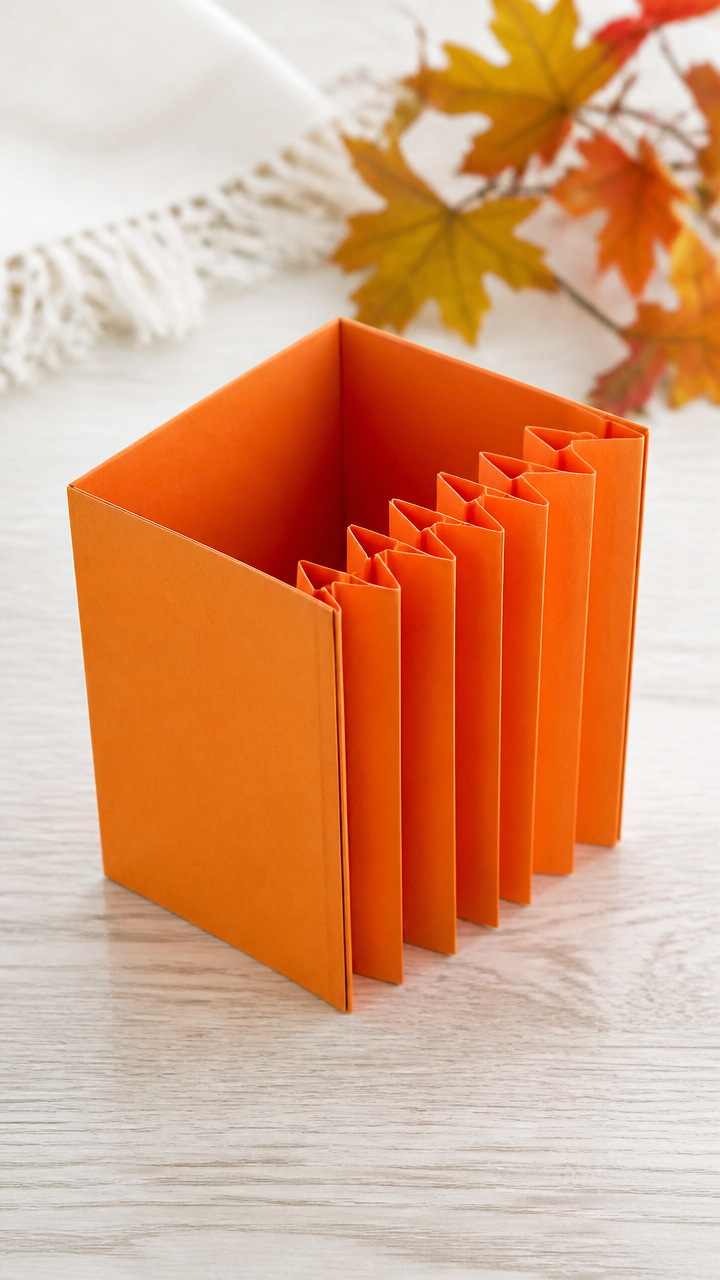
A box with expanding sides holds candy, notes, or small toys. The fold makes it fun to open and reuse.
Materials Needed
- 8.5×11 inch orange cardstock, 2 sheets
- Glue stick
- Ruler
- Pencil
- Scissors
How to Make It
- On one sheet, measure and mark dots at 2, 4, 6, and 8 inches along both long edges.
- Use the ruler to connect opposite marks with light pencil lines, creating four panels.
- Fold each line alternately mountain and valley to form an S-fold accordion strip.
- Apply glue to the outer edges of the two end panels and press them to the second sheet, now the base, aligning widthwise.
- Let dry flat for 5 minutes, then lift gently to see the box rise when pulled open.
13. Feather Fan Name Tags
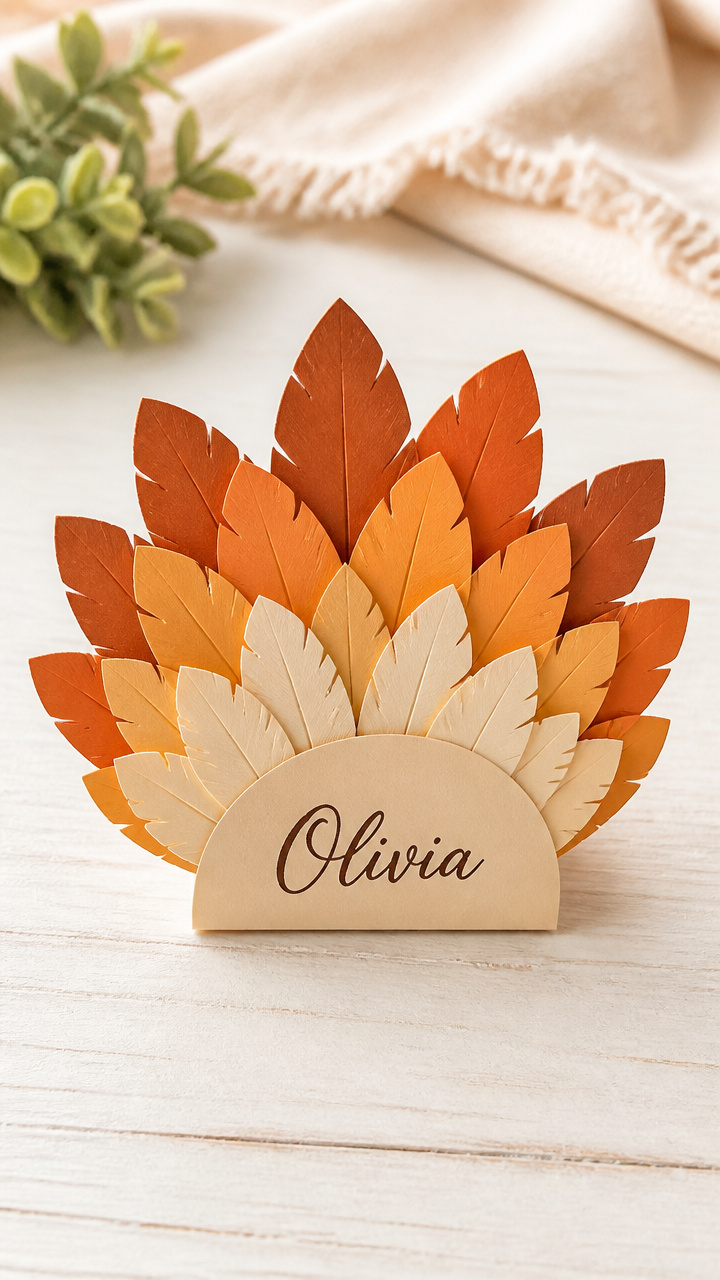
Delicate layered feathers in warm gradients identify seats with grace. Each tag stands on its own at the table.
Materials Needed
- Gradient paper pack: cream to rust, 10 sheets
- Scissors
- Glue stick
- Calligraphy pen, dark brown
- Pencil
- Ruler
How to Make It
- Cut 15 feather shapes 3 inches long from the gradient paper, varying the color depth.
- Stack three feathers of similar size but different tones, shifting each down 0.25 inch to show layers.
- Glue the bases together and let dry for 2 minutes under a small book.
- Write one guest’s name on the top feather in cursive with the calligraphy pen.
- Bend the bottom 0.5 inch of the stack backward to form a stand and place at each setting.


14. Waxed Paper Pilgrim Hat Art
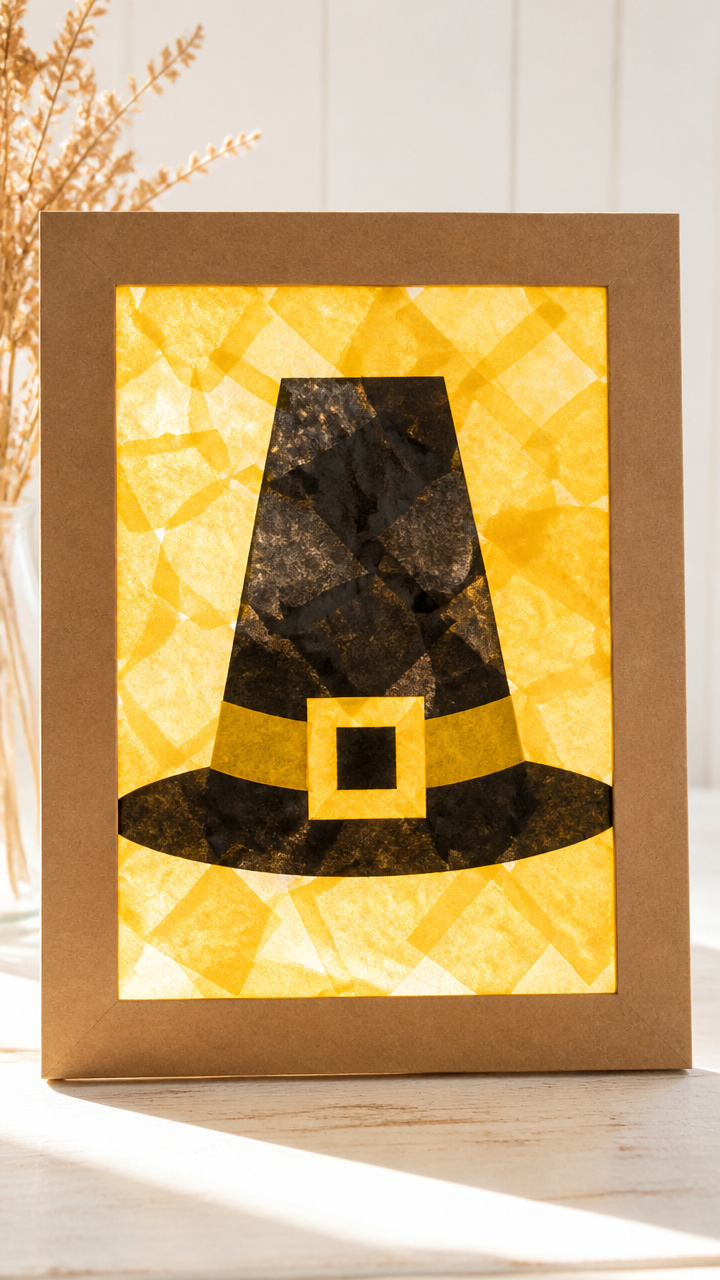
Black and yellow waxed paper fused with heat becomes a stained-glass style decoration. Sunlight makes it shimmer.
Materials Needed
- Black and yellow waxed paper, 2 sheets each
- Pencil
- Scissors
- Iron
- Parchment paper, 2 sheets
- Cardboard frame, 8×10 inch
How to Make It
- Cut a large pilgrim hat shape from black waxed paper: a 4 inch tall crown and 2 inch brim.
- Cut thin yellow strips and layer them behind the brim and buckle area, extending slightly beyond edges.
- Place one parchment sheet on the ironing board, then lay the waxed paper design on top, yellow side down.
- Cover with the second parchment sheet and press the iron on low heat for 8 seconds, lifting to check fusion.
- Trim excess and slide the finished piece into the cardboard frame, propping on a shelf or window.


15. Paper Chain Harvest Chain
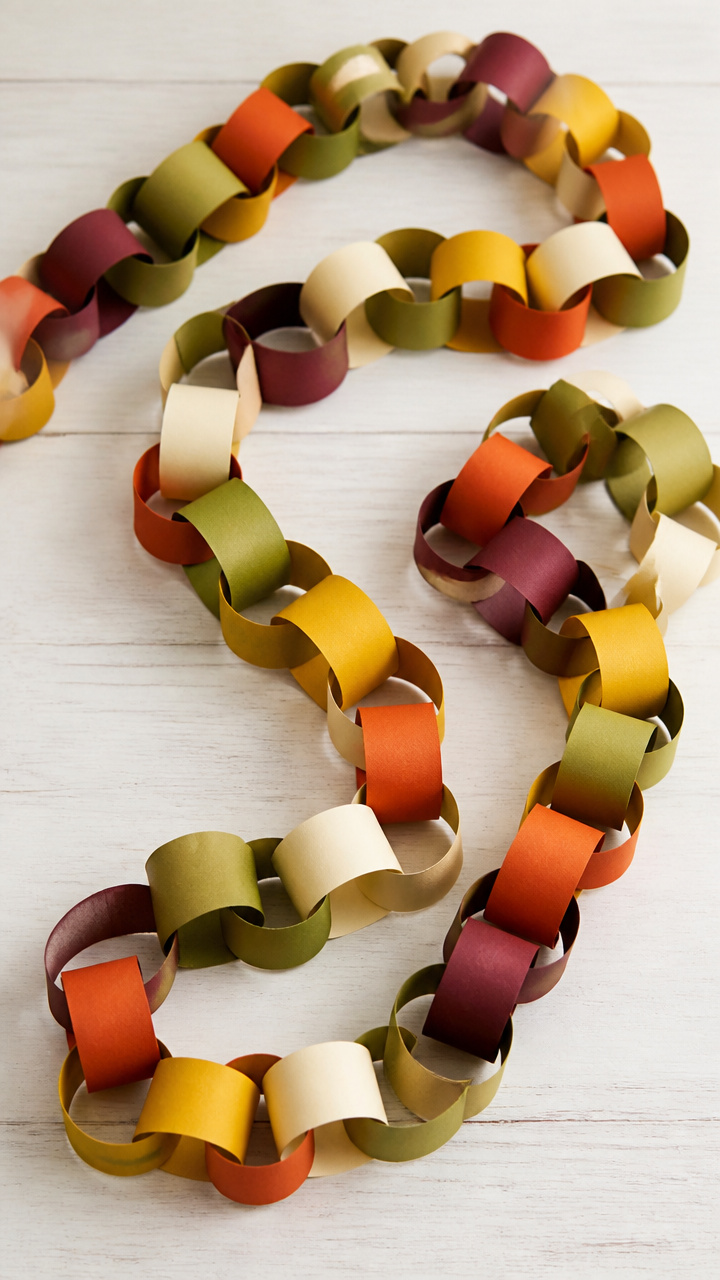
Interlocked rings in harvest palette loop across rooms. This classic garland takes just 20 minutes.
Materials Needed
- Construction paper: 5 sheets each in olive, mustard, burgundy, cream, and burnt sienna
- Glue stick
- Scissors
- Ruler
- Pencil
How to Make It
- Cut each sheet into seven 1×8 inch strips, yielding 175 total.
- Form a ring by bringing the short ends of one strip together and gluing them flat.
- Thread a second strip through the first before sealing it into a ring, linking them.
- Continue alternating colors in a repeating sequence until the chain measures 8 feet.
- Hang with tape every 2 feet along a wall or ceiling edge.

You’ve got everything you need to start crafting right now. Pull out the paper, gather the kids, and let your table tell a story this year.